
1. Продукт бүтүп калдыview
The PowMr Growatt SPF 5000ES is a 5000W 48V solar inverter with an integrated MPPT charge controller. This versatile unit is designed to work with or without a 48V battery system, offering flexible power solutions for various applications. It features a maximum PV input voltage of 450VDC and provides a 220VAC output.
Негизги өзгөчөлүктөр төмөнкүлөрдү камтыйт:
- Integrated MPPT charge controller with 100A maximum charge current.
- Supports 48V battery systems (Li-Ion & Lead Acid: AGM, Flooded, User-defined, Lithium).
- Capable of operating without a 48V battery.
- 220VAC pure sine wave output.
- Максималдуу PV киргизүү көлөмүtage 450VDC чейин.
- Конфигурациялануучу тор же күн киргизүү приоритети.
- Bypass mode support.
- Parallel operation for capacity expansion up to 30kW (max 6 units).
- Detailed LCD display for monitoring and settings.
- WIFI/GPRS remote monitoring (optional).
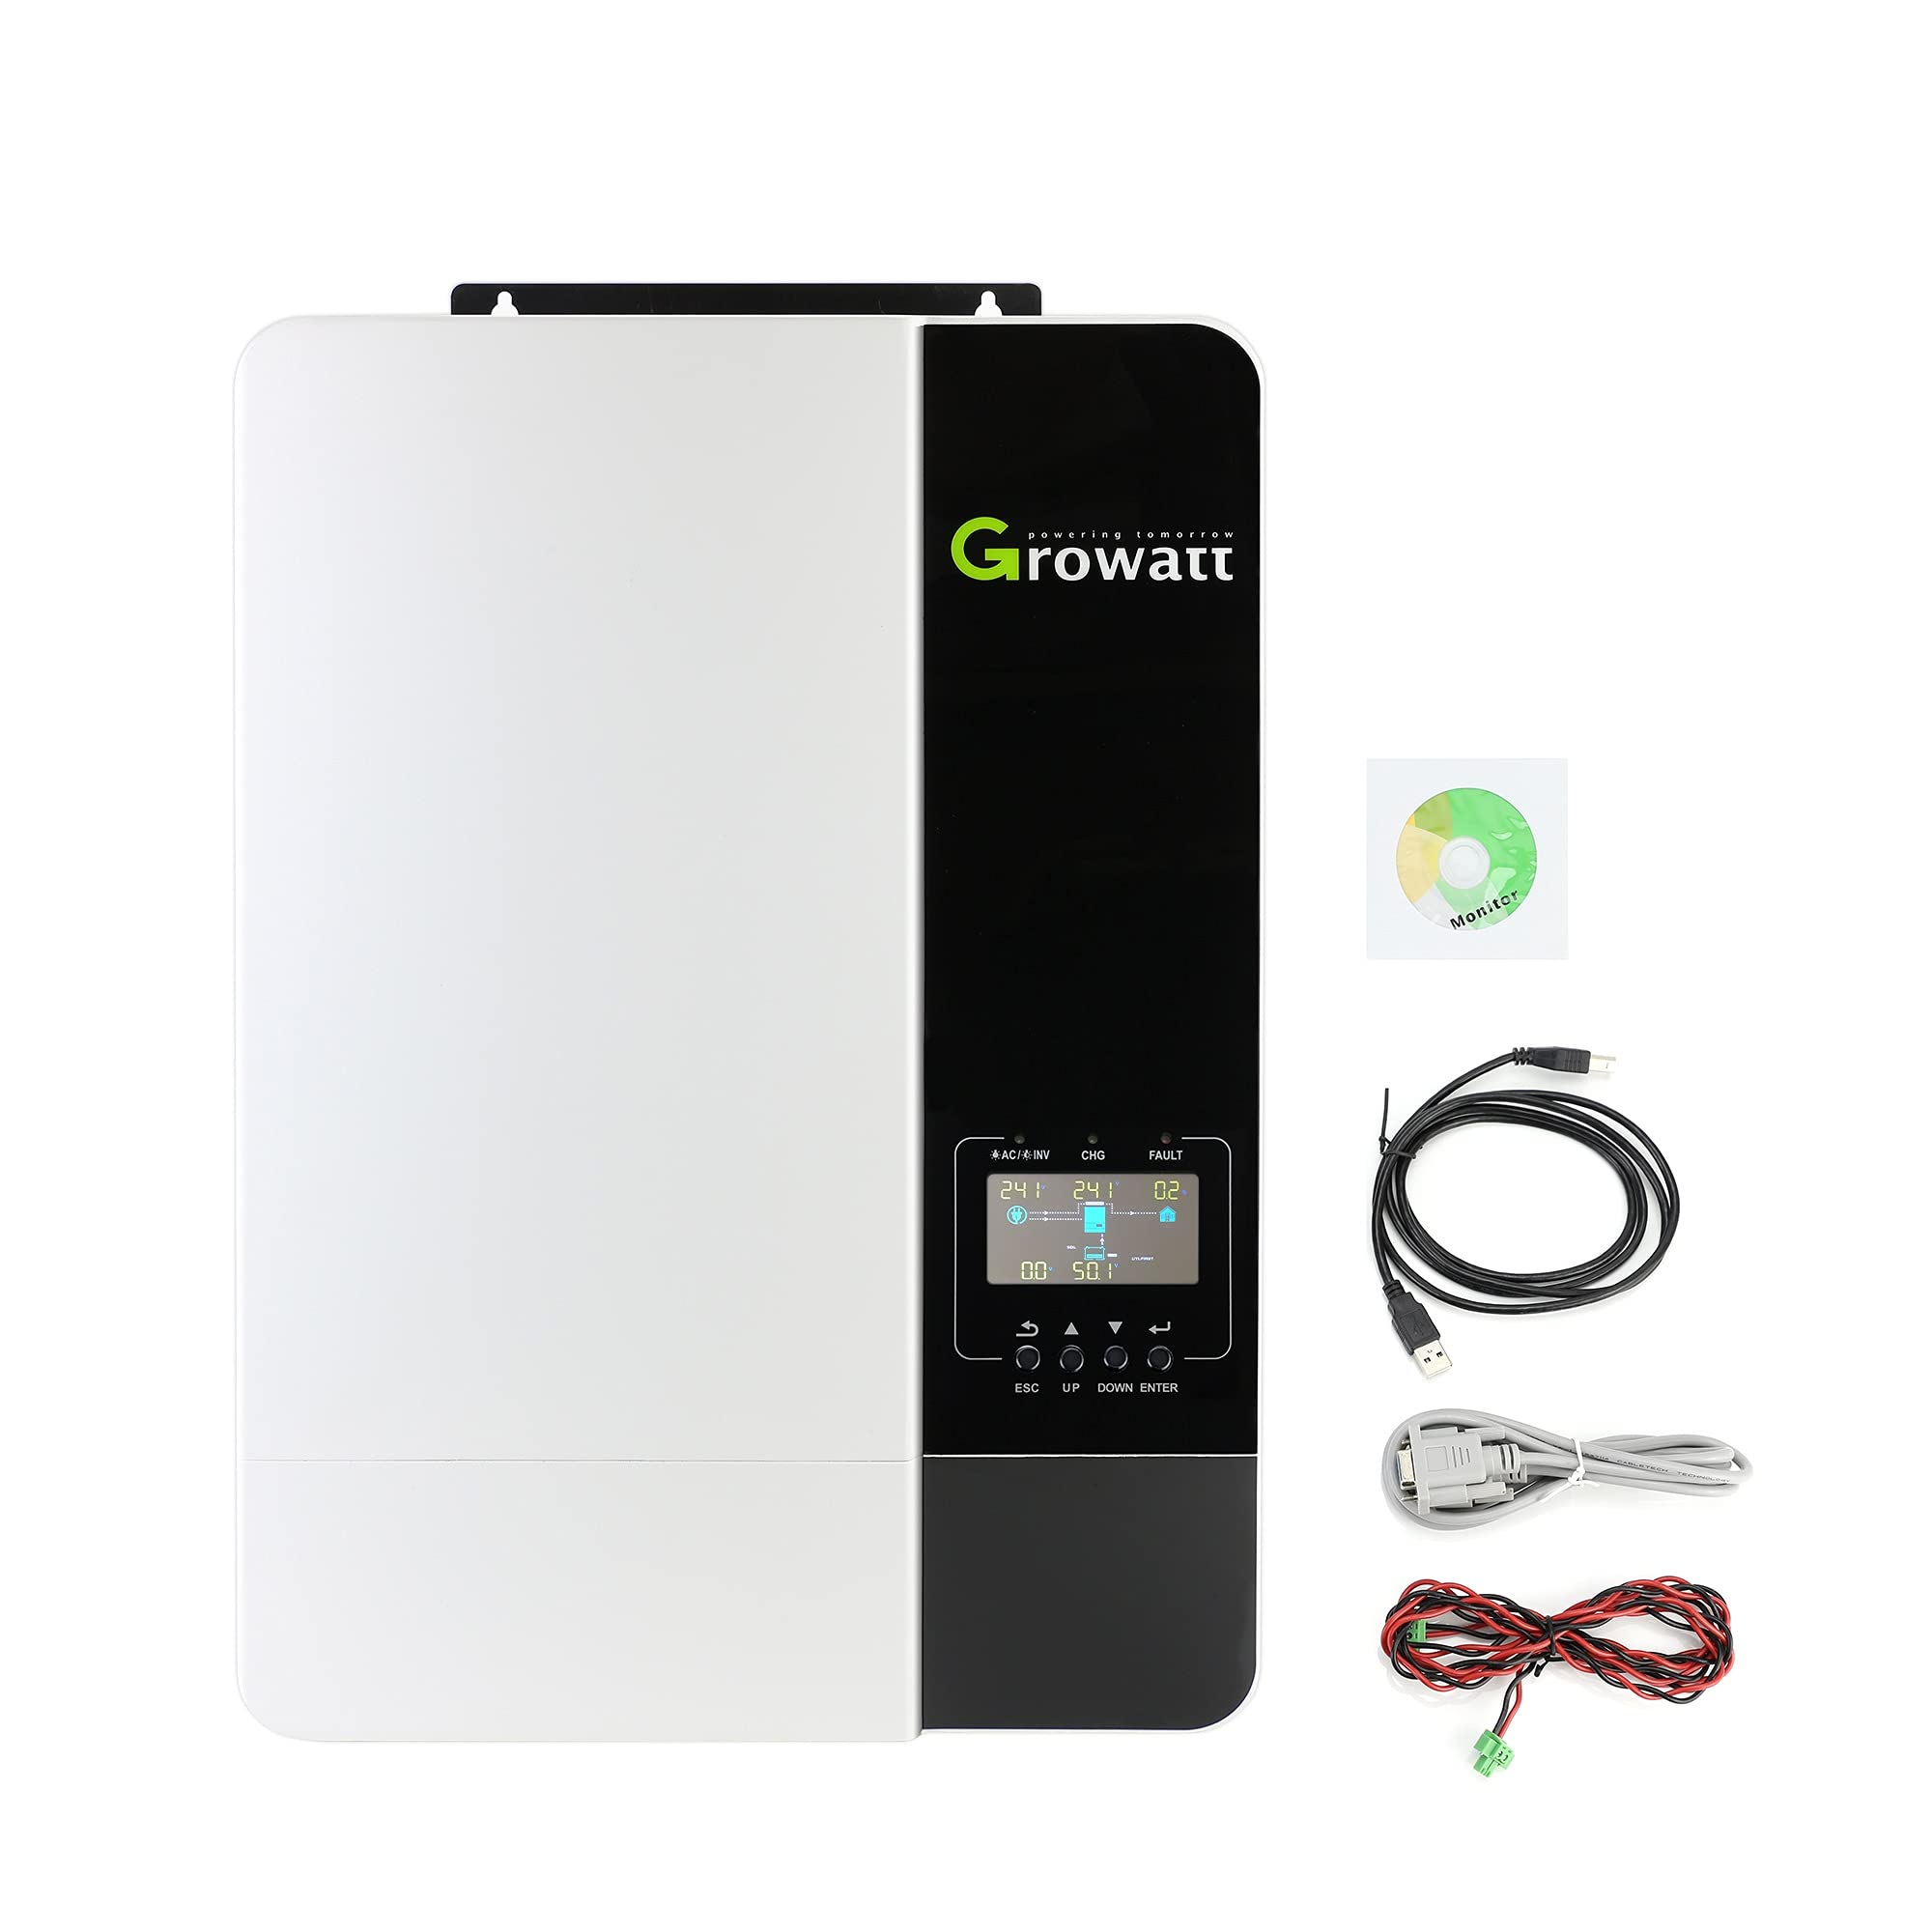
Сүрөт 1: Алдыңкы view of the Growatt SPF 5000ES Solar Inverter.
2. Пакеттин мазмуну
Upon unpacking, verify that all items listed below are included and undamaged. If any items are missing or damaged, please contact your dealer.
Стандарттык пакет, адатта, төмөнкүлөрдү камтыйт:
- Growatt SPF 5000ES Inverter Unit
- User Manual
- Программа CD
- Параллель байланыш кабели
- Current Sharing Cable
- USB байланыш кабели
For a visual guide on unpacking and identifying components, refer to the 'Packing And Unpack Inspect' section of Video 1 in the Operation section.
3. Орнотуу
3.1 Коопсуздук чаралары
- Инверторду тез күйүүчү курулуш материалдарына орнотууга болбойт.
- Mount the inverter on a solid surface capable of supporting its weight.
- Install the inverter at eye level to ensure the LCD display is easily readable.
- Ensure the ambient temperature is between 0°C and 55°C for optimal operation.
- Maintain sufficient clearance (at least 20 cm on sides, 50 cm top/bottom) around the inverter for heat dissipation and wire access.

Figure 2: Recommended installation position and clearances for the inverter to ensure proper ventilation and access.
3.2 Зымдарды туташтыруу
All wiring should be performed by a qualified electrician. Ensure all power sources are disconnected before making any connections.
Батарея туташуу:
- Connect the 48V battery bank to the Battery Input Port.
- Use 2AWG size cables for battery connections.
- Ensure correct polarity (+ to + and - to -).
AC киргизүү туташуу:
- Connect the utility grid or generator AC input to the AC Input Port.
- Use 8AWG size cables for AC input connections.
- Connect Ground wire to Ground terminal, Hot Line 1 to L terminal, and Hot Line 2 to N terminal.
AC чыгаруу туташуусу:
- Connect your loads to the AC Output Port.
- Use 8AWG size cables for AC output connections.
Фотоэлектрдик киргизүү туташуусу:
- Connect the solar panel array to the PV Input Port.
- Use 8AWG size cables for PV input connections.
- Ensure PV panel voltage is at least 150V and stable, and current does not exceed 18A.

3-сүрөт: Детальдуу view of the inverter's connection ports and recommended cable sizes.
Байланыш порттору:
The inverter includes ports for WIFI/GPRS, USB, CAN, and RS485 communication for monitoring and parallel operation. An optional WIFI/GPRS module can be connected for remote monitoring.

Figure 4: Front panel with LCD display and indicators, and rear panel showing AC input/output, PV input, battery input, and various communication ports.
4. Операция
4.1 Күйгүзүү/өчүрүү
- Бардык зымдарды туташтыруу коопсуз жана туура экендигин текшериңиз.
- Switch the DC input breaker to the ON position.
- Switch the AC output breaker to the ON position.
- Press the Power On/Off switch on the inverter to turn it on.
4.2 LCD Display and Function Buttons
The inverter features an LCD display and function buttons for monitoring system status and configuring settings.
4.3 Система орнотуулары
To access and modify settings, press and hold the ENTER button for 3 seconds. Use the UP and DOWN buttons to navigate through programs and values, and ENTER to confirm selections.
Program 01: Output Source Priority
This setting determines the priority of power sources for your loads.
- SOL (Solar First): Solar energy powers loads as first priority. If solar is insufficient, battery energy supplies power. Grid energy is used only if solar is unavailable or battery voltage drops below a warning level.
- UTI (Utility First): Utility grid is the primary power source.
- SBU (Solar-Battery-Utility): Solar power first, then battery, then utility.
- SUB (Solar-Utility-Battery): Solar power first, then utility, then battery.
Program 05: Battery Type
Select the type of battery connected to the inverter. Options include AGM, Flooded, User-defined, and Lithium. For Lithium batteries, consult the lithium battery compatibility list and set the relevant communication protocol.
Program 14: Charger Source Priority
This setting determines the priority of charging sources for your battery.
- CSO (Solar First): Solar energy charges the battery as first priority. Utility charges only when solar energy is not available.
- CUE (Grid First): Grid energy charges the battery as first priority.
- SNU (Solar and Grid): Both solar and utility energy charge the battery.
- OSO (Only Solar): Only solar energy will be the charger source, regardless of utility power availability.
Program 19: Bulk Charging Voltage (CV voltage)
Set the bulk charging voltage from 48V to 58.4V. This setting is active when Program 05 is set to 'User-defined'.
Program 20: Floating Charging Voltage
Set the floating charging voltage from 48V to 58.4V. This setting is active when Program 05 is set to 'User-defined'.
Program 21: Low DC Cut-off Voltage
Set the low DC cut-off voltage from 40V to 48V. This setting is active when Program 05 is set to 'User-defined'.
Program 23: AC Output Mode (Parallel Operation)
When units are used in parallel for a single-phase system, select "PAL". For parallel operation in a three-phase system, select "3P1" for L1 phase, "3P2" for L2 phase, and "3P3" for L3 phase.
Video 1: Growatt SPF 5000ES Inverter Installation and Operation Guide. This video demonstrates system introduction, unpacking, product overview, installation steps, and basic operation settings for the inverter, including troubleshooting.
5. Техникалык шарттар
| Өзгөчөлүк | Спецификация |
|---|---|
| Бренд | PowMr |
| Модел | SPF 5000ES |
| Power Source | Батарея менен иштейт |
| Ватtage | 5000 ватт |
| Киргизүү көлөмүtage | 48 вольт |
| Чыгуу күчү | 5000 Ватт |
| Output Voltage | 120 вольт, 220 вольт |
| Жыштык | 50 Гц |
| Максималдуу PV киргизүү көлөмүtage | 450VDC |
| Максималдуу заряд агымы | 100A |
| Элемент Салмагы | 31.9 фунт |
6. Кыйынчылыктарды
Refer to the table below for common issues and their solutions. For more detailed troubleshooting, please consult the full user manual.
| Problem / Fault Code | Түшүндүрмө | Эмне кылуу керек |
|---|---|---|
| Ишке киргизүү процессинде блок автоматтык түрдө өчүп калат. | батарея томtage is too low (<1.91V/Cell). | 1. Батареяны кайра заряддаңыз. 2. Батареяны алмаштырыңыз. |
| Күйгүзүлгөндөн кийин жооп жок. | 1. Батареянын көлөмүtage is too low (<1.4V/Cell). 2. Battery polarity is reversed. | 1. Батареялар менен зымдар жакшы туташтырылганын текшериңиз. 2. Батареяны кайра заряддаңыз. 3. Батареяны алмаштырыңыз. |
| Mains exist but unit works in battery mode. (Green LED is flashing) | Киргизүү тtage is 0 on the LCD and green LED is flashing. | AC өчүргүч өчүп калганын жана AC зымдары жакшы туташтырылганын текшериңиз. |
| Mains exist but unit works in battery mode. (Green LED is flashing) | AC кубаттуулугунун сапаты жетишсиз. (Жээк же генератор) | 1. AC зымдары өтө ичке жана/же өтө узун экендигин текшериңиз. 2. Генератор (эгерде колдонулса) жакшы иштеп жатканын же кирүүчү томtage range setting is correct. (UPS - Appliance) |
| Mains exist but unit works in battery mode. (Green LED is flashing) | Set "Battery First" or "Solar First" as the priority of output source. | Change output source priority to Utility First. |
| When it's turned on, internal relay is switching on and off repeatedly. | ЖК дисплей жана диоддор күйүп турат. | Battery is disconnected. Check if battery wires are connected well. |
| Ката коду 01 | Күйөрмандын катасы | Желдеткичти алмаштырыңыз. |
| Ката коду 02 | Internal temperature of component is over 100°C. | Агрегаттын аба агымы бөгөлүп калганын же чөйрөнүн температурасы өтө жогору экендигин текшериңиз. |
| Ката коду 03 | Батарея ашыкча заряддалган. | Оңдоо борборуна кайтуу. |
| Ката коду 03 | батарея томtage өтө жогору. | Батареялардын спецификациясы жана саны талаптарга жооп берерин текшериңиз. |
| Ката коду 05 | Чыгуу кыска туташкан | Зымдар жакшы туташтырылганын текшерип, анормалдуу жүктү алып салыңыз. |
| Ката коду 06/08 | Чыгуу анормалдуу (Инвертор тtage below 190Vac or is higher than 260Vac) | 1. Туташкан жүктү азайтыңыз. 2. Return to repair center. |
| Ката коду 07 | The inverter is overload 110% and time is up. | Кээ бир жабдууларды өчүрүү менен туташкан жүктү азайтыңыз. |
| Ката коду 08/09/53/57 | Ички компоненттери ишке ашкан жок. | Оңдоо борборуна кайтуу. |
| Ката коду 51 | Ашыкча ток же толкун | Түзмөктү кайра иштетиңиз, эгер ката кайталанса, оңдоо борборуна кайрылыңыз. |
| Ката коду 52 | Автобус томtage өтө төмөн | Түзмөктү кайра иштетиңиз, эгер ката кайталанса, оңдоо борборуна кайрылыңыз. |
| Ката коду 55 | Чыгуу томtage тең салмактуу эмес | Батарея жакшы туташтырылган болсо, оңдоо борборуна кайрылыңыз. |
| Ката коду 56 | Батарея жакшы туташкан эмес же сактагыч күйүп кеткен. | Батарея жакшы туташтырылган болсо, оңдоо борборуна кайрылыңыз. |
| Ката коду 60 | Negative power fault. | 1. Check whether the AC output connected to the grid input. 2. Check whether Program 8 settings are the same for all parallel inverters. 3. Check whether the current sharing cables are connected well in the same parallel phases. 4. Check whether all neutral wires of all parallel units are connected together. 5. If problem still exists, contact repair center. |
| Ката коду 80 | CAN fault. | 1. Check whether the parallel communication cables are connected well. 2. Check whether Program 23 settings are right for the parallel system. |
| Ката коду 81 | Host loss. | If problem still exists, contact repair center. |
7. Кепилдик жана колдоо
The product comes with a manufacturer's warranty. For specific warranty terms and conditions, please refer to the warranty card included in your package or contact PowMr customer support. For technical assistance or service, please reach out to your authorized dealer or the manufacturer directly.
Warranty Description: 1 (as per product specifications, further details should be sought from the manufacturer).