1. Киришүү
This manual provides detailed instructions for the installation, operation, and maintenance of the VIVOTEK ND9323P H.265 8-Channel Embedded PoE Network Video Recorder (NVR). Please read this manual thoroughly before using the product to ensure proper and safe operation. Keep this manual for future reference.
2. Коопсуздук маалыматы
Observe the following safety precautions to prevent damage to the NVR and to ensure user safety:
- Электр камсыздоо: Use only the power adapter supplied with the NVR. Ensure the power source matches the NVR's voltagд талаптар.
- Вентиляция: Желдетүү тешиктерин жаппаңыз. Ашыкча ысып кетпеши үчүн NVRди жакшы желдетилген жерге орнотуңуз.
- Курчап турган чөйрө: Avoid exposing the NVR to water, moisture, extreme temperatures, or direct sunlight. Do not place heavy objects on the NVR.
- Тейлөө: Бул продуктту өзүңүз тейлөөгө аракет кылбаңыз. Бардык тейлөөнү квалификациялуу тейлөө кызматкерлерине тапшырыңыз.
- Колдонуу: Handle the NVR with care. Avoid dropping or subjecting it to strong impacts.
3. Пакеттин мазмуну
Carefully unpack the box and ensure all items are present and in good condition. If any items are missing or damaged, contact your vendor immediately.
- VIVOTEK ND9323P NVR Unit
- Кубаттуу адаптер
- USB чычкан
- Ыкчам орнотуу колдонмосу
- Accessory Pack (Screws for HDD installation, Ethernet cable)
- Case (referring to the NVR enclosure itself)
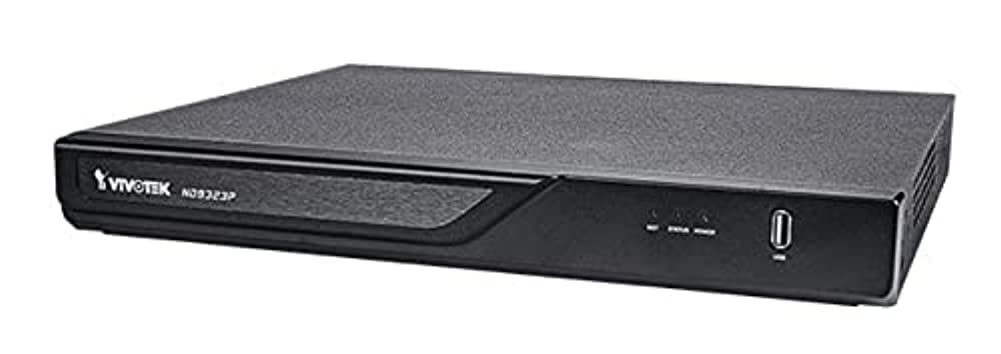
Figure 3.1: VIVOTEK ND9323P NVR unit. This image shows the front panel of the NVR, typically featuring status indicators and USB ports.
4. Продукт бүтүп калдыview
The VIVOTEK ND9323P is an 8-channel embedded Network Video Recorder designed for IP surveillance systems. It supports H.265 video compression for efficient storage and bandwidth usage. With its integrated Power over Ethernet (PoE) ports, it simplifies camera installation by providing both power and data connectivity through a single Ethernet cable.
4.1 Негизги өзгөчөлүктөрү
- 8-Channel Video Input
- H.265/H.264 Video Compression
- 8 x 802.3at/af PoE Ports
- Local Display Output (HDMI/VGA)
- Remote Access via VIVOTEK VIVOCloud App or VMS
- Supports up to 16TB HDD storage (HDD not included)
4.2 Алдыңкы жана арткы панелдер
Refer to the Quick Installation Guide for detailed diagrams of the front and rear panels, indicating ports and indicators.
- Алдыңкы панели: Power LED, HDD LED, Network LED, USB ports.
- Арткы Panel: Power input, LAN port, PoE ports (1-8), HDMI output, VGA output, Audio I/O, USB ports.
5. Орнотуу
5.1 Катуу дискти орнотуу (милдеттүү эмес)
The NVR does not typically include a pre-installed hard drive. Follow these steps to install a 3.5-inch SATA hard drive:
- NVRдин үстүнкү капкагын бурап чыгарып, алып салыңыз.
- Connect the SATA data and power cables from the NVR to the hard drive.
- Берилген бурамаларды колдонуп, катуу дискти NVR корпусуна бекитиңиз.
- Үстүнкү капкакты ордуна коюп, бурама менен бекитиңиз.
Эскертүү: Ensure the NVR is powered off and unplugged before installing or removing a hard drive.
5.2 Физикалык байланыштар
- Камераларды туташтыруу: Connect your IP cameras to the NVR's PoE ports (1-8) using Ethernet cables. The NVR will provide power and network connectivity to the cameras.
- Тармакка туташуу: Connect the NVR's LAN port to your local network router or switch using an Ethernet cable.
- Дисплейди туташтыруу: Мониторду NVRдин HDMI же VGA чыгаруу портуна туташтырыңыз.
- Чычканды туташтыруу: USB чычканын NVRдин USB портторунун бирине сайыңыз.
- Күйгүзүү: Кубат адаптерин NVRдин кубат киргизүү булагына туташтырып, андан кийин аны розеткага сайыңыз. NVR автоматтык түрдө күйөт.
5.3 Баштапкы конфигурация
Upon first boot, the NVR will guide you through a setup wizard on the connected monitor:
- Тил тандоо: Өзүңүзгө жаккан тилди тандаңыз.
- Сырсөздү орнотуу: Create a strong password for the administrator account. This is crucial for security.
- Тармак орнотуулары: Configure network settings (DHCP or Static IP). DHCP is recommended for most home users.
- Убакыт жана дата: Set the correct time zone, date, and time.
- Катуу дискти инициализациялоо: If you installed a new hard drive, the NVR will prompt you to format it. Confirm to proceed. Эскертүү: Formatting will erase all data on the drive.
- Камерадан издөө жана кошуу: The NVR will automatically search for connected VIVOTEK cameras. Select and add them to the NVR.
- Бүтүрүү: Complete the wizard to access the NVR's live view.
6. NVRди иштетүү
6.1 NVRге жетүү
You can access and manage the NVR through various methods:
- Жергиликтүү дисплей: Directly via the connected monitor and USB mouse.
- Web Браузер: NVRдин IP дарегин киргизиңиз web бир тармакка туташкан компьютердеги браузер.
- VIVOTEK VIVOCloud App: Download the mobile app for remote viewбашкаруу жана башкаруу.
- VIVOTEK VAST 2 VMS: For advanced management and multi-NVR systems.
6.2 Live View
Жашоо view displays real-time video feeds from all connected cameras. You can switch between single-camera view, көп камералуу торчо view, and customize the display layout.
6.3 Жазуу орнотуулары
Configure recording schedules and modes for each camera:
- Тынымсыз жаздыруу: Рекорддор 24/7.
- Кыймылды аныктоо жазуусу: Кыймыл аныкталганда гана жаздырылат.
- Пландаштырылган жаздыруу: Белгилүү бир убакыт аралыгындагы жазуулар.
- Окуяны жаздыруу: Records based on external triggers or alarms.
Access these settings through the NVR's main menu: Configuration > Recording > Schedule.
6.4 Ойнотуу
Кайраview foo жазылганtage:
- Негизги менюдан тандаңыз Ойнотуу.
- Choose the camera(s) and the date/time range you wish to review.
- Use the timeline and playback controls (play, pause, fast forward, rewind) to navigate through the footage.
6.5 Event Management and Notifications
Configure the NVR to respond to events such as motion detection, camera tampering, or network disconnection. The NVR can send email notifications, trigger alarms, or start recording.
Access these settings via: Configuration > Event.
7. Техникалык тейлөө
7.1 Микропрограмма жаңыртуулары
Regularly check for and install firmware updates to ensure optimal performance, security, and access to new features. Firmware can be updated via the NVR's web interface or local display menu: Configuration > System > Firmware Upgrade.
Абайлаңыз: Do not power off the NVR during a firmware upgrade. This can cause permanent damage.
7.2 Катуу дискти башкаруу
Monitor the health of your hard drive(s) and ensure sufficient storage space. The NVR will automatically overwrite the oldest recordings when the disk is full, based on your settings.
Access HDD status and settings via: Configuration > Storage > HDD Management.
7.3 Тазалоо
Keep the NVR unit clean and free from dust. Use a soft, dry cloth for cleaning. Do not use liquid cleaners or aerosols.
8. Кыйынчылыктарды
This section addresses common issues you might encounter with your VIVOTEK ND9323P NVR.
8.1 Монитордо видео дисплей жок
- Кабелдерди текшерүү: HDMI/VGA кабелинин NVRге да, мониторго да бекем туташтырылганын текшериңиз.
- Монитор киргизүү: Verify the monitor is set to the correct input source (HDMI/VGA).
- NVR кубаты: Confirm the NVR is powered on and its power LED is illuminated.
8.2 Cameras Not Showing Up / No Image
- PoE туташуу: Ensure cameras are properly connected to the NVR's PoE ports. Check if the PoE port LEDs on the NVR are active.
- Камеранын күчү: If not using PoE, ensure cameras are receiving power from their own power adapters.
- Тармакка туташуу: Verify the NVR and cameras are on the same network segment if not directly connected via PoE.
- Камеранын абалы: Check the camera's own status indicators.
- NVR Camera Management: барыңыз Configuration > Camera > Camera Management to ensure cameras are added and enabled. Try rescanning for cameras.
8.3 Cannot Access NVR via Web Браузер
- IP дареги: Confirm the NVR's IP address is correct and that your computer is on the same network.
- Тармак кабели: Ensure the NVR's LAN port is connected to your network.
- Firewall: Temporarily disable your computer's firewall to check if it's blocking access.
- Браузердин шайкештиги: Use a recommended web браузер (мисалы, Chrome, Firefox).
8.4 Унутулган сырсөз
If you forget the administrator password, you may need to perform a factory reset. Refer to the VIVOTEK support website or contact technical support for the specific procedure for your model, as this often involves a physical reset button or a specific utility.
9. Техникалык шарттар
The following table lists the key specifications for the VIVOTEK ND9323P NVR:
| Өзгөчөлүк | Спецификация |
|---|---|
| Модель номери | ND9323P |
| Бренд | VIVOTEK |
| Каналдардын саны | 8 |
| Байланыш технологиясы | Ethernet |
| Шайкеш түзмөктөр | Camera, Mobile Device |
| Видеону кысуу | H.265, H.264 |
| PoE порттору | 8 x 802.3at/af |
| Продукциянын өлчөмдөрү | 19.69 x 19.69 x 11.02 дюйм |
| Элемент Салмагы | 0.01 унция |
| Өндүрүүчү | Vivotek |
10. Кепилдик жана колдоо
VIVOTEK өнүмдөрү чектелген кепилдик менен камтылган. Кепилдиктин толук шарттары жана эрежелери үчүн, өнүмүңүзгө тиркелген кепилдик картасын караңыз же расмий VIVOTEK дүкөнүнө баш багыңыз. webсайт.
For technical support, product registration, or to download the latest firmware and software, please visit the VIVOTEK support portal:
VIVOTEK Official Support Webсайт
When contacting support, please have your NVR's model number (ND9323P) and serial number ready.