
1. Киришүү
Сатып алганыңыз үчүн рахматasing the VILINICE 6500 Lumens 720P Native Portable Projector. This manual provides essential information for the safe and efficient operation of your device. Please read it thoroughly before use and retain it for future reference.
2. Коопсуздук маалыматы
To ensure safe operation and prolong the lifespan of your projector, please observe the following safety precautions:
- Вентиляция тешиктерин жаппаңыз. Ашыкча ысып кетүүнүн алдын алуу үчүн проектордун айланасында адекваттуу аба агымын камсыз кылыңыз.
- Проектордун линзасынын жарыгына түз тийүүдөн алыс болуңуз. Жаркыраган жарык көздүн чарчоосуна же зыян келтириши мүмкүн.
- Проекторду туруксуз жерлерге койбоңуз. Кулап кетпеши үчүн, анын тегиз, туруктуу бетте экенин текшериңиз.
- Проекторду суудан, нымдуулуктан жана тез күйүүчү материалдардан алыс кармаңыз.
- Проектор менен келген кубат адаптерин гана колдонуңуз.
- Проекторду өз алдынча оңдоого аракет кылбаңыз. Бардык тейлөө иштерин квалификациялуу адистерге тапшырыңыз.
- Чагылган бороондордо же көпкө колдонулбаганда проекторду электр розеткасынан ажыратыңыз.
3. Пакеттин мазмуну
Пакеттин мазмунун ачканда текшериңиз. Эгерде кандайдыр бир нерселер жок болсо же бузулса, кардарларды колдоо менен байланышыңыз.
- VILINICE 6500 Lumens 720P Native Portable Projector
- Алыстан башкаруу
- Электр кабели
- HDMI кабели
- AV Cable
- User Manual
- 100-inch Projector Screen (as indicated in product images)
4. Продукт бүтүп калдыview
Проектордун компоненттери жана интерфейстери менен таанышыңыз.

Image: The VILINICE projector shown with its remote controls, highlighting its compact design.
4.1 Алды жана каптал View
- Проекциялык линза: Сүрөттү экранга чыгарат.
- Фокус шакеги: Сүрөттүн тунуктугун тууралайт.
- Keystone түзөтүү шакеги: Трапеция сымал сүрөттүн бурмаланышын оңдойт.
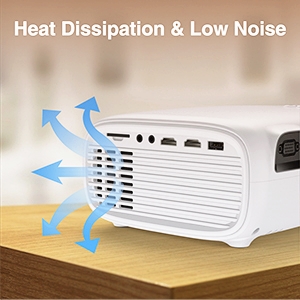
- Вентиляция тешиктери: Жылуулукту таркатуу үчүн. Бөгөттөбөңүз.

Image: The projector's rear and side panels displaying multiple connectivity options including AV, AUX, HDMI, USB, VGA, and SD card slot.
4.2 Арткы жана каптал интерфейстери
- AV порт: AV кабелин колдонуп, эски түзмөктөрдү туташтыруу үчүн.
- AUX (Audio Out) Port: Тышкы динамиктерди же наушниктерди туташтыруу үчүн.
- HDMI порттору (x2): For connecting devices like laptops, gaming consoles, or TV sticks.
- USB порттору (x2): For connecting USB drives to play media or power devices.
- VGA порту: For connecting computers with a VGA output.
- SD карта уячасы: SD картадан медианы түз ойнотуу үчүн.
- Кубат киргизүү: Кубат адаптерине туташат.
5. Орнотуу
5.1 Жайгаштыруу жана проекциялоо
Position the projector on a stable surface. The optimal projection distance and screen size can vary. Ensure the projector is perpendicular to the screen for the best image quality.

Image: The projector set up for an outdoor movie night, demonstrating its portability and the included 100-inch screen.
The projector also features a mounting hole for ceiling or tripod installation.
Сүрөт: деталдуу view of the projector's mounting hole, suitable for various installation methods.
5.2 Кубат туташтыруу
Кубат кабелин проектордун кубат киргизүү булагына туташтырып, андан кийин аны розеткага сайыңыз.
5.3 Фокустоо жана Keystone коррекциясы
After powering on, adjust the focus ring on the projector lens until the image is clear. If the image appears trapezoidal, use the keystone correction ring to adjust it to a rectangular shape.

Image: Visual guide demonstrating how to adjust the focus and keystone correction for a clear and properly shaped image.
5.4 Түзмөктөрдү туташтыруу
Проектор ар кандай киргизүү булактарын колдойт:
- HDMI: Connect laptops, TV sticks, gaming consoles (PS4, Xbox), or DVD players using an HDMI cable.
- USB: Insert a USB disk to play photos, videos, or music directly.
- VGA: Эски компьютерлерди же ноутбуктарды VGA кабели аркылуу туташтырыңыз.
- OF: Connect legacy devices like VCRs or older DVD players.
- SD карта: Insert an SD card into the slot to access media files.
- Смартфондор: For smartphone connectivity, an external MHL HDMI adapter (not included) may be required.
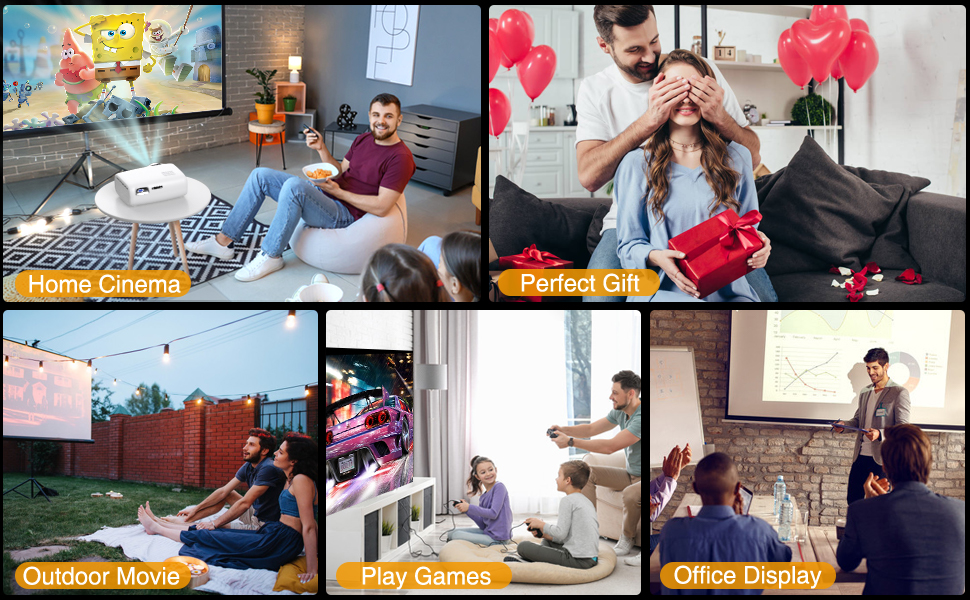
Image: Illustration of connecting a smartphone or laptop to the projector, emphasizing ease of use.
6. Операция
6.1 Күйгүзүү/өчүрүү
Аппаратты күйгүзүү же өчүрүү үчүн проектордун же пульттун кубат баскычын басыңыз.
6.2 Киргизүү булагын тандоо
Use the "Source" button on the remote control or the projector's control panel to select the desired input source (HDMI1, HDMI2, USB, VGA, AV, SD Card).
6.3 Орнотууларды тууралоо
Navigate the on-screen menu using the remote control to adjust various settings:
- Сүрөт жөндөөлөрү: Adjust brightness, contrast, color, and aspect ratio.
- Үн орнотуулары: Control volume and audio modes. The projector features a built-in HiFi stereo speaker for an immersive audio experience.
- Чоңойтуу функциясы: The projector supports a 100%-75% zoom function, allowing you to adjust the screen size without moving the projector.
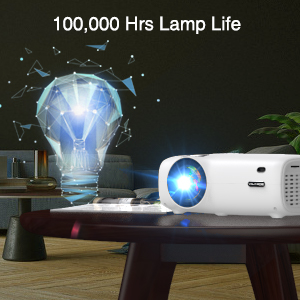
Image: Visual representation of the projector's zoom function, showing how the image size can be reduced from 100% to 75%.

Image: A family enjoying a movie projected by the VILINICE projector, highlighting the built-in HiFi stereo speaker for a great auditory experience.
7. Техникалык тейлөө
Proper maintenance ensures optimal performance and longevity of your projector.
- Линзаны тазалоо: Use a soft, lint-free cloth and lens cleaning solution specifically designed for optical lenses. Do not use abrasive cleaners.
- Чаңды тазалоо: Regularly clean the projector's exterior with a soft, dry cloth. Use a can of compressed air to gently clear dust from ventilation openings.
- Сактагыч: Колдонулбаганда, проекторду салкын, кургак жерде, тике күн нурунан жана экстремалдык температурадан алыс сактаңыз.
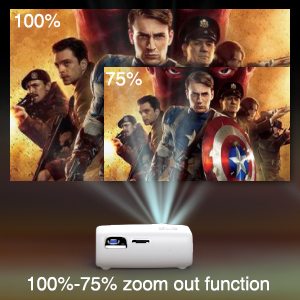
Image: Illustration of the projector's heat dissipation system, designed for efficient cooling and low noise operation.
The projector is designed with a long-lasting lamp өмүрү 100,000 XNUMX саатка чейин.

Image: A visual representation emphasizing the projector's extended lamp lifespan of 100,000 hours.
8. Кыйынчылыктарды
Эгер көйгөйлөргө туш болсоңуз, төмөнкү жалпы көйгөйлөрдү жана чечимдерди караңыз:
- Кубат жок:
- Электр кабелинин проекторго да, розеткага да бекем туташтырылганын текшериңиз.
- Электр розеткасынын иштешин текшериңиз.
- Сүрөт жок:
- Verify the input source is correctly selected (e.g., HDMI1, USB).
- Check the connection cable (HDMI, VGA, AV) between the projector and the source device.
- Түзмөктүн күйгүзүлгөнүн жана сигнал чыгарып жатканын текшериңиз.
- бүдөмүк сүрөт:
- Проектор объективиндеги фокус шакегин тууралаңыз.
- Проекциялоо аралыгы сунушталган диапазондо экенине ынаныңыз.
- Эгерде проектордун линзасы кир болсо, аны тазалаңыз.
- Трапеция формасындагы сүрөт:
- Adjust the keystone correction ring until the image is rectangular.
- Ensure the projector is placed on a flat surface and is perpendicular to the screen.
- Үн жок:
- Проектордо да, баштапкы түзмөктө да үнүн жогорулатыңыз.
- Check if external speakers are connected and properly functioning.
- Ensure the audio output settings on the source device are correct.
9. Техникалык шарттар
Below are the technical specifications for the VILINICE 6500 Lumens 720P Native Portable Projector:
| Өзгөчөлүк | Спецификация |
|---|---|
| Бренд | VILINICE |
| Display Resolution | Native 1280 x 720 (720P) |
| Колдоого алынган резолюция | 1080P Full HD |
| Жарыктык | 6500 Lumens |
| Дисплей түрү | LCD |
| Байланыш технологиясы | HDMI, MHL, USB, VGA |
| Өзгөчө өзгөчөлүк | Portable, 100%-75% Zoom Function |
| Динамик түрү | Built-In, Surround (HiFi Stereo) |
| Lamp Жашоо | 100,000 саатка чейин |
| Элемент Салмагы | 4.92 фунт |
| Продукциянын өлчөмдөрү | 12.6 x 5.51 x 8.27 дюйм |
10. Кепилдик жана колдоо
VILINICE products come with a standard manufacturer's warranty. For detailed warranty information, product support, or technical assistance, please refer to the warranty card included in your package or visit the official VILINICE website. Do not attempt to open or modify the projector, as this may void your warranty.