1. Киришүү
This manual provides detailed instructions for the installation, operation, and maintenance of your VPFET HDMI Extender. This device allows you to extend 1080p HDMI signals up to 200 feet (60 meters) over a single Cat5e/6/7 Ethernet cable. It supports Power over Cable (POC) technology, requiring power only at the Transmitter (TX) unit.
2. Коопсуздук маалыматы
- Ensure all cables are connected securely before powering on the device.
- Use only the provided 5V DC power adapter.
- Аппаратты нымдуулукка же экстремалдык температурага дуушар кылбаңыз.
- Түзмөктү бөлүктөргө бөлүп алуудан алыс болуңуз; тейлөөнү квалификациялуу адистерге тапшырыңыз.
- Use high-quality oxygen-free copper Cat5e/6/7 cables for optimal performance and transmission distance.
3. Пакеттин мазмуну
Пакетиңизде бардык буюмдар бар экенин текшериңиз:
- 1 x HDMI Transmitter (TX) Unit
- 1 x HDMI Receiver (RX) Unit
- 1 x 5V DC электр булагы
- 1 x User Manual

Image: Contents of the VPFET HDMI Extender package, showing the transmitter, receiver, power adapter, and user manual.
4. Продукт бүтүп калдыview жана компоненттер
Familiarize yourself with the ports and indicators on both the Transmitter (TX) and Receiver (RX) units.

Сүрөт: деталдуу view of the Transmitter (TX) and Receiver (RX) units, highlighting HDMI Input/Output, 5V Power Output, EDID Copy button, and RJ45 ports.
Өткөргүч (TX) бирдиги:
- HDMI киргизүү: Connects to the HDMI source device (e.g., PC, DVD player, game console).
- 5V кубаттуулук киргизүү: Connects to the included 5V DC power adapter.
- EDID Copy Button: Used to copy EDID information from the display.
- RJ45 Output (OUT): Connects to the Receiver (RX) unit via Cat5e/6/7 cable.
Кабыл алгыч (RX) блогу:
- HDMI чыгышы: Connects to the HDMI display device (e.g., TV, monitor).
- RJ45 Input (IN): Connects to the Transmitter (TX) unit via Cat5e/6/7 cable.
- Note: The RX unit receives power via the Cat cable (POC) from the TX unit.
5. Орнотуу нускамалары
Follow these steps to set up your HDMI Extender:
- Connect HDMI Source to TX: Connect your HDMI source device (e.g., PC, DVD player, game console) to the HDMI-IN port of the Transmitter (TX) unit using a high-quality HDMI cable.
- Connect Display to RX: Connect your HDMI display device (e.g., TV, monitor) to the HDMI OUT port of the Receiver (RX) unit using a high-quality HDMI cable.
- Connect TX and RX with Ethernet Cable: туташтыруу RJ45 OUT port of the TX unit to the RJ45 IN port of the RX unit using a single Cat5e, Cat6, or Cat7 Ethernet cable. Ensure the cable is oxygen-free copper for optimal performance.
- Power On TX Unit: Кошумча 5V DC кубат адаптерин туташтырыңыз 5V кубаттуулук киргизүү port on the Transmitter (TX) unit. The RX unit will receive power via the Ethernet cable (POC).
- Байланышты текшерүү: Once all connections are made and the TX unit is powered, check for signal on your display.

Image: Connection diagram illustrating how to connect the HDMI source (laptop, PC, DVD, TV Box) to the Transmitter (TX), the TX to the Receiver (RX) via a Cat5e/6/7 cable, and the RX to the display.
EDID Copy Function:
The EDID (Extended Display Identification Data) copy function ensures the best video and audio signals are transmitted by allowing the TX unit to learn the display's capabilities. It is recommended to perform this step if you experience display issues.
- Connect the Transmitter (TX) unit directly to your monitor/display using an HDMI cable (without the RX unit or Cat cable).
- Connect the 5V power adapter to the TX unit.
- басып, кармап туруңуз EDID баскычы on the TX unit for approximately 3 seconds.
- The signal indicator light will flash 3 times, indicating that the EDID information has been successfully copied and stored.
- You can now proceed with the full setup as described above. The copied EDID will be remembered until the TX unit is reset or a new EDID copy operation is performed.
To restore factory EDID settings, connect the TX unit to power, then press and hold the EDID button for 3 seconds. The signal indicator will light up and then turn off, confirming the reset.

Image: Close-up of the Transmitter (TX) unit, highlighting the EDID button and its function in copying display information.
6. Иштөө нускамалары
Once the setup is complete, the VPFET HDMI Extender operates automatically. Ensure your source device is powered on and outputting an HDMI signal, and your display is set to the correct HDMI input.
- Power Over Cable (POC): The TX unit powers the RX unit through the Ethernet cable, simplifying installation by eliminating the need for a power outlet at the display end.
- Automatic Equalization: The built-in automatic equalization algorithm adjusts for cable transmission distance, ensuring stable signal transmission without manual configuration.
- Колдоого алынган чечимдер: The extender supports resolutions up to 1920x1200@60Hz and 1080p@60Hz.
- Колдоого алынган аудио форматтары: DTS-HD, Dolby-trueHD, DTS, Dolby-AC3, DSD.
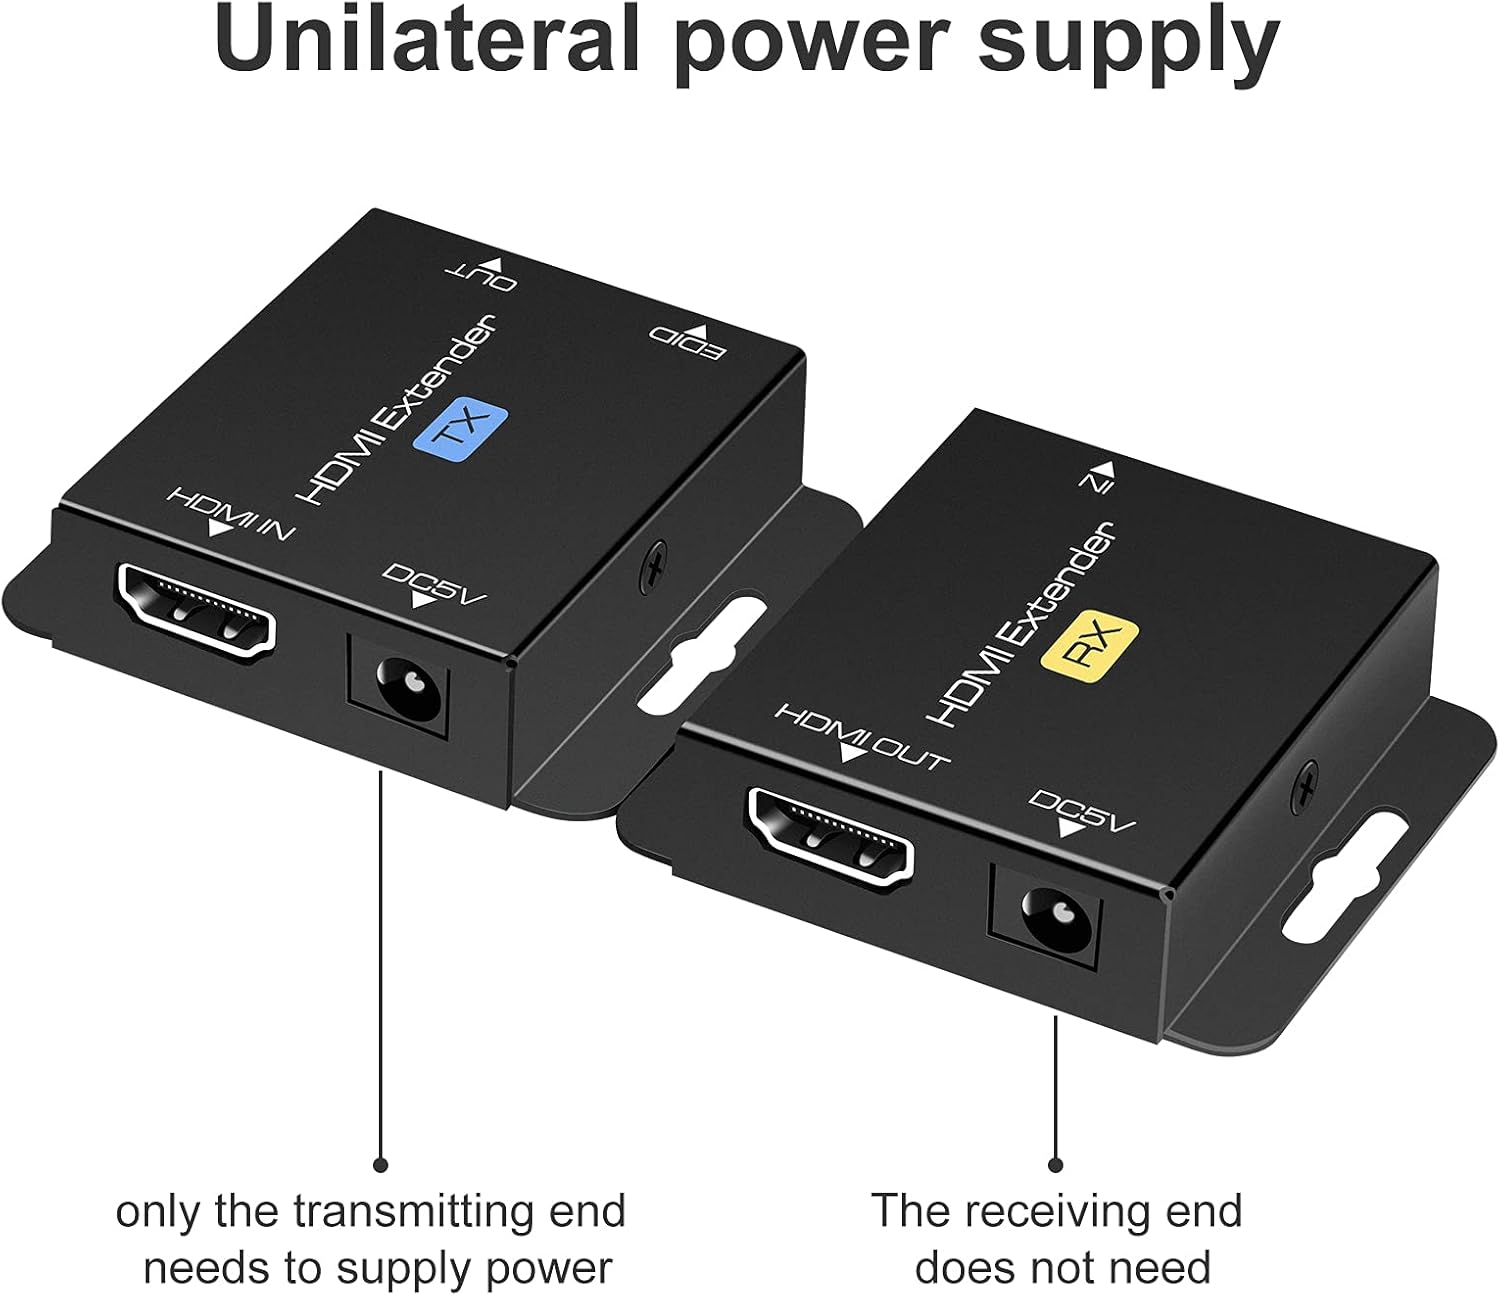
Image: Illustration of the unilateral power supply (POC) feature, indicating that only the transmitting (TX) end requires a power connection, while the receiving (RX) end does not.

Image: An illustration of the HDMI Extender in operation, showing a laptop connected to the TX unit, which is then connected via a long Ethernet cable to the RX unit, and finally to a large display, demonstrating extended transmission distance.
7. Техникалык шарттар
| Өзгөчөлүк | Деталь |
|---|---|
| Max Resolution Support | 1920x1200@60Hz / 1080p@60Hz / 3D |
| Transmission Distance (Cat5e/6/7) | Up to 200ft (60m) for 1080p; up to 165ft for 1920x1200@60Hz |
| Колдоого алынган аудио форматтары | DTS-HD, Dolby-trueHD, DTS, Dolby-AC3, DSD |
| Max Transmission өткөрүү жөндөмдүүлүгү | 1.65Gbps |
| Input/Output HDMI Cable Distance | Up to 16ft (5m) AWG26 HDMI standard cable |
| Электр камсыздоо | Input: AC 100V-240V (50/60Hz), Output: DC 5V |
| POC Support | Yes (Power on Cat6/7 from TX to RX) |
| EDID Көчүрүү | Ооба |
| Dimensions (TX/RX Unit) | Approx. 2.4in x 2.1in x 0.63in (6.1cm x 5.3cm x 1.6cm) |
| Элемент Салмагы | 9.3 унция (пакеттин жалпы салмагы) |
Image: Dimensions of the VPFET HDMI Extender Transmitter (TX) unit, showing its compact size.
8. Кыйынчылыктарды
Эгер көйгөйлөргө туш болсоңуз, төмөнкү жалпы көйгөйлөрдү жана чечимдерди караңыз:
- Сүрөт жок/сигнал:
- Ensure all HDMI and Ethernet cables are securely connected.
- Verify the TX unit is powered on with the included 5V adapter.
- Дисплей туура HDMI киргизүүгө коюлганын текшериңиз.
- Try performing the EDID Copy procedure (Section 5).
- Test with shorter, certified HDMI and Ethernet cables.
- Ensure the Ethernet cable is Cat5e/6/7 (oxygen-free copper recommended) and not damaged.
- Жымыңдаган/үзгүлтүктүү сигнал:
- Check cable lengths; ensure they are within the specified limits (200ft for Cat cable, 16ft for HDMI).
- Ensure the Ethernet cable is not running parallel to power lines or other sources of interference.
- Башка Ethernet кабелин колдонуп көрүңүз.
- Perform the EDID Copy procedure.
- Аудио жок:
- Баштапкы түзмөгүңүздөгү жана дисплейиңиздеги аудио жөндөөлөрүн текшериңиз.
- HDMI кабелдери аудио өткөрүүнү колдой турганын текшериңиз.
- Perform the EDID Copy procedure.
9. Техникалык тейлөө
The VPFET HDMI Extender requires minimal maintenance. Follow these guidelines to ensure longevity:
- Аппаратты салкын, кургак жерде, тике күн нурунан жана жылуулук булактарынан алыс кармаңыз.
- Сыртын жумшак, кургак чүпүрөк менен тазалаңыз. Суюк тазалоочу каражаттарды же аэрозольдорду колдонбоңуз.
- Ашыкча ысып кетүүнүн алдын алуу үчүн, шаймандын айланасында жакшы желдетүүнү камсыз кылыңыз.
10. Кепилдик жана колдоо
For warranty information or technical support, please refer to the contact details provided with your purchase or visit the official VPFET website. Please have your model number (B099ZCTV74) and purchase date ready when contacting support.