
1. Introduction and Overview
The Brifit EU-WA100 Indoor Outdoor Thermometer provides real-time monitoring of temperature and humidity in up to four locations simultaneously. This device includes a main unit and three wireless remote sensors, allowing you to track environmental conditions both indoors and outdoors. It features a large backlit LCD display, records maximum and minimum values, and indicates comfort levels.

Image: The Brifit EU-WA100 main display unit and three wireless remote sensors.
2. Пакеттин мазмуну
Сураныч, бардык буюмдар бар экенин текшерүү үчүн пакетти текшериңиз:
- 1 x Brifit EU-WA100 Main Thermometer Host Unit
- 1 x USB Charging Cable (100 cm length)
- 3 x Wireless Remote Sensors (with lanyards)
- 3 x Transparent Suction Cups
- 1 x User Manual
3. Продукциянын өзгөчөлүктөрү
- Simultaneous Display: Large 4.6-inch backlit LCD screen displays temperature and humidity for the main unit and three remote sensors, along with trend indicators and comfort levels.
- реалдуу убакыт мониторинг: Provides current temperature and humidity readings.
- Маалыматтардын жазуулары: Records maximum and minimum temperature and humidity values for the last 24 hours or all-time.
- Three Wireless Sensors: Includes three remote sensors for monitoring multiple locations.
- Кеңейтилген диапазон: Sensors can transmit data up to 100 meters (328 feet) in open areas without obstacles.
- Кош энергия менен камсыздоо: Main unit can be powered by 3x AA batteries or a USB cable. Remote sensors require 2x AAA batteries each.
- Ар тараптуу жайгаштыруу: Main unit supports standing, wall-mounting, and magnetic attachment. Remote sensors can be stood, wall-mounted, or attached with suction cups.
- Температура бирдиктери: Цельсий (℃) жана Фаренгейт (℉) ортосунда оңой которулуңуз.
- Арткы жарык: The main unit features a backlight for easy reading in low light conditions.

Сүрөт: An overview of the Brifit thermometer's key features, including temperature, humidity, trend indicator, high precision, and 3 channels.
4. Орнотуу
4.1 Main Unit Setup
- Электр камсыздоо:
- Insert 3x AA batteries (not included) into the battery compartment, observing correct polarity.
- Alternatively, connect the provided USB charging cable to the main unit and a power source. If both are connected, the USB power will be prioritized.
- The main unit will power on and display indoor temperature and humidity.
4.2 Remote Sensor Setup
- Insert 2x AAA batteries (not included) into each remote sensor, observing correct polarity.
- The sensors will automatically attempt to pair with the main unit. The main unit will display the readings from each connected sensor on channels 1, 2, and 3.
- If a sensor does not connect, press the "RF SEARCH CHANNEL" button on the main unit to initiate a search. Ensure sensors are within range.
- Place the remote sensors in desired locations (e.g., outdoors, in a greenhouse, or another room). Avoid placing them in direct sunlight or areas with poor ventilation, as this can affect measurement accuracy.

Image: Illustration of the main unit's dual power supply options: USB cable or 3x AA batteries.
5. Операция
5.1 Дисплейview

Сүрөт: деталдуу view of the main unit's LCD display, showing channels, RF signal, temperature, humidity, and trend indicators.
- Channels 1, 2, 3: Display readings from the respective remote sensors.
- Жабык: Displays readings from the main unit's internal sensor.
- RF сигналы: Indicates successful connection to remote sensors.
- Current Temperature/Humidity: Real-time measurements.
- Trend Indicator: Arrows show if temperature/humidity is rising, falling, or stable.
- Comfort Status: Icons (DRY, COM, WET) indicate air comfort levels based on humidity.
5.2 Баскыч функциялары
- ℃/℉ баскычы: Press to switch between Celsius and Fahrenheit temperature units.
- МИН/МАКС баскычы:
- үчүн бир жолу басыңыз view maximum temperature and humidity recorded.
- үчүн кайра басыңыз view minimum temperature and humidity recorded.
- Press and hold to clear the recorded MAX/MIN values.
- RF SEARCH CHANNEL Button: Press to manually search for and pair with remote sensors.
- ЖАРЫК баскычы: Press to activate the backlight.
- When powered by USB, there are two backlight levels (semi-bright, full-bright).
- When powered by batteries, the backlight is fixed.
5.3 Ыңгайлуулук көрсөткүчү
The display shows a comfort indicator based on humidity levels:
- КУРГАК: Нымдуулук < 40%
- COM (Comfort): Нымдуулук 40% ~ 70%
- СУУ: Нымдуулук > 70%

Image: Visual representation of the air comfort indicator (DRY, COM, WET) based on humidity percentages.
6. Орнотуу ыкмалары
6.1 Негизги блокту жайгаштыруу
The main unit offers three installation options:
- Турган: Use the integrated kickstand to place it on a desk or table.
- Дубалга орнотуу: Hang it on a wall using the mounting hole on the back.
- Магниттик: Attach it to a metallic surface, such as a refrigerator, using the magnetic back.

Image: The main unit standing upright on a surface next to a plant.

Image: The main unit mounted on a wall above a sofa.

Image: The main unit magnetically attached to a refrigerator door.
6.2 Алыстан сенсорду жайгаштыруу
Each remote sensor is equipped with a lanyard and a suction cup for flexible placement:
- Турган: Place on any flat surface.
- Дубалга орнотуу: Hang using the lanyard or a screw.
- Сорулгазы: Attach to smooth surfaces like windows or tiles.
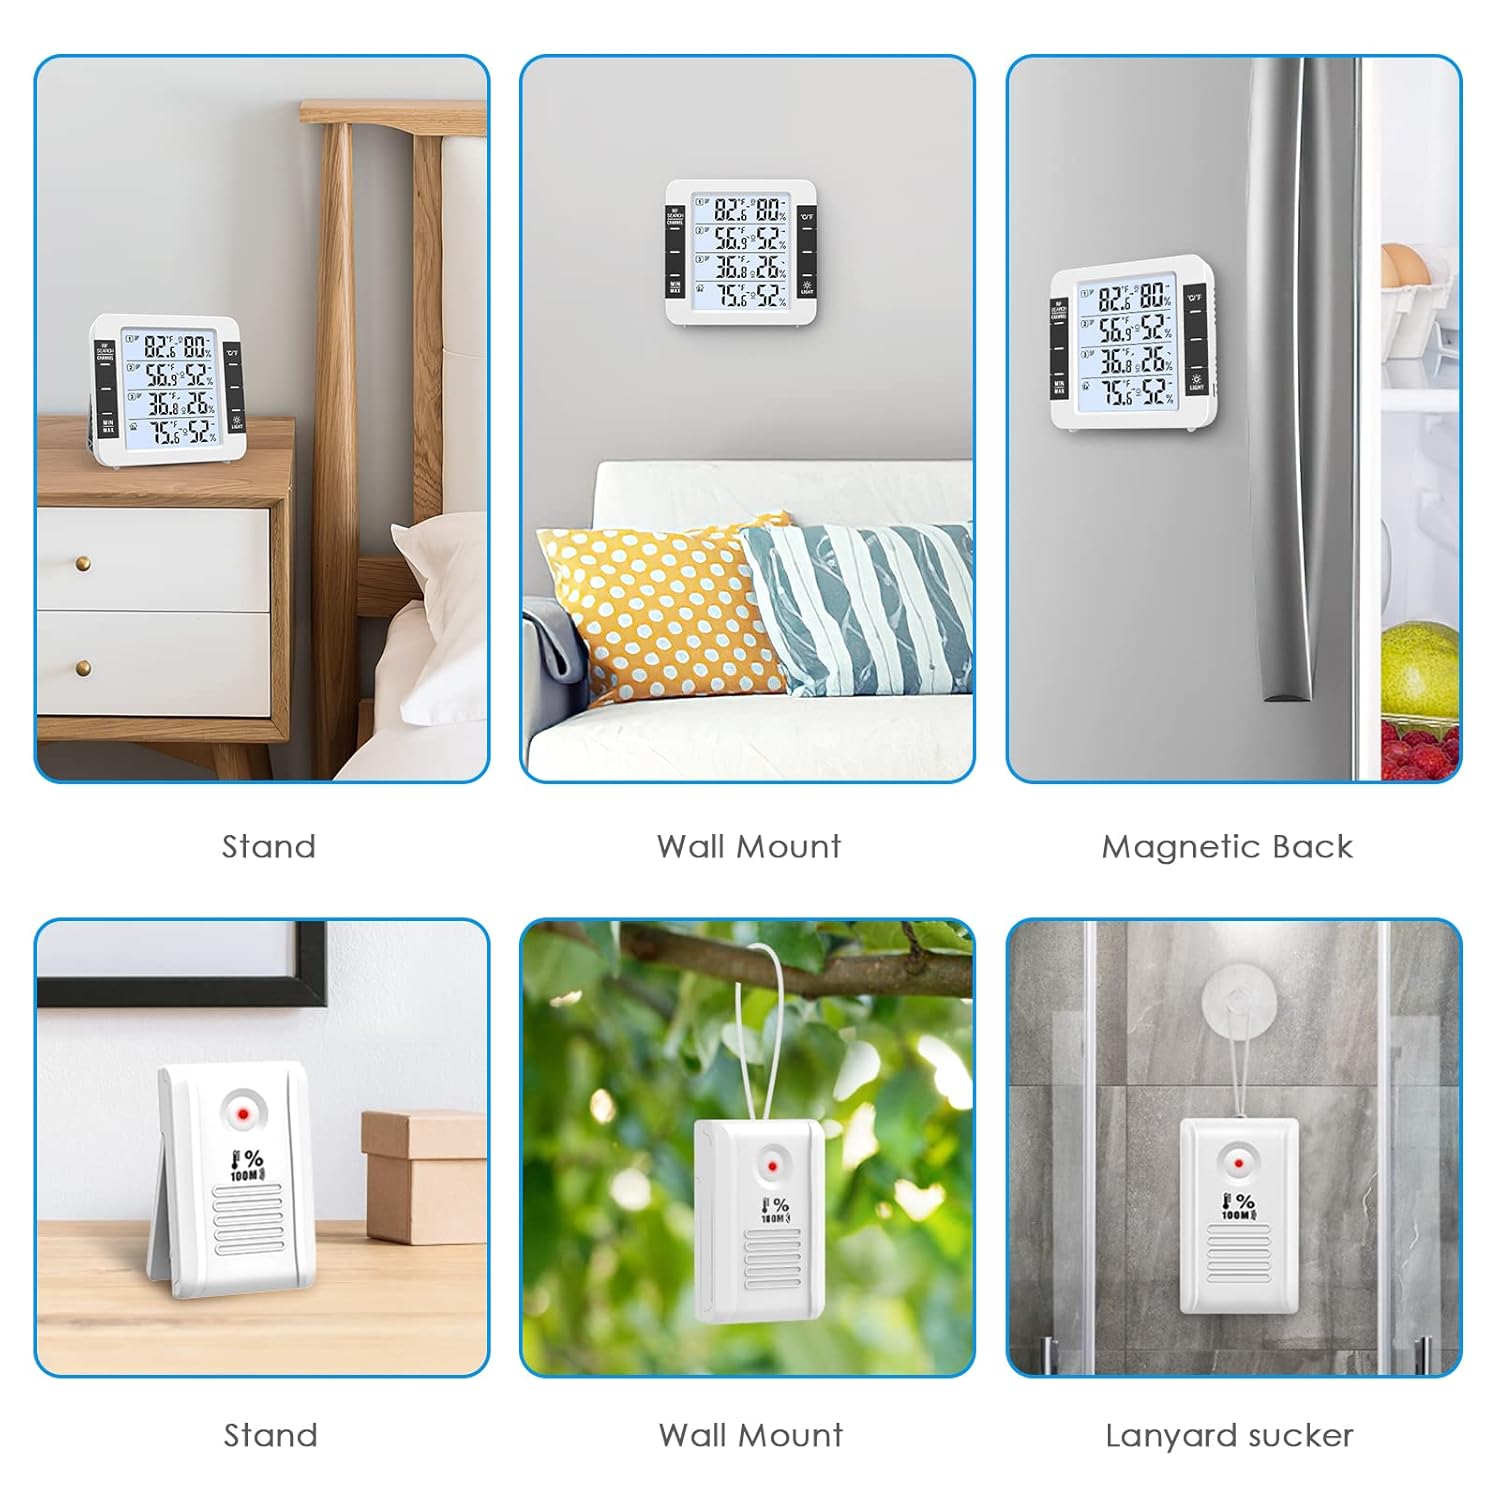
Image: Various installation methods for the main unit (stand, wall mount, magnetic) and remote sensors (stand, wall mount, suction cup).
7. Электр камсыздоо
The main unit and remote sensors have different power requirements:
- Негизги блок: Requires 3x AA batteries (not included) or can be powered via the included USB cable.
- Алыстан сенсорлор: Each sensor requires 2x AAA batteries (not included).
When battery levels are low, a low battery symbol will appear on the corresponding channel on the main unit's display.

Image: The main unit displaying a low battery icon for a sensor, indicating it's time to replace batteries.
8. Техникалык тейлөө
- Тазалоо: Wipe the device and sensors with a soft, dry cloth. Do not use abrasive cleaners or immerse in water.
- Батареяны алмаштыруу: Replace batteries promptly when the low battery indicator appears to ensure continuous operation and accurate readings.
- Жайгашкан жери: Avoid placing sensors in direct sunlight, near heat sources, or in areas with poor ventilation to maintain accuracy. Do not install in air vents.
- Сактагыч: Аппаратты узак убакытка сактасаңыз, агып кетпеш үчүн бардык батарейкаларды алып салыңыз.
9. Кыйынчылыктарды
| Көйгөй | Мүмкүн себеп | Чечим |
|---|---|---|
| Негизги блокто дисплей жок. | Batteries are dead or incorrectly inserted; USB cable not connected or faulty. | Check battery polarity and replace if necessary. Ensure USB cable is securely connected to a working power source. |
| Remote sensor not displaying data. | Sensor batteries are dead; sensor is out of range; interference; sensor not paired. | Replace sensor batteries. Move sensor closer to the main unit. Press "RF SEARCH CHANNEL" on the main unit to re-pair. Avoid strong electromagnetic interference. |
| Туура эмес окуулар. | Sensor placed in direct sunlight, near heat/cold sources, or in poor ventilation. | Relocate sensors to a shaded, well-ventilated area away from extreme temperature sources. Allow time for readings to stabilize after relocation. |
| Арткы жарык иштебейт же күңүрт. | Battery power only; low battery. | Connect via USB for brighter backlight options. Replace main unit batteries if backlight is dim on battery power. |
10. Техникалык шарттар
| Өзгөчөлүк | Деталь |
|---|---|
| Модель номери | EU-WA100 |
| Негизги бирдиктин өлчөмдөрү | 11.8 x 11.2 x 2.5 см (4.64 x 4.4 x 0.98 дюйм) |
| Remote Sensor Dimensions | 8.3 x 5 x 2 см (3.27 x 1.97 x 0.79 дюйм) |
| Дисплей | Арткы жарык менен LCD |
| Түс | Ак |
| Жабык температура диапазону | -20°Cден 70°Cге чейин (-4°Fтен 158°Fге чейин) |
| Тышкы температура диапазону | -50°Cден 70°Cге чейин (-58°Fтен 158°Fге чейин) |
| нымдуулук колому | 10% - 99% RH |
| Температуранын тактыгы | ±1°C (±2°F) |
| Нымдуулуктун тактыгы | ±5% RH |
| Зымсыз берүү диапазону | Ачык абада 100 метрге (328 фут) чейин |
| Негизги блоктун кубаттуулугу | 3x AA batteries (not included) or USB cable |
| Сенсор күчү | 2x AAA batteries per sensor (not included) |
| Байланыш технологиясы | Wireless RF, USB |
| Материал | Пластик |

Image: Diagram showing the dimensions of the main unit and the effective range of the wireless sensors, with examples of sensor placement.

Image: Infographic detailing the detection ranges for indoor/outdoor temperature and humidity, along with accuracy specifications.
11. Кепилдик жана колдоо
Information regarding specific warranty terms and customer support contact details is not provided in the product data. Please refer to the product packaging or the manufacturer's official webкепилдик жөнүндө маалымат жана кардарларды тейлөө байланыштары үчүн сайт.
12. Колдонуу сценарийлери
The Brifit EU-WA100 thermometer is suitable for various environments:

Image: Collage showing various places where the thermometer can be used, including bedroom, living room, office, greenhouse, warehouse, and wine cellar.

Сүрөт: Мисamples of diverse environments for the thermometer, such as bedroom, office, cellar, greenhouse, and incubator.