Introduction
The Keychron Q2 is a fully customizable wired mechanical keyboard featuring a compact 65% layout. Constructed with a solid full aluminum frame, the Q2 is designed for easy assembly and offers a premium typing experience. It supports full QMK and VIA programming for extensive customization and features hot-swappable switches for personalized tactile feedback.

Image: The Keychron Q2 Wired Custom Mechanical Keyboard, showcasing its compact 65% layout and blue color scheme.
Орнотуу колдонмосу
1. Пакеттин мазмуну
Баштоодон мурун, бардык компоненттердин бар экендигин текшериңиз:
- Keychron Q2 Keyboard Kit (Aluminum Case, PCB, Steel Plate, Sound Absorbing Foam, Case Foam, Gaskets)
- USB Type-Cден Type-Cге чейин кабель
- USB Type-A - Type-C адаптер
- Switch Puller
- Баскыч капкагын тарткыч
- Screwdriver
- Hex ачкычы
- Stabilizers (4 sets)
Note: All tools are typically located at the bottom of the packaging.

Image: Diagram illustrating the contents of the Keychron Q2 package, including the keyboard, cables, and tools.
2. Баскычтопту туташтыруу
- Locate the USB Type-C port on the back of the Keychron Q2 keyboard.
- Connect one end of the provided USB Type-C to Type-C cable to the keyboard.
- Connect the other end of the cable to your computer's USB Type-C port. If your computer only has USB Type-A ports, use the included USB Type-A to Type-C adapter.
- Ensure the operating system switch (located on the back edge of the keyboard) is set to the correct position for your system (Mac or Windows).
- Баскычтоп сиздин операциялык тутумуңуз тарабынан автоматтык түрдө таанылат.

Сүрөт: жакын план view of the Keychron Q2 keyboard with a USB-C cable connected, showing the Mac/Win switch.
Иштөө нускамалары
1. QMK/VIA ыңгайлаштыруу
The Keychron Q2 supports full QMK and VIA programming, allowing you to remap keys, create macros, and customize lighting effects. To use VIA software:
- VIA программасын расмий Keychron сайтынан жүктөп алыңыз webсайт (keychron.com/pages/qmk-via).
- Connect your Q2 keyboard to your computer via the USB cable.
- Launch the VIA software. The software should automatically detect your Q2 keyboard. If not, you may need to import the Q2 keymap JSON file, also available on the Keychron webсайт.
- Use the graphical interface to drag and drop functions, assign macros, and configure lighting for each key. Changes are applied in real-time.

Image: Screenshot of the VIA software interface, demonstrating how to remap keys on the Keychron Q2 keyboard.
2. Ыкчам алмаштыруучу которгучтар
The Q2's PCB supports both 3-pin and 5-pin MX style mechanical switches, allowing for easy switch replacement without soldering.
- Берилген ачкыч капкагын тарткычты колдонуп, алмаштыргыңыз келген которгучтан клавиатураны кылдаттык менен чыгарып алыңыз.
- Use the provided switch puller to gently grip the top and bottom clips of the switch. Pull the switch straight up to remove it from the PCB.
- Жаңы которгучтун төөнөгүчтөрүн ПХБдагы тешиктерге тууралаңыз. Ийилип калбаш үчүн төөнөгүчтөр түз экенин текшериңиз.
- Жаңы которгучту чыкылдагыча ордуна бекем басыңыз.
- Баскычтоптун капкагын кайра бекитиңиз.

Сүрөт: жакын план view of the Keychron Q2's PCB with several switches removed, demonstrating the hot-swappable feature.
3. Keycaps and RGB Lighting
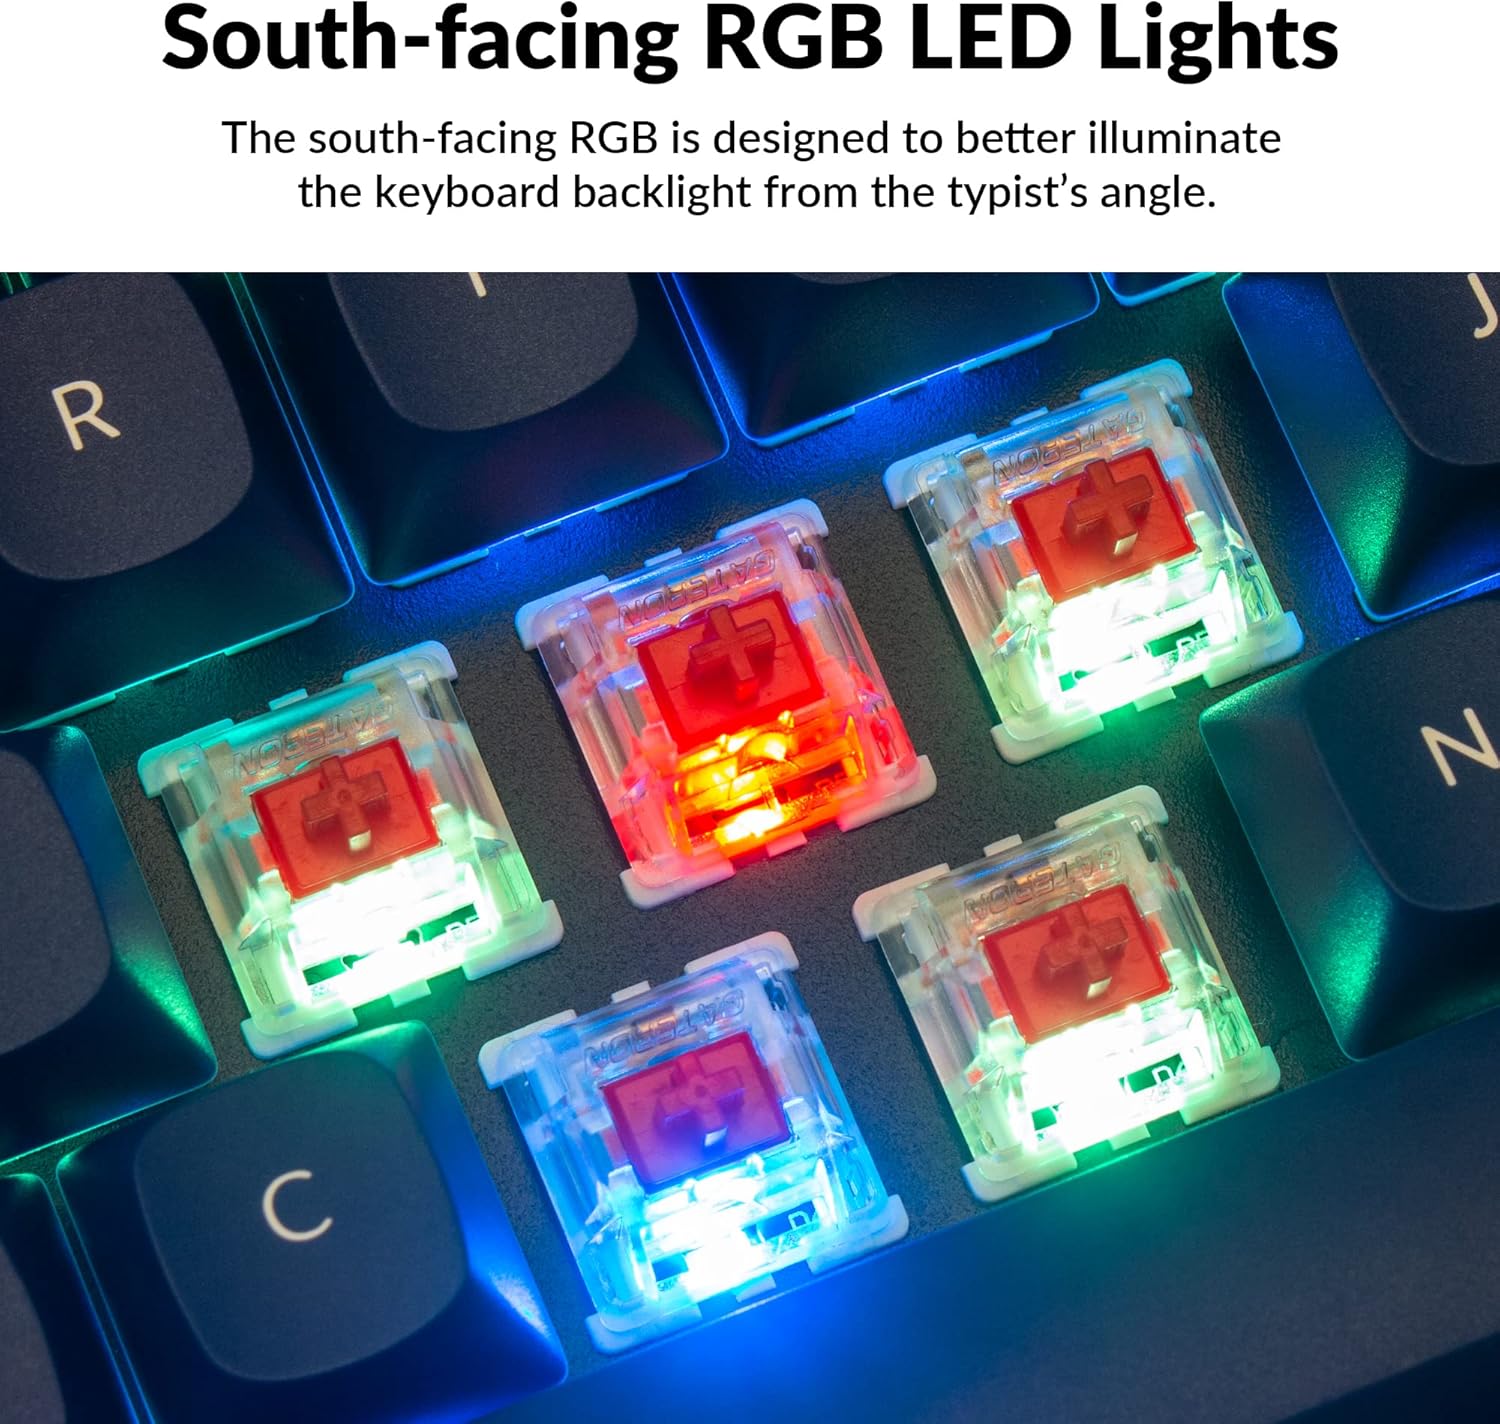
The Q2 comes with premium non-shine-through PBT keycaps, known for their durability and oil resistance. The keyboard features south-facing RGB LEDs, designed to provide better illumination of the backlight from the typist's perspective.
Сүрөт: деталдуу view of the Keychron Q2's double-shot PBT keycaps, highlighting their texture and legends.

Image: A close-up of the Keychron Q2's south-facing RGB LEDs illuminating the switches from below.
Техникалык тейлөө
1. Баскычтопту тазалоо
Үзгүлтүксүз тазалоо клавиатуранын иштешин жана көрүнүшүн сактоого жардам берет.
- Чаңды тазалоо: Баскыч капкактарынын ортосундагы чаңды жана калдыктарды үйлөө үчүн кысылган аба банкасын колдонуңуз.
- Клавиатураны тазалоо: For deeper cleaning, remove the keycaps using the provided keycap puller. Wash them with mild soap and water, then ensure they are completely dry before reattaching.
- Ишти тазалоо: Wipe the aluminum case with a soft, damp кездеме. Финишке зыян келтире турган катаал химиялык заттардан алыс болуңуз.
2. Switch and Stabilizer Maintenance
The hot-swappable design allows for easy maintenance of switches and stabilizers.
- Которуу алмаштыруу: If a switch becomes faulty, replace it using the hot-swapping procedure described in the Operating Instructions.
- Стабилизаторду майлоо: For optimal performance and reduced wobbliness on larger keys (space bar, shift, enter), the PCB-mounted screw-in stabilizers can be lubricated. This typically involves disassembling the keyboard to access the stabilizers.

Image: An exploded diagram of the Keychron Q2, showing its various components like keycaps, switches, top case, gaskets, plate, PCB, sound absorbing foam, case foam, bottom case, and silicone gaskets, illustrating ease of disassembly.
Проблемаларды чечүү
Жалпы маселелер жана чечимдер:
- Баскычтоп жооп бербейт:
- USB кабели клавиатурага жана компьютерге бекем туташып турганын текшериңиз.
- Verify the Mac/Windows switch on the back of the keyboard is set to the correct operating system.
- Try connecting the keyboard to a different USB port or a different computer to rule out port issues.
- Компьютериңизди өчүрүп күйгүзүңүз.
- Атайын ачкычтар иштебейт:
- Remove the keycap and switch for the non-functional key. Inspect the switch pins for bends or damage. Straighten bent pins carefully or replace the switch if damaged.
- Коммутатордун платага толугу менен орнотулганын текшериңиз.
- Check VIA software to ensure the key has not been accidentally remapped or disabled.
- RGB жарыктандыруу маселелери:
- Клавиатура туура туташтырылганын текшериңиз.
- Use the VIA software to check and adjust lighting settings.
- Perform a factory reset if lighting issues persist (refer to Keychron's official support for specific reset procedures).
- Keyboard Disconnecting Randomly:
- Башка USB кабелин колдонуп көрүңүз.
- Ensure the USB port on your computer is stable and providing sufficient power.
- Компьютериңиздин USB драйверлерин жаңыртыңыз.
If you encounter issues not covered here, please refer to the official Keychron support resources.
Техникалык шарттар
| Өзгөчөлүк | Деталь |
|---|---|
| Бренд | Keychron |
| Модель аты | Q2 |
| Модель номери | Q2-J1 |
| Баскычтоптун жайгашуусу | 65% (68 Keys), QWERTY |
| Байланыш технологиясы | Wired (USB-A, USB-C) |
| Шайкеш түзмөктөр | PC (Linux, MacOS, Windows) |
| Которуу түрү | Gateron G Pro Red (Linear), Hot-swappable |
| Арткы жарыктандыруу | RGB (түштүктү караган) |
| Материал | Full Aluminum Frame, PBT Keycaps |
| Продукциянын өлчөмдөрү | 12.89"L x 4.76"W x 1.33"H |
| Өзгөчөлүктөр | QMK/VIA Programmable, Double Gasket Design |
Кепилдик маалымат
Keychron products typically come with a standard manufacturer's warranty. For detailed information regarding the warranty period, coverage, and terms and conditions for your Keychron Q2 keyboard, please refer to the official Keychron webсайтка же продуктуңузга кошулган кепилдик картасы. Кепилдик дооматтар үчүн сатып алганыңыздын далилин сактаңыз.
Колдоо жана ресурстар
For further assistance, software downloads (VIA), firmware updates, and frequently asked questions, please visit the official Keychron support page:
- Keychron расмий Webсайт: www.keychron.com
- QMK/VIA Software & Firmware: www.keychron.com/pages/qmk-via
- Keychron Store: Amazon'догу Keychron дүкөнүнө барыңыз
You can also find community forums and additional user guides online for advanced customization and troubleshooting tips.