
Introduction
This manual provides essential instructions for the proper installation, operation, and maintenance of your maXpeedingrods Snow Plow Mount Kit. Please read this manual thoroughly before installation and use to ensure safe and efficient operation. Retain this manual for future reference.
Коопсуздук маалыматы
Always prioritize safety during installation and operation. Failure to follow safety guidelines can result in injury or damage to equipment.
- Тиешелүү жеке коргоочу шаймандарды (ЖКК), анын ичинде коопсуздук көз айнектерин жана кол каптарды кийиңиз.
- Орнотууну баштоодон мурун, унаанын кол тормозу тартылып, тегиз жерге токтотулганын текшериңиз.
- Do not modify the snow plow mount kit components. Use only as intended.
- Verify all connections are secure before operating the snow plow.
- Consult a qualified mechanic if you are unsure about any installation steps.
Пакеттин мазмуну
Орнотууну улантуудан мурун бардык компоненттер бар экенин жана бузулбаганын текшериңиз.
- 1x Left Snow Plow Mounting Pocket (Part Number: 1304406, 67858)
- 1x Right Snow Plow Mounting Pocket (Part Number: 1304407, 67859)
- 2x Mounting Pins
- 2x Cotter Pins

Figure 1: Complete Snow Plow Mount Kit components.

2-сүрөт: Детальдуу view of mounting pins and cotter pins.
Орнотуу жана орнотуу
The maXpeedingrods Snow Plow Mount Kit is designed for easy installation and removal. Follow these steps for proper mounting.
- Унааны даярдоо: Park the vehicle on a flat, stable surface. Engage the parking brake and turn off the engine.
- Орнотуу жерлерин аныктоо: Locate the designated mounting points on your vehicle's frame or bumper for the snow plow. The kit includes distinct left and right mounting pockets.
- Position the Mounting Pockets: Align the left mounting pocket (Part Number 1304406) with the left side mounting point on your vehicle. Repeat for the right mounting pocket (Part Number 1304407) on the right side.
- Secure the Pockets: Attach the mounting pockets to the vehicle using appropriate hardware (not included, typically supplied with the snow plow frame or vehicle). Ensure all bolts are tightened to the manufacturer's specifications.
- Install Mounting Pins: Once the pockets are securely attached, insert the provided mounting pins into the designated holes on the pockets.
- Secure with Cotter Pins: Insert the cotter pins through the holes in the mounting pins to prevent them from dislodging during operation.
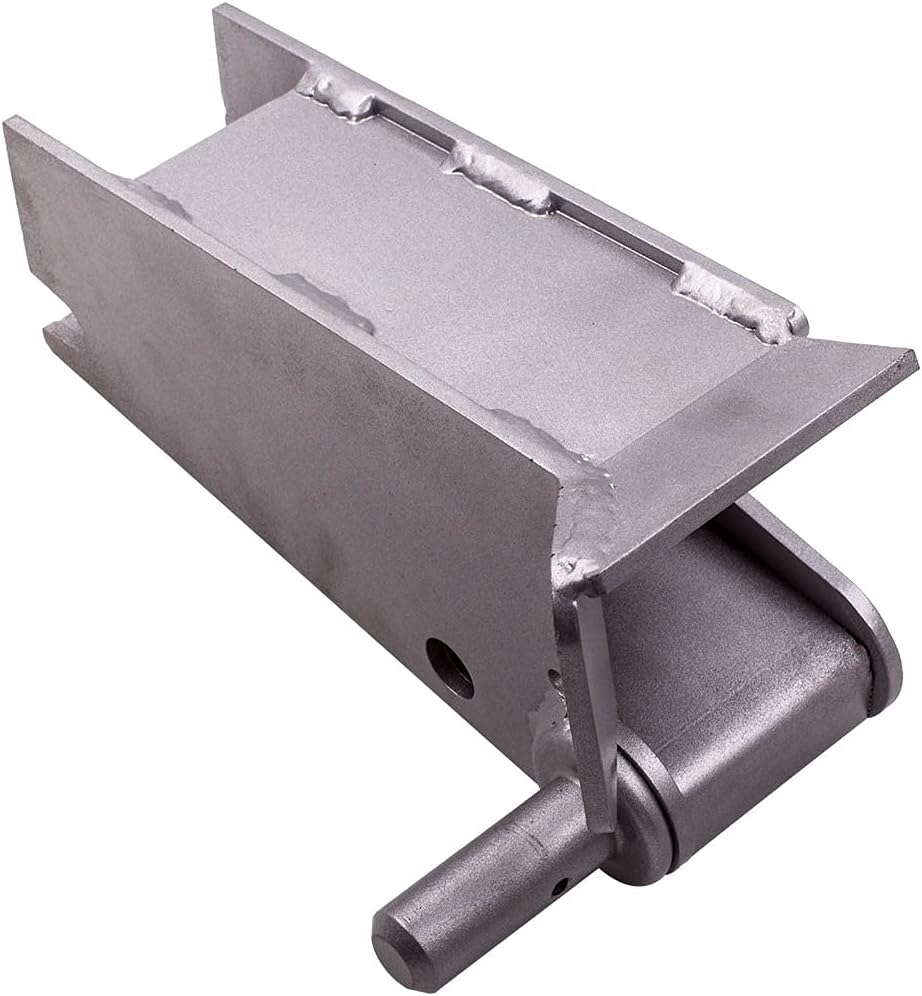
3-сүрөт: Каптал view of a mounting pocket, highlighting the pin mechanism.

Figure 4: Detail of the mounting pin and cotter pin insertion.
Иштөө нускамалары
These mounting pockets serve as the attachment points for your snow plow frame. Once installed, the snow plow can be easily attached and removed.
- Attaching the Snow Plow: Align the snow plow frame with the installed mounting pockets. Insert the snow plow's attachment pins into the pockets and secure them with the provided mounting pins and cotter pins.
- Detaching the Snow Plow: Remove the cotter pins, then the mounting pins, and carefully detach the snow plow frame from the mounting pockets.
- Always ensure the snow plow is securely attached before operation.
Техникалык тейлөө
Regular maintenance ensures the longevity and reliable performance of your snow plow mount kit.
- Текшерүү: Periodically inspect the mounting pockets, pins, and cotter pins for signs of wear, corrosion, or damage.
- Тазалоо: Clean off any dirt, salt, or debris, especially after snow plowing operations.
- Майлоо: Apply a light coat of grease or anti-corrosion spray to the pins and pivot points to prevent rust and ensure smooth operation.
- Аппараттык камсыздоону текшерүү: Verify that all bolts securing the mounting pockets to the vehicle remain tight. Re-tighten as necessary.
- Replace any worn or damaged components immediately.
Проблемаларды чечүү
This section addresses common issues you might encounter with the snow plow mount kit.
- Маселе: Difficulty inserting or removing pins.
Чечим: Check for debris or corrosion in the pinholes. Clean and lubricate as needed. Ensure the snow plow frame is properly aligned. - Маселе: Mounts appear loose after installation.
Чечим: Re-check all mounting bolts for tightness. Ensure they are torqued to the vehicle or snow plow manufacturer's specifications. Inspect for any damage to the mounting points on the vehicle. - Маселе: Visible rust or corrosion.
Чечим: Clean the affected areas thoroughly. Apply rust-inhibiting paint or a protective coating. Regular lubrication can help prevent future corrosion.
Техникалык шарттар
| Бренд | maXpeedingrods |
| Модель номерлери | 1304406 (Left), 1304407 (Right) |
| Өндүрүүчү бөлүгүнүн номери | KJ1362 |
| Алмаштыруучу тетиктердин номерлери | 67858, 67859 |
| Элемент Салмагы | 27 фунт |
| Продукциянын өлчөмдөрү | 14.57 x 10.24 x 8.66 дюйм |
Кепилдик жана колдоо
For any questions, concerns, or assistance regarding your maXpeedingrods Snow Plow Mount Kit, please contact maXpeedingrods customer support. Refer to your purchase documentation for specific warranty details.
"Note--for whatever we can help, please feel free to contact us."