1. Киришүү
This manual provides essential instructions for the safe and efficient use of your Andoer NP-FV5 Battery Charger and NP-FV5 Plus rechargeable batteries. Please read this manual thoroughly before using the product and retain it for future reference.

Image 1.1: Andoer NP-FV5 Battery Charger Kit Components
2. Коопсуздук маалыматы
To prevent injury or damage to your product, observe the following safety precautions:
- Батарея топтомдорун ажыратпаңыз, ачпаңыз же майдалабаңыз.
- Батареяларды ысыкка же отко чыгарбаңыз. Түз тийген күн нурунда сактоодон алыс болуңуз.
- Батареяны кыска туташтырбаңыз. Батареяларды коробкага же суурмага туш келди сактабаңыз, анда алар бири-бирин кыска туташтырып же башка металл буюмдар менен кыска туташтырып коюшу мүмкүн.
- Батареяларды механикалык соккуга дуушар кылбаңыз.
- Батареядан суу агып кетсе, суюктуктун териге же көзгө тийүүсүнө жол бербеңиз. Эгерде тийип калса, жабыркаган жерди көп суу менен жууп, медициналык жардамга кайрылыңыз.
- Батареяларды таза жана кургак кармаңыз.
- Жабдуу менен колдонуу үчүн атайын берилгенден башка эч кандай заряддагычты колдонбоңуз.
- Do not leave a battery on charge when not in use.
- Do not immerse the charger or batteries in water or other liquids.
- Балдар жетпеген жерде сактаңыз.
3. Пакеттин мазмуну
Пакетиңизде бардык буюмдар бар экенин текшериңиз:
- 1 x Andoer NP-FV5 Battery Charger
- 2 x Andoer NP-FV5 Plus 3.7V 1000mAh Lithium-ion Polymer Batteries
- 1 x USB Charging Cable (Micro USB)
4. Продукт бүтүп калдыview
The Andoer NP-FV5 Battery Charger is designed to charge NP-FV5 series batteries efficiently. It features a compact design and an LED indicator for charging status.
4.1. Charger Components
- Батарея уячасы: Area where the battery is inserted for charging.
- Заряддоо байланыштары: Metal pins inside the slot that connect to the battery.
- Микро USB порту: Input for the USB charging cable.
- LED көрсөткүч жарыгы: Заряддоо абалын көрсөтөт.

Image 4.1: Charger Battery Slot and Contacts

Image 4.2: Charger with USB Port and LED
4.2. Батарея бүттүview
The NP-FV5 Plus batteries are 3.7V 1000mAh Lithium-ion Polymer batteries, providing reliable power for compatible devices.
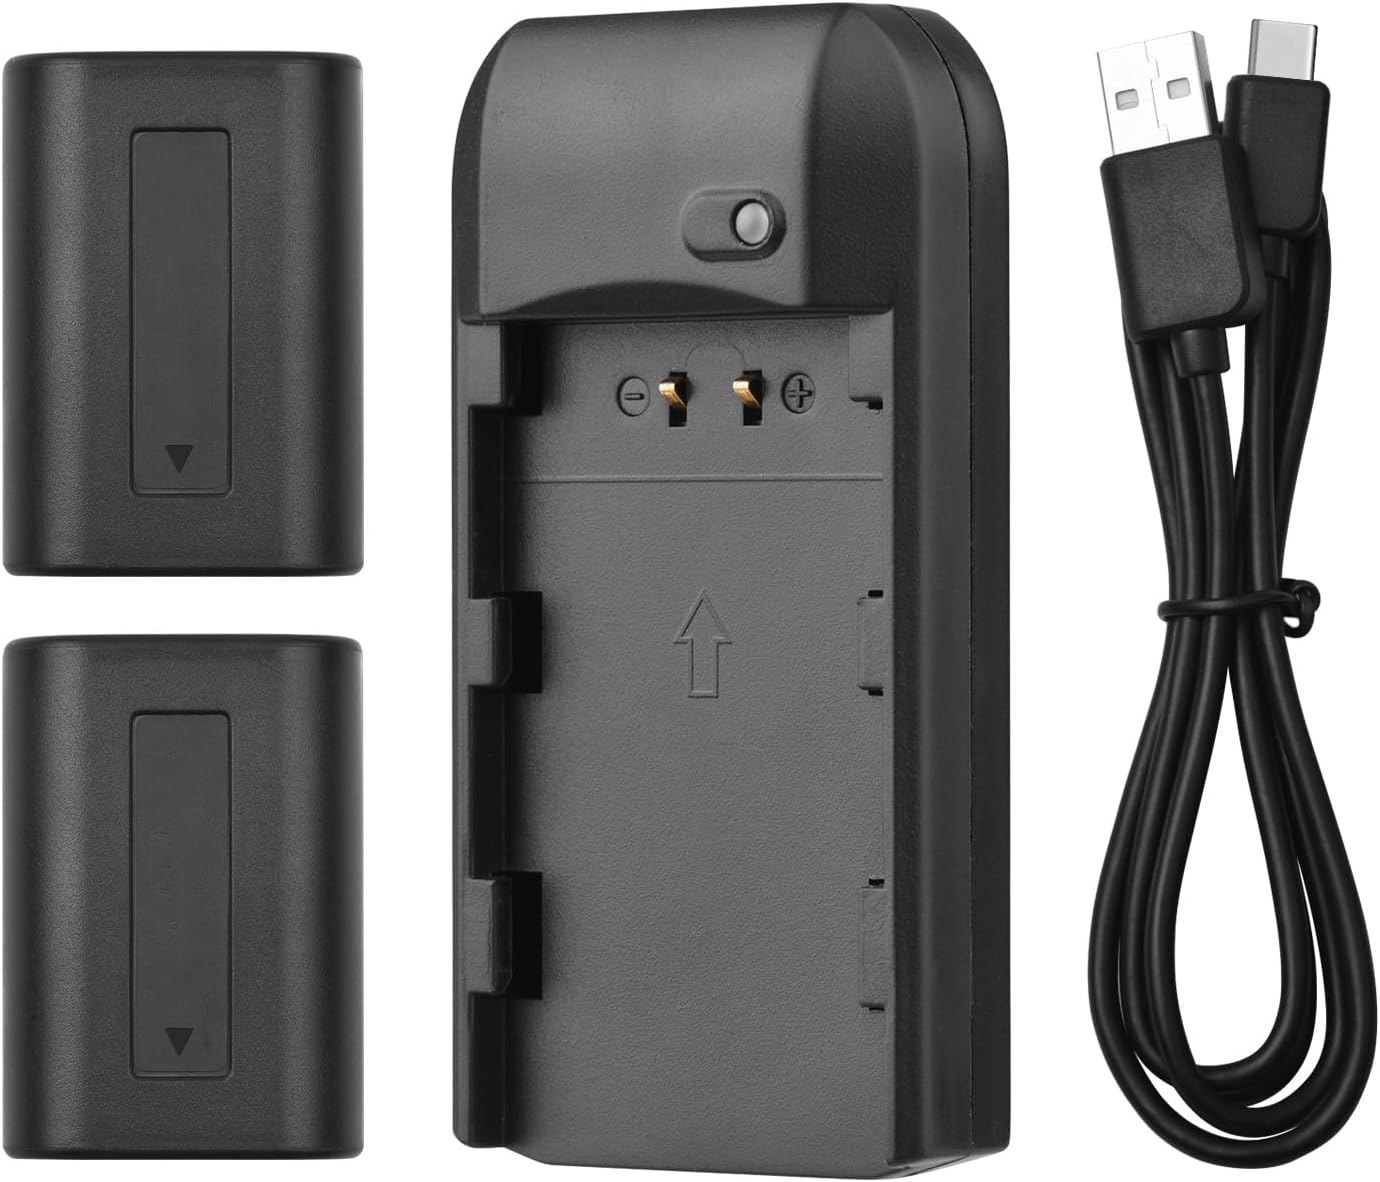
Image 4.3: All Kit Components
5. Орнотуу жана заряддоо
Follow these steps to set up your charger and begin charging the batteries:
- Заряддагычты туташтыруу: Insert the Micro USB end of the provided USB charging cable into the charger's Micro USB port.
- Кубат Булагына туташуу: Connect the standard USB-A end of the cable to a compatible 5V 1A USB power source. This can be a laptop, a USB wall adapter, or a power bank.
- Батарея салыңыз: Carefully align the NP-FV5 battery with the charger's battery slot and gently push it in until it clicks into place. Ensure the battery contacts align with the charger's pins.
- Монитордун заряддоо абалы: The LED indicator light on the charger will show the charging status:
- Кызыл жарык: Батарея учурда заряддалып жатканын көрсөтөт.
- Жашыл жарык: Батарейканын толук заряддалгандыгын көрсөтөт.
- Батареяны алып салуу: Once the LED turns green, the battery is fully charged. Gently pull the battery out of the charger.

Image 5.1: LED Indicator Light Status
6. Иштөө нускамалары
The charger operates automatically once a battery is inserted and power is connected. No manual intervention is required during the charging process.
- Always ensure the charger is connected to a stable 5V 1A power source.
- Only charge NP-FV5 series batteries with this charger.
- Do not cover the charger during operation to ensure proper ventilation.
7. Техникалык тейлөө жана сактоо
Proper maintenance ensures the longevity of your charger and batteries:
- Тазалоо: Use a soft, dry cloth to clean the charger and batteries. Do not use liquid cleaners or solvents.
- Сактагыч: Заряддагычты жана батарейкаларды салкын, кургак жерде, күндүн түз нурунан жана өтө жогорку температурадан алыс сактаңыз.
- Батареяга кам көрүү: For long-term storage, it is recommended to charge batteries to approximately 50% capacity. Avoid storing fully charged or completely depleted batteries for extended periods.
- Кабельге кам көрүү: USB кабелин ашыкча ийилип же бурмалоодон алыс болуңуз.
8. Кыйынчылыктарды
Эгер көйгөйлөргө туш болсоңуз, төмөнкү жалпы көйгөйлөрдү жана чечимдерди караңыз:
| Көйгөй | Мүмкүн себеп | Чечим |
|---|---|---|
| LED индикатору күйбөйт. | No power supply, faulty cable, or incorrect battery insertion. |
|
| Battery does not charge (LED remains red indefinitely or doesn't change). | Battery fault, charger fault, or insufficient power input. |
|
| Заряддоочу түзүлүш же батарея заряддоо учурунда өтө ысып кетет. | Overload, faulty battery, or poor ventilation. |
|
9. Техникалык шарттар
Technical details for the Andoer NP-FV5 Battery Charger and NP-FV5 Plus Batteries:
| Компонент | Спецификация |
|---|---|
| Заряддагыч киргизүү | DC 5V 1A |
| Заряддагычтын чыгышы | DC 4.2V, 400mA |
| Заряддоо порту | Микро USB |
| Батарея түрү | Литий-ион полимер |
| Батарея Voltage | 3.7V |
| Батарея сыйымдуулугу | 1000mAh |
| Заряддагычтын өлчөмдөрү | 6.5 x 3.3 x 1.5 см (2.6 x 1.3 x 0.6 дюйм) |
| Заряддагычтын салмагы | 11г (0.4 унция) |
| Модель номери | XCW2361199610991EL (Charger) / NP-FV5 (Batteries) |

Image 9.1: Charger Dimensions

Image 9.2: Charger Label with Specifications
10. Кепилдик жана колдоо
Кепилдик жөнүндө маалымат жана кардарларды колдоо кызматы үчүн, сатып алуу учурунда берилген документтерди караңыз же сатуучуга кайрылыңыз. Кепилдик боюнча дооматтар үчүн сатып алууну тастыктаган документти сактап коюңуз.
For further assistance, you may visit the official Andoer webсайтка же кардарларды тейлөө бөлүмүнө кайрылыңыз.