1. Киришүү
Thank you for choosing the Gdrasuya10 16-Cube Modular Shoe Organizer. This manual provides essential information for the safe assembly, operation, and maintenance of your new shoe storage solution. Please read these instructions carefully before beginning assembly and retain them for future reference.

Figure 1: Fully assembled Gdrasuya10 16-Cube Modular Shoe Organizer.
2. Коопсуздук маалыматы
To ensure safe use of this product, please observe the following precautions:
- Тумчугуп калуу коркунучун болтурбоо үчүн бардык кичинекей бөлүктөрүн жана таңгактоочу материалдарды балдардан жана үй жаныбарларынан алыс кармаңыз.
- Ensure all connections are securely fastened during assembly. Periodically check connections for tightness.
- Do not overload the shelves. Refer to the specifications section for weight limits.
- Place the organizer on a flat, stable surface to prevent tipping.
- Avoid climbing on or hanging from the unit.
- Do not expose the product to direct sunlight or extreme temperatures, as this may cause material degradation.
3. Пакеттин мазмуну
Монтаждоону баштоодон мурун, төмөндө келтирилген компоненттердин бардыгы бар экенин жана бузулбаганын текшериңиз. Эгерде кандайдыр бир бөлүктөрү жок же бузулуп калса, кардарларды колдоо менен байланышыңыз.
| Part | Description | Саны |
|---|---|---|
| Модулдук панелдер | Polypropylene panels forming the cube walls. | (Varies by configuration) |
| Туташтыргычтар | Plastic connectors for joining panels. | (Varies by configuration) |
| эшиктер | Transparent doors for each cube. | 16 |
| Асма таякчалар | Optional rods for hanging items. | (Эгер камтылган болсо) |
| Mallet | Small mallet for securing connections. | 1 |
Note: The exact number of panels and connectors will depend on the chosen configuration (e.g., 16 cubes).
4. Монтаждоо боюнча нускамалар
This modular shoe organizer is designed for easy assembly. Follow these steps to construct your unit.
4.1. Макетиңизди пландаштыруу
The modular design allows for various configurations. Plan your desired layout (vertical, horizontal, or a combination) before starting. Ensure you have enough space for the assembled unit.
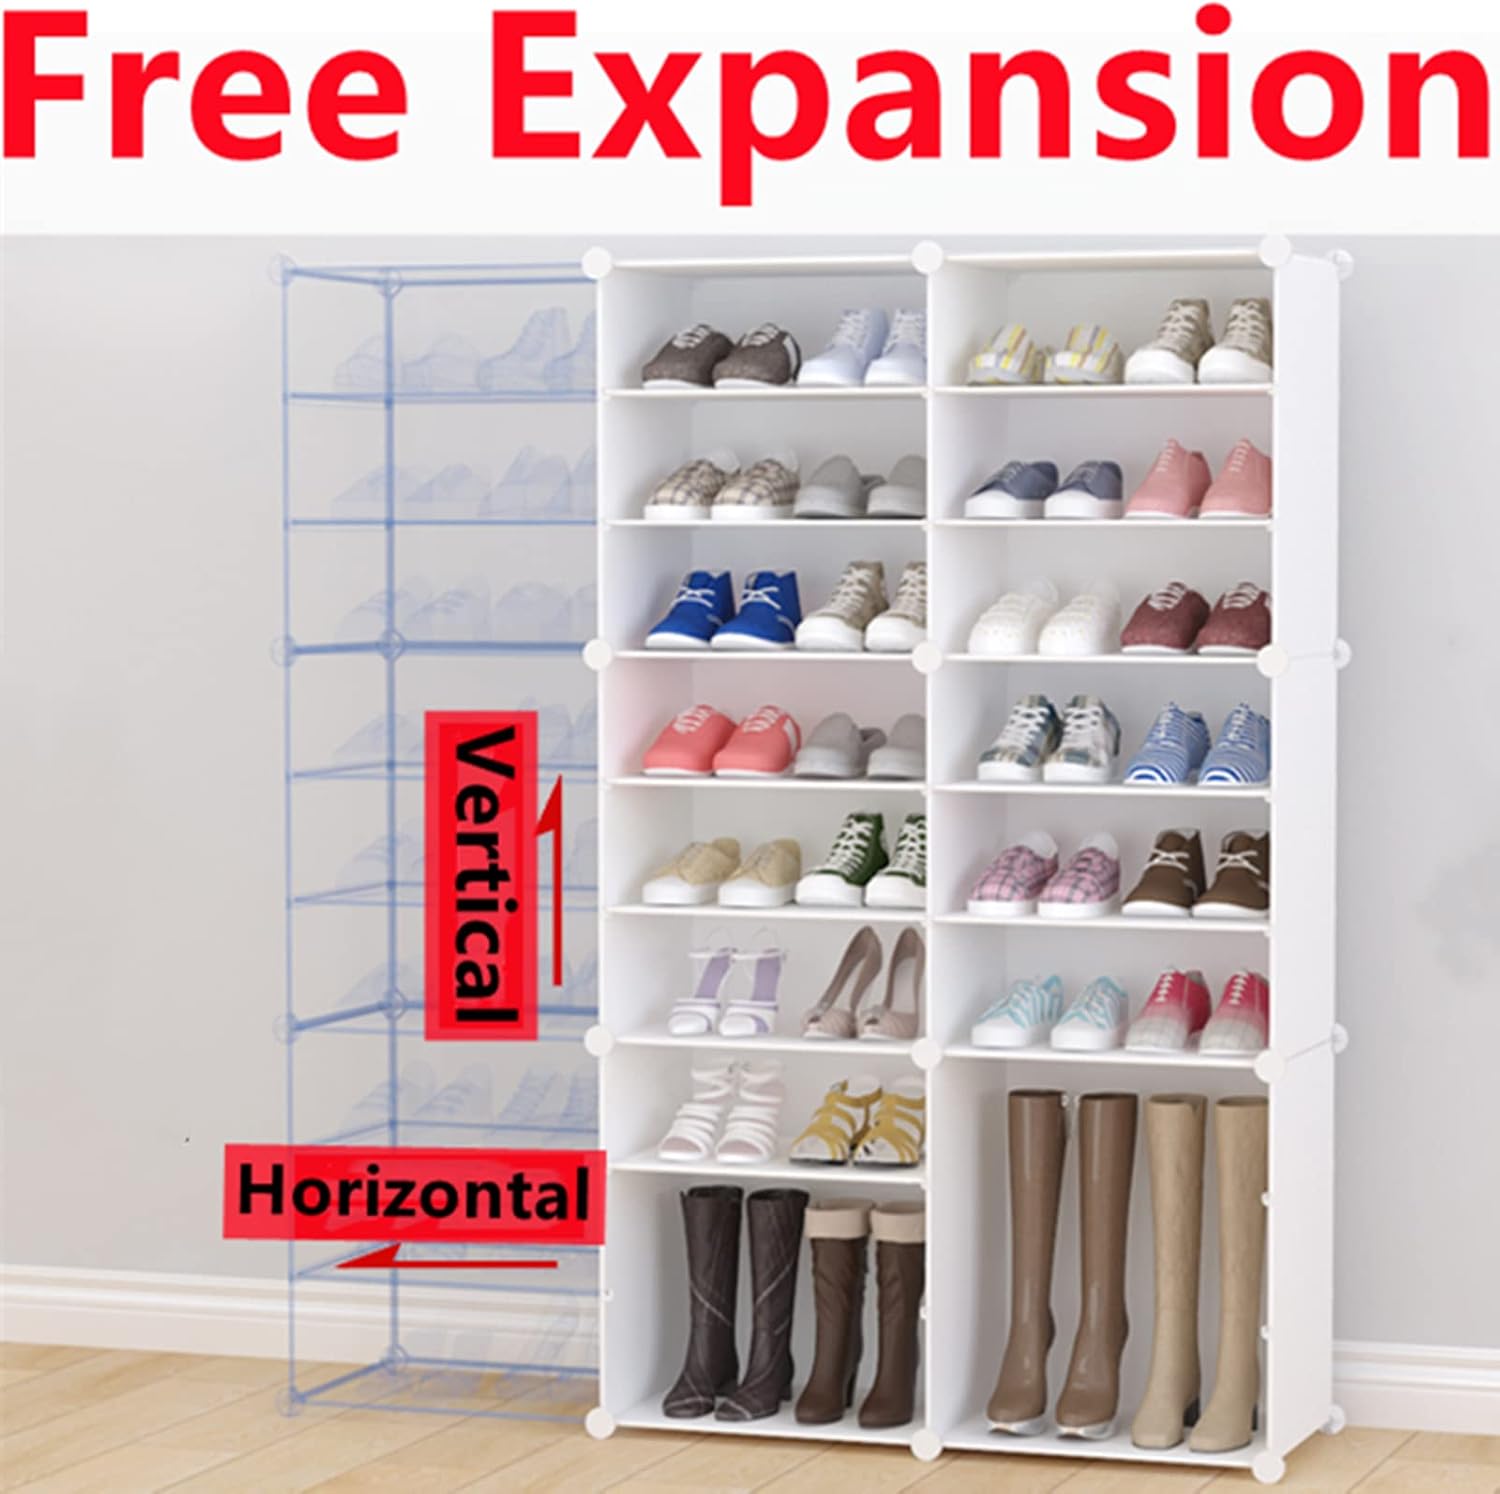
2-сүрөт: Мисample of vertical and horizontal expansion possibilities.
4.2. Connecting Panels
- Панелдерди даярдоо: Lay out the square and rectangular panels on a clean, flat surface.
- Туташтыргычтарды тиркөө: Insert the edges of the panels firmly into the slots of the plastic connectors. Ensure the panels are fully seated within the connectors.
- Коопсуз байланыштар: Use the provided mallet to gently tap the connectors, ensuring a tight and stable fit. A secure connection is crucial for the stability of the entire unit.
- Кубиктерди куруу: Continue connecting panels to form individual cubes. Each cube typically requires 4 side panels, 1 back panel, and 1 front panel (if using doors).

Figure 3: Detail of a single cube unit.
4.3. Assembling the Structure
- Stacking Cubes: Once individual cubes are formed, begin stacking them according to your planned layout. Use connectors to join adjacent cubes.
- Adding Doors: Attach the transparent doors to the front of each cube. The doors typically clip into the connectors or have a simple hinge mechanism.
- Жөнгө салынуучу текче: For taller items like boots, internal shelves can be removed to create larger compartments. Simply detach the desired internal panel.

Figure 4: Demonstrating adjustable shelving for boots.

Figure 5: Different configurations for various shoe types.
5. Колдонуу
The Gdrasuya10 16-Cube Modular Shoe Organizer is designed for storing shoes and other lightweight items. Its transparent doors allow for easy visibility and access to your stored items.
- Сыйымдуулугу: Each cube can typically store 6 pairs of shoes, allowing for a total capacity of up to 96 pairs for a 16-cube unit.
- Ар тараптуулугу: Suitable for use in bedrooms, closets, entryways, or any area requiring organized storage.
- Жөнгө салынуучу сактагыч: Customize the internal space by removing shelves to accommodate taller footwear like boots.

Figure 6: The organizer in a typical usage scenario.
6. Техникалык тейлөө
To keep your shoe organizer in optimal condition, follow these simple maintenance guidelines:
- Тазалоо: Жарнак менен беттерди сүртүңүзamp cloth. Avoid using abrasive cleaners or harsh chemicals, as they may damage the material.
- Текшерүү: Periodically check all connections and components for any signs of wear or loosening. Re-tighten connections as needed.
- Сактагыч: If disassembling for storage, ensure all parts are clean and dry before packing. Store in a cool, dry place.
7. Техникалык шарттар
| Өзгөчөлүк | Деталь |
|---|---|
| Бренд | Гдрасуя10 |
| Модел | 16-Cube Modular Shoe Organizer |
| Материал | Полипропилен |
| Түс | Ак |
| Кубиктердин саны | 16 |
| Total Shoe Capacity | Up to 96 pairs (6 pairs per cube) |
| Продукциянын өлчөмдөрү (болжол менен) | 12.6"D x 65.75"W x 73.62"H (for 16-cube configuration) |
| Өзгөчөлүктөр | Adjustable shelving, Easy to assemble, Transparent doors, Freestanding |
| Ассамблея талап кылынат | Ооба |

Figure 7: Approximate dimensions of the 16-cube unit.
8. Кепилдик жана колдоо
Gdrasuya10 is committed to providing quality products. If you encounter any issues with your 16-Cube Modular Shoe Organizer, including missing parts or dissatisfaction with the product, please contact our customer service team for assistance.
Please ensure all parts are included after receiving the product. Refer to the installation video (if available and relevant) before installing. Our team will provide a satisfactory solution.
For support, please visit the Gdrasuya10 brand store on Amazon or contact us through the Amazon platform.