
1. Киришүү
The EVTSCAN Peakmeter PM8213C is a portable digital multimeter designed for various electrical measurements. This instrument offers stable performance, high precision, and low power consumption, making it a reliable tool for both professional and DIY users. Its compact appearance and comprehensive features ensure accurate readings for voltage, current, resistance, continuity, non-contact voltage (NCV), frequency, and duty cycle.
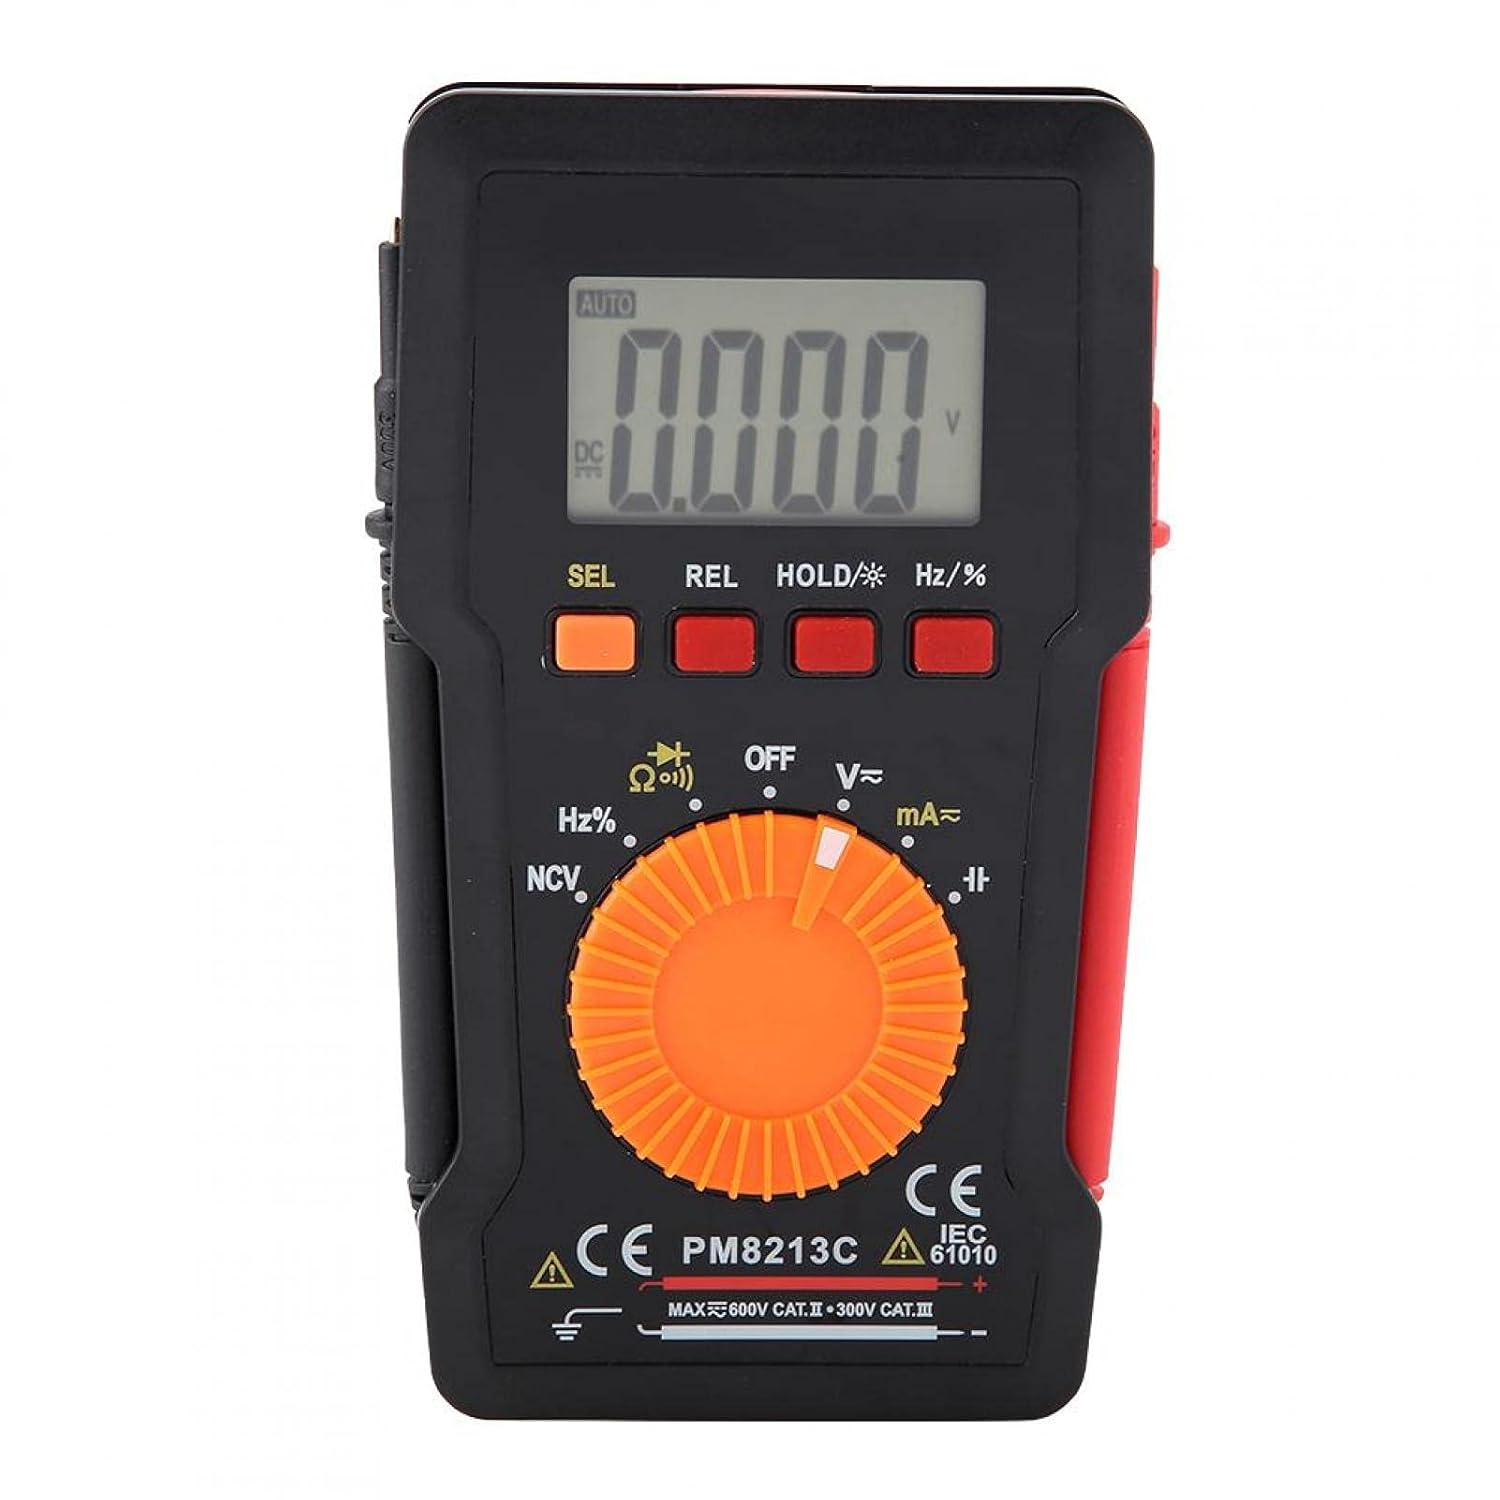
Сүрөт 1: Алдыңкы view of the EVTSCAN Peakmeter PM8213C Digital Multimeter.
2. Коопсуздук маалыматы
To ensure safe operation and service of the meter, please read this manual carefully before use. Failure to observe safety warnings can result in serious injury or death. Always adhere to local and national safety codes.
- Эч бир функция үчүн киргизүүнүн максималдуу чегинен ашпаңыз.
- Том менен иштөөдө этият болуңузtag30V AC RMS, 42V пик же 60V DC жогору. Бул томtagшок коркунучун жаратат.
- Before measuring current, ensure the meter's test leads are connected to the correct input jacks and the function switch is set to the appropriate current range.
- Always disconnect the test leads from the circuit before changing the function switch position.
- Батареянын аз көрсөткүчү так көрсөткүчтөрдү камсыз кылуу үчүн дароо батареяны алмаштырыңыз.
- Do not operate the meter if it appears damaged or if the protective casing is removed.
- Өлчөө учурунда колду жана манжаларды зонд тосмолорунун артында кармаңыз.
3. Продукт бүтүп калдыview
3.1. Компоненттер
The PM8213C multimeter consists of the following main components:
- LCD дисплей: Өлчөө көрсөткүчтөрүн, бирдиктерин жана функциянын көрсөткүчтөрүн көрсөтөт.
- Функция баскычтары: SEL (Select), REL (Relative), HOLD (Data Hold), Hz/% (Frequency/Duty Cycle).
- Айлануучу которгуч: Used to select the desired measurement function (e.g., V~, V-, Ω, Continuity, NCV, Hz%, mA~, A~).
- Киргизүү уячалары: Terminals for connecting test leads (COM, VΩHz, mA, A).
- Сыноочулар: Сыноодон өтүп жаткан схемага туташтыруу үчүн кызыл жана кара зымдар.
- Коргоочу корпус: Provides protection for the meter.

Figure 2: Key features of the PM8213C Multimeter, including LCD screen and compact design.
3.2. Символдорду көрсөтүү
Familiarize yourself with the symbols that may appear on the LCD display:
- АВТО: Auto-ranging mode is active.
- DC/AC: Direct Current / Alternating Current.
- V: Вольт (Тtagжана).
- Ω: Ohms (Resistance).
- Гц: Hertz (Frequency).
- %: Милдеттик цикл.
- NCV: Байланышсыз томtage аныктоо.
- КОЛДО: Data Hold function is active.
- REL: Салыштырмалуу өлчөө режими.
- Battery Symbol: Батареянын аз кубаттуулугун көрсөтөт.
- OOL: Over-range indication.
4. Орнотуу
4.1. Батареяны орнотуу
The PM8213C requires one CR2032 (3V) button cell battery for operation. The battery is typically not included in the package.
- Мультиметр өчүрүлгөнүн текшериңиз.
- Эсептегичтин артындагы батарея отсегин табыңыз.
- Use a suitable tool (e.g., a small screwdriver) to open the battery compartment cover.
- Insert the CR2032 battery, observing the correct polarity (+ and - markings).
- Батарея уясынын капкагын ордуна коюп, аны бекитиңиз.
4.2. Сыноочу туташуусу
Connect the test leads to the appropriate input jacks before taking any measurements.
- туташтыруу кара сыноо үчүн жетек COM (жалпы) киргизүү уячасы.
- Көпчүлүк өлчөөлөр үчүн (томtage, resistance, frequency, duty cycle, continuity), connect the кызыл сыноо үчүн жетек VΩHz киргизүү уячасы.
- For current measurements (mA), connect the кызыл сыноо үчүн жетек mA киргизүү уячасы.
- For higher current measurements (A), connect the кызыл сыноо үчүн жетек A input jack (if available and distinct from mA). Note: The PM8213C typically uses a single current input for mA/A, check the dial for specific ranges.
5. Иштөө нускамалары
5.1. Күйгүзүү/өчүрүү
To turn the multimeter ON, rotate the function switch from the OFF position to any desired measurement function. To turn the multimeter OFF, rotate the function switch to the OFF position. The meter features an automatic power-off function after approximately 30 minutes of inactivity to conserve battery life.
5.2. Функция тандоо
Use the rotary switch to select the primary measurement function. For functions with multiple modes (e.g., AC/DC voltage, continuity/diode), press the СЕЛ режимдердин ортосунда которулуу үчүн баскыч.
5.3. DC Voltage (V-)
- Кызыл сыноо зымын VΩHz уячасына, ал эми кара сыноо зымын COM уячасына туташтырыңыз.
- Set the rotary switch to the V- position.
- Сыноо өткөргүчтөрүн DC Voltagсиз өлчөөнү каалаган булак же компонент.
- Томду окуңузtage дисплейдеги e мааниси.
5.4. Өлчөө AC Voltage (V~)
- Кызыл сыноо зымын VΩHz уячасына, ал эми кара сыноо зымын COM уячасына туташтырыңыз.
- Set the rotary switch to the V~ position.
- Сыноо өткөргүчтөрүн AC Voltagэлектрондук булак же компонент.
- Томду окуңузtage дисплейдеги e мааниси.
5.5. Каршылыкты өлчөө (Ω)
- Каршылыкты өлчөөдөн мурун чынжырдын токтун өчүрүлгөнүн текшериңиз.
- Кызыл сыноо зымын VΩHz уячасына, ал эми кара сыноо зымын COM уячасына туташтырыңыз.
- Айланма которгучту Ω абалына коюңуз.
- Каршылыгын өлчөөнү каалаган компонентке сыноо өткөргүчтөрүн туташтырыңыз.
- ЖК дисплейдеги каршылыктын маанисин окуңуз.
5.6. Үзгүлтүксүздүк тести (Ω))))
- Схема кубаты өчүрүлгөнүн текшериңиз.
- Кызыл сыноо зымын VΩHz уячасына, ал эми кара сыноо зымын COM уячасына туташтырыңыз.
- Set the rotary switch to the Continuity position (often shared with Resistance or Diode). Press СЕЛ if needed to select continuity.
- Сыноо өткөргүчтөрүн компонент же зым аркылуу туташтырыңыз.
- Эгерде үзгүлтүксүздүк бар болсо (төмөнкү каршылык), эсептегич үн чыгарат.
5.7. Контактсыз томtage (NCV) аныктоо
- Айланма которгучту NCV абалына коюңуз.
- Move the top edge of the multimeter close to the conductor suspected of having AC voltage.
- Эсептегич AC том бар экендигин көрсөтөтtage through an audible beep and/or visual indicator (e.g., LED).
5.8. Measuring Frequency (Hz) and Duty Cycle (%)
- Кызыл сыноо зымын VΩHz уячасына, ал эми кара сыноо зымын COM уячасына туташтырыңыз.
- Set the rotary switch to the Hz/% position.
- Сыноочу зымдарды сигнал булагына параллель туташтырыңыз.
- басыңыз Гц /% жыштык жана жумуш циклинин өлчөөлөрүнүн ортосунда которулуу үчүн баскыч.
- LCD дисплейиндеги маанини окуп чыгыңыз.
5.9. Measuring Current (mA~, A~)
- ЭСКЕРТҮҮ: Эч качан эсептегичти томго параллель туташтырбаңызtage source when measuring current. This will blow the fuse and can damage the meter.
- Схема кубаты өчүрүлгөнүн текшериңиз.
- Кара сыноо өткөргүчтү COM уячасына туташтырыңыз.
- Милли үчүнampere (mA) measurements, connect the red test lead to the mA jack. For ampere (A) measurements, connect the red test lead to the A jack (if separate).
- Set the rotary switch to the appropriate mA~ or A~ position.
- Open the circuit where you want to measure current and connect the meter in series with the load.
- Re-energize the circuit and read the current value on the LCD display.
6. Техникалык тейлөө
6.1. Тазалоо
Эсептегичтин кутучасын жарнама менен сүртүңүзamp кездеме жана жумшак жуугуч каражат. Абразивдүү заттарды же эриткичтерди колдонбоңуз. Киргизүү терминалдарын кирден жана нымдуулуктан таза кармаңыз.
6.2. Батареяны алмаштыруу
When the low battery indicator appears on the display, replace the CR2032 battery promptly to ensure accurate measurements.
- Мультиметрди өчүрүп, бардык сыноо өткөргүчтөрүн ажыратыңыз.
- Эсептегичтин артындагы батарея бөлүкчөсүнүн капкагын ачыңыз.
- Эски CR2032 батареясын алып салыңыз.
- Insert a new CR2032 (3V) button cell battery, ensuring correct polarity.
- Батарея бөлүгүнүн капкагын бекем жабыңыз.
6.3. Сактагычты алмаштыруу
If the current measurement function stops working, the fuse may need replacement. The fuse specification is F 400mA/250V.
- Мультиметрди өчүрүп, бардык сыноо өткөргүчтөрүн ажыратыңыз.
- Open the meter's casing (refer to the battery replacement section for access, or consult the full service manual if necessary).
- Locate the blown fuse.
- Carefully remove the old fuse and replace it with a new fuse of the exact same type and rating (F 400mA/250V).
- Reassemble the meter's casing коопсуз.
7. Кыйынчылыктарды
If the meter does not function correctly, check the following points before seeking service:
- Дисплей жок же дисплей алсыз: Батарея орнотулганын текшерип, керек болсо алмаштырыңыз.
- Туура эмес окуулар: Ensure test leads are correctly connected to the appropriate input jacks and the rotary switch is set to the correct function and range. Check battery level.
- Токту өлчөө иштебей жатат: Check and replace the fuse if blown. Ensure test leads are connected in series with the circuit.
- "OOL" displayed: Ченелген маани тандалган диапазондон ашып кетти. Жогорку диапазонго өтүңүз же киргизүү эсептегичтин мүмкүнчүлүктөрүндө болушун камсыз кылыңыз.
8. Техникалык шарттар
| Бийиктик | 2000 мден аз |
| Иштөө температурасы | 0 ~ 40 °C |
| Иштөө нымдуулугу | <80% RH (not considered at <10 °C) |
| Сактоо температурасы | -10 ~ 60 °C |
| Сактоочу нымдуулук | <70% RH (remove batteries) |
| Температура коэффициенти | 0.1 precision/°C |
| Максималдуу уруксат берилген томtage (Input to Ground) | 600V DC же AC rms |
| Fuse Protection | F 400mA/250V |
| Sampling Rate | Болжол менен секундасына 3 жолу |
| Авто өчүрүү | Болжол менен 30 мүнөт |
| Дисплей | Maximum 3999 counts |
| Over-range Display | "OOL" |
| Электр камсыздоо | CR2032 (3V) button cell battery |
| Салмагы | Approximately 120 - 142 g |
| Өлчөмдөрү (L x W x Y) | 127 x 70 x 12.5 мм (болжол менен 12.8 x 7.5 x 1.3 см) |
8.1. DC Voltage (PM8213C)
| Диапазон | Резолюция | Тактык |
|---|---|---|
| 4 V | 0.001 V | ±(0.1% + 3 сан) |
| 40 V | 0.01 V | ±(0.1% + 3 сан) |
| 400 V | 0.1 V | ±(0.1% + 3 сан) |
| 600 V | 1 V | ±(0.1% + 3 сан) |
8.2. Пакеттин мазмуну
- 1 x Digital Multimeter (PM8213C)
- 2 х Тесттер
- 1 x коргоочу куту
9. Кепилдик жана колдоо
Кепилдик маалыматы же техникалык колдоо үчүн сатуучуга же өндүрүүчүгө түздөн-түз кайрылыңыз. Сатып алганыңыздын далили катары сатып алуу дүмүрчөгүңүздү сактаңыз.