Introduction
This manual provides essential instructions for the safe and efficient operation, maintenance, and troubleshooting of your KARACA Coffee Art Aroma Filter Coffee Machine. Please read this manual thoroughly before first use and keep it for future reference.
Маанилүү коопсуздук нускамалары
- Шайманды колдонуудан мурун бардык нускамаларды окуп чыгыңыз.
- ысык беттерге тийбеңиз. Туткаларды же туткаларды колдонуңуз.
- Өрттөн, электр тогунун соккусунан жана адамдардын жаракат алуусунан коргоо үчүн шнурду, вилкаларды же шайманды сууга же башка суюктукка салбаңыз.
- Кандайдыр бир шайманды балдар же алардын жанында колдонуп жатканда, катуу көзөмөл керек.
- Колдонбогондо жана тазалоодон мурун розеткадан ажыратыңыз. Тетиктерди кийүүдөн же чечүүдөн мурун жана шайманды тазалоодон мурун муздатыңыз.
- Эч бир шайманды зымы же сайы бузулган же шайман иштебей калгандан кийин же кандайдыр бир түрдө бузулгандан кийин иштетпеңиз.
- Шаймандын өндүрүүчүсү сунуш кылбаган кошумча тиркемелерди колдонуу өрткө, электр шокуна же адамдардын жаракат алышына алып келиши мүмкүн.
- Сыртта колдонбоңуз.
- Шнур столдун же столдун четине илинип калышына же ысык беттерге тийбеңиз.
- Ыстык газ же электр мешине же ысытылган мештин жанына коюуга болбойт.
- Ар дайым алгач сайгычка сайыңыз, андан кийин шнурду розеткага сайыңыз. Өчүрүү үчүн каалаган башкарууну "өчүрүү" абалына буруңуз, андан кийин розеткадан сайгычты чыгарыңыз.
- Шайманды максаттуу колдонуудан башка максатта колдонбоңуз.
Продукт компоненттери
Familiarize yourself with the parts of your KARACA Coffee Art Aroma Filter Coffee Machine:

Сүрөт: жарылган view showing the main components of the coffee machine, including the digital display, removable water tank (1.35 L), nylon filter, coffee basket, and stainless steel thermos (1.2 L).
- Санариптик дисплей: Shows time and brewing status.
- Башкаруу панели: Buttons for ON/OFF, START, PROGRAM, AUTO, AROMA FUNCTION, HOUR, MIN.
- Removable Water Tank (1.35 L): Жеңил толтуруу жана тазалоо үчүн.
- Нейлон чыпкасы: Reusable filter for ground coffee.
- Кофе себет: Holds the nylon filter and ground coffee.
- Stainless Steel Thermos (1.2 L): Keeps coffee hot for extended periods.
Орнотуу жана биринчи колдонуу
- Пакеттен чыгаруу: Carefully remove all packaging materials and inspect the coffee machine for any damage.
- Алгачкы тазалоо: Before first use, wash the removable water tank, nylon filter, coffee basket, and thermos with warm, soapy water. Rinse thoroughly and dry. Wipe the exterior of the machine with a damp кездеме.
- Позициялоо: Place the coffee machine on a stable, flat, heat-resistant surface, away from the edge of the counter. Ensure adequate ventilation around the appliance.
- Биринчи демдөө цикли (тазалоо): Fill the water tank with clean water up to the maximum level. Do not add coffee. Run a full brewing cycle to clean the internal components. Discard the water.
Иштөө нускамалары
Basic Coffee Brewing

Image: A visual guide demonstrating the coffee brewing process, from adding coffee grounds and water to starting the machine and pouring the finished coffee.
- Кофе даярдоо: Insert the nylon filter into the coffee basket. Add your desired amount of ground coffee into the filter.
- Суу кошуу: Fill the removable water tank with fresh, cold water up to the desired level (max 1.35 L). Ensure the thermos is correctly placed on the heating plate.
- Сыра кайнатууну баштоо: Press the "ON/OFF" button, then press the "START" button to begin the brewing process. The digital display will show the brewing progress.
- Кызмат кылуу: Once brewing is complete, carefully remove the thermos and pour your coffee. The stainless steel thermos is designed to keep your coffee hot for an extended period.
Aroma функциясын колдонуу

Сүрөт: деталдуу view of the coffee machine's control panel, highlighting the digital display and various function buttons, including the 'Aroma Function' button.
The Aroma Function enhances the coffee's flavor for a richer taste.
- Follow steps 1 and 2 for basic brewing.
- Before pressing "START", press the "AROMA FUNCTION" button. An indicator light may illuminate.
- Press "START" to begin brewing with the enhanced aroma setting.
Setting the Timer (Programmable Brewing)

Image: The coffee machine on a wooden table with a cup of coffee, emphasizing the digital display and control panel, indicating the timer function for scheduled brewing.
The timer function allows you to program the machine to start brewing at a specific time.
- Учурдагы убакытты коюу: With the machine plugged in, use the "HOUR" and "MIN" buttons to set the current time on the digital display.
- Сыра кайнатууга даярданыңыз: Add coffee grounds to the filter and fill the water tank as described in the basic brewing section.
- Программанын убактысын коюу: Press the "PROGRAM" button. The display will flash. Use the "HOUR" and "MIN" buttons to set your desired brewing start time.
- Auto Brew иштетүү: Press the "AUTO" button. An indicator light will confirm that the automatic brewing is set. The machine will now start brewing at the programmed time.
Кароо жана тейлөө
Күнүмдүк тазалоо
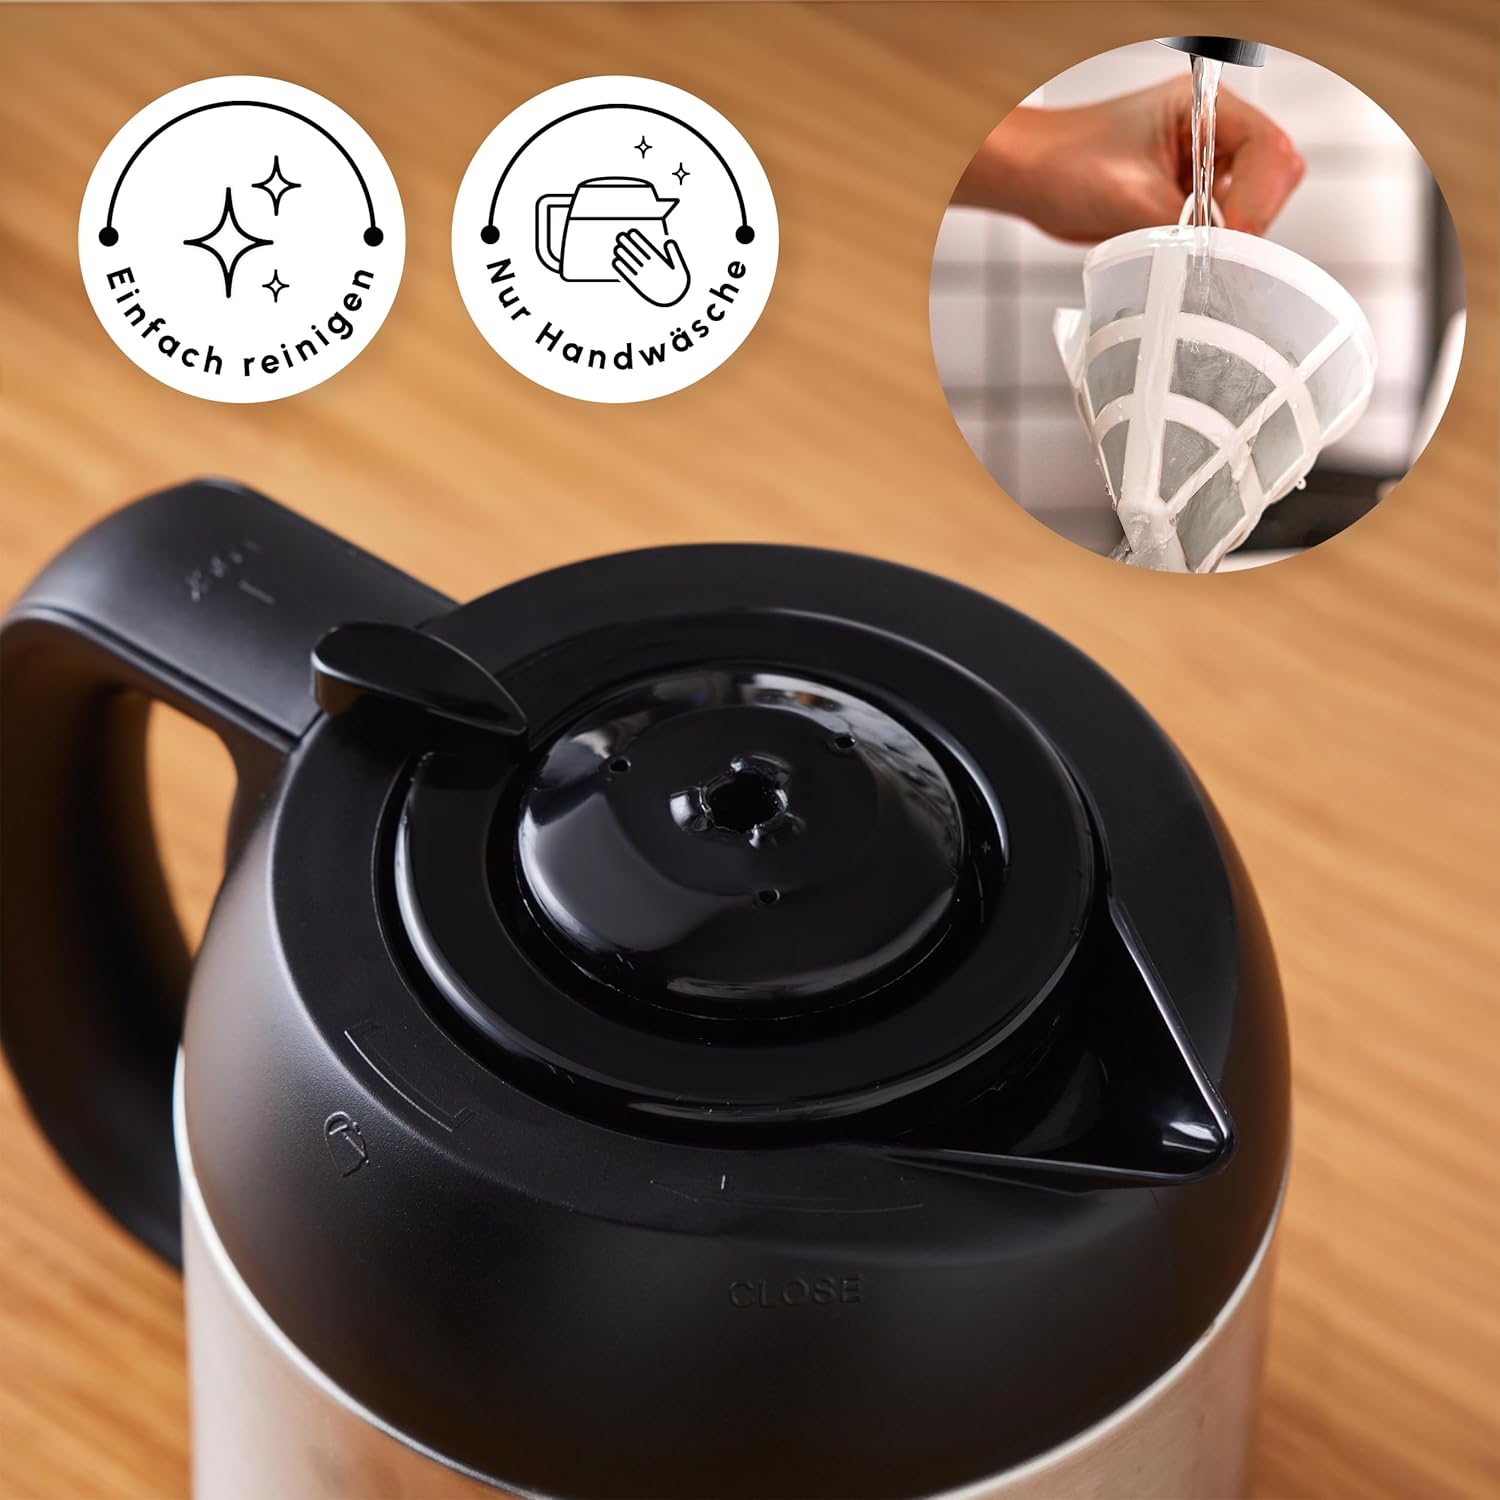
Image: A hand cleaning the reusable nylon filter under a faucet, accompanied by icons signifying easy cleaning and the recommendation for hand washing.
- Ажыратыңыз: Always unplug the coffee machine from the power outlet before cleaning.
- Алынуучу тетиктерди жуу: Remove the water tank, nylon filter, coffee basket, and thermos. Wash them with warm, soapy water. Rinse thoroughly and dry completely. The nylon filter should be hand-washed.
- Сырты тазалоо: Кофе машинасынын сыртын жумшак, г менен сүртүңүзamp кездеме. Абразивдүү тазалагычтарды же тазалоочу жайларды колдонбоңуз.
- Чөмүлбө: Never immerse the main unit of the coffee machine in water or any other liquid.
Кактан тазалоо
Mineral deposits from water can build up in your coffee machine over time, affecting performance and coffee taste. Regular descaling is essential.
- Жыштыгы: The frequency of descaling depends on the hardness of your water and how often you use the machine. A general recommendation is every 2-4 weeks.
- Какты тазалоо чечими: Use a commercially available descaling solution suitable for coffee machines, or a mixture of white vinegar and water (1 part vinegar to 2 parts water).
- Процесс: Fill the water tank with the descaling solution. Place the empty thermos on the heating plate. Run a full brewing cycle.
- Чайноо циклдери: After the descaling cycle, discard the solution. Fill the water tank with clean water and run at least two full brewing cycles with only water to rinse out any remaining descaling solution.
Проблемаларды чечүү
| Көйгөй | Мүмкүн себеп | Чечим |
|---|---|---|
| Coffee does not brew or stops mid-cycle. | Machine needs descaling; water tank empty; power interruption. | Perform descaling procedure; ensure water tank is filled; check power connection. |
| Кофе жетиштүү ысык эмес. | Thermos not properly sealed; thermos not pre-heated. | Ensure thermos lid is securely closed; pre-heat thermos with hot water before brewing. |
| Plastic taste in coffee. | New machine residue; insufficient initial cleaning. | Run several cycles with only water; ensure all removable parts are thoroughly cleaned. If problem persists, contact customer support. |
| Digital display or controls not responding. | Power issue; temporary electronic glitch. | Unplug the machine for a few minutes, then plug it back in. If the issue persists, contact customer support. |
Техникалык мүнөздөмөлөр

Image: The coffee machine with its key dimensions labeled, including height, width, and depth, along with the power cord length.
- Бренд: ROE
- Модель номери: 153.03.06.2270
- Түсү: Inox (дат баспас болот)
- Продукциянын өлчөмдөрү (L x W x Y): 22 x 22 x 34 см
- Суу резервуарынын сыйымдуулугу: 1.35 литр
- Thermos Capacity: 1.2 литр
- Күч: 1000 Ватт
- Тtage: 230 вольт
- Материал: Дат баспаган болот
- Салмагы: 3.88 килограмм
- Өзгөчөлүктөр: Programmable, Timer Function, Aroma Function, Digital Clock, Large Control Panel, Removable Water Tank, Reusable Nylon Filter
Кепилдик жана Кардарларды колдоо
For warranty information, please refer to the documentation included with your product packaging or visit the official KARACA website. For technical support, spare parts, or service inquiries, please contact KARACA customer service through their official channels.