
1. Киришүү
This manual provides detailed instructions for the installation, adjustment, maintenance, and troubleshooting of your maXpeedingrods T6 Series Coilover Suspension Kit. Please read this manual thoroughly before installation and use to ensure proper function and safety.
2. Продукт бүтүп калдыview & Өзгөчөлүктөрү
The maXpeedingrods T6 Series Coilover Suspension Kit is designed to enhance vehicle handling and appearance. Key features include:
- Унаанын жабдылышы: Specifically designed for Honda Accord LX, SE, LX-P sedan CP2 CP3 (2008-2012), Honda Accord LX, SE, LX-P coupe CS1 CS2 (2008-2012), Honda Accord LX, SE, LX-P sedan CU1 CU2 CU3 (2008-2015), Honda Accord Tourer 5-door wagon CW1 (2008-2015), and Acura TSX (2009-2015).
- Street Performance T6 Series: Optimized for street performance driving, balancing comfort, speed, and safety. Features an upgraded damper knob for easier adjustment and high-quality dampмай.
- 24 Levels Adjustable Damping: Allows precise control over ride comfort and handling. Levels 0-8 are suggested for street use, 9-16 for mountain roads, and 17-24 for race tracks.
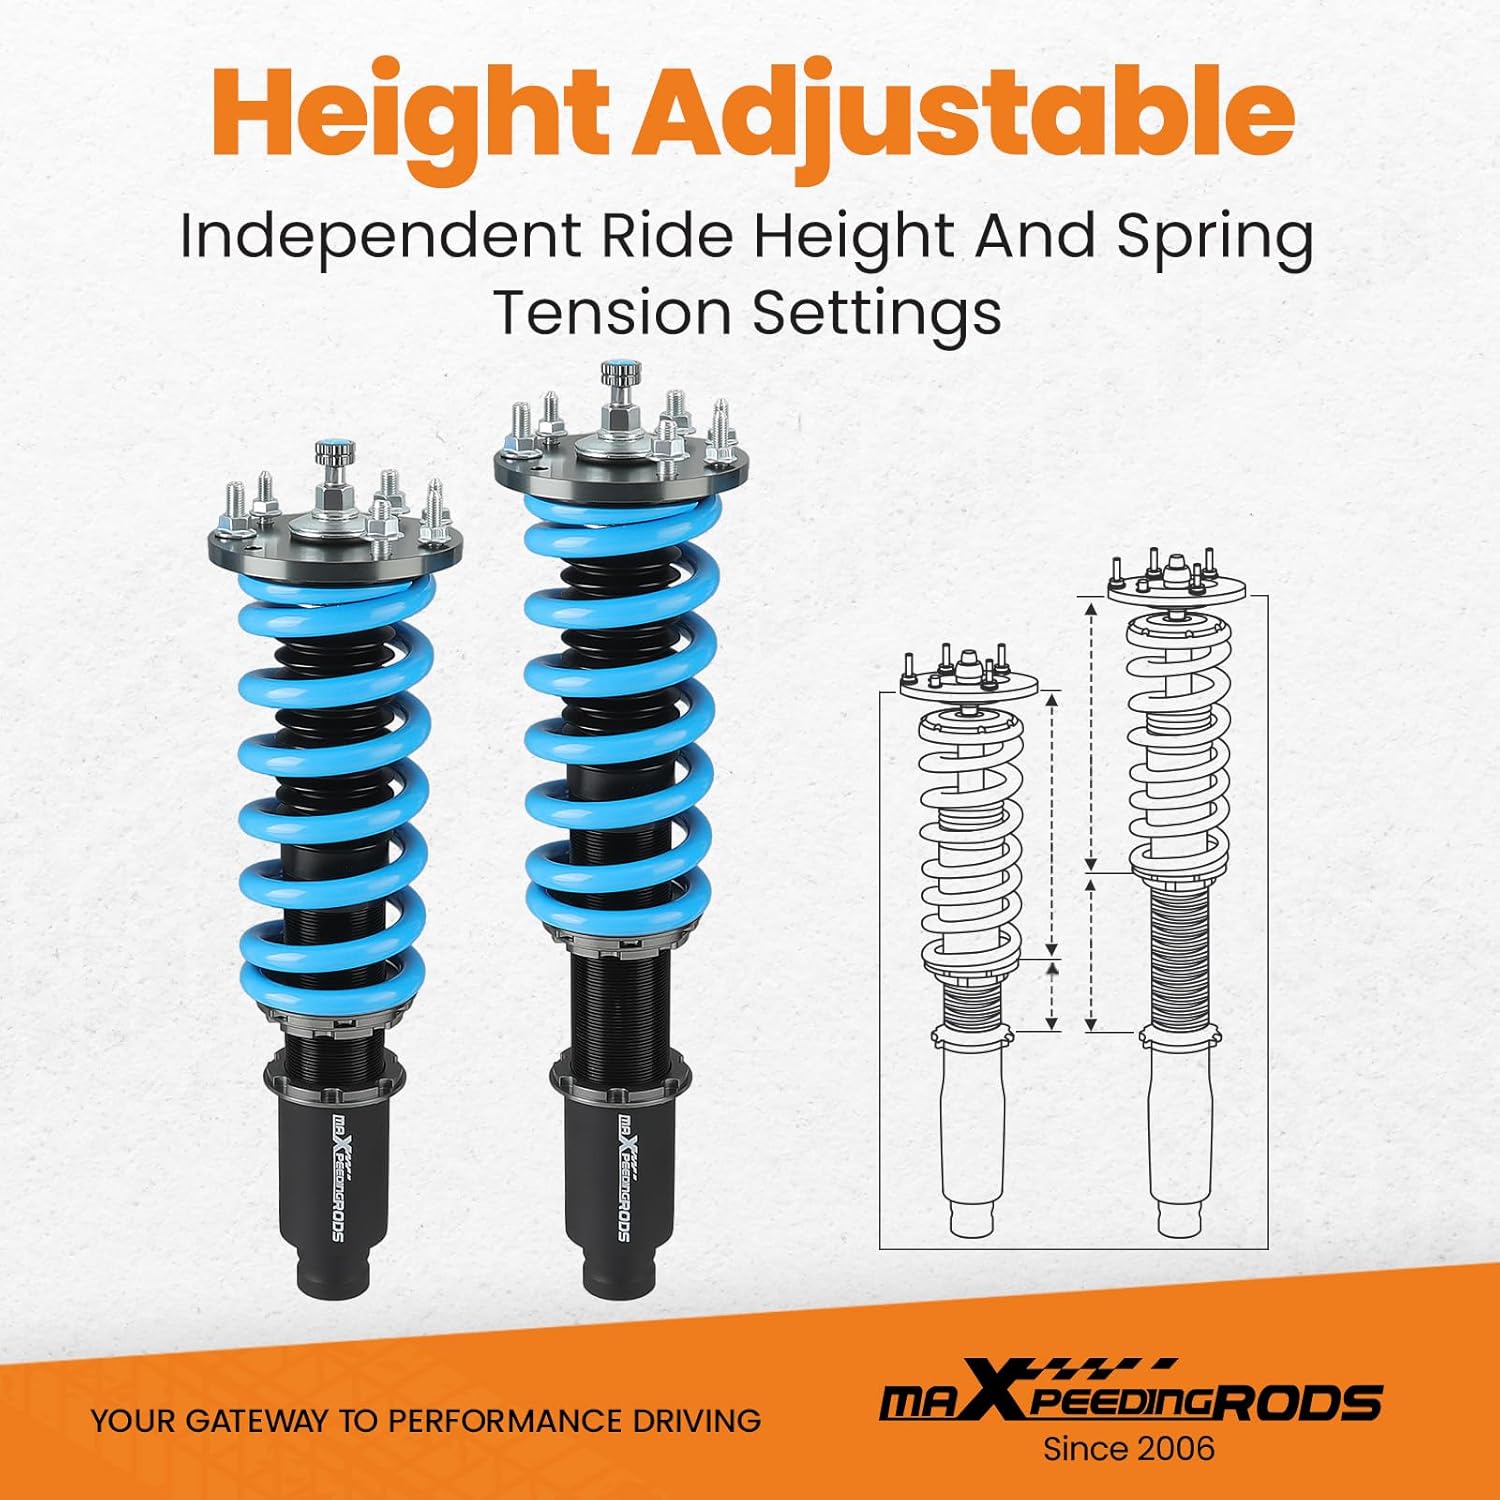
- Жөнгө салынуучу бийиктик: Provides 1-3 inches of height adjustment for a more aggressive stance and improved steering response.
- Жазгы чен: Front: 10 kg/mm (560 lbs/in); Rear: 7 kg/mm (392 lbs/in). High tensile performance springs are stress-tested over 600,000 times with minimal distortion.
- Туруктуу курулуш: Features upgraded full aluminum plates, 22mm front rod diameter for long-lasting rod lifetime, high rigid piston rod, 6061-T6 AL perch, anodized shock body with galvanized anti-corrosion coating, and matte finish lower mount.

3. Техникалык шарттар
| Атрибут | Нарк |
|---|---|
| Бренд | maXpeedingrods |
| Элемент моделинин номери | KJ699 |
| Auto Part Position | Фронт |
| Стиль | Заманбап |
| Унаа кызматынын түрү | Машина |
| Сырткы бүтүрүү | Кара |
| Материал | Алюминий |
| Элемент Салмагы | 58.1 фунт |
| Продукциянын өлчөмдөрү | 25.2 x 19.69 x 7.87 дюйм |
4. Коопсуздук маалыматы
Suspension installation requires specialized tools and knowledge. Improper installation can lead to serious injury or vehicle damage. It is highly recommended that installation be performed by a certified professional mechanic. Always wear appropriate personal protective equipment (PPE) during installation. Ensure the vehicle is securely supported on jack stands or a lift before beginning any work.
5. Орнотуу боюнча колдонмо
This section outlines the general steps for installing the maXpeedingrods T6 Series Coilover Kit. Refer to the included installation instructions for your specific vehicle model for detailed torque specifications and procedures.
5.1. Алдын ала орнотуу
- Gather all necessary tools as listed in your product packaging.
- Унааны түз жерге токтотуп, токтоочу тормозду коюңуз.
- Loosen the lug nuts on the wheels to be removed.
- Lift the vehicle using a hydraulic lift or jack stands, ensuring it is stable and secure.
- Дөңгөлөктөрдү алып салыңыз.
5.2. Front Coilover Installation
- Remove the brake hose mount and sensor clip from the old strut assembly.
- Loosen and remove the knuckle bolts connecting the old strut to the knuckle.
- Open the hood and secure it. Remove the access panel from the cowl to expose the upper strut mounts.
- Remove the upper nuts securing the old strut to the vehicle chassis.
- Унаадан эски тирөөч түзүлүшүн этияттык менен алып салыңыз.
- Install the new maXpeedingrods front coilover assembly. Hand-start the new hardware for the upper mount.
- Tighten the top mount nuts to 60 Nm (45 ft-lb) of torque.
- Lift the vehicle and insert the knuckle into the bottom of the new coilover.
- Reuse the old hardware to secure the knuckle bolts and tighten to 130 Nm (95 ft-lb) of torque.
- Secure the brake hose and sensor clip to the new coilover.
- Reinstall the access panel and remount the weather seal.
5.3. Rear Coilover Installation
- Loosen the lug nuts on the rear wheels and lift the vehicle. Remove the rear wheels.
- Open the trunk. Remove the trunk mat, foam pad, and side carpet liner clips to access the upper shock absorber hardware.
- Remove the upper shock absorber hardware.
- Төмөнкү амортизатордун жабдыктарын алып салыңыз.
- Remove the old shock absorber and rear spring.
- Install the new maXpeedingrods rear coilover spring with the adjuster plate.
- When installing the new rear shock, remove the damping adjustment cap using the provided small hex key. Remove the new hardware and reuse the original upper bushing.
- Install the new shock absorber and secure the lower bolt. Tighten to 80 Nm (60 ft-lb) of torque.
- Lower the vehicle to attach the upper shock from inside the trunk. Place the original bushing over the shock mount, then the washer and the nut.
- Tighten the upper nut with a 17mm socket.
- кайра орнотуу damping adjustment topper.
- Reassemble the trunk interior: carpet liner, foam parts, and plastic loading guard.
5.4. Орнотуудан кийинки
- Reinstall the wheels. Hand-start lug nuts, then use a 17mm socket to secure them. Torque lug nuts to 130 Nm (95 ft-lb) of torque.
- Унааны толугу менен түшүрүңүз.
- Perform a test drive to check for any unusual noises or handling characteristics.
- It is highly recommended to get a professional wheel alignment after installing new suspension components.

5.5. Assembly and Overview Videos
Video 1: This video demonstrates the assembly process for a coilover, showing how various components fit together. It is useful for understanding the structure of the suspension kit.
Видео 2: Бул видео жалпы маалымат беретview of the COT6 series coilovers, highlighting their features and design. While not specific to installation, it offers insight into the product's capabilities.
6. Adjustment Guide
6.1. Дamping Adjustment (24 Levels)
The coilovers feature 24 levels of damping force adjustment, allowing you to fine-tune your ride for various conditions. The adjustment knob is located at the top of the coilover.
- 0-8-деңгээлдер: Recommended for comfortable street driving.
- 9-16-деңгээлдер: Suitable for mountain roads or more spirited driving.
- 17-24-деңгээлдер: Designed for track use, offering maximum stiffness and control.

6.2. Бийиктигин тууралоо
The coilovers allow for 1-3 inches of ride height adjustment. This is achieved by rotating the lower mount on the threaded shock body. Use the provided spanner wrenches to loosen the locking collars, adjust the height, and then re-tighten the collars securely.
7. Техникалык тейлөө
Regular maintenance ensures the longevity and optimal performance of your coilovers.
- Үзгүлтүксүз текшерүү: Periodically inspect the coilovers for any signs of damage, leaks, or loose components. Check for wear on bushings and mounts.
- Тазалоо: Keep the coilovers clean from dirt, salt, and debris, especially the threaded sections. Use mild soap and water, then rinse thoroughly.
- Майлоо: Apply a thin layer of anti-seize lubricant to the threads of the coilover body and locking collars to prevent seizing and facilitate future adjustments.
- Dust Boots: Ensure the full-length dust boots are intact and properly seated to protect the piston rod from contaminants.

8. Кыйынчылыктарды
If you experience issues with your coilovers, consider the following common problems and solutions:
- Адаттан тыш үндөр (Кыңылдаган/чырылдаган):
- Бардык бекитүүчү болттордун туура моментти текшерүүсүн текшериңиз.
- Inspect bushings for wear or damage.
- Ensure spring seats and locking collars are tight.
- Poor Ride Quality (Too Stiff/Too Soft):
- тууралоо damping settings according to Section 6.1.
- Verify spring preload is set correctly.
- Тегиз эмес жүрүү бийиктиги:
- Re-measure and adjust ride height on all four corners as per Section 6.2.
- Ensure locking collars are securely tightened after adjustment.
- Leaking Shock Absorber:
- A small amount of oil residue is normal. Excessive oil leakage indicates a seal failure. Contact customer support for assistance.
9. Кепилдик жана колдоо
For warranty information, technical support, or any questions regarding your maXpeedingrods T6 Series Coilover Suspension Kit, please refer to the warranty card included in your product packaging or visit the official maXpeedingrods website. Always provide your model number (KJ699) and purchase details when contacting support.