
Introduction
Thank you for choosing the WEN 10-inch 3.5-Amp Two-Speed Band Saw with Stand, Model BA3962. This manual provides essential information for the safe assembly, operation, maintenance, and troubleshooting of your new band saw. Please read this manual thoroughly before operating the tool to ensure proper use and to prevent injury or damage.
The WEN BA3962 band saw is designed for cutting wood and similar materials, offering two speed settings for versatility. It features a 3.5-amp motor, a 10-inch throat, and a 6-inch cutting depth, making it suitable for various woodworking projects.
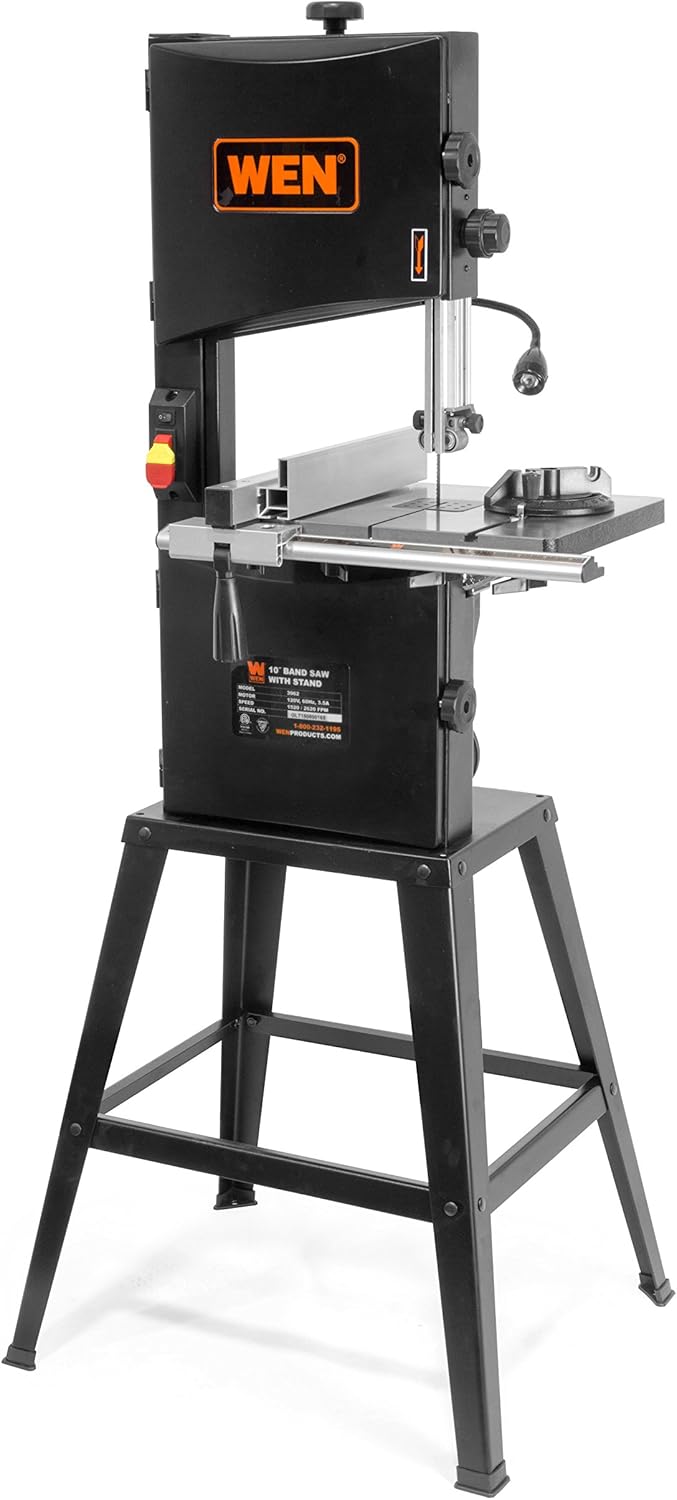
Figure 1: ашыкview of the WEN 10-inch Band Saw with Stand (Model BA3962).
Маанилүү коопсуздук нускамалары
ЭСКЕРТҮҮ: Бул электр куралы менен берилген бардык коопсуздук эскертүүлөрүн, нускамаларды, иллюстрацияларды жана спецификацияларды окуңуз. Төмөндө саналып өткөн бардык көрсөтмөлөрдү аткарбоо электр шокуна, өрткө жана/же олуттуу жаракатка алып келиши мүмкүн.
Жалпы электр шаймандарынын коопсуздугу
- Жумуш аймагынын коопсуздугу: Жумуш ордун таза жана жакшы жарыктандырылган кармаңыз. Башаламан же караңгы жерлер кырсыктарга алып келет. Электр шаймандарын жарылуучу атмосферада, мисалы, тез күйүүчү суюктуктар, газдар же чаң бар жерде иштетпеңиз.
- Электр коопсуздугу: Power tool plugs must match the outlet. Never modify the plug in any way. Avoid body contact with grounded surfaces such as pipes, radiators, ranges, and refrigerators.
- Жеке коопсуздук: Always wear eye protection. Use hearing protection when operating noisy tools. Wear a dust mask if operation is dusty. Do not overreach. Keep proper footing and balance at all times. Dress properly; avoid loose clothing, jewelry, or long hair that can get caught in moving parts.
- Куралды колдонуу жана кам көрүү: Электр аспапты күчтөп албаңыз. Колдонмоңуз үчүн туура электр шайманын колдонуңуз. Кандайдыр бир тууралоолорду жасоодон, аксессуарларды алмаштыруудан же электр шаймандарын сактоодон мурда вилканы кубат булагынан ажыратыңыз.
Band Saw Specific Safety
- Бычактын коопсуздугу: Ensure the blade is properly installed and tensioned before operation. Never touch the blade while it is moving. Always use the correct blade type and size for the material being cut.
- Материалды иштетүү: Securely support the workpiece. Never cut freehand. Use the fence or miter gauge to guide the material. Keep hands clear of the blade path.
- Чаңды чогултуу: Connect a dust collection system to the dust port to minimize airborne dust and keep the work area clean.
- Түзөтүүлөр: Make all adjustments with the power tool unplugged. Ensure all locking mechanisms are tightened before operation.
Компоненттер бүттүview
Familiarize yourself with the main components of your WEN band saw:
- Мотор: 3.5-amp motor providing power for cutting.
- Бычак: 72-inch blade, adjustable for various widths (1/8 to 1/2 inches).
- Таблица: Cast aluminum work table (14-1/8 x 12-1/2 inches) that can bevel up to 45 degrees.
- Blade жетектемелери: Upper and lower blade guides to support the blade during cutting.
- Тосмо: Adjustable fence for straight cuts.
- Митр өлчөгүч: For angled cuts.
- Чаң порту: 3-in-1 dust port for connecting a dust collection system.
- Иш жарык: Integrated work light to illuminate the cutting area.
- Стенд: Sturdy metal stand for stable operation.

Сүрөт 2: Жакын пландан view of the blade, table, and fence assembly.
Орнотуу жана чогултуу
Before beginning assembly, ensure all parts are present and undamaged. Refer to the packing list in your separate assembly guide for a complete list of components.
1. Стенд жыйыны
- Assemble the stand components according to the instructions provided with the stand. Ensure all fasteners are securely tightened.
- Чогултулган стендди туруктуу, тегиз жерге коюңуз.
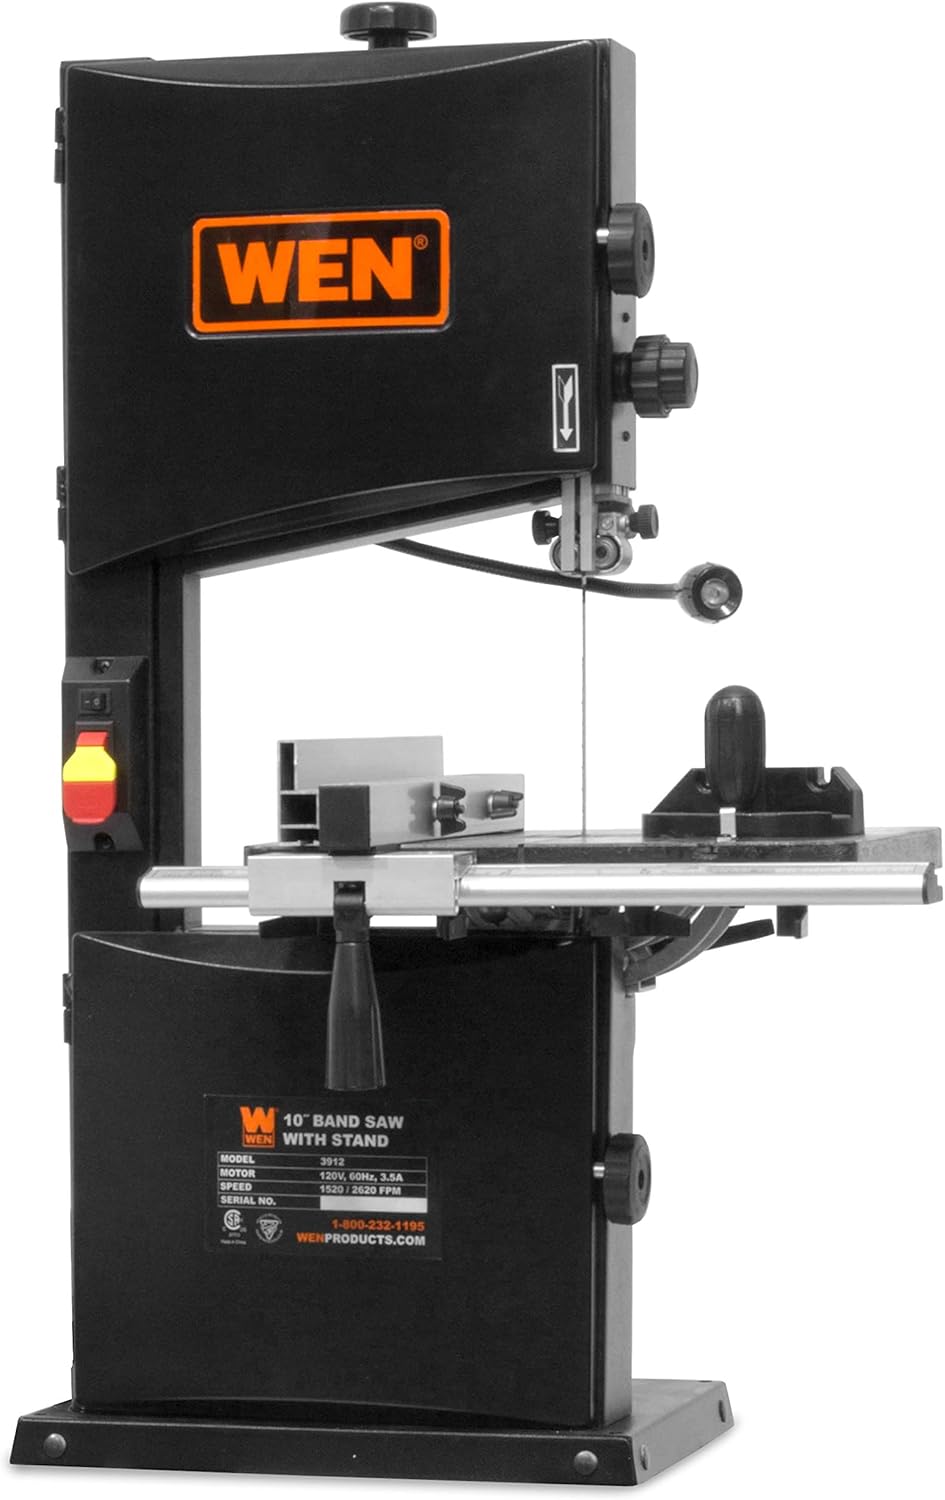
Figure 3: Fully assembled WEN band saw on its stand.
2. Mounting the Band Saw
- Carefully lift the band saw main unit and place it onto the assembled stand.
- Align the mounting holes on the band saw base with those on the stand.
- Secure the band saw to the stand using the provided bolts, washers, and nuts. Tighten all fasteners firmly.
3. Blade Installation and Tensioning
WARNING: Disconnect the power cord before installing or adjusting the blade.
- Жогорку жана төмөнкү дөңгөлөк капкактарын ачыңыз.
- Loosen the blade tension knob to release tension.
- Carefully position the blade around the upper and lower wheels, ensuring the teeth point downwards towards the table.
- Guide the blade through the upper and lower blade guides.
- Adjust the blade tension knob until the blade is taut. A properly tensioned blade will deflect slightly when pressed with a finger.
- Close the wheel covers.

4-сүрөт: Ички view showing blade wheels and path.
4. Blade Guide Adjustment
WARNING: Ensure the power cord is disconnected.
- Үстүнкү бычактын жетектөөчү жыйындысын даярдалган бөлүгүнөн болжол менен 1/8-1/4 дюймга чейин тууралаңыз.
- Adjust the side blade guides so they are just barely touching the sides of the blade, without binding.
- Adjust the rear thrust bearing so it is just behind the blade, allowing the blade to run freely but providing support during cutting.

5-сүрөт: Детальдуу view of the blade guide assembly.
5. Table and Fence Adjustment
- Table Squareness: Use a square to ensure the table is 90 degrees to the blade. Adjust the table tilt mechanism if necessary.
- Table Bevel: The table can be tilted up to 45 degrees for angled cuts. Loosen the locking knob, adjust to the desired angle, and retighten.
- Тосмо орнотуу: Attach the rip fence to the table. Ensure it is parallel to the blade for straight cuts.

Figure 6: Table tilt adjustment for bevel cuts.
6. Чаң чыгаруучу портту туташтыруу
Connect a dust collection system to the 3-in-1 dust port to maintain a clean work environment and improve visibility.

Figure 7: Location of the 3-in-1 dust port.
7. Work Light Positioning
Adjust the flexible work light to illuminate your cutting line for better visibility.

Figure 8: Work light positioned to illuminate the cutting area.
Иштөө нускамалары
WARNING: Always wear appropriate safety gear, including eye protection, hearing protection, and a dust mask, during operation.
1. Power Connection and Speed Selection
- Электр шнурын ылайыктуу электр розеткасына сайыңыз.
- Select the desired blade speed:
- 1520 FPM: Lower speed, suitable for thicker materials or intricate cuts.
- 2620 FPM: Higher speed, suitable for general cutting of thinner wood.
- Turn on the band saw using the power switch. Allow the blade to reach full speed before beginning a cut.
2. Making Cuts
- Түз кесүү: Use the rip fence to guide the workpiece. Ensure the fence is parallel to the blade and securely locked. Feed the material slowly and steadily into the blade.
- Ийилген кесүүлөр: For curved cuts, do not use the fence. Guide the workpiece freehand, keeping your hands clear of the blade. Use a narrower blade for tighter curves.
- Cross-Cuts and Angled Cuts: Use the miter gauge to guide the workpiece. Adjust the miter gauge to the desired angle.
- Resawing: For resawing wider boards, ensure the upper blade guide is set just above the workpiece. Use a wider blade for better stability.
Important: Do not force the material through the blade. Apply steady, even pressure. Forcing the blade can lead to blade deflection, poor cut quality, or motor stalling.
3. Операциядан кийин
- Turn off the band saw and wait for the blade to come to a complete stop before leaving the machine.
- Электр шнурын ажыратыңыз.
- Clean the work area and the machine, removing sawdust and debris.
Техникалык тейлөө
WARNING: Always disconnect the power cord before performing any maintenance or adjustments.
1. Бычакты алмаштыруу
Replace dull or damaged blades promptly. A dull blade can cause excessive heat, poor cuts, and strain on the motor.
- Кубатты ажыратыңыз.
- Open wheel covers and release blade tension.
- Этияттык менен эски бычакты алып салыңыз.
- Install the new blade, ensuring teeth are pointing correctly and it is seated on the wheels.
- Tension the new blade and adjust blade guides as described in the Setup section.
- Close wheel covers.
2. Тазалоо
- Regularly clean sawdust and debris from the table, blade guides, and inside the wheel housing. Accumulated dust can affect performance and cause the machine to stall.
- Use a vacuum cleaner or compressed air (with caution and eye protection) to remove dust.
- Wipe down exterior surfaces with a clean, damp кездеме. Катуу химиялык заттарды колдонбоңуз.
3. Guide Bearing and Thrust Bearing Inspection
Periodically inspect the blade guide bearings and thrust bearings for wear. Replace them if they show signs of damage or excessive play. Ensure they are properly adjusted to support the blade without binding.
Проблемаларды чечүү
This section addresses common issues you might encounter with your WEN band saw. For problems not listed here, contact WEN customer support.
| Көйгөй | Мүмкүн себеп | Чечим |
|---|---|---|
| Motor does not start or stalls during operation. |
|
|
| Poor cut quality (rough, uneven, blade deflection). |
|
|
| Blade breaks frequently. |
|
|
| Work light is ineffective or creates shadows. |
|
|
Техникалык шарттар
| Өзгөчөлүк | Деталь |
|---|---|
| Модель номери | BA3962 |
| Бренд | ВЕН |
| Мотор | 3.5 Ampс, 420 Уоттс |
| Blade Length | 72 дюйм |
| Blade Width Capacity | 1/8 1/2 дюйм |
| Кесүү тереңдиги | 6 дюймга чейин |
| Cutting Width (Throat) | 9-3/4 дюйм |
| Ылдамдыктар | 1520 FPM (Feet Per Minute), 2620 FPM |
| Таблицанын өлчөмдөрү | 14-1/8 x 12-1/2 inches (Cast Aluminum) |
| Table Bevel Capacity | 0ден 45 градуска чейин |
| Чаң порту | 3-in-1 |
| Жалпы өлчөмдөрү (L x W x Y) | 67.3 x 53.3 x 148.6 см (болжол менен 26.5 x 21 x 58.5 дюйм) |
| Power Source | Электр зымдары |
| Бычактын материалы | High-Speed Steel (standard included blade) |
| Коопсуздукту сактоо | UL тизмеленген |
Кепилдик жана колдоо
Кепилдик маалымат
The WEN 10-inch 3.5-Amp Two-Speed Band Saw (Model BA3962) includes a 2 жылдык чектелген кепилдик from the date of purchase. This warranty covers defects in material and workmanship under normal use. Please retain your proof of purchase for warranty claims.
For full warranty terms and conditions, please refer to the official WEN warranty documentation or visit the WEN webсайт.
Кардарларды колдоо
If you have any questions, require technical assistance, or need to make a warranty claim, please contact WEN customer service. Have your model number (BA3962) and purchase information ready when contacting support.
Эң акыркы байланыш маалыматы үчүн, төмөнкү дарекке кириңиз: wenproducts.com.