Andoer 2.7K Digital Camera Compact Video Camcorder
Andoer 2.7K Digital Camera 48MP User Manual
Model: 2.7K Digital Camera Compact Video Camcorder
Introduction
This manual provides essential instructions for the safe and effective operation of your Andoer 2.7K Digital Camera. Please read this manual thoroughly before using the camera and retain it for future reference.
The Andoer 2.7K Digital Camera is a compact device designed for capturing high-resolution photos and videos. It features a 48MP image sensor, 2.7K video recording capabilities, a 2.88-inch IPS screen, 16X digital zoom, and various functions such as anti-shake, face detection, and a built-in LED fill light.
Пакеттин мазмуну
Төмөндө тизмеленген нерселердин баары пакетиңизге камтылганын текшериңиз:
- 1 x Andoer 2.7K Digital Camera
- 2 x Lithium Batteries (3.7V 700mAh)
- 1 x USB заряддоо кабели
- 1 Билек боонун х
- 1 x Ташуу сумкасы
- 1 x Колдонуучунун колдонмосу (англисче)

Figure 1: Contents of the camera package.
Камера бүттүview

Сүрөт 2: Алдыңкы жана арткы view of the camera with included batteries.
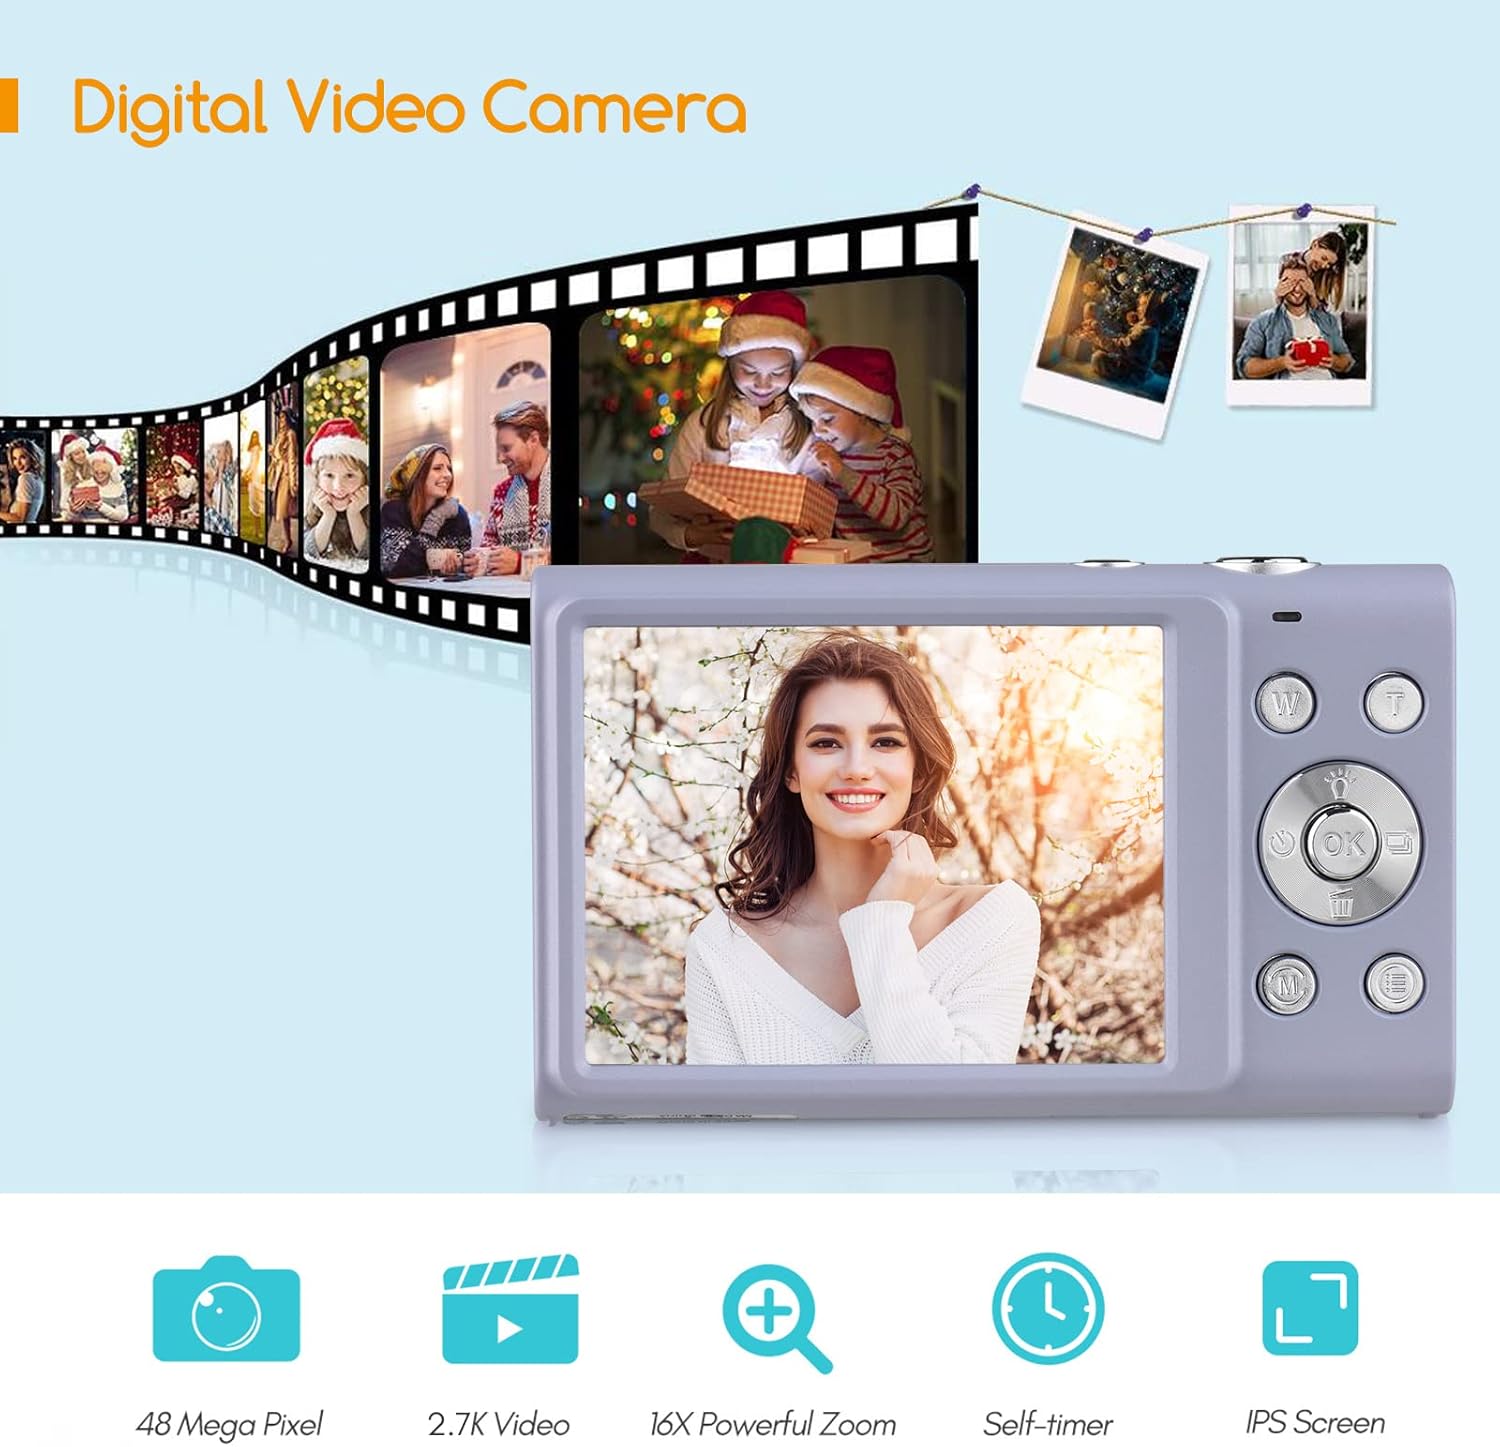
Figure 3: Camera features highlighted.
Жайгашуу
1. Батареяны орнотуу
- Камеранын ылдый жагында жайгашкан батарея бөлүкчөсүнүн капкагын ачыңыз.
- Insert a fully charged lithium battery (3.7V 700mAh) into the compartment, ensuring correct polarity.
- Батарея уясынын капкагын бекем жабыңыз.
2. Батареяны заряддоо
- Connect the camera to a power source (e.g., computer USB port or USB wall adapter) using the provided USB charge cable.
- Заряддоо индикаторунун жарыгы күйөт. Заряддоо аяктагандан кийин ал өчөт же түсүн өзгөртөт.
- Толук кубаттоо адатта болжол менен 2-3 саатты талап кылат.
3. Эстутум картасын орнотуу
The camera requires an external Class-10 memory card (up to 128GB, not included) for storing photos and videos.
- Камеранын капталындагы эстутум картасынын уячасын табыңыз.
- Insert the memory card with the metal contacts facing the front of the camera until it clicks into place.
- Алып салуу үчүн, картаны ал чыгып кеткенче акырын басыңыз.
4. Билек боону тагуу
Thread the wrist strap through the strap eyelet on the side of the camera to prevent accidental drops.
5. Tripod орнотуу
The camera features a universal 1/4" screw hole on the bottom, allowing it to be mounted on a tripod for stable shots.

Figure 4: Universal 1/4" screw hole for tripod attachment.
Иштөө нускамалары
1. Күйгүзүү/өчүрүү
- Press and hold the Power button (usually marked with a circle and a line) to turn the camera on or off.
- The camera has an auto power-off feature (1min/3min/5min) to conserve battery life. This can be adjusted in the settings.
2. Сүрөт тартуу
- Turn on the camera. The screen will display the live view.
- Frame your shot using the 2.88-inch IPS screen.
- Press the Shutter button (typically on top of the camera) halfway down to focus. The camera features auto-focus.
- Сүрөткө тартуу үчүн жапкычты толугу менен ылдый басыңыз.
Photo Modes and Features:
- Чечим: Supports up to 48MP. Adjust in settings.
- Digital Zoom: Use the W/T (Wide/Telephoto) buttons to zoom in or out (up to 16X digital zoom).
- Шакка каршы: Санариптик сүрөт турукташтыруу камеранын кыймылынан улам бүдөмүктүктү азайтууга жардам берет.
- Жүздү аныктоо жана жылмаюуну тартуу: Камера жүздөрдү аныктап, жылмаюу аныкталганда автоматтык түрдө сүрөткө тарта алат.
- Авто таймер: Options for Off, 2 sec, 5 sec, 10 sec delays.
- Үзгүлтүксүз атуу: Сүрөттөрдүн ырааттуулугун тез тартыңыз.
- Built-in LED Fill Light: Activate for additional illumination in low-light conditions.

Figure 5: Demonstrations of Self-Timer, Continuous Shooting, LED Fill Light, and Face Detection.

6-сүрөт: Мисample of 16X Digital Zoom in use.

Figure 7: Face Detection and Smile Capture in action.
3. Видеолорду жаздыруу
- Switch the camera to video mode (if applicable, usually via a mode button or menu option).
- Жаздырууну баштоо үчүн "Жаздыруу" баскычын (көбүнчө кызыл чекит менен белгиленген) басыңыз.
- Жазууну токтотуу үчүн Record баскычын кайра басыңыз.
Видеонун өзгөчөлүктөрү:
- Чечим: Supports 2.7K (2688x1520), 1080P (1920x1080), 720P (1280x720), VGA (640x480).
- Digital Zoom: Available during video recording.

Figure 8: Camera's 2.7K video and 48MP photo capabilities.
4. Ойнотуу
- Press the Playback button (often marked with a triangle icon) to enter playback mode.
- Use the navigation buttons to browse through your photos and videos.
- Press the Playback button again or the Shutter button to exit playback mode.
5. Компьютерге туташуу
- Камераны өчүрүңүз.
- Камераны компьютериңизге берилген USB кабели аркылуу туташтырыңыз.
- Камера компьютериңизде алынуучу диск катары көрсөтүлөт.
- You can then transfer photos and videos to your computer.
- Supported Operating Systems: Windows XP/ Vista/ 7/ 8/ 10, Mac 10.2 and above.
Техникалык тейлөө
- Тазалоо: Use a soft, dry cloth to clean the camera body. For the lens and screen, use a specialized lens cleaning cloth and solution. Avoid harsh chemicals.
- Батареяга кам көрүү: Батареяларды салкын, кургак жерде сактаңыз. Аларды өтө жогорку температурага дуушар кылбаңыз. Эгер камераны көпкө колдонбосоңуз, батареяны алып салыңыз.
- Сактагыч: When not in use, store the camera in its carry bag in a dry, dust-free environment.
- Суу каршылык: Бул камера жок суу өткөрбөйт. Сууга же жогорку нымдуулукка дуушар кылбаңыз.
Проблемаларды чечүү
| Көйгөй | Мүмкүн себеп | Чечим |
|---|---|---|
| Камера күйбөйт. | Батарея түгөнүп калган же туура эмес салынган. | Charge the battery or re-insert it correctly. Ensure the battery compartment is closed. |
| Сүрөткө/видео тартууга болбойт. | Эстутум картасы толгон, салынбаган же бузулган. | Insert a memory card, delete unnecessary fileс, же картаны форматтаңыз (бул бардык маалыматтарды өчүрөт). |
| Сүрөттөр бүдөмүк. | Camera shake, dirty lens, or out of focus. | Hold the camera steady, clean the lens, ensure auto-focus is engaged (half-press shutter). Use anti-shake feature. |
| Жаркылдак иштебей жатат. | Flash is disabled or battery is low. | Жаркылдактын жөндөөлөрүн текшериңиз. Батареянын жетиштүү заряддалганын текшериңиз. |
| Камера катып калат. | Программанын катасы. | Remove and re-insert the battery to reset the camera. |
Техникалык шарттар
| Өзгөчөлүк | Деталь |
|---|---|
| Сүрөт сенсору | CMOS сенсор |
| Сүрөттүн чечилиши | 48MP, 44MP, 36MP, 24MP, 20MP, 16MP, 12MP, 10MP |
| Video Resolution | 2.7K (2688x1520), 1080P (1920x1080), 720P (1280x720), VGA (640x480) |
| Дисплей | 2.88 дюймдук IPS экраны |
| Digital Zoom | 16X |
| Диафрагма | F/3.2 |
| Фокустун узундугу | f=7.36мм |
| File Формат | JPG / AVI |
| Таасир | EV-3 to EV+3 |
| Авто таймер | Өчүк / 2 сек / 5 сек / 10 сек |
| Авто өчүрүү | 1мин / 3мин / 5мин |
| Өзгөчөлүктөр | Anti-Shake, Face Detect, Smile Capture, Built-in LED Fill Light, Continuous Photography |
| Сактагыч | Supports Class-10 external memory card up to 128GB (not included) |
| Электр камсыздоо | 1 x Lithium battery (3.7V 700mAh) |
| Элементтин өлчөмү | 9.4 * 5.6 * 1.9 см / 3.7 * 2.2 * 0.7 дюйм |
| Элемент Салмагы | 115g / 4.1oz (with battery) |
| Операциялык системага талап | Windows XP/ Vista/ 7/ 8/ 10, Mac 10.2 |
Кепилдик жана колдоо
For warranty information, please refer to the documentation provided at the time of purchase or contact your retailer. Andoer products typically come with a standard manufacturer's warranty covering defects in materials and workmanship.
If you encounter any issues not covered in the troubleshooting section, or require further assistance, please contact Andoer customer support through their official webсайтты же продуктуңуз менен берилген байланыш маалыматын.
Ask a question about this manual
Ask about setup, troubleshooting, compatibility, parts, safety, or missing instructions. Manuals+ will review the question and use this page’s manual context to help answer it.