
1. Киришүү
This manual provides essential information for the safe and effective operation, setup, and maintenance of your BLACK+DECKER BES701-QS 1500W Miter Saw. This powerful 216mm miter saw is designed for precise crosscutting and miter cutting of wood boards, skirting boards, and laminate flooring. It features a shadow line for accurate cuts without calibration, and robust supports for workpiece stability. Please read this manual thoroughly before use and retain it for future reference.
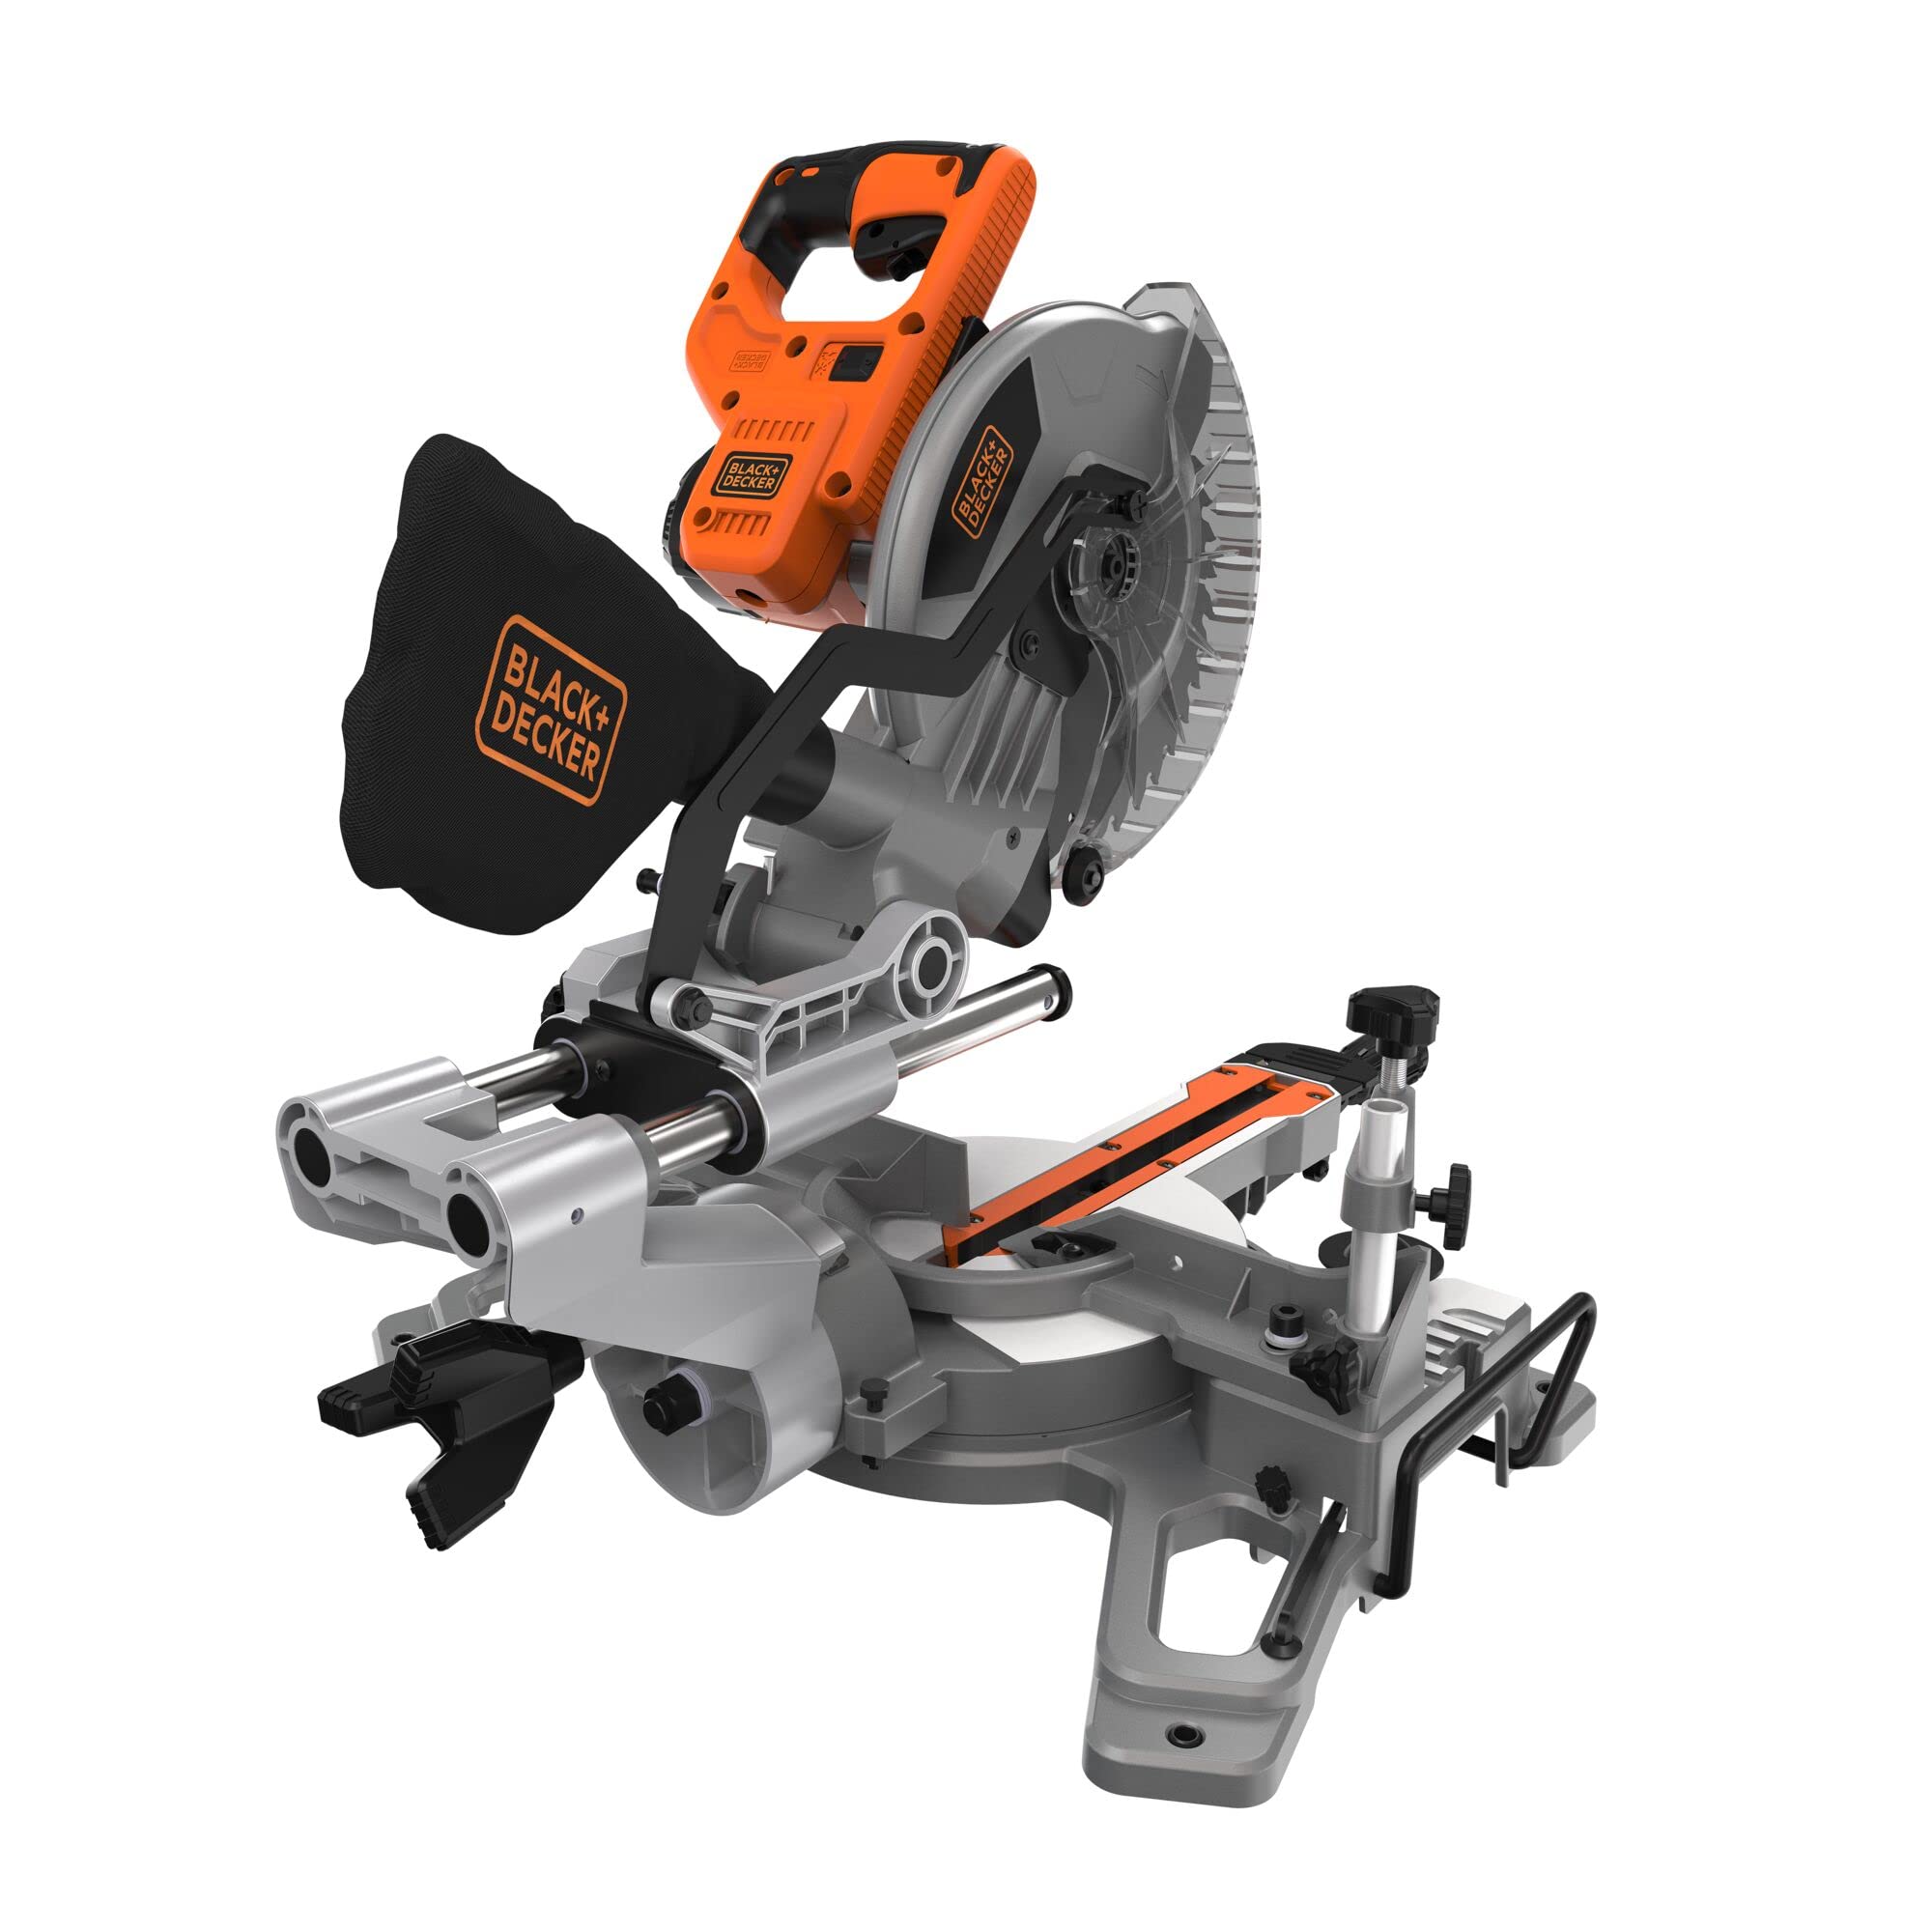
Сүрөт 1: Алдыңкы view of the BLACK+DECKER BES701-QS Miter Saw.
2. Коопсуздук маалыматы
Өрт, электр шок жана жеке жаракат алуу коркунучун азайтуу үчүн ар дайым негизги коопсуздук чараларын сактаңыз. Бул колдонмону келечекте маалымат алуу үчүн сактаңыз.
Жалпы электр куралынын коопсуздук эскертүүлөрү
- Жумуш аймагынын коопсуздугу: Жумушчу жерди таза жана жакшы жарыктандырыңыз. Жарылуучу чөйрөдө, мисалы, күйүүчү суюктуктар, газдар же чаң бар жерде электр шаймандарын иштетпеңиз.
- Электр коопсуздугу: Электр шайманынын сайгычтары розеткага дал келиши керек. Сайгычты эч качан өзгөртпөңүз. Жерге туташтырылган же жерге төшөлгөн беттерге денеге тийбеңиз. Электр шаймандарын жамгырга же нымдуу шарттарга тийгизбеңиз.
- Жеке коопсуздук: Always wear eye protection (safety glasses or goggles) and hearing protection. Use a dust mask if operations create dust. Dress properly; avoid loose clothing or jewelry. Secure long hair.
- Куралды колдонуу жана кам көрүү: Электр аспапты күчтөп албаңыз. Колдонмоңуз үчүн туура электр шайманын колдонуңуз. Кандайдыр бир тууралоолорду жасоодон, аксессуарларды алмаштыруудан же электр шаймандарын сактоодон мурда вилканы кубат булагынан ажыратыңыз.
- Кыйгач араага тиешелүү коопсуздук: Ensure the blade guard is always in place and functioning correctly. Keep hands clear of the blade path. Secure the workpiece firmly with clamps before cutting. Never attempt to free jammed material while the saw is running.

Figure 2: Always wear appropriate safety gear, including eye and hearing protection, when operating the miter saw.
3. Компоненттер
Familiarize yourself with the main components of your miter saw:
- Мотор корпусу: 1500W мотор камтыйт.
- Blade Guard: Retractable guard for safety during operation.
- араа бычак: 216mm, 24-tooth blade for wood cutting.
- Миттер столу: Rotates for angle cuts.
- Митр шкаласы: Indicates the miter angle.
- Miter Lock Handle: Secures the miter table at the desired angle.
- Жөндөө баскычы: Adjusts the blade tilt for bevel cuts.
- Тосмо: Иштетилген бөлүктү бычактын учуна таянып турат.
- Workpiece Clamp: Secures the workpiece to the miter table.
- Чаң баштыгы: Иштөө учурунда жыгачтын таарындысын чогултат.
- Handle with Trigger Switch: For operating the saw.

Figure 3: ашыкview of the miter saw's main components.
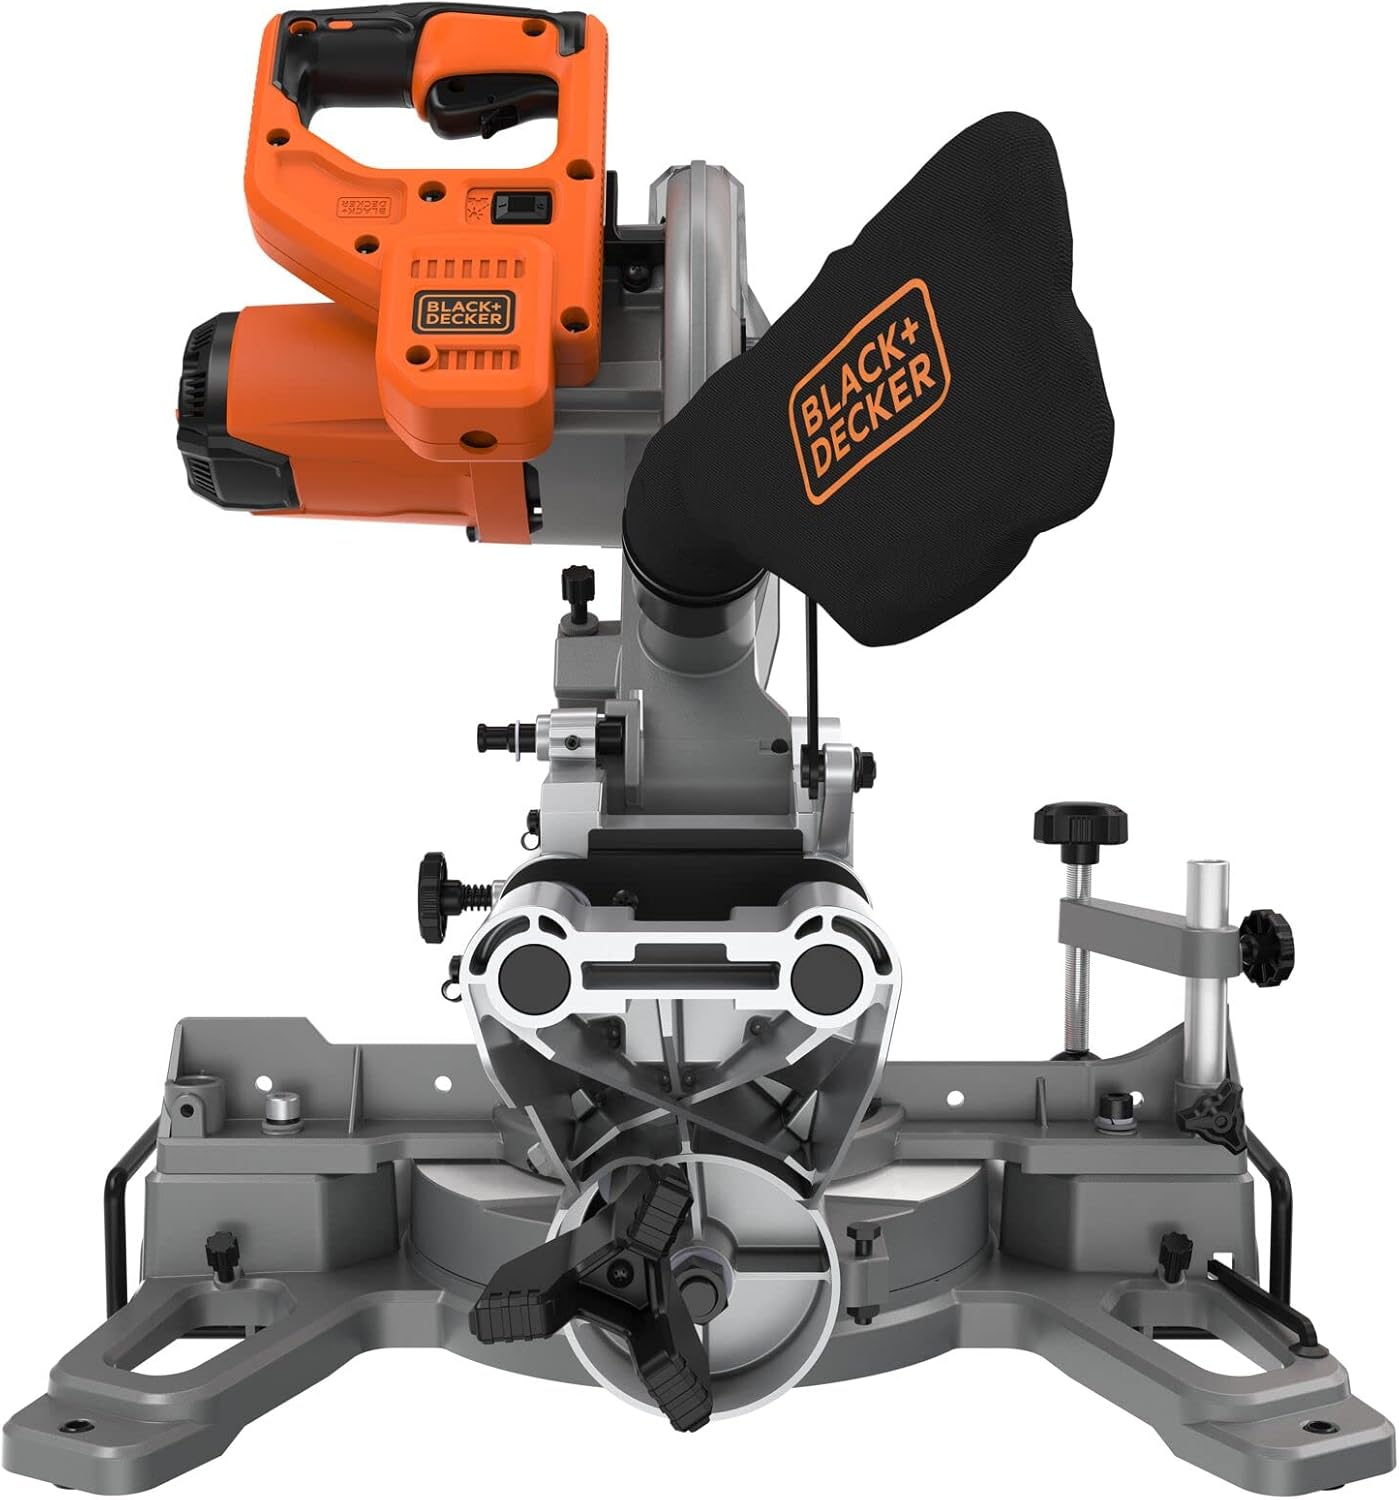
4-сүрөт: Арткы view showing the dust bag attachment point.
4. Орнотуу
4.1 Таңгактан чыгаруу жана текшерүү
Carefully remove the miter saw from its packaging. Inspect for any damage that may have occurred during shipping. Ensure all components listed in Section 3 are present.
4.2 Арааны орнотуу
For stable operation, it is recommended to mount the miter saw to a workbench or a dedicated miter saw stand. Use appropriate bolts and nuts to secure the saw through the mounting holes in its base.
4.3 Blade Installation/Change
The saw comes with a 216mm, 24-tooth blade. If you need to change the blade:
- Кубатты өчүрүү: Always unplug the saw from the power source.
- Access Blade: Lift the blade guard and locate the spindle lock button.
- Lock Spindle: Бычактын айланышына жол бербөө үчүн шпиндельди бекитүү баскычын басып, кармап туруңуз.
- Арбор гайкасын бошотуңуз: Use the provided wrench to loosen the arbor nut. Note that the nut may have a left-hand thread (turn clockwise to loosen).
- Бычакты алып салуу: Сырткы фланецти жана эски бычакты этияттык менен алып салыңыз.
- New Blade орнотуу: Place the new blade onto the arbor, ensuring the teeth are pointing in the correct direction (usually indicated by an arrow on the blade and saw). Replace the outer flange and arbor nut.
- Гайканы бекемдөө: Hold the spindle lock and tighten the arbor nut firmly.
4.4 Чаң баштыгын орнотуу
Attach the provided dust bag to the dust port at the rear of the saw. Ensure it is securely fastened to effectively collect sawdust during operation.
5. Иштөө нускамалары
5.1 Кубат туташтыруу
Connect the saw to a suitable 230V AC power outlet. Ensure the power cord is not in the path of the blade or workpiece.
5.2 Кыйшайуу бурчун жөндөө
To make angle cuts:
- Unlock Miter Table: Митер кулпу туткасын бошотуңуз.
- Орнотуу бурч: Rotate the miter table to the desired angle, indicated on the miter scale. Common angles are often detented for quick setting.
- Lock Miter Table: Tighten the miter lock handle firmly to secure the table.

Figure 5: The miter scale allows for precise angle adjustments.

Figure 6: Loosening the miter lock handle to adjust the cutting angle.
5.3 Кыйшайуу бурчун жөндөө
For bevel cuts (tilting the blade):
- Конустун кулпусун ачуу: Loosen the bevel adjustment knob, typically located at the rear of the saw.
- Орнотуу бурч: Tilt the saw head to the desired bevel angle (up to 45°), guided by the bevel scale.
- Конусту кулпулоо: Ийикти тууралоо баскычын бекем тартыңыз.
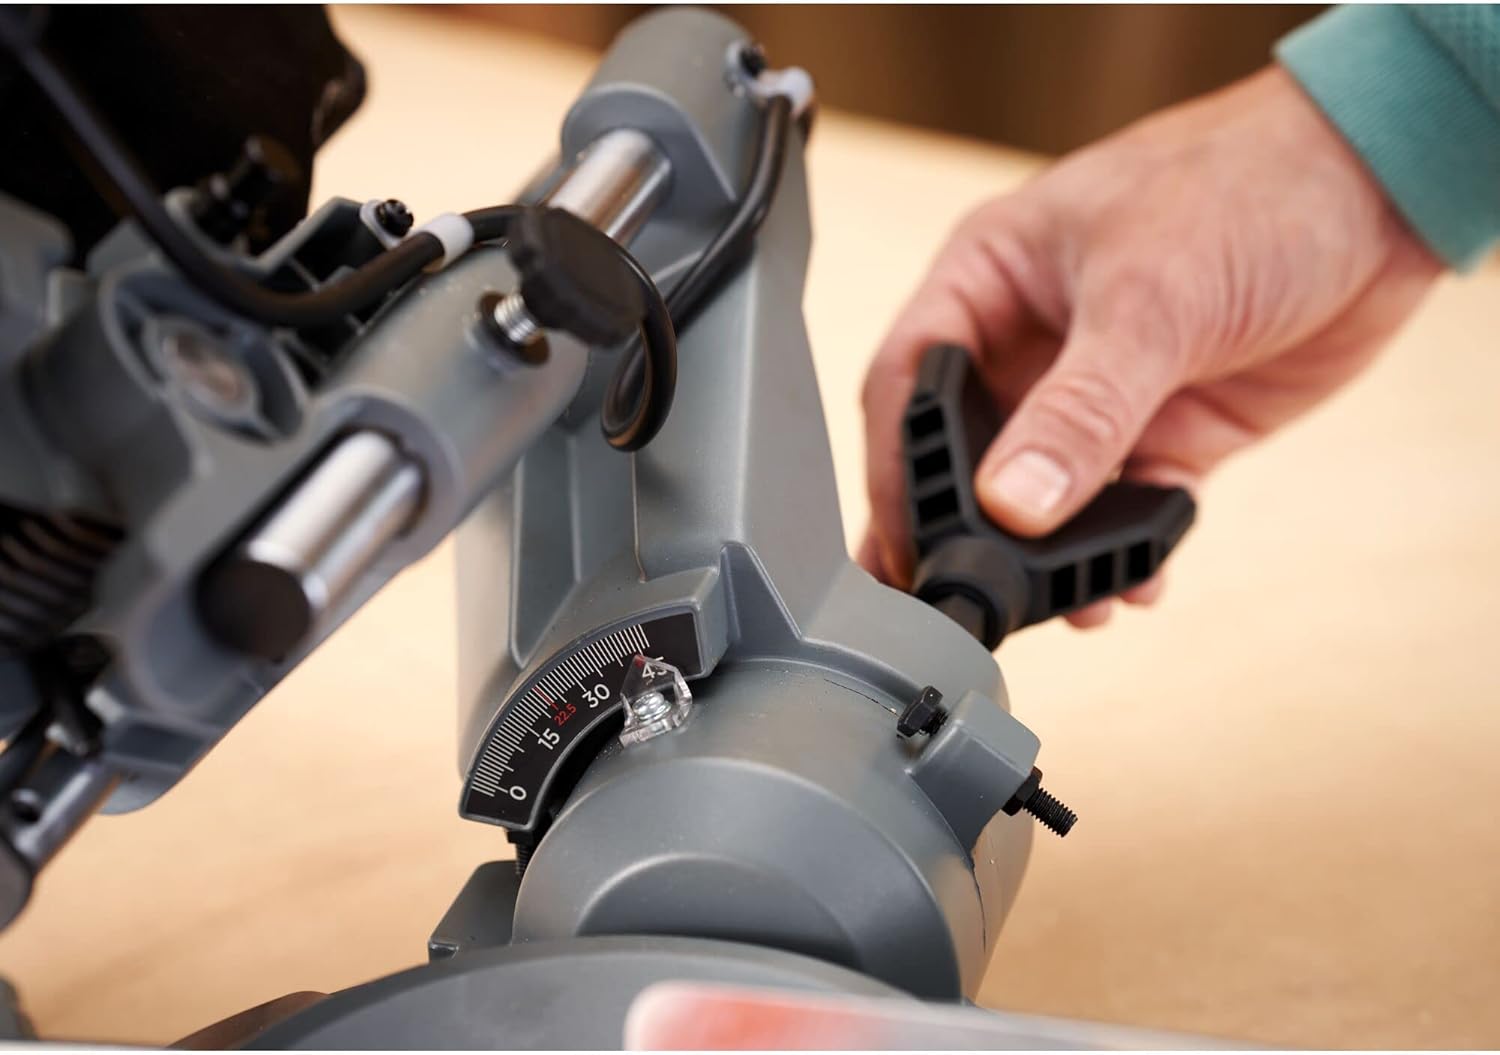
Figure 7: Adjusting the bevel angle for tilted cuts.
5.4 Securing Workpiece
Always secure the workpiece firmly before cutting:
- Place the workpiece against the fence and on the miter table.
- Даярдоо бөлүгүн колдонуңузamp to hold the material securely against the fence and table. Ensure the clamp does not interfere with the blade path.

Figure 8: Securing the workpiece with the integrated clamp туруктуулук үчүн.
5.5 Кесүү
Follow these steps for a safe and precise cut:
- Ensure the workpiece is properly secured and the desired angle is set.
- Lower the saw head slightly to align the blade with your cut line. The shadow line feature will project a clear line on the workpiece, indicating the exact cut path.
- Raise the saw head, then depress the trigger switch to start the motor. Allow the blade to reach full speed before cutting.
- Slowly and steadily lower the saw head through the workpiece. Do not force the cut.
- Кесүү аяктагандан кийин, триггердин которгучун коё берип, араанын башын көтөрүүдөн мурун бычактын толугу менен токтошуна мүмкүнчүлүк бериңиз.
- Remove the cut piece and any off-cuts from the work area.

Figure 9: The shadow line feature provides a precise guide for cutting.
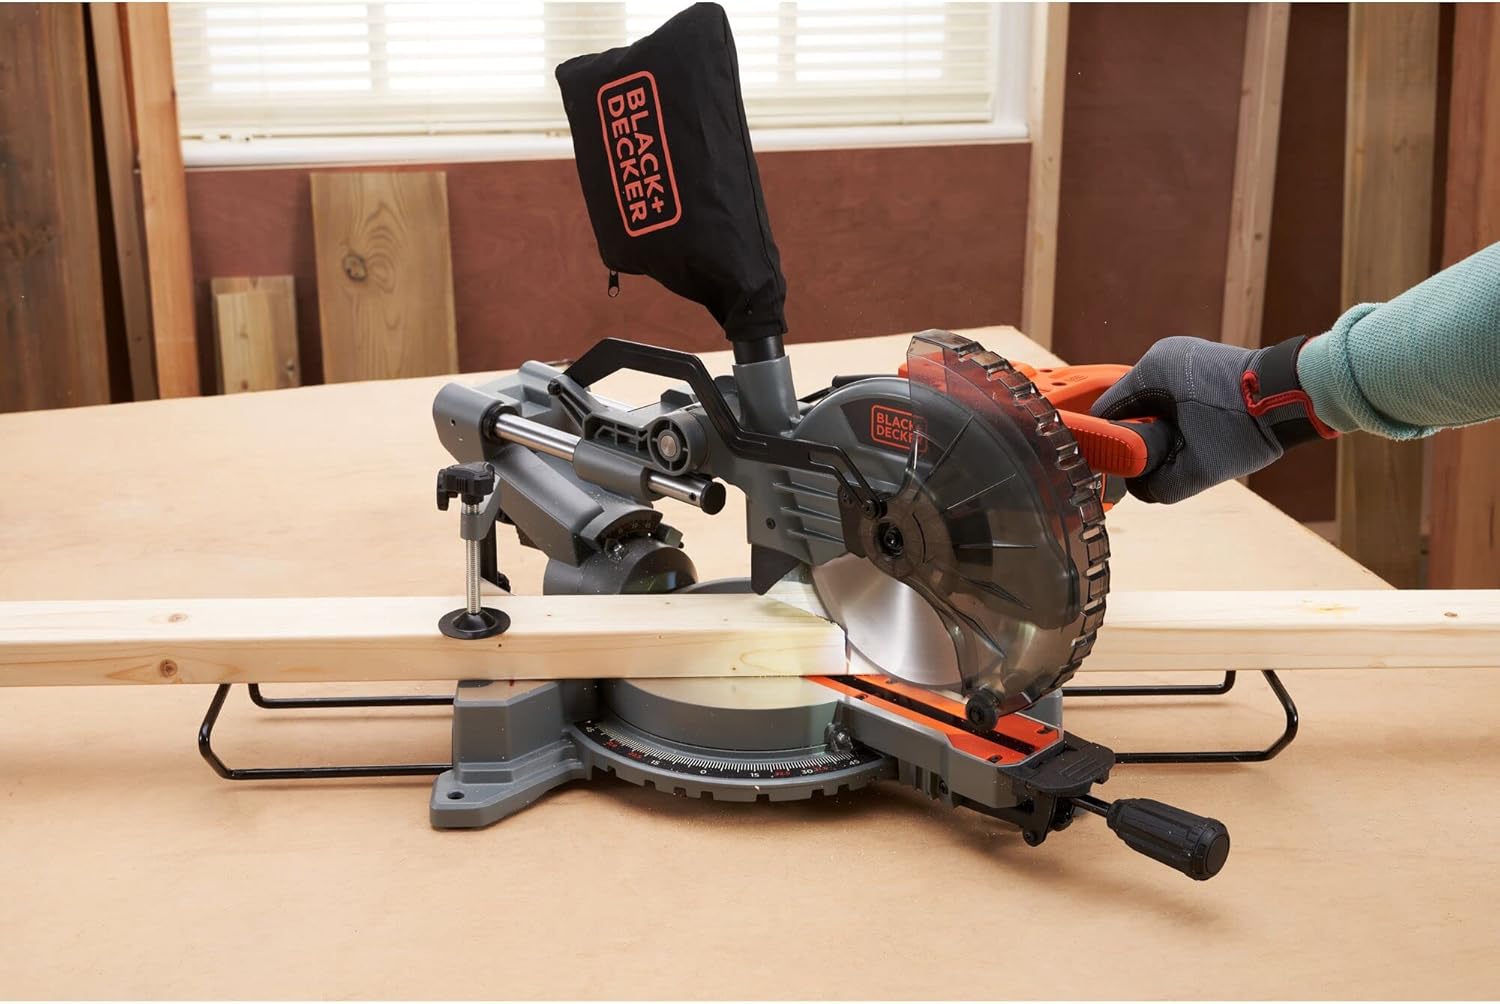
Figure 10: The miter saw in operation, demonstrating a typical cutting scenario.
6. Техникалык тейлөө
Regular maintenance ensures optimal performance and extends the life of your tool. Always disconnect the saw from the power supply before performing any maintenance.
6.1 Тазалоо
- Чаң баштыгы: Regularly empty the dust bag to maintain effective dust collection.

Figure 11: Emptying the dust bag is crucial for maintaining a clean workspace and efficient dust collection.
- Жалпы тазалоо: Use a soft brush or compressed air to clean dust and debris from the motor vents, blade guard, and miter table. Do not use solvents or abrasive cleaners.
6.2 Бычактарды текшерүү жана алмаштыруу
Inspect the saw blade regularly for sharpness, cracks, or missing teeth. A dull or damaged blade can cause kickback and reduce cutting efficiency. Replace damaged blades immediately following the procedure in Section 4.3.
6.3 Жалпы текшерүү
Check all screws and fasteners for tightness. Inspect the power cord for damage. Ensure all moving parts operate smoothly.
7. Кыйынчылыктарды
Бул бөлүмдө сиз кескич араа менен кездешүүчү кеңири таралган көйгөйлөр каралат.
| Көйгөй | Мүмкүн себеп | Чечим |
|---|---|---|
| Сау башталбайт | Электр энергиясы жок; Туура эмес өчүргүч; Мотор ашыкча жүктөө | Check power connection and circuit breaker; Contact service center if switch is faulty; Allow motor to cool down. |
| Туура эмес кесүүлөр | Miter/bevel angle not locked; Dull blade; Workpiece not secured | Ensure all locks are tightened; Replace blade; Secure workpiece firmly with clamp. |
| Ашыкча чаң | Чаң баштыгы толуп калган же туура эмес бекитилген; Чаң порту бүтөлүп калган | Empty and reattach dust bag; Clear any blockages from the dust port. |
| Бычак жумуш бөлүгүндө байлайт | Dull blade; Forcing the cut; Improper workpiece support | Replace blade; Reduce cutting speed; Ensure workpiece is fully supported and clampред. |
8. Техникалык шарттар
Technical specifications for the BLACK+DECKER BES701-QS Miter Saw:
| Өзгөчөлүк | Спецификация |
|---|---|
| Модель номери | BES701-QS |
| Күч | 1500 Ватт (айрым мүнөздөмөлөрдө 1600 Ватт көрсөтүлгөн) |
| Тtage | 230 вольт (AC) |
| Бычактын диаметри | 216 мм |
| Макс кесүү кубаттуулугу | 220 мм чейин |
| Bevel Cut Capacity | 45° чейин |
| Өлчөмдөрү (L x W x Y) | 58.6 x 45 x 37.1 см |
| Салмагы | 13.48 кг |
| Материал | Metal (body), Plastic (handle) |
| Power Source | Электр зымдары |
| Өзгөчө өзгөчөлүк | Depth Adjustment, Shadow Line |
| Камтылган компоненттер | 1 x 216 mm 24-tooth Saw Blade, 1 x Dust Bag |
| Сертификация | CE |
9. Кепилдик жана колдоо
9.1 Кепилдик маалыматы
This BLACK+DECKER BES701-QS Miter Saw comes with a Limited Warranty. Please refer to the warranty card included with your product for specific terms, conditions, and duration of coverage. Retain your proof of purchase for warranty claims.
9.2 Кардарларды колдоо
For technical assistance, spare parts, or service, please contact BLACK+DECKER customer support in your region. Contact information can typically be found on the BLACK+DECKER official webсайтында же продуктунун таңгагында.