
1. Киришүү
This manual provides essential information for the safe and efficient operation of your Cuifati 30A MPPT Solar Controller. Please read these instructions carefully before installation and use to ensure optimal performance and longevity of the product.
The Cuifati 30A MPPT Solar Controller is designed to manage the power flow from your solar panels to your battery bank, ensuring efficient charging and protecting your batteries from overcharge and over-discharge. It features an intelligent regulator compatible with 12V, 24V, 36V, and 48V systems, a built-in USB port for device charging, and an LCD digital panel for easy monitoring and parameter configuration.
2. Продукт бүтүп калдыview
2.1 Негизги өзгөчөлүктөрү
- Кеңири шайкештик: Supports 12V, 24V, 36V, and 48V battery systems.
- Integrated USB Output: Two 5V/2A USB ports for charging mobile devices.
- Акылдуу коргоо: Features protection against overcurrent, short-circuit, inverse polarity, low voltage, жана ашыкча төлөм.
- LCD дисплей: Provides real-time status and data, allowing for convenient mode switching and parameter configuration.
- Automatic System Management: Manages solar panel and battery operations automatically with a built-in industrial microcontroller.
2.2 Компоненттер
The solar controller unit includes the main control module with an LCD screen, USB ports, and terminal connections for solar panels, battery, and load. The device is housed in an engineering plastic casing designed for durability.

Сүрөт 1: Алдыңкы view of the Cuifati 30A MPPT Solar Controller, showing the LCD display, USB ports, and connection terminals.
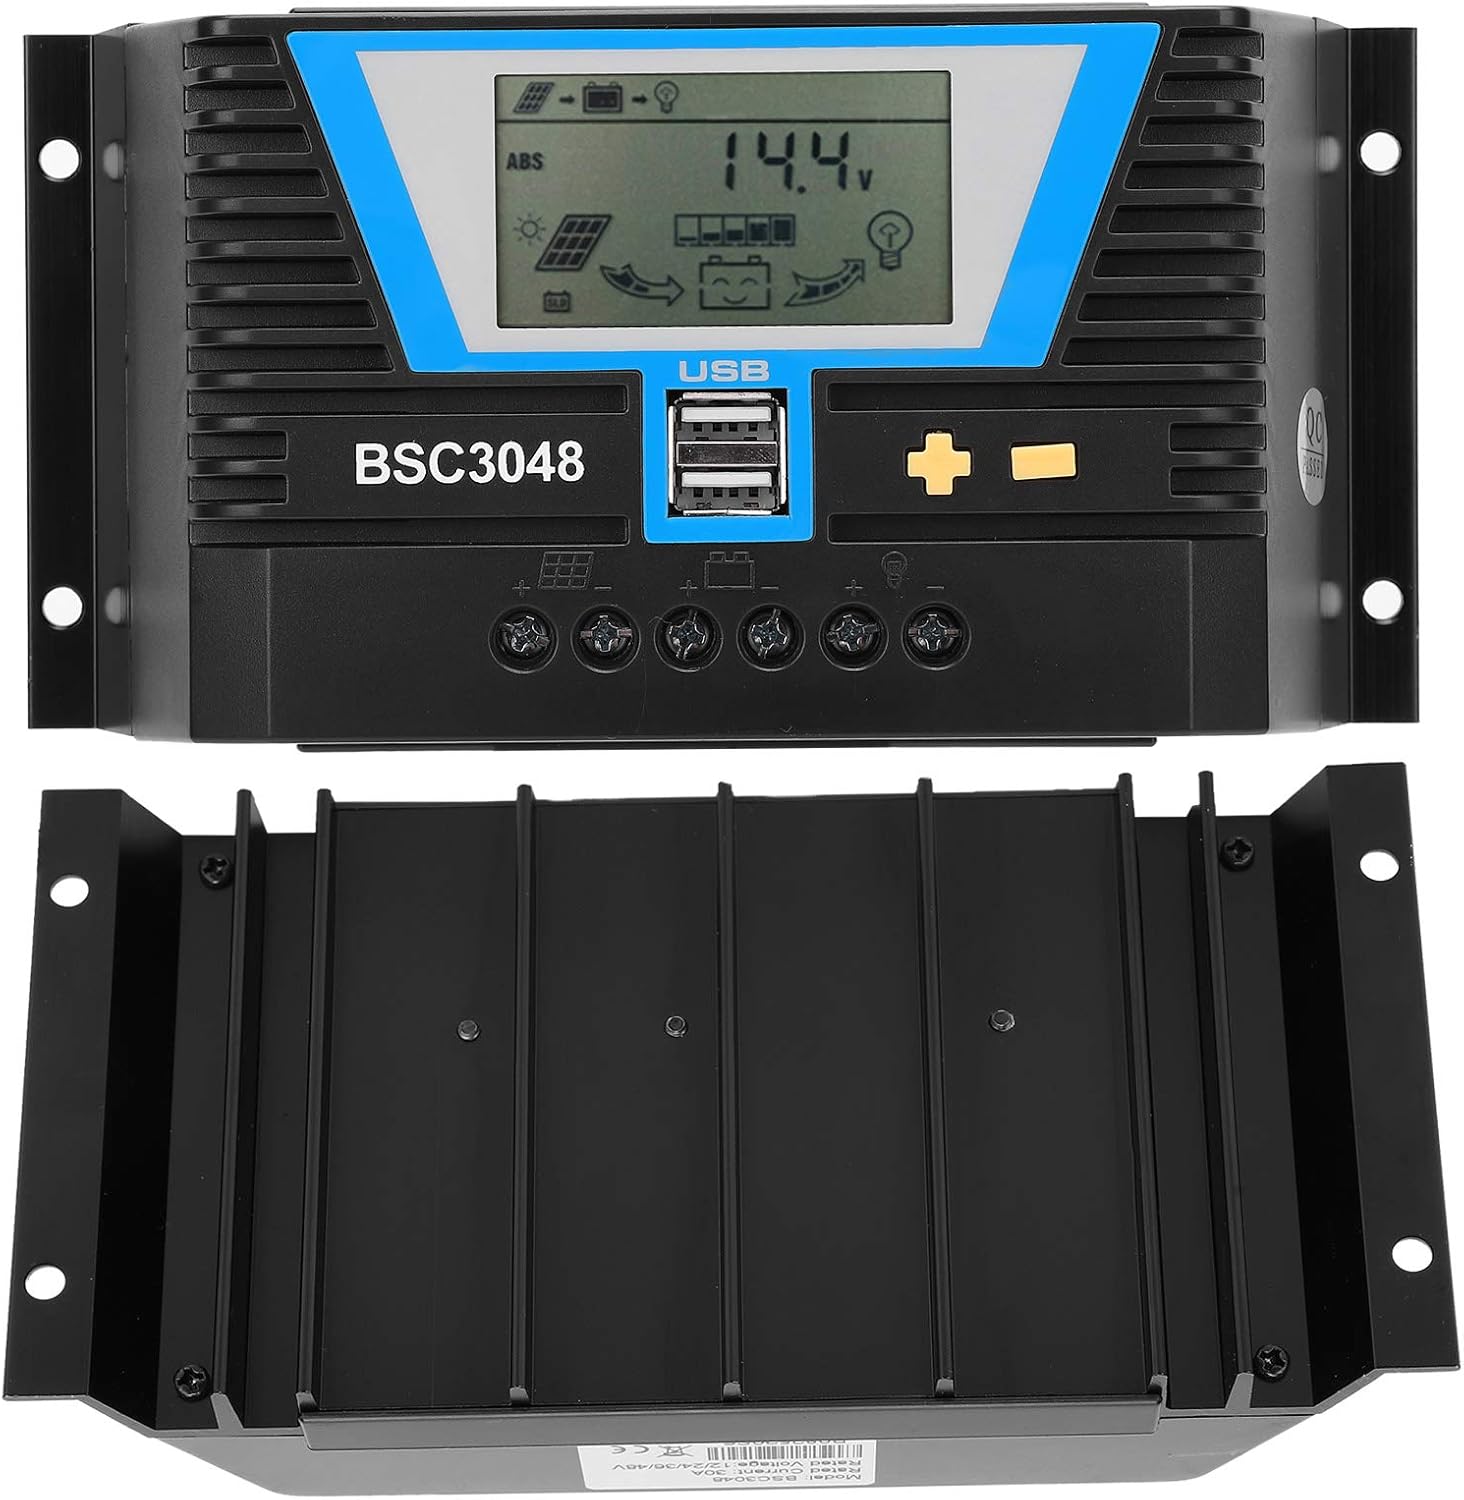
2-сүрөт: Алдыңкы жана астыңкы view of the solar controller, highlighting the heat sink fins for efficient cooling.
3. Техникалык шарттар
| Параметр | Нарк |
|---|---|
| Элемент түрү | Күн башкаруучусу |
| Материал | Инженердик пластик |
| Номиналдуу ток | 30A |
| Rated Working Voltage | 12V/24V/36V/48V (Автоматтык сезүү) |
| Solar Panel Input Voltage | ≤100V |
| Статикалык жоготуу | ≤30mA |
| Loop Pressure Drop | ≤0.3V |
| USB чыгышы | 5V/2A x 2 |
| Иштөө температурасы | -20~ +55° |
| Коргоо деңгээли | IP32 |
| Салыштырмалуу нымдуулук | ≤95%, конденсация жок |
| Терминалдын көлөмү | 6AWG/16мм² |
| Пакеттин өлчөмдөрү | 8.66 x 4.57 x 2.24 дюйм |
| Элемент Салмагы | 1.1 фунт (0.5 килограмм) |
4. Орнотуу жана орнотуу
Proper installation is crucial for the safe and efficient operation of your solar charging system. Please follow these steps carefully:
4.1 Коопсуздук чаралары
- Ensure all connections are secure and correct to prevent damage to the controller or other components.
- Always connect the battery first, then the solar panel, and finally the load. Disconnect in the reverse order.
- Install the controller in a well-ventilated area, away from direct sunlight, high temperatures, and moisture.
- Use appropriate wire gauges for all connections to minimize power loss and prevent overheating.
4.2 Туташуу кадамдары
- Батареяны туташтыруу: Connect the positive and negative terminals of your battery to the corresponding battery terminals on the solar controller. Ensure correct polarity. The LCD display should light up.
- Күн панелин туташтыруу: Connect the positive and negative terminals of your solar panel(s) to the corresponding solar panel terminals on the controller. Ensure correct polarity.
- Жүктөөнү туташтыруу (кошумча): If you are connecting a DC load directly to the controller, connect its positive and negative terminals to the load terminals on the controller.

Сүрөт 3: Жакын пландан view of the controller's connection terminals for solar panels, battery, and load.
5. Иштөө нускамалары
The Cuifati solar controller features an intuitive LCD display and control buttons for easy operation and monitoring.
5.1 ЖК дисплей жана баскычтар
The LCD screen displays various system parameters such as battery voltage, charging current, discharge current, and operating modes. The controller typically has three buttons: a 'Mode' button, a '+' button, and a '-' button.

Figure 4: The controller's LCD display and control buttons, along with a guide to basic operations.
5.2 Негизги операциялар
| Mode | Иштөө инструкциясы |
|---|---|
| Серептөө режими | Short press the "+" or "-" button to cycle through display parameters. |
| Load Switch | When the load is set to 24-hour mode, short press "+" on the main interface to toggle the load. Do not manually switch the load in other working modes. |
| Режимди коюңуз | In the settable interface, long press "+" to enter parameter setting. Short press "+" or "-" to adjust the parameter. Long press "+" again to confirm and save the parameter setting. (Long pressing "-" will not save parameters and restore to the last setting). |
| Калыбына келтирүү | Long press "+" in the ambient temperature interface to reset the controller. |
5.3 USB кубаттоо
The two 5V/2A USB ports can be used to charge compatible electronic devices such as mobile phones, tablets, and PCs. Simply connect your device using a standard USB cable.
6. Техникалык тейлөө
Regular maintenance ensures the longevity and optimal performance of your solar controller.
- Тазалык: Башкаргычты таза, чаң менен таштандылардан таза кармаңыз. Бетин кургак чүпүрөк менен сүртүңүз.
- Байланыштары: Periodically check all wire connections to ensure they are tight and free from corrosion. Loose connections can lead to power loss or overheating.
- Вентиляция: Контроллердин ысып кетишине жол бербөө үчүн, орнотуу аянтынын жакшы желдетилгенин текшериңиз.
- Экологиялык текшерүү: Verify that the controller is not exposed to excessive moisture, extreme temperatures, or direct sunlight, which can degrade its performance and lifespan.
7. Кыйынчылыктарды
If you encounter issues with your Cuifati solar controller, refer to the following common problems and solutions:
7.1 No Display on LCD Screen
- Батарея туташуусун текшерүү: Ensure the battery is correctly connected to the controller with the correct polarity. The controller draws power from the battery to operate its display.
- Батарея Voltage: Батареянын көлөмүн текшериңизtage is within the operating range (12V-48V). If the battery is completely discharged, the controller may not power on.
7.2 Батарея заряддалбай жатат
- Күн панелинин туташуу: Check if the solar panels are correctly connected to the controller with the correct polarity.
- Күн панелинин чыгышы: Ensure the solar panels are receiving sufficient sunlight and are producing voltage. Use a multimeter to check the open-circuit voltagкүн батареяларынын д.
- Контроллердин жөндөөлөрү: Verify that the battery type and charging parameters are correctly set in the controller's settings.
7.3 Load Not Working
- Туташуу жүктөө: Ensure the load is correctly connected to the controller's load terminals.
- Load Switch Setting: Check the load switch setting on the controller. If it's in a timed mode, ensure the current time is within the active period.
- Батарея Voltage: Эгерде батареянын томtage is too low, the controller may cut off the load to protect the battery.
- Ашыкча жүктөн коргоо: The controller has overload protection. Ensure the load current does not exceed the controller's rated load current.
8. Кепилдик жана колдоо
The Cuifati 30A MPPT Solar Controller comes with a 12-month warranty. For any issues or support inquiries, please contact Cuifati customer service via email. Please have your product model number (CUIFATImipqrgdwyu) and purchase details ready when contacting support.
Кошумча коргоо пландары кеңейтилген камтуу үчүн жеткиликтүү:
- 3 жылдык коргоо планы
- 4 жылдык коргоо планы
For details on these plans, please refer to your purchase documentation or contact your retailer.