Introduction
This manual provides comprehensive instructions for the POMIACAM 5-Inch 4-in-1 CCTV Monitor Tester, Model IV8W. It covers product features, setup, operation, maintenance, troubleshooting, and technical specifications. Please read this manual thoroughly before using the device to ensure proper operation and to prevent damage.
Продукт бүттүview
Негизги өзгөчөлүктөрү
- 5-inch TFT-LCD screen (800*480 resolution) for clear video display.
- Supports 4-in-1 HD video surveillance testing: AHD, TVI, CVI, and CVBS cameras up to 8MP.
- Integrated PTZ controller with Pelco-D/P protocol via RS485 interface.
- HDMI and VGA inputs for use as a monitor or for DVR/NVR debugging.
- UTP cable test functionality to display connection status and line sequence.
- DC12V 1A power output to power cameras directly.
- Built-in rechargeable battery providing up to 11 hours of continuous operation.
Кутуда эмне бар
Стандарттык пакет төмөнкүлөрдү камтыйт:
- POMIACAM 5-Inch 4-in-1 CCTV Monitor Tester (Model IV8W)
- Кубаттуу адаптер
- USB заряддоо кабели
- BNC Cables (for video connection)
- DC Power Cable
- Билек боо
- UTP Terminator Dongle (for cable testing)

Түзмөктүн жайгашуусу жана порттору
Familiarize yourself with the various ports and controls on the POMIACAM CCTV Tester.

- Кубат баскычы: Located on the top right side.
- DC12V чыгаруу: For powering external cameras.
- USB порт: For data transfer or charging.
- Аудио киргизүү/чыгыш: For audio testing.
- RJ45 Порт: For UTP cable testing.
- VGA киргизүү: Connect to VGA sources.
- HDMI киргизүү: HDMI булактарына туташуу.
- RS485 порт: PTZ башкаруу үчүн.
- Башкаруу баскычтары: Focus, Zoom, Menu, Directional Pad.
Жайгашуу
Аппаратты заряддоо
- Connect the provided power adapter to the tester's USB Charge port.
- Адаптерди стандарттуу электр розеткасына сайыңыз.
- Кубаттоо индикатору күйөт. Толук кубаттоо үчүн, адатта, 3-4 саат талап кылынат.
- Батареянын иштөө мөөнөтүн оптималдаштыруу үчүн, түзмөктү биринчи жолу колдонуудан мурун толук заряддалганын текшериңиз.
Күйгүзүү/өчүрүү
- To power on, press and hold the power button (located on the top right) until the screen illuminates.
- Өчүрүү үчүн, өчүрүү буйругу чыкканга чейин кубат баскычын басып, кармап туруңуз, андан кийин ырастаңыз.
Иштөө нускамалары
Connecting a CCTV Camera (AHD/TVI/CVI/CVBS)
- Ensure the CCTV camera is powered off.
- Connect the BNC video cable from the camera to the "VIDEO IN" port on the tester.
- If the camera requires power, connect a DC power cable from the camera to the tester's "DC12V OUT" port.
- Power on the camera and the tester. The video feed should appear on the screen.
- Use the menu to select the correct video format (AHD, TVI, CVI, CVBS) if auto-detection fails.
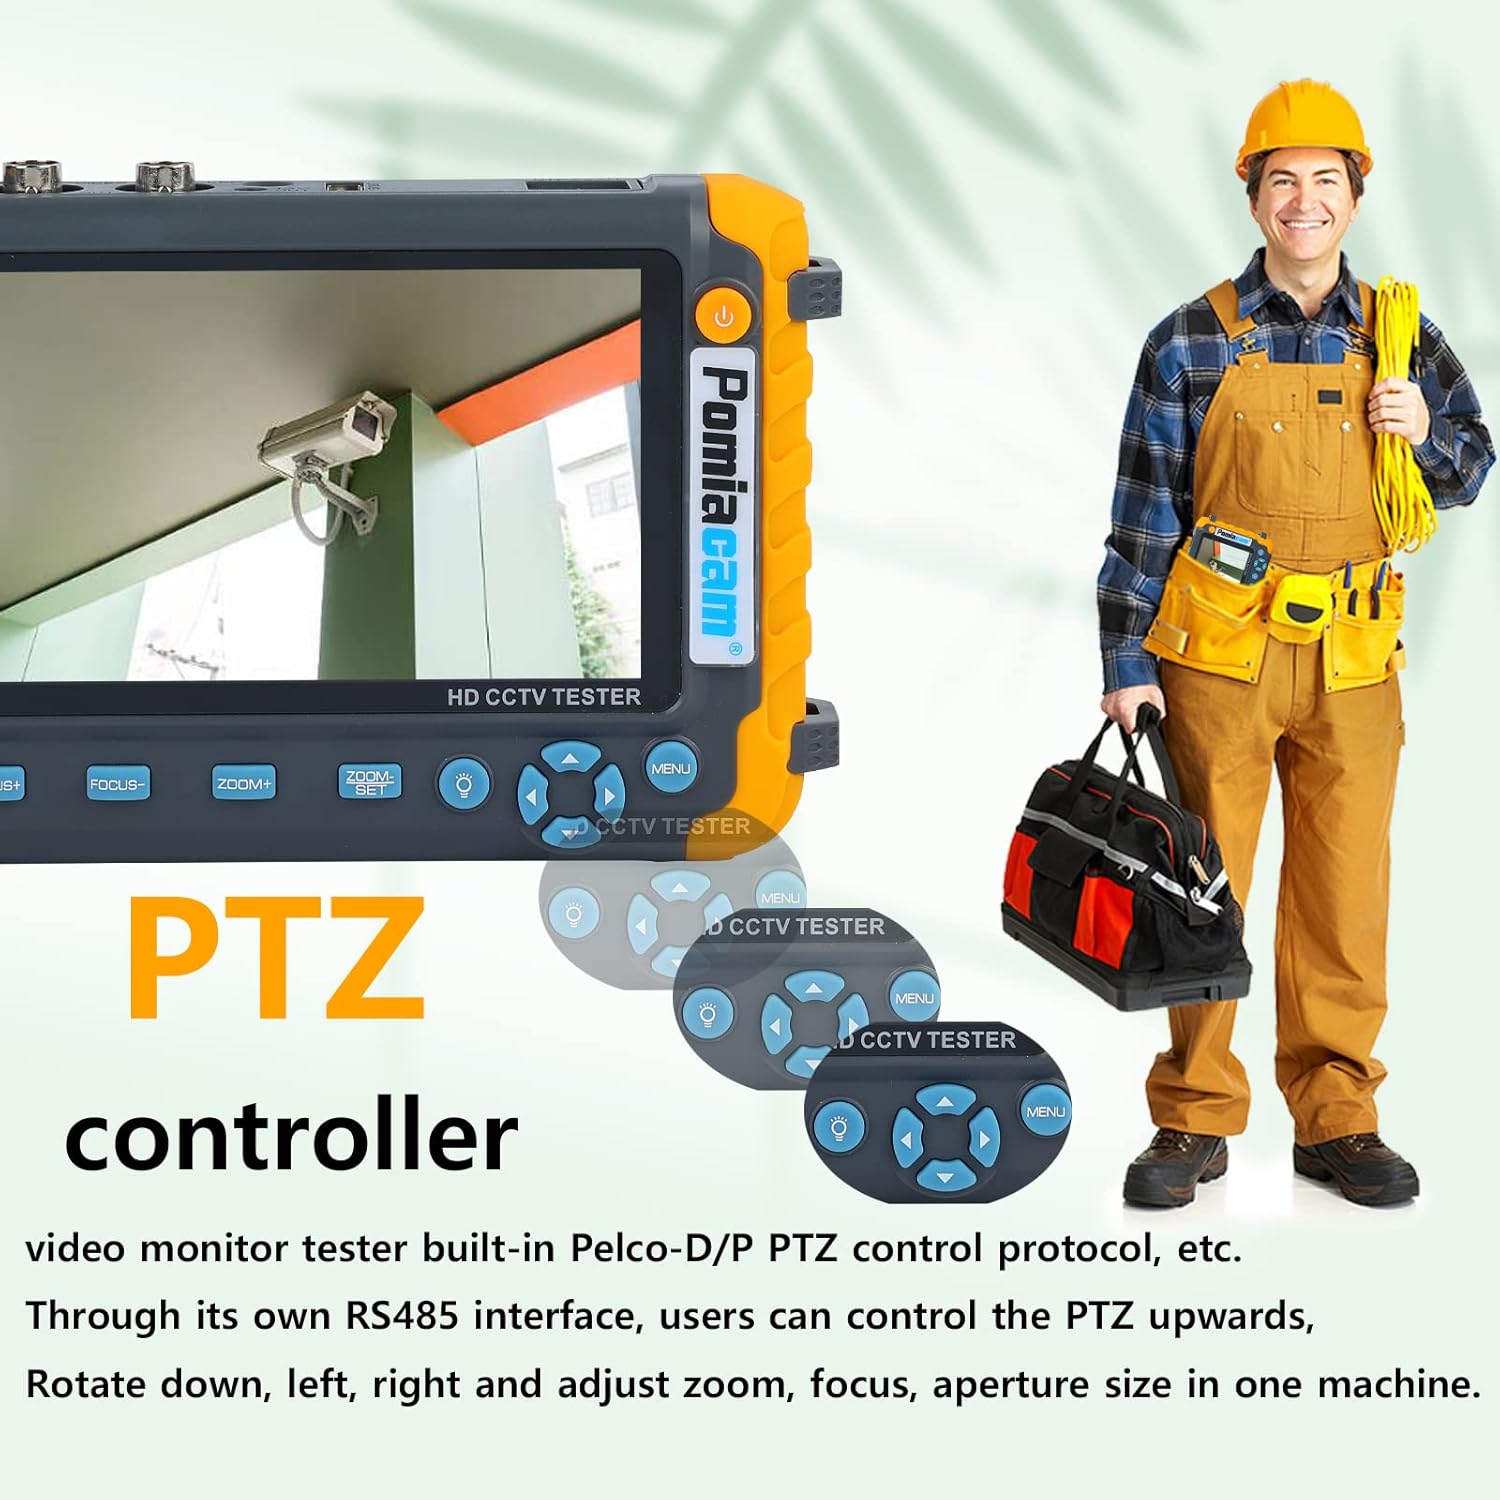
PTZ Control
The tester supports Pelco-D/P protocols for PTZ camera control.
- Connect the RS485 control wires from the PTZ camera to the tester's RS485 port.
- Access the PTZ control menu on the tester.
- Configure the camera's address and protocol settings to match the tester.
- Use the directional buttons and Focus/Zoom controls to manipulate the PTZ camera.

UTP Cable Testing
- Connect one end of the UTP cable to the RJ45 port on the tester.
- Connect the other end of the UTP cable to the provided UTP terminator dongle.
- Navigate to the UTP test function in the tester's menu.
- The screen will display the cable connection status, type, and line sequence.
HDMI/VGA Input Mode
The tester can function as a monitor for HDMI or VGA sources.
- Connect an HDMI or VGA cable from your source (e.g., DVR/NVR) to the corresponding input port on the tester.
- Use the "VGA/HDMI switch" button or menu option to select the desired input.
- The video from the external source will be displayed on the tester's screen.
Техникалык тейлөө
- Тазалоо: Аппаратты тазалоо үчүн жумшак, кургак чүпүрөктү колдонуңуз. Суюк тазалагычтарды же эриткичтерди колдонбоңуз.
- Сактагыч: Аппаратты түз күн нурунан жана экстремалдык температурадан алыс салкын, кургак жерде сактаңыз.
- Батареяга кам көрүү: Батареянын иштөө мөөнөтүн узартуу үчүн, бат-баттан батарейканы толук зарядсыздандырбаңыз. Аппаратты узак убакыт бою колдонбосо дагы, үзгүлтүксүз заряддаңыз.
- Программалык камсыздоонун жаңыртуулары: Өндүрүүчүнү текшериңиз webбардык жеткиликтүү микропрограммаларды жаңыртуу үчүн сайтка мезгил-мезгили менен кириңиз.
Проблемаларды чечүү
Видео сигнал жок
- Байланыштарды текшерүү: Ensure all video cables are securely connected to both the camera and the tester.
- Электр камсыздоо: Verify that the camera is receiving power, either from the tester's DC12V output or an external power source.
- Видео формат: Confirm that the tester's video format setting matches the camera's output (AHD, TVI, CVI, CVBS). Adjust in the menu if necessary.
- Камера функциясы: Test the camera with another known working monitor or DVR to rule out camera issues.
PTZ Control Not Responding
- RS485 туташуу: Ensure the RS485 wires are correctly connected (A to A, B to B).
- Protocol and Address: Verify that the PTZ protocol (Pelco-D/P) and camera address settings on the tester match the PTZ camera's configuration.
- Берүү ылдамдыгы: Check if the baud rate setting on the tester matches the camera's baud rate.
Батарея бат эле түгөнөт
- Толук заряд: Ensure the device is fully charged (3-4 hours) before use.
- Кубат баскычы: As noted by some users, ensure the power button is not accidentally pressed while stored, which can drain the battery.
- Экологиялык факторлор: Экстремалдуу температуралар батареянын иштешине таасир этиши мүмкүн.
- Батареянын жашы: Убакыттын өтүшү менен кайра заряддалуучу батарейкалар табигый түрдө кубаттуулугун жоготот.
Техникалык шарттар
| Өзгөчөлүк | Деталь |
|---|---|
| Дисплей | 5-inch TFT-LCD (Non-touch), 800x480 resolution |
| Видео киргизүү форматтары | AHD (up to 8MP), TVI (up to 8MP), CVI (up to 8MP), CVBS (PAL/NTSC) |
| HDMI киргизүү | Колдоого алынган |
| VGA киргизүү | Колдоого алынган |
| PTZ Control | RS485, Pelco-D/P protocol |
| UTP кабелдик сыноо | Displays connection status, type, and line sequence |
| DC Power Output | 12V 1A |
| Батарея | 1 литий-иондук батарейка (кошулган) |
| Батареянын иштөө мөөнөтү | Up to 11 hours (after 3-4 hours charge) |
| Өлчөмдөр | 8.66 x 6.93 x 3.5 дюйм (Пакет) |
| Элемент Салмагы | 1.76 фунт |
| Өндүрүүчү | POMIACAM |

Кепилдик жана колдоо
For warranty information and technical support, please refer to the official POMIACAM website or contact their customer service directly. Details are typically provided with your purchase documentation or on the manufacturer's product page.
Өндүрүүчү: POMIACAM
Webсайт: Visit the POMIACAM Store on Amazon