
MasterPRO BGMP-9137
Masterpro by Carlo Cracco PastiAmo Pasta Machine BGMP-9137 User Manual
Модел: BGMP-9137
Introduction
Thank you for choosing the Masterpro by Carlo Cracco PastiAmo Automatic Pasta Machine. This appliance is designed to simplify homemade pasta preparation, offering convenience and versatility. Please read this manual carefully before using the machine to ensure safe and optimal operation. Keep this manual for future reference.

Image: The Masterpro PastiAmo pasta machine positioned on a kitchen counter, surrounded by fresh pasta ingredients like flour, eggs, and vegetables, highlighting its integration into a home cooking environment.
Маанилүү коопсуздук нускамалары
- Колдонуудан мурун бардык нускамаларды окуп чыгыңыз.
- Мотор блогун сууга же башка суюктуктарга батырбаңыз.
- Шайманды балдар жетпеген жерде сактаңыз.
- Always unplug the machine from the power outlet before cleaning or when not in use.
- Машинаны шнур же сайгыч бузулуп иштетпеңиз.
- Иштеп жаткан учурда кыймылдуу бөлүктөргө тийбеңиз.
- Өндүрүүчү сунуштаган тиркемелерди гана колдонуңуз.
- Бул шайман тиричиликте гана колдонуу үчүн.
Продукт компоненттери
Familiarize yourself with the parts of your PastiAmo pasta machine:
- Негизги блок: Мотор жана башкаруу панели жайгашкан.
- Аралаштыруу камерасы: Transparent container for ingredients.
- Капкак: Covers the mixing chamber.
- Башкаруу панели: With LED display and function buttons.
- Extrusion Head: Where pasta dies are attached.
- Pasta Dies: Various shapes for different pasta types.
- Water Measuring Cup: For precise liquid measurement.
- Flour Measuring Cup: For precise flour measurement.
- 2-in-1 Cutting and Cleaning Tool: For cutting pasta and cleaning dies.
- Pasta Drying Rack: For drying freshly made pasta.
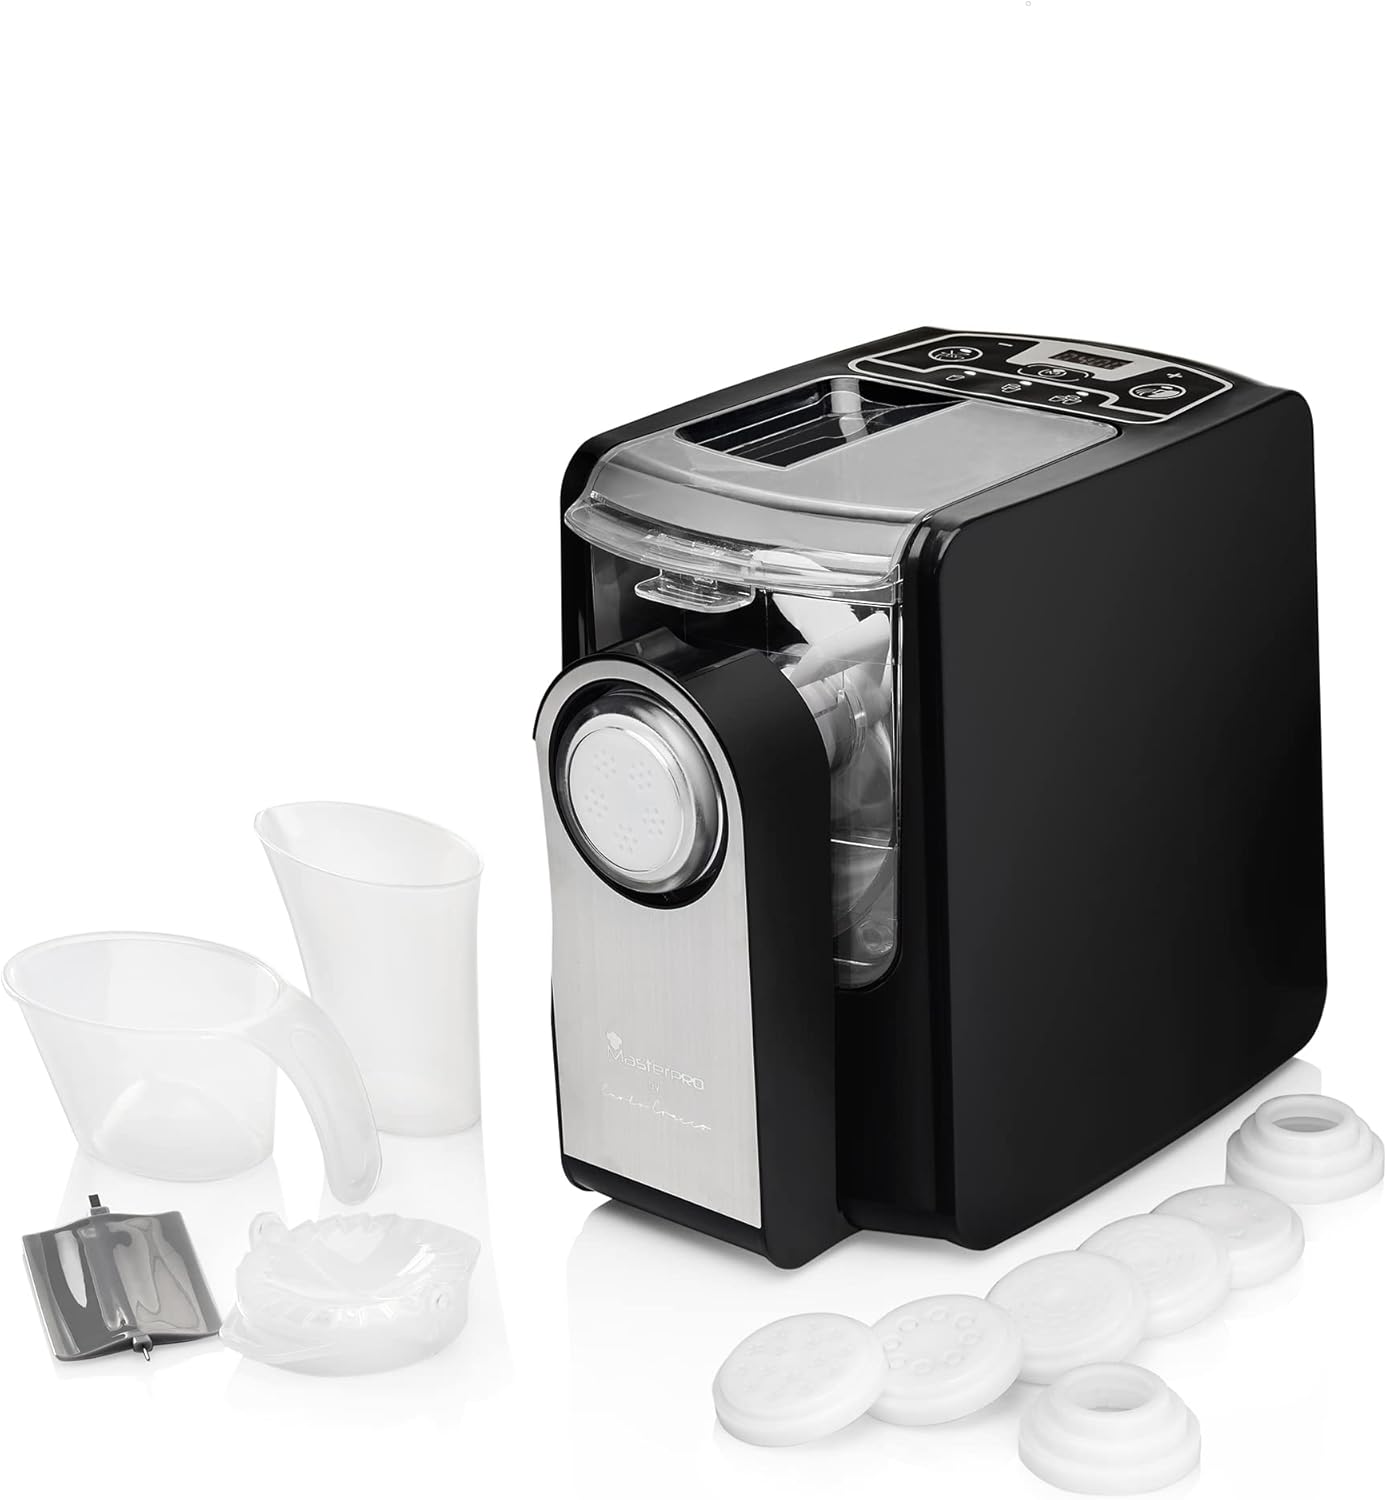
Image: The Masterpro PastiAmo pasta machine displayed alongside its complete set of accessories, including various pasta dies, measuring cups, and a cleaning tool, illustrating all included components.

Сүрөт: деталдуу view of the Masterpro PastiAmo pasta machine's accessories, including the various pasta dies and measuring cups, highlighting their design and function.
Орнотуу жана биринчи колдонуу
Таңгактан чыгаруу жана баштапкы тазалоо
- Бардык таңгактоочу материалдарды кылдаттык менен алып салыңыз.
- Wash all removable parts (mixing chamber, lid, pasta dies, measuring cups, cleaning tool) with warm, soapy water. Rinse thoroughly and dry completely.
- Негизги блокту жарнама менен сүртүңүзamp кездеме. Негизги блокту сууга салбаңыз.
Ассамблея
- Негизги блокту туруктуу, тегиз бетке коюңуз.
- Аралаштыруу камерасын негизги блокко салыңыз.
- Attach the desired pasta die to the extrusion head, then secure the extrusion head to the front of the mixing chamber.
- Place the lid onto the mixing chamber.
- Ensure all parts are correctly assembled and locked into place before plugging in the machine.
Иштөө нускамалары
Макарон жасоо
- Ингредиенттерди даярдоо: Use the provided measuring cups for precise flour and liquid (water/egg) ratios. A common ratio is 250g flour to 90-100ml liquid. Adjust based on flour type and desired consistency.
- Ун кошуу: Pour the measured flour into the mixing chamber.
- Start Kneading: Close the lid. Select the automatic kneading function on the control panel. The machine will begin mixing the flour.
- Суюктук кошуу: Slowly pour the liquid through the opening in the lid while the machine is kneading. This allows for gradual absorption and proper dough formation. The kneading process typically takes about 3 minutes. The dough should appear crumbly, like small peas.
- Экструзия: Once kneading is complete, the machine will automatically switch to extrusion mode. Pasta will begin to emerge from the die.
- Cut Pasta: Use the 2-in-1 cutting tool to cut the pasta to your desired length as it extrudes.
- Кургак макарон: Place the freshly cut pasta on the provided drying rack to prevent sticking.
- Cook Pasta: Cook fresh pasta immediately in boiling water.

Image: The Masterpro PastiAmo pasta machine actively extruding fresh pasta, which is collecting on a plate, with a pasta drying rack visible in the background, demonstrating the pasta making process.
Using Different Pasta Dies
The PastiAmo machine comes with various dies to create different pasta shapes:
- Fettuccine Disc
- Macaroni Disc
- Angel Hair Disc
- Pappardelle Disc
- Sheet Disc (for lasagna or ravioli)
- Linguine Disc
- Ravioli Mold (requires sheet pasta)
To change a die, ensure the machine is unplugged and cooled. Remove the extrusion head, replace the die, and reattach the head securely.
Note: The product title mentions a video tutorial. For detailed visual instructions on operation and specific recipes, please refer to the official Masterpro video tutorials available online.
Тазалоо жана тейлөө
Regular cleaning ensures the longevity and hygiene of your pasta machine.
Тазалоо кадамдары
- Ажыратыңыз: Тазалоодон мурун ар дайым машинаны розеткадан сууруп алыңыз.
- Бөлүп салуу: Remove the lid, mixing chamber, extrusion head, and pasta die.
- Камырдын калдыктарын алып салуу: Allow any remaining dough to dry slightly. This makes it easier to remove. Use the cleaning tool to scrape off dried dough from the mixing chamber, extrusion head, and especially the small holes in the pasta dies.
- Жуучу бөлүктөр: Wash all removable parts (mixing chamber, lid, dies, measuring cups, cleaning tool) with warm, soapy water. Rinse thoroughly.
- Толугу менен кургатуу: Ensure all parts are completely dry before reassembling or storing to prevent mold or damage.
- Таза негизги блок: Негизги блокту жарнама менен сүртүңүзamp кездеме. Абразивдүү тазалагычтарды колдонбоңуз же сууга салбаңыз.
Important: The Masterpro PastiAmo Pasta Machine is NOT dishwasher safe. Hand wash all removable parts.
Сактагыч
Store the clean and dry pasta machine and its accessories in a cool, dry place, away from direct sunlight and moisture.
Проблемаларды чечүү
| Көйгөй | Мүмкүн себеп | Чечим |
|---|---|---|
| Машина иштебейт. | Not plugged in; lid not properly closed; parts not assembled correctly. | Ensure power cord is securely plugged in. Check that the lid is fully closed and all components are correctly assembled. |
| Dough is too wet or too dry. | Incorrect flour to liquid ratio. | Adjust liquid amount. For too wet, add a small amount of flour. For too dry, add a small amount of liquid. The dough should be crumbly, not sticky. |
| Pasta does not extrude or extrudes poorly. | Dough consistency is wrong; die is clogged; extrusion head not properly secured. | Check dough consistency (should be crumbly). Clean the pasta die thoroughly. Ensure the extrusion head is securely attached. |
| Иш учурунда машина токтойт. | Overload protection activated; lid opened during operation. | Unplug the machine, wait a few minutes for it to cool down, then restart. Ensure the lid remains closed during operation. Reduce the amount of dough if consistently overloading. |
Техникалык шарттар
- Бренд: MasterPRO
- Модель номери: BGMP-9137
- Түсү: Кара
- Материал: Эритме болот
- Иштөө режими: Автоматтык
- Күч: 260 Вт
- Дисктердин саны: 6 (plus ravioli mold)
- Идиш жуугучта коопсуз: Жок
- Өндүрүүчү: Bergner
Кепилдик жана колдоо
For warranty information and customer support, please refer to the documentation provided at the time of purchase or contact MasterPRO customer service directly. Keep your proof of purchase for any warranty claims.
For additional assistance, including recipes and video tutorials, please visit the official MasterPRO webсайтка же алардын колдоо каналдарына кайрылыңыз.
Ask a question about this manual
Ask about setup, troubleshooting, compatibility, parts, safety, or missing instructions. Manuals+ will review the question and use this page’s manual context to help answer it.