
1. Киришүү
The LILYGO T-Display ESP32 Module is a compact development board featuring an ESP32 microcontroller, a 1.14-inch IPS ST7789V display, and a CH9102F USB-to-serial chip. This version includes a protective shell, making it suitable for various embedded projects requiring Wi-Fi, Bluetooth, and a small display. This manual provides essential information for setting up, operating, and maintaining your T-Display module.

Сүрөт: алдыңкы view of the LILYGO T-Display ESP32 Module with its protective shell.
2. Продукт бүтүп калдыview жана өзгөчөлүктөрү
The LILYGO T-Display ESP32 module integrates several key components for versatile development:
- Микроконтроллер: ESP32 (Xtensa dual-core LX6 microprocessor)
- Flash эстутум: 16MB
- Дисплей: 1.14-inch IPS ST7789V LCD, 135x240 resolution, 260 ppi, 4-wire SPI interface.
- Байланыш: Wi-Fi 802.11 b/g/n, Bluetooth V4.2+BLE
- USB интерфейси: Type-C, with CH9102F USB-to-serial chip.
- Электр камсыздоо: Supports USB and Li-Po battery dual power supply (JST GH 1.25mm connector).
- Onboard Functions: Two user-programmable buttons (GPIO0, GPIO35), reset button, battery power detection.
- Programming Platforms: Compatible with Arduino-IDE and MicroPython.
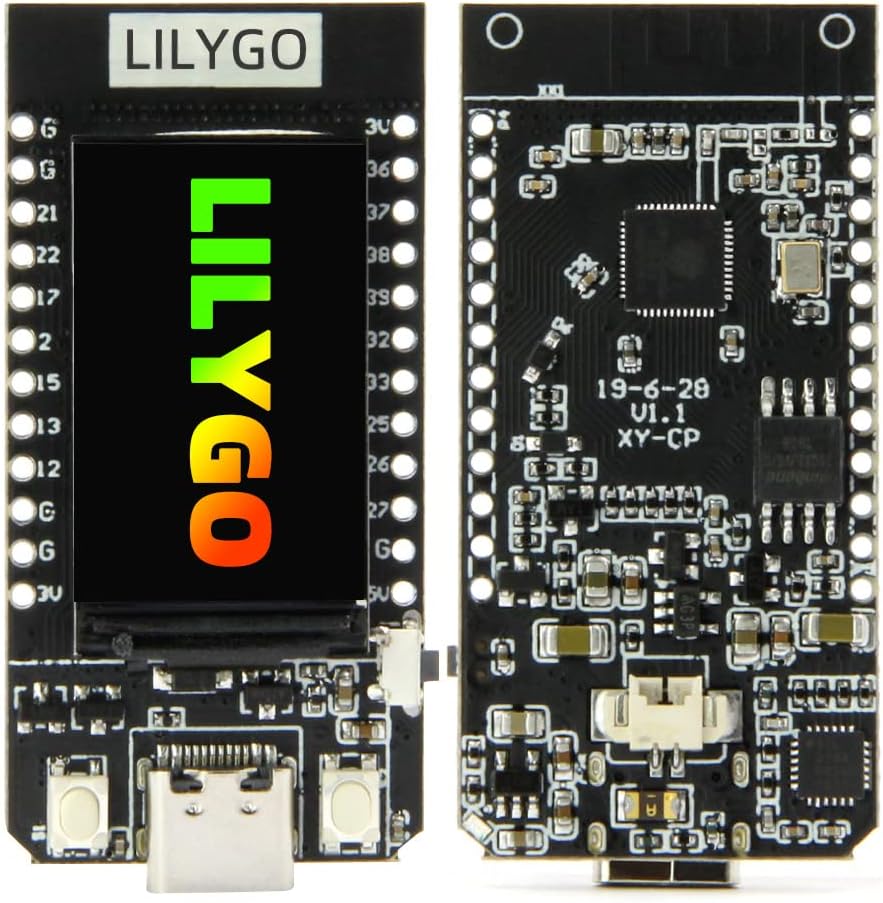
Сүрөт: алдыңкы жана арткы view of the LILYGO T-Display ESP32 module board.

Image: Diagram highlighting key features including MCU, display, and power options.
3. Кутуда эмне бар
Your LILYGO T-Display ESP32 Module package includes the following components:
- LILYGO T-Display ESP32 Development Board
- Protective Shell/Case
- Pin Headers (for optional soldering)
- Battery Connector Cable (for Li-Po battery connection)

Image: Illustration of the components included in the package: the T-Display board, battery cable, and pin headers.
4. Орнотуу
4.1 Assembling the Shell (Optional)
If your module came without the shell pre-assembled, carefully place the T-Display board into the provided protective case. Ensure the USB-C port and buttons align with the case openings.

Image: The two halves of the protective shell for the T-Display module.

Image: The T-Display module fully assembled within its protective shell.
4.2 Модулду кубаттандыруу
The T-Display module can be powered via its USB Type-C port or by connecting a compatible 3.7V Li-Po battery to the JST GH 1.25mm connector.
- USB Power: Connect a USB Type-C cable from the module to a computer or a 5V USB power adapter.
- Батарея кубаттуулугу: Connect a 3.7V Li-Po battery to the JST connector. Ensure correct polarity. The module includes a battery charging circuit.

Image: The LILYGO T-Display ESP32 module with a Li-Po battery connected via its JST connector.
4.3 Тирөөч схемасы
Refer to the pinout diagram for connecting external components and understanding the GPIO assignments.

Image: Detailed pinout diagram for the ESP32 TTGO T-Display V1.1, showing GPIOs, power pins, and display connections.
5. Иштөө нускамалары
5.1 Software Development
The LILYGO T-Display ESP32 module can be programmed using popular development environments:
- Arduino IDE: Install the ESP32 board support package in the Arduino IDE. Select the appropriate board (e.g., ESP32 Dev Module) and port.
- MicroPython: Flash MicroPython firmware to the ESP32, then use a serial terminal or IDE like Thonny to upload scripts.
For detailed programming guides, examples, and libraries, refer to the official LILYGO GitHub repository:
github.com/Xinyuan-LilyGO/TTGO-T-Display
5.2 Using the Display and Buttons
The 1.14-inch IPS display is controlled via SPI. Libraries are available for graphics and text display. The two onboard buttons (GPIO0 and GPIO35) can be programmed for user input, menu navigation, or other functions within your application.
6. Техникалык тейлөө
- Тазалоо: Use a soft, dry cloth to clean the module and display. Avoid liquid cleaners directly on the board.
- Сактагыч: Колдонулбаган учурда модулду кургак, антистатикалык чөйрөдө сактаңыз.
- Колдонуу: Avoid applying excessive force to the display or connectors. Handle the board by its edges to prevent damage to components.
- Программалык камсыздоонун жаңыртуулары: Regularly check the official GitHub repository for firmware updates and bug fixes to ensure optimal performance.
7. Кыйынчылыктарды
- Модуль күйбөйт:
- Ensure the USB-C cable is securely connected and providing power.
- If using a battery, check that it is charged and correctly connected to the JST port.
- Дисплей иштебейт:
- Verify that your code initializes the ST7789V display correctly.
- Check for any physical damage to the display or its connections.
- Жүктөө каталары:
- Ensure the correct board and COM port are selected in your IDE.
- Install the necessary USB-to-serial drivers (CH9102F).
- Sometimes pressing the boot button (if available) while uploading can help.
- Wi-Fi/Bluetooth көйгөйлөрү:
- Check your code for correct Wi-Fi/Bluetooth initialization and credentials.
- Ensure sufficient power supply for wireless operations.
For further assistance, consult the LILYGO GitHub repository or community forums.
8. Техникалык шарттар
| Өзгөчөлүк | Деталь |
|---|---|
| Бренд | ЛИЛИГО |
| Модель аты | TTGO T-Display |
| Микроконтроллер | ESP32 (Xtensa dual-core LX6 microprocessor) |
| Flash Memory | 16 MB |
| Дисплей | 1.14 Inch IPS ST7789V LCD (135x240 resolution) |
| USB интерфейси | Type-C (CH9102F chip) |
| Зымсыз байланыш | Wi-Fi (802.11 b/g/n), Bluetooth (V4.2+BLE) |
| Электр камсыздоо | USB, Li-Po Battery (JST GH 1.25mm) |
| Операциялык системанын шайкештиги | Linux (for development environment) |
| Dimensions (with shell) | L: 56.5mm, W: 31mm, H: 11mm (approximate) |

Image: Diagram showing the approximate dimensions of the LILYGO T-Display ESP32 module with its shell.
9. Кепилдик жана колдоо
For warranty information, technical support, or further inquiries, please contact LILYGO directly or visit their official website and GitHub repository. Keep your purchase receipt for warranty claims.
LILYGO Store: Visit the LILYGO Store on Amazon
GitHub Repository: github.com/Xinyuan-LilyGO/TTGO-T-Display