VBESTLIFE Vbestlifeipn0xvta9c
VBESTLIFE X79G A Mainboard User Manual
Model: Vbestlifeipn0xvta9c
1. Киришүү
This manual provides comprehensive instructions for the installation, operation, and maintenance of your VBESTLIFE X79G A Mainboard. This M ATX computer mainboard is designed for DIY computer enthusiasts, offering robust performance with support for M.2 interface, SATA2.0, Gigabit Network Card, 4xDDR3 memory slots, and 12xUSB2.0 ports. Please read this manual thoroughly before proceeding with installation to ensure proper setup and functionality.
2. Продукт бүтүп калдыview
The VBESTLIFE X79G A Mainboard is built with a PCB board for long-term stability and features a high-capacity power supply for smooth program execution. It supports a range of Intel Xeon E5 V1/V2 and Core CPUs.

Figure 2.1: VBESTLIFE X79G A Mainboard. This image displays the overall layout of the motherboard, including the LGA2011 CPU socket, four DDR3 memory slots (green), PCIe x16 slot, SATA ports, and USB headers.
2.1 Негизги өзгөчөлүктөрү
- M.2 Interface: Equipped with an NVME M.2 compatible interface, offering theoretical bandwidth up to 4GB/s.
- Durable PCB Board: Constructed with a high-quality PCB board to ensure long-term stability and prevent deformation.
- CPU колдоо: Features an X79G A server chip, supporting Intel Xeon E5 V1/V2 and Core CPUs (e.g., Xeon E5 4650, E5 2640 v2, E5 2670 v2, Core i7 3930K, i7 4960X).
- SATA 2.0 Slots: Includes SATA 2.0 slots for efficient data transfer.
- PCIe 3.0X16 Graphics Card Slot: Provides a dedicated slot for high-performance graphics cards.
- Гигабит Ethernet: Integrated Gigabit Network Card for high-speed network connectivity.
- Solid Capacitors: Utilizes all solidly state capacitors for stable power supply and enhanced stability.

Figure 2.2: All Solidly Capacitors. This image highlights the solid-state capacitors on the motherboard, which contribute to stable performance and extended lifespan.

Figure 2.3: Motherboard Interface Layout. This diagram provides a detailed view of the motherboard's various interfaces, including Front USB 2.0x2, DDR3x4 memory slots, 8PIN CPU power connector, LGA2011 CPU Slot, 24PIN motherboard power connector, SATA2.0x4, 4PIN CPU Fan Pin, M.2 NVME interface, PCIe 16X slot, Gigabit NIC x 1, and 5.1 Channel audio.
3. Орнотуу жана орнотуу
Proper installation is crucial for the optimal performance of your mainboard. Ensure you have all necessary components and tools before beginning.
3.1 Пакеттин мазмуну
- 1 x DDR3 Mainboard (with inbuilt CR2032 240mah battery)
- 1 x Металл пластина (киргизүү/чыгаруу калканы)
- 1 x Байланыш кабели (SATA кабели)
- 1 х Колдонуучунун колдонмосу (бул документ)

Figure 3.1: Mainboard and Accessories. This image shows the VBESTLIFE X79G A Mainboard alongside the included metal I/O shield and connection cable (SATA cable).
3.2 Компонентти орнотуу кадамдары
- Ишти даярдоо: Ensure your computer case is ready for motherboard installation. Install the I/O shield into the case's rear opening.
- CPU орнотуу: Carefully open the CPU socket retention arm. Align the CPU with the socket (matching the golden triangle on the CPU to the triangle on the socket) and gently place it into the LGA2011 socket. Close the retention arm to secure the CPU.
- CPU муздаткычын орнотуу: Apply thermal paste to the CPU if not pre-applied on the cooler. Mount the CPU cooler according to its specific instructions, ensuring it is securely fastened and the fan cable is connected to the CPU_FAN header on the motherboard.
- Install RAM (DDR3 Memory): Open the clips on the DDR3 memory slots. Align the memory modules with the slots, ensuring the notch on the module matches the key in the slot. Press down firmly on both ends until the clips snap into place. For dual-channel performance, install memory in matching colored slots (e.g., DIMM1 and DIMM2).
- Install M.2 NVME SSD (Optional): If using an M.2 NVME SSD, insert it into the M.2 slot at an angle, then gently push it down and secure it with the provided screw.
- Графикалык картаны орнотуу (кошумча): Open the retention clip on the PCIe 16X slot. Align your graphics card with the slot and press down firmly until it clicks into place. Secure it with a screw to the case.
- Connect Storage Drives (SATA): Connect your SATA hard drives or SSDs to the SATA2.0 ports on the motherboard using SATA data cables. Connect the power cables from your power supply to these drives.
- Кубат булагына туташтыруу: Connect the 24-pin ATX power connector from your power supply to the main 24-pin power socket on the motherboard. Connect the 8-pin CPU power connector to the 8-pin socket near the CPU.
- Алдыңкы панелдик кабелдерди туташтыруу: Connect the power button, reset button, USB ports, audio jacks, and LED indicators from your case's front panel to the corresponding headers on the motherboard. Refer to your case manual for specific pin assignments.
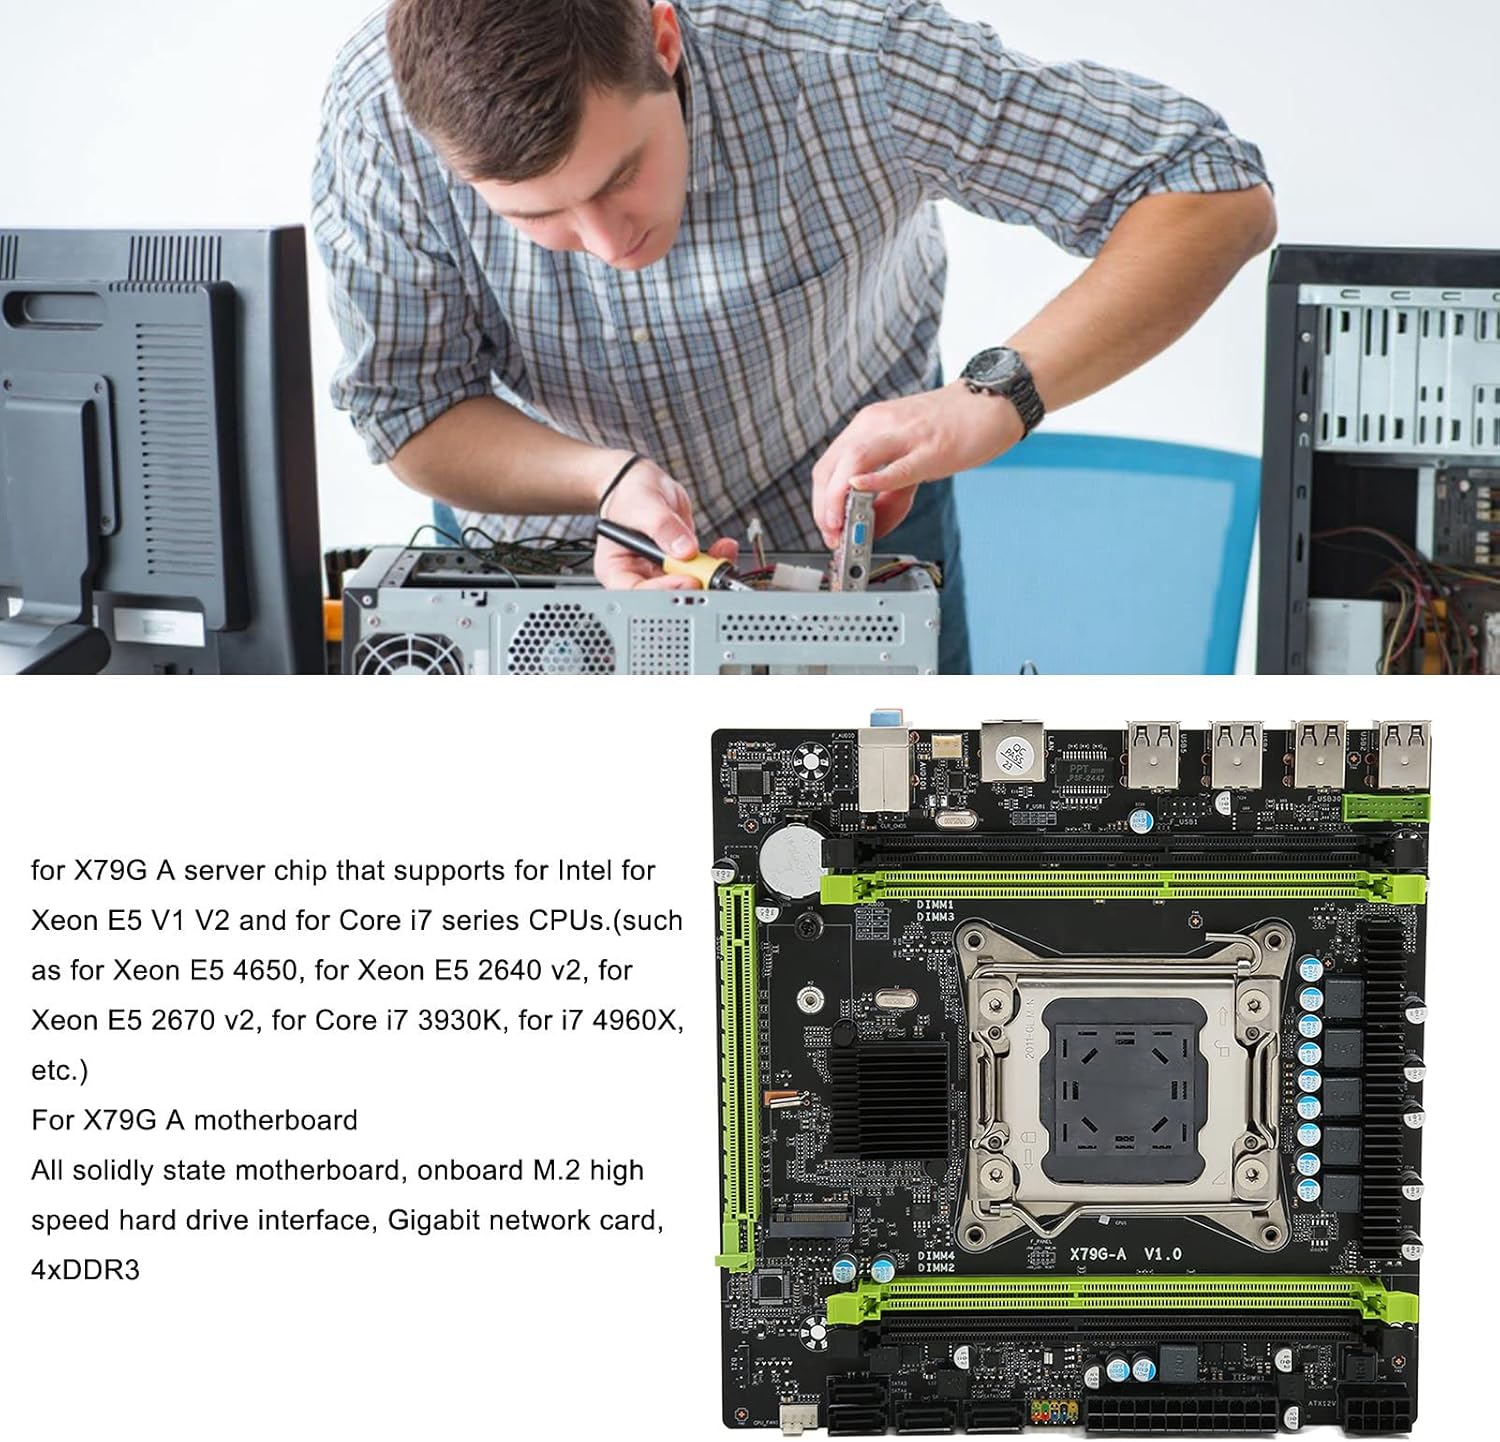
Figure 3.2: Component Installation. This image illustrates the process of installing components onto a motherboard, emphasizing careful handling and proper alignment.
4. Иштөө нускамалары
Бардык компоненттер орнотулуп, туташтырылгандан кийин, сиз тутумуңузду иштете аласыз.
4.1 Биринчи жүктөө
- Бардык электр кабелдеринин бекем туташтырылганын жана кубат менен камсыз кылуу которгучу ON абалында экенин текшериңиз.
- Компьютериңиздин корпусундагы кубат баскычын басыңыз.
- The system should boot and display the BIOS/UEFI screen or begin the operating system installation process.
4.2 BIOS/UEFI орнотуу
During the initial boot, you may need to enter the BIOS/UEFI setup to configure boot order, system time, or other settings. Typically, you can access this by pressing the DEL or F2 Баштоо учурунда баскычты кайра-кайра басыңыз.
4.3 Драйверди орнотуу
After installing your operating system, install the necessary drivers for the motherboard's chipset, network card, audio, and any other integrated components. These drivers are usually provided on a CD/DVD with the motherboard or can be downloaded from the manufacturer's webсайт.
5. Техникалык тейлөө
Regular maintenance helps ensure the longevity and stable operation of your mainboard.
- Чаңды тазалоо: Компьютериңиздин корпусун мезгил-мезгили менен ачып, энелик платадан, процессордун муздаткычынан жана башка компоненттерден чаңды кетирүү үчүн кысылган абаны колдонуңуз. Чаң абанын агымына тоскоол болуп, ысып кетишине алып келиши мүмкүн.
- Байланыштарды текшерүү: Ensure all cables (power, SATA, front panel) are securely seated. Loose connections can cause intermittent issues.
- BIOS/UEFI жаңыртуулары: Өндүрүүчүнү текшериңиз website for BIOS/UEFI updates. These updates can improve compatibility, stability, and performance. Follow the update instructions carefully to avoid damaging the motherboard.
- Component Contact Cleaning: If experiencing issues, carefully remove memory modules, the CPU, and graphics card. Gently wipe their metal contacts (the gold-plated pins) with a clean, soft eraser to remove any oxidation or residue, then reinsert them firmly.
6. Кыйынчылыктарды
If you encounter issues after installation or during operation, consider the following troubleshooting steps:
6.1 Жалпы маселелер жана чечимдер
- Дисплей жок/жүктөө жок:
- Ensure the monitor is connected to the graphics card (or integrated graphics) and powered on.
- Бардык кубат кабелдери (24-пин ATX, 8-пин CPU, GPU PCIe кубаты) коопсуз туташтырылганын текшериңиз.
- RAM модулдарын кайра орнотуңуз. Бир гана RAM модулу орнотулган абалда жүктөөгө аракет кылып көрүңүз.
- Графикалык картаны кайра орнотуңуз.
- Perform a CMOS reset (see 6.2).
- Тармакка туташуу жок:
- Ensure the Ethernet cable is properly connected to the motherboard's LAN port and your router/modem.
- Install or update the network card drivers.
- Операциялык системаңыздагы тармак жөндөөлөрүн текшериңиз.
- Үн жок:
- Ensure speakers/headphones are correctly plugged into the audio jacks.
- Install or update audio drivers.
- Check sound settings in your operating system.
- Системанын туруксуздугу/бузуулар:
- CPU жана GPU температурасын текшерүү. Адекваттуу муздатууну камсыз кылыңыз.
- Verify RAM is compatible and properly seated. Run a memory diagnostic tool.
- Бардык компоненттер үчүн жетиштүү кубаттуулукту камсыз кылыңыз.
- Update all drivers and BIOS/UEFI.
6.2 Resetting CMOS (Factory Settings)
If you experience persistent issues, resetting the CMOS (Complementary Metal-Oxide-Semiconductor) can revert BIOS settings to their factory defaults, which can resolve configuration-related problems.
- Өчүрүү: Компьютериңизди өчүрүп, кубат шнурун розеткадан сууруп алыңыз.
- Locate CMOS Battery: Find the small, coin-sized battery (CR2032) on the motherboard.
- Батареяны алып салуу: Gently remove the battery from its holder.
- Күтө туруңуз: Wait for 5-10 minutes to ensure all residual power is drained.
- Батареяны кайра салыңыз: Place the CMOS battery back into its holder, ensuring correct polarity.
- Күйгүзүү: Plug in the power cord and power on your computer. You may need to reconfigure basic BIOS settings like date and time.
7. Техникалык шарттар
Detailed technical specifications for the VBESTLIFE X79G A Mainboard.
| Өзгөчөлүк | Спецификация |
|---|---|
| Элемент түрү | DDR3 Mainboard |
| Материал | PCB |
| Motherboard Board Type | M ATX |
| Motherboard көлөмү | Approx. 190 x 190mm / 7.5 x 7.5in |
| Графикалык картанын уячасы | 1xPCIE 16X (PCIe 3.0X16) |
| Тармак картасы | Гигабит тармак картасы |
| CPU розеткасынын түрү | LGA2011 V1/V2 |
| Memory Slots саны | 4xDDR3 |
| Memory Capacity Maximum | 128 ГБ |
| Катуу диск интерфейси | 4xSATA2.0 |
| Power Connector | 1x8pin, 1x24pin |
| USB интерфейси | 12xUSB2.0 (8xUSB2.0 Rear Interface) |
| Кеңейүү интерфейси | 1xNVME M.2 Interface |
| Камтылган батарея | CR2032x1 240mah |
| Элемент Салмагы | 1.42 фунт |
| Продукциянын өлчөмдөрү | 7.5 x 7.5 x 7.5 дюйм |
8. Кепилдик жана колдоо
For warranty information and technical support, please refer to the documentation provided with your purchase or visit the official VBESTLIFE webсайт. Кепилдик дооматтар үчүн сатып алганыңыздын далилин сактаңыз.
If you require further assistance, please contact VBESTLIFE customer support through their official channels.
Ask a question about this manual
Ask about setup, troubleshooting, compatibility, parts, safety, or missing instructions. Manuals+ will review the question and use this page’s manual context to help answer it.