
1. Киришүү
This manual provides detailed instructions for the installation, operation, and maintenance of your Aqua Control FullVision 2 Digital Irrigation Timer. This device is designed to automate garden watering with two independent outlets, ensuring efficient and precise irrigation.
2. Продукт бүтүп калдыview
The Aqua Control FullVision 2 features a panoramic LCD screen for clear visibility of all programming information. It includes intuitive buttons for easy setup and control.
2.1. Компоненттер
- Main Timer Unit with LCD Display
- Control Buttons (NOW, A/B, ESC/OFF, OK, +, -, DELAY)
- Water Inlet (with 1/2" and 3/4" double thread)
- Two Independent Water Outlets (A and B)
- Battery Compartment (located on the back)
2.2. Дисплей жана башкаруу элементтери
The large LCD screen displays the current time, start time, watering duration, frequency, and next watering event. Buttons allow for navigation and setting adjustments.

1-сүрөт: Фронт view of the Aqua Control FullVision 2 Digital Irrigation Timer, showing the panoramic LCD display and control buttons. The timer has a black body with blue connectors.
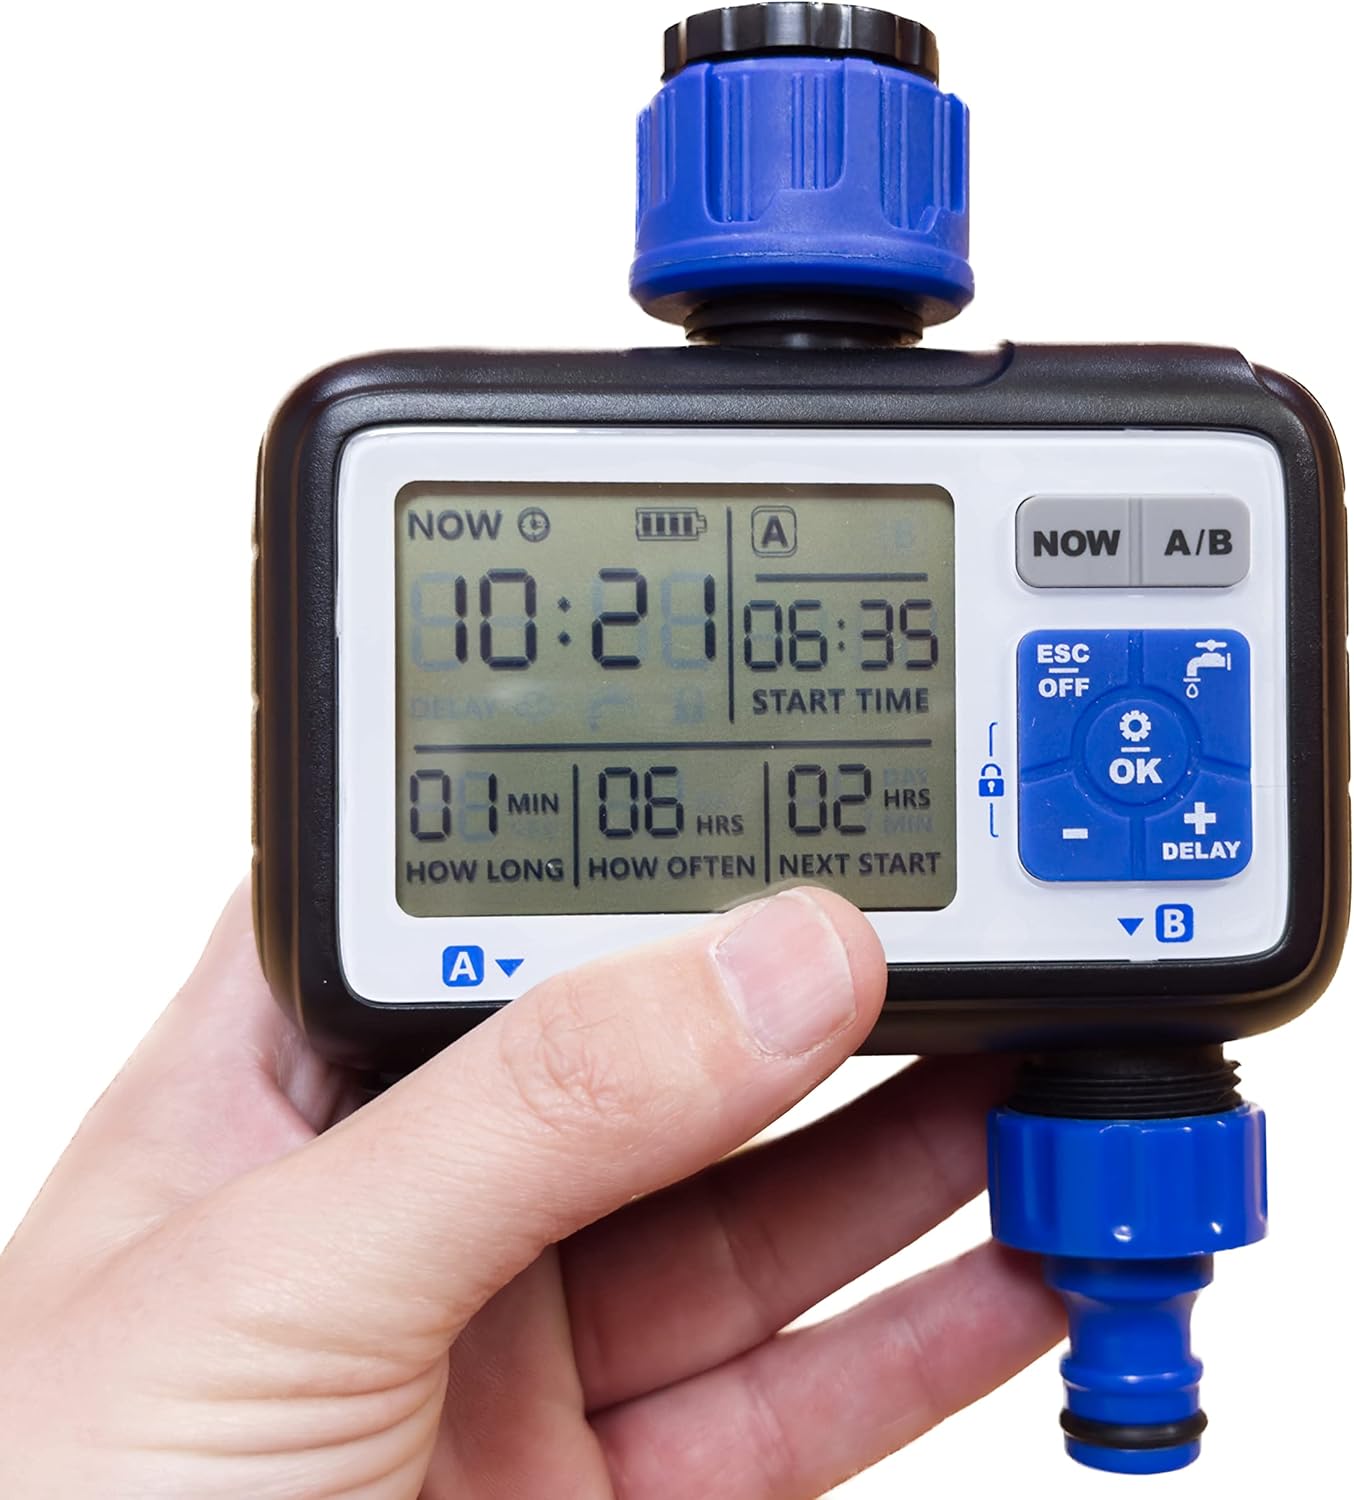
2-сүрөт: A hand holding the Aqua Control FullVision 2 timer, illustrating the size and the clear visibility of the digital display. The display shows current time, start time, duration, frequency, and next start time. A QR code is visible on the packaging in the background, linking to http://qr.altadex.com/C4115 кошумча маалымат үчүн.
3. Орнотуу
3.1. Батареяны орнотуу
- Таймердин артындагы батарея бөлүкчөсүн табыңыз.
- Бөлүмдүн капкагын ачыңыз.
- Insert two 1.5V AA alkaline batteries (not included), ensuring correct polarity.
- Батарея уясынын капкагын бекем жабыңыз.
3.2. Connecting to the Faucet
- Крандын жабылганын текшериңиз.
- The timer includes a double thread (1/2" and 3/4") for compatibility with most garden taps. Screw the timer onto your garden faucet securely by hand. Do not overtighten.
- Connect your irrigation hoses to the two independent outlets (A and B) at the bottom of the timer.

3-сүрөт: Жогорку view of the Aqua Control FullVision 2 timer, highlighting the water inlet with its universal thread connector.
4. Иштөө нускамалары
The FullVision 2 timer is designed for straightforward programming in just four steps.
4.1. Basic 4-Step Programming
After installing batteries, follow these steps to set up your watering schedule:
- Учурдагы убакытты коюу: Press the 'NOW' button. Use the '+' and '-' buttons to adjust the current hour and minute. Press 'OK' to confirm.
- Баштоо убактысын коюу: Press 'OK' to move to 'START TIME'. Use '+' and '-' to set the desired time for watering to begin. Press 'OK' to confirm.
- Узактыгы коюу: Press 'OK' to move to 'HOW LONG' (watering duration). Use '+' and '-' to set the length of each watering cycle (e.g., 15 minutes). Press 'OK' to confirm.
- Жыштык коюу: Press 'OK' to move to 'HOW OFTEN' (watering frequency). Use '+' and '-' to set how often the watering cycle repeats (e.g., every 6 hours). Press 'OK' to confirm.
The timer will now display the next scheduled watering event. You can switch between programming for outlet A and outlet B using the 'A/B' button.
4.2. Атайын функциялар
- Экран кулпусу: To prevent accidental changes, press and hold the 'OK' button until a lock icon appears on the screen. Repeat to unlock.
- Жаан кечигүү: Press the 'DELAY' button to pause the watering schedule for a set period (e.g., 24, 48, 72 hours) in case of rain. Press 'DELAY' repeatedly to cycle through options.
- Кол менен сугаруу: To initiate watering outside of the programmed schedule, press and hold the 'OK' button (without screen lock) until manual watering begins. This will not alter your existing program.
- Батареяны үнөмдөө режими: The timer automatically enters a low-power mode when inactive to conserve battery life.
- Өчүрүү: Press the 'ESC/OFF' button to turn off the timer. Press it again to turn it back on.
5. Техникалык тейлөө
- Тазалоо: Таймердин сыртын мезгил-мезгили менен жумшак,amp кездеме. Абразивдүү тазалагычтарды колдонбоңуз же аппаратты сууга салбаңыз.
- Батареяны алмаштыруу: Экранда батареянын заряды аз калганын көрсөткөн индикатор пайда болгондо, батареяларды алмаштырып, үзгүлтүксүз иштешин камсыз кылыңыз.
- Кыштоо: Before freezing temperatures, disconnect the timer from the faucet, remove batteries, and store the unit indoors in a dry, frost-free location.
6. Кыйынчылыктарды
- Суу агымы жок:
- Кран толугу менен ачык экенин текшериңиз.
- Check if the timer is programmed correctly and not in 'OFF' mode or 'Rain Delay'.
- Verify that batteries are installed correctly and have sufficient charge.
- Дисплей иштебейт:
- Батареяларды жаңысына алмаштырыңыз.
- Батареянын полярдуулугу туура экенин текшериңиз.
- Туура эмес сугаруу убактысы:
- Re-check your programming settings for current time, start time, duration, and frequency.
- Ensure the screen is not locked, preventing changes.
7. Техникалык шарттар
| Өзгөчөлүк | Спецификация |
|---|---|
| Модель номери | C4115 |
| Өлчөмдөр | 14 x 15 x 6 см |
| Салмагы | 418 г |
| Материал | Чайыр, Пластмасса |
| Экран түрү | LCD |
| Power Source | 2 x 1.5V AA Batteries (not included) |
| Суу түтүктөрү | 2 Көз карандысыз |
| Кранды туташтыруу | 1/2" and 3/4" Double Thread |
8. Кепилдик жана колдоо
For warranty information, please refer to the documentation included with your product or contact Aqua Control customer support. Additional product information and support may be available via the manufacturer's website or by scanning the QR code found on the product packaging: http://qr.altadex.com/C4115.