
1. Киришүү
This manual provides essential information for the safe and efficient operation of your YIHUA 948DB+ II Digital Soldering Station Kit. Please read these instructions carefully before use and retain them for future reference.
2. Коопсуздук чаралары
WARNING: Always observe basic safety precautions when using electrical appliances to reduce the risk of fire, electric shock, and personal injury.
- кубат менен камсыз кылуу Voltagталаптар (110-240V).
- Ширетүүчү түтүндү дем алуудан сактануу үчүн жакшы желдетилген жерде колдонуңуз.
- Do not touch the hot soldering iron tip or heated components.
- Always place the soldering iron in its holder when not in use.
- Балдар жетпеген жерде сактаңыз.
- Disconnect from power when not in use or before cleaning/maintenance.
- Эгерде шайман же электр шнуру бузулган болсо, аны иштетпеңиз.
3. Пакеттин мазмуну
Пакетиңизде бардык буюмдар бар экенин текшериңиз:
- 1 x YIHUA 948DB+ II Main Unit
- 1 x Soldering Iron Holder
- 3 x Soldering Tips (T12 compatible)
- 1 x Кубат кабели

Сүрөт: бүттүview of the YIHUA 948DB+ II Digital Soldering Station Kit, showing the main unit, soldering iron, and holder.
4. Продукциянын өзгөчөлүктөрү
- Тез жылытуу: Heats to 800°F (427°C) in approximately 5 seconds.
- Жөнгө температурасы: Range from 392°F to 1000°F (200°C to 538°C).
- PID Program Control: Maintains stable and accurate temperature.
- Компакт дизайн: Main unit dimensions of 11.9 x 9.4 x 4.3 cm (4.7 x 3.7 x 1.7 inches).
- °F/°C Айландыруу: Easily switch between Fahrenheit and Celsius display.
- Уйку режими: Reduces tip wear when idle (adjustable 5/10/30 min).
- Автоматтык өчүрүү: Enhances safety, activates 30 minutes after sleep mode.
- 3 Preset Channels: Quick access to frequently used temperature settings.
- Температураны калибрлөө: Allows for precise temperature correction.
- Quick-Change Tip Design: Easy extraction and insertion of soldering tips.
- Accurate Temperature Feedback: Sensor located close to the tip for precise readings.

Image: Illustration of the fast and accurate T12 compatible soldering tip design.
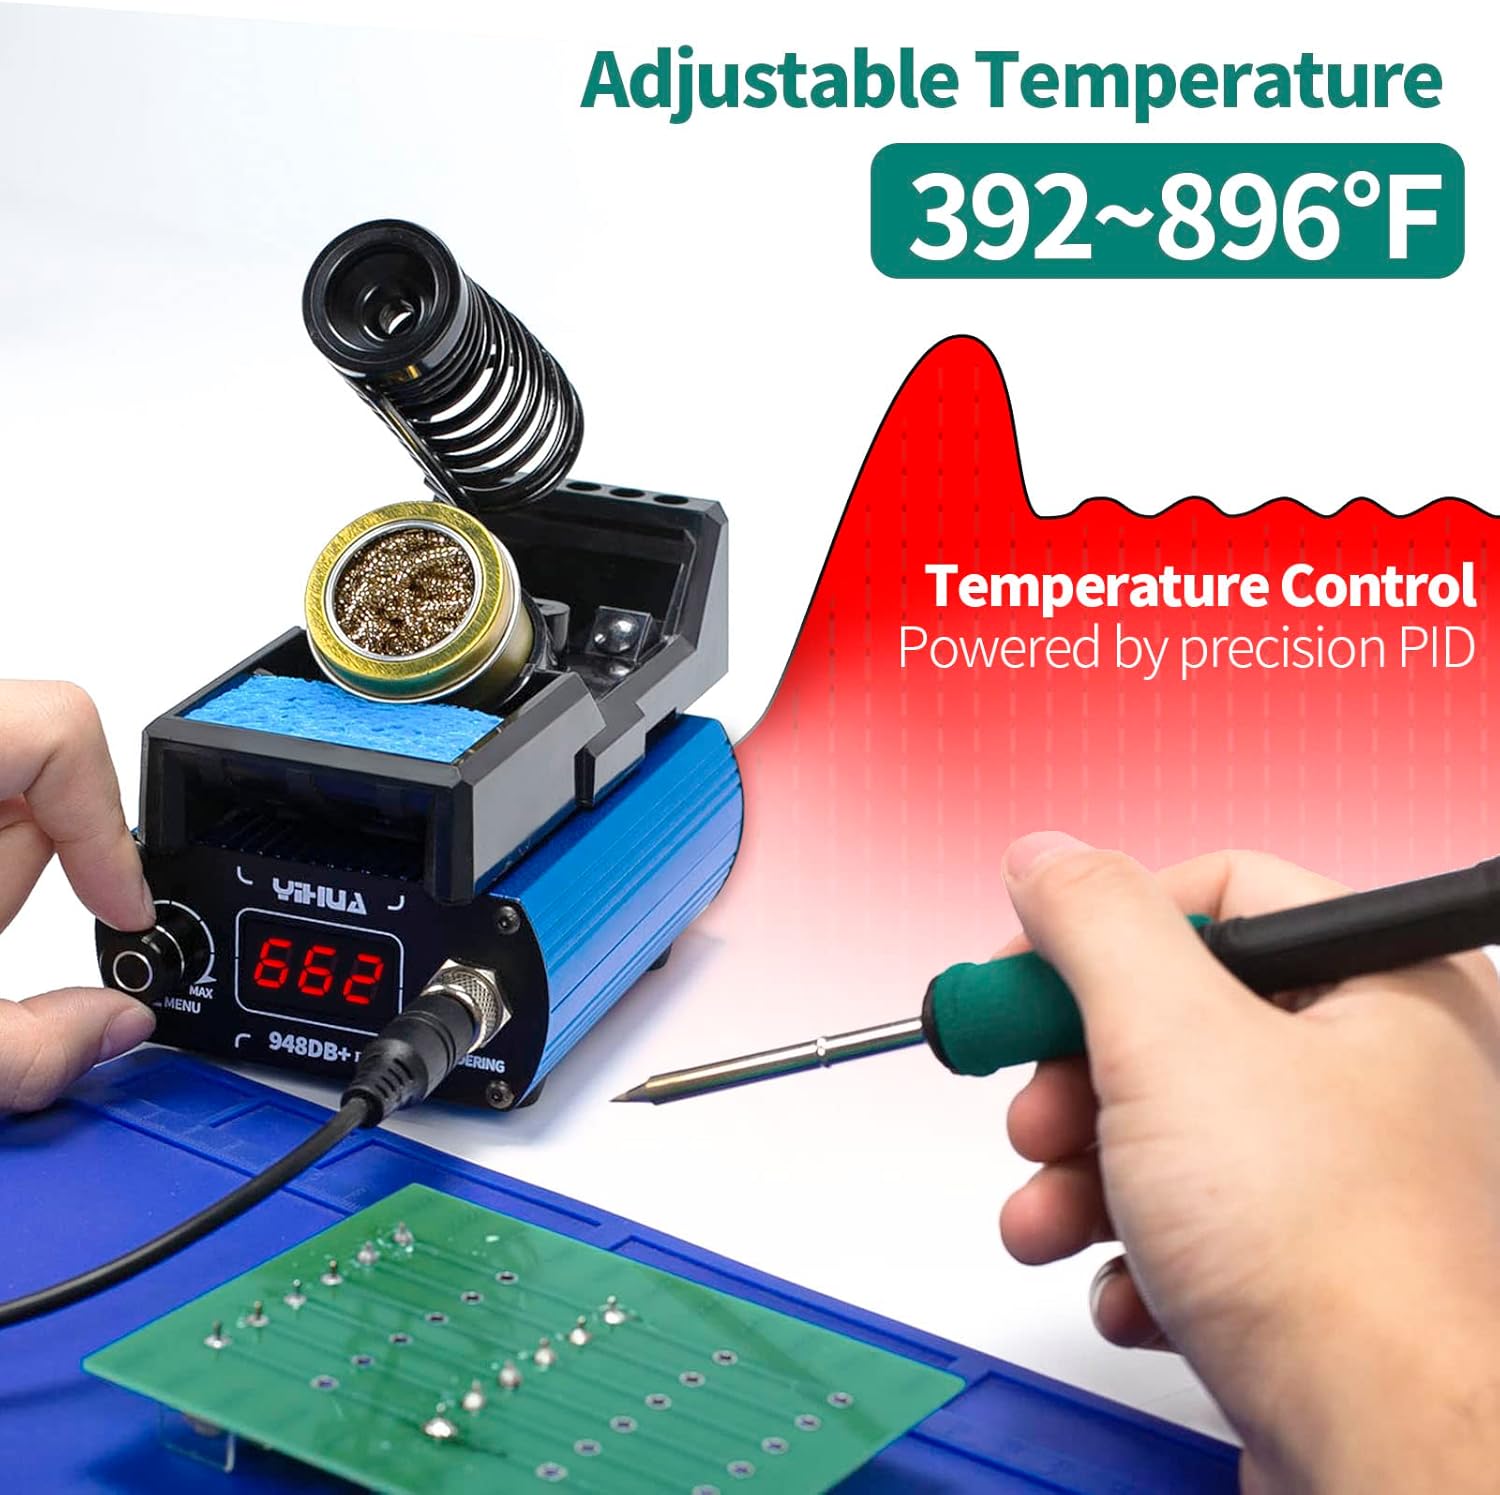
Image: Display showing adjustable temperature control powered by precision PID.

Image: Visual representation of the sleep mode and automatic shutdown functions.

Image: Display showing three preset temperature channels (CH1, CH2, CH3).
5. Орнотуу
- Таңылганын ачуу: Бардык компоненттерди таңгактан кылдаттык менен алып салыңыз.
- Жайгашкан жери: Негизги блокту туруктуу, ысыкка чыдамдуу бетке коюңуз.
- Ширетүүчү темирди туташтыруу: Insert the soldering iron's connector into the "SOLDERING" port on the main unit.
- Attach Iron Holder: Secure the soldering iron holder to the main unit using the provided screw, if applicable, or place it securely next to the unit.
- Ширетүүчү учту салыңыз:
- Ensure the soldering iron is cool.
- Gently insert the desired T12 compatible soldering tip into the soldering iron handle until it is fully seated. Refer to the image below for correct insertion.

Image: Step-by-step guide on how to correctly insert and extract a soldering iron tip.
- Кубат туташуу: Connect the power cable to the main unit and then to a suitable electrical outlet (110-240V).
6. Иштөө нускамалары
6.1 Күйгүзүү/өчүрүү
- To power on, press the power switch. The display will illuminate.
- Өчүрүү үчүн, кубат баскычын кайра басыңыз.
6.2 Температураны орнотуу
- Кол менен жөндөө: Rotate the adjustment knob (MIN/MAX/MENU) to increase or decrease the desired temperature. The display will show the set temperature.
- Using Preset Channels: Press the adjustment knob to cycle through the 3 preset temperature channels (CH1, CH2, CH3). Each channel can be pre-configured for specific temperatures.

Image: A user operating the soldering station, demonstrating the temperature display and soldering process.
6.3 °F/°C Conversion
To switch between Fahrenheit and Celsius display, refer to the specific instructions in the full manual (usually involves a long press or combination of button presses on the adjustment knob).

Image: Display showing the Fahrenheit to Celsius conversion function.
6.4 Sleep Mode and Automatic Shutdown
- The unit will enter sleep mode after a period of inactivity (default or user-set 5/10/30 minutes). The display will indicate "SLP".
- After 30 minutes in sleep mode, the unit will automatically shut down for safety.
- To wake from sleep mode, simply pick up the soldering iron or press any button.
6.5 Температураны калибрлөө
If the displayed temperature does not match the actual tip temperature (verified with a thermometer), the unit can be calibrated. Refer to the full manual for detailed calibration steps, which typically involve entering a calibration mode and adjusting the offset.

Image: A user performing temperature calibration on the soldering station using an external thermometer.
7. Техникалык тейлөө
- Кеңеш тазалоо: Regularly clean the soldering tip using the included brass wool tip cleaner or a damp sponge. This helps maintain tip performance and longevity.
- Калайлоо үчүн кеңеш: Always tin the tip with a small amount of solder before storing and after cleaning to prevent oxidation.
- Алмаштыруу кеңештери: Ensure the iron is cool before replacing tips. Follow the tip insertion steps outlined in Section 5.
- Агрегатты тазалоо: Wipe the main unit with a soft, dry cloth. Do not use abrasive cleaners or solvents.

Image: Close-up of the soldering iron holder, showing the tip cleaner (brass wool) and cleaning sponge.
8. Кыйынчылыктарды
| Көйгөй | Мүмкүн себеп | Чечим |
|---|---|---|
| Түзмөк күйбөйт. | No power supply; faulty power cable. | Check power connection; try a different outlet; inspect power cable for damage. |
| Паяным темир ысыбайт. | Iron not properly connected; faulty heating element/tip; incorrect temperature setting. | Ensure iron is fully plugged in; check tip insertion; increase temperature setting. |
| Temperature unstable or inaccurate. | Tip not fully inserted; need for calibration. | Ensure tip is fully seated; perform temperature calibration (refer to Section 6.5). |
| Solder not melting easily. | Temperature too low; oxidized tip. | Increase temperature; clean and re-tin the soldering tip. |
9. Техникалык шарттар
| Өзгөчөлүк | Деталь |
|---|---|
| Модель номери | YIHUA 948DB+ II |
| Бренд | YIHUA |
| Тtage | 110 вольт |
| Ватtage | 75 ватт |
| Температура диапазону | 392°F - 1000°F (200°C - 538°C) |
| Температуранын туруктуулугу | Stable (PID controlled) |
| Дисплей түрү | LCD |
| Каналдардын саны | 3 Алдын ала коюлган каналдар |
| Продукциянын өлчөмдөрү (Негизги бирдик) | 11.9 см (D) x 9.4 см (W) x 4.3 см (H) |
| Продукт Салмагы | 1.02 килограмм |
| Камтылган элементтер | Main unit, soldering iron holder, 3 T12 tips, power cable |

Image: Diagram showing the dimensions of the main unit and the soldering iron.
10. Кепилдик жана колдоо
YIHUA provides a 12-month manufacturer's technical coverage in the USA and 24/7 professional assistance. For warranty claims or technical support, please contact YIHUA customer service through the platform of purchase or visit the official YIHUA webсайт.
This model is designed to operate with 110-240V power supply and comes with a standard US power plug.