1. Киришүү
Thank you for choosing the COUGAR MX360 RGB Mid Tower Case. This manual provides essential information for the proper installation, operation, and maintenance of your new PC case. The MX360 RGB combines a sleek design with ARGB LED strips on the front panel, offering excellent cooling performance and support for a wide range of components, including up to a 360mm radiator, 315mm graphics cards, and 170mm CPU coolers. Its compact layout and full-length PSU shroud contribute to a clean and organized build.
2. Коопсуздук маалыматы
- Компоненттерди орнотуудан же алып салуудан мурун ар дайым кубат менен жабдууну розеткадан ажыратыңыз.
- Handle components with care to avoid damage from static electricity. Consider using an anti-static wrist strap.
- Майда тетиктерди жана бурамаларды балдардан алыс кармаңыз.
- Ашыкча ысып кетүүнүн алдын алуу үчүн корпустун айланасында туура желдетүүнү камсыз кылыңыз.
- Корпусту же анын бөлүктөрүн өзгөртүүгө аракет кылбаңыз, анткени бул сиздин кепилдикти жокко чыгарып, коопсуздукка коркунуч келтириши мүмкүн.
3. Пакеттин мазмуну
Сиздин пакетиңизде төмөнкү нерселердин бардыгы камтылганын текшериңиз:
- COUGAR MX360 RGB Mid Tower Case
- Кошумча кутуча (бурамаларды, тирөөчтөрдү, кабель байлагычтарды ж.б. камтыйт)
- Колдонуучунун Колдонмосу (бул документ)
4. Продукт бүтүп калдыview
The COUGAR MX360 RGB case features a minimalist design with integrated ARGB lighting and a tempered glass side panel for showcasing your build.

4.1-сүрөт: алдыңкы жагы view of the COUGAR MX360 RGB case, showing the interior and active RGB lighting.
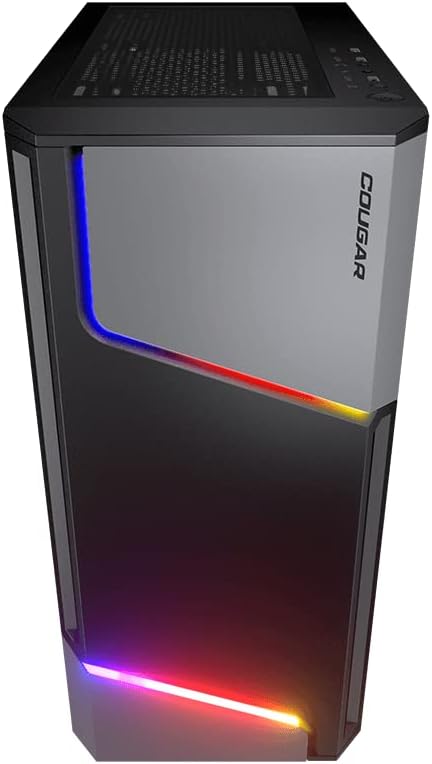
Сүрөт 4.2: Алдыңкы view of the COUGAR MX360 RGB case, highlighting the integrated ARGB LED strips.
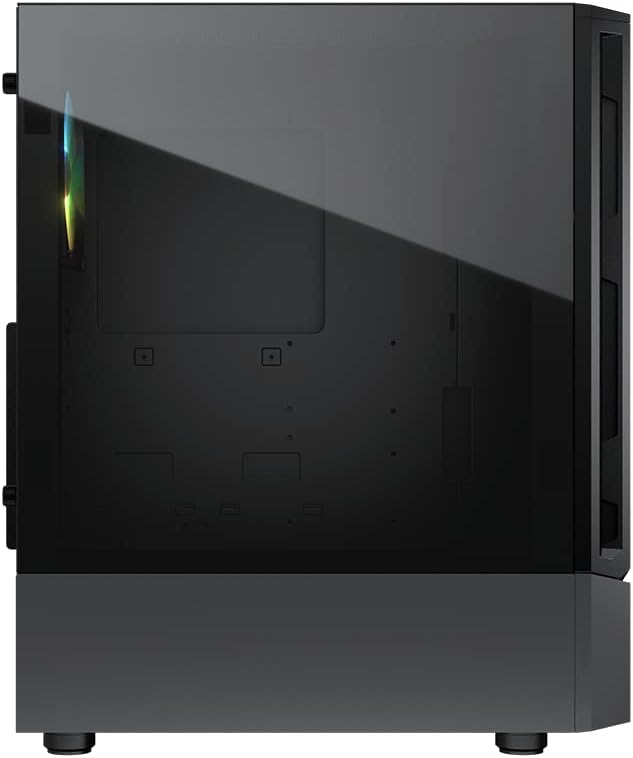
4.3-сүрөт: Каптал view of the COUGAR MX360 RGB case, featuring the tempered glass panel.

4.4-сүрөт: бурчтуу фронт view of the COUGAR MX360 RGB case, showcasing its design and ARGB elements.
5. Орнотуу жана орнотуу
Follow these steps to install your components into the COUGAR MX360 RGB case.
5.1 Ишти даярдоо
- Корпусту тегиз, туруктуу бетке коюңуз.
- Remove the tempered glass side panel by unscrewing the thumb screws at the rear of the case and carefully sliding the panel off.
- Remove the opposite metal side panel by unscrewing the thumb screws and sliding it off.
5.2 Motherboard орнотуу
- I/O калканын (эгер энелик платаңызга алдын ала орнотулбаган болсо) корпустун арткы тешигине орнотуңуз.
- Ensure the correct standoffs are installed for your motherboard form factor (ATX, Micro-ATX, Mini-ITX). Adjust or add standoffs as needed.
- Этияттык менен энелик платаңызды буроо тешикчелерин тегиздеп, стендтерге жайгаштырыңыз.
- Берилген бурамалар менен энелик тактаны бекитиңиз.
5.3 Электр менен камсыздоо блогун (PSU) орнотуу
- Locate the PSU shroud at the bottom of the case.
- Slide your PSU into the designated compartment from the rear of the case.
- PSUну корпустун артындагы бурамалар менен бекитиңиз.
- Route necessary cables through the cutouts in the PSU shroud for cable management.
5.4 Сактоочу дискти орнотуу
The MX360 RGB supports various storage configurations.
- 3.5" HDD: Электр кубатынын капкагынын астында жайгашкан диск капасына орнотуңуз.
- 2.5" SSD/HDD: Mount onto the dedicated trays or mounting points behind the motherboard tray.
5.5 Графикалык картаны (GPU) орнотуу
- Керектүү PCIe уячасынын капкактарын корпустун арткы бөлүгүнөн алып салыңыз.
- Графикалык картаңызды энелик платадагы тиешелүү PCIe уячасына салыңыз.
- Secure the graphics card with screws. The case supports graphics cards up to 315mm in length.
5.6 Cooling System Installation (Fans/Radiators)
The case supports up to six fans and a 360mm water cooling radiator.
- Алдыңкы: Supports up to 3 x 120mm or 2 x 140mm fans, or a 240/280/360mm radiator.
- Жогорку: Supports up to 2 x 120mm or 2 x 140mm fans, or a 240/280mm radiator.
- Арткы: 1 x 120 мм желдеткичти колдойт.
Install fans or radiators using the provided screws, ensuring proper airflow direction.
5.7 Front Panel Connections
Connect the front panel cables (USB, Audio, Power, Reset, LED) to their corresponding headers on your motherboard. Refer to your motherboard manual for exact header locations.
5.8 ARGB Lighting Connection
The integrated ARGB LED strips on the front panel connect via a 5V/3Pin ARGB connector. Connect this cable to a compatible 5V/3Pin ARGB header on your motherboard to synchronize lighting effects with your system.
6. Ишти иштетүү
Once all components are installed and connected, replace the side panels. Power on your system using the power button on the top I/O panel. The ARGB lighting will illuminate, controlled by your motherboard's software or a dedicated ARGB controller if you have one installed.
7. Техникалык тейлөө
Үзгүлтүксүз тейлөө сиздин PC компоненттеринин оптималдуу иштешин жана узак иштөөсүн камсыз кылууга жардам берет.
- Чаң чыпкалары: The MX360 RGB includes removable dust filters (e.g., top, bottom). Periodically remove and clean these filters with compressed air or water (ensure they are completely dry before reinstallation).
- Ички тазалоо: Use compressed air to remove dust from internal components like fans, heatsinks, and the motherboard.
- Тышкы тазалоо: Сырткы беттерин жумшак менен сүртүңүз, гamp кездеме. Абразивдүү тазалагычтардан алыс болуңуз.
8. Кыйынчылыктарды
Көйгөйгө туш болсоңуз, төмөнкү жалпы көйгөйлөрдү чечүү кадамдарын караңыз:
- Кубат жок: Ensure all power cables (24-pin ATX, 8-pin CPU, GPU power) are securely connected. Check the PSU switch is in the 'ON' position. Verify front panel power button connection to the motherboard.
- ARGB жарыктандыруу иштебейт: Confirm the 5V/3Pin ARGB connector is correctly plugged into a compatible motherboard header. Check your motherboard's RGB software for control settings.
- Ашыкча ысып кетүү: Ensure all case fans are spinning and oriented correctly for optimal airflow. Check for dust buildup on filters and components. Verify CPU cooler and GPU cooler are properly installed.
- Бошоң байланыштар: Re-seat all components (RAM, GPU, storage drives) and check all power and data cables.
9. Техникалык шарттар
| Өзгөчөлүк | Спецификация |
|---|---|
| Бренд | Cougar |
| Модель аты | MX360 RGB |
| Элемент моделинин номери | CGR-5CC6G-RGB |
| Иштин түрү | Ара Tower |
| Өлчөмдөрү (LxWxH) | 14.88 x 8.27 x 18.11 дюйм (378 x 210 x 460 мм) |
| Элемент Салмагы | 10.56 фунт (4.8 килограмм) |
| Материал | Tempered Glass, Fine Metal |
| Түс | Кара |
| Motherboard Support | Mini ITX / Micro ATX / ATX |
| Макс. Графикалык картанын узундугу | 315 мм |
| Макс. CPU муздаткычтын бийиктиги | 170 мм |
| PSU колдоо | Стандарттык ATX PS2 |
| Муздатуу ыкмасы | Аба / Суу |
| Радиатор колдоо | Front: 360mm / 280mm / 240mm / 140mm / 120mm Top: 280mm / 240mm / 140mm / 120mm Арткы: 120мм |
| Күйөрмандардын колдоосу | Алдыңкы: 3 x 120 мм / 2 x 140 мм Жогорку: 2 x 120 мм / 2 x 140 мм Арткы: 1 x 120 мм |
| Drive Bays | 3.5" HDD: 2 2.5" SSD: 2+2 (converted from 3.5" drive bays) |
| I/O панели | USB 3.0 x 2, USB 2.0 x 1, Mic x 1, Audio x 1, RGB Button |
| Өзгөчө өзгөчөлүк | ARGB LED Strips, Full-length PSU Cover for Cable Hiding and Improved Airflow |
10. Кепилдик жана колдоо
COUGAR products are designed and manufactured to the highest quality standards. For warranty information, please refer to the warranty card included with your product or visit the official COUGAR webсайт. Кепилдик дооматтар үчүн сатып алганыңыздын далилин сактаңыз.
For technical support or further assistance, please visit the official COUGAR website or contact their customer service department. You can find more information and resources on the COUGAR Store on Amazon.