
1. Киришүү
This manual provides detailed instructions for the setup, operation, maintenance, and troubleshooting of your UNISHEEN UR500A-MINI 4K Capture Box. Please read this manual thoroughly before using the device to ensure proper functionality and to prevent damage.
2. Коопсуздук маалыматы
- Аппаратты сууга же ашыкча нымдуулукка дуушар кылбаңыз.
- Аппаратты жылуулук булактарынын жанына же тике күн нуруна коюудан алыс болуңуз.
- Берилген кубат адаптерин гана колдонуңуз.
- Аппаратты өзүңүз ачууга же оңдоого аракет кылбаңыз. Бардык тейлөөлөрдү квалификациялуу кызматкерлерге тапшырыңыз.
- Аппаратты балдар жетпеген жерде сактаңыз.
3. Пакеттин мазмуну
Төмөндө тизмеленген нерселердин баары пакетиңизге камтылганын текшериңиз:
- UNISHEEN UR500A-MINI Video Recorder Box
- MMI Cable (Multi-Media Interface Cable for CVBS/VGA/YPbPr inputs)
- USB кабели
- HDMI кабели
- Алыстан башкаруу
- Кубаттуу адаптер
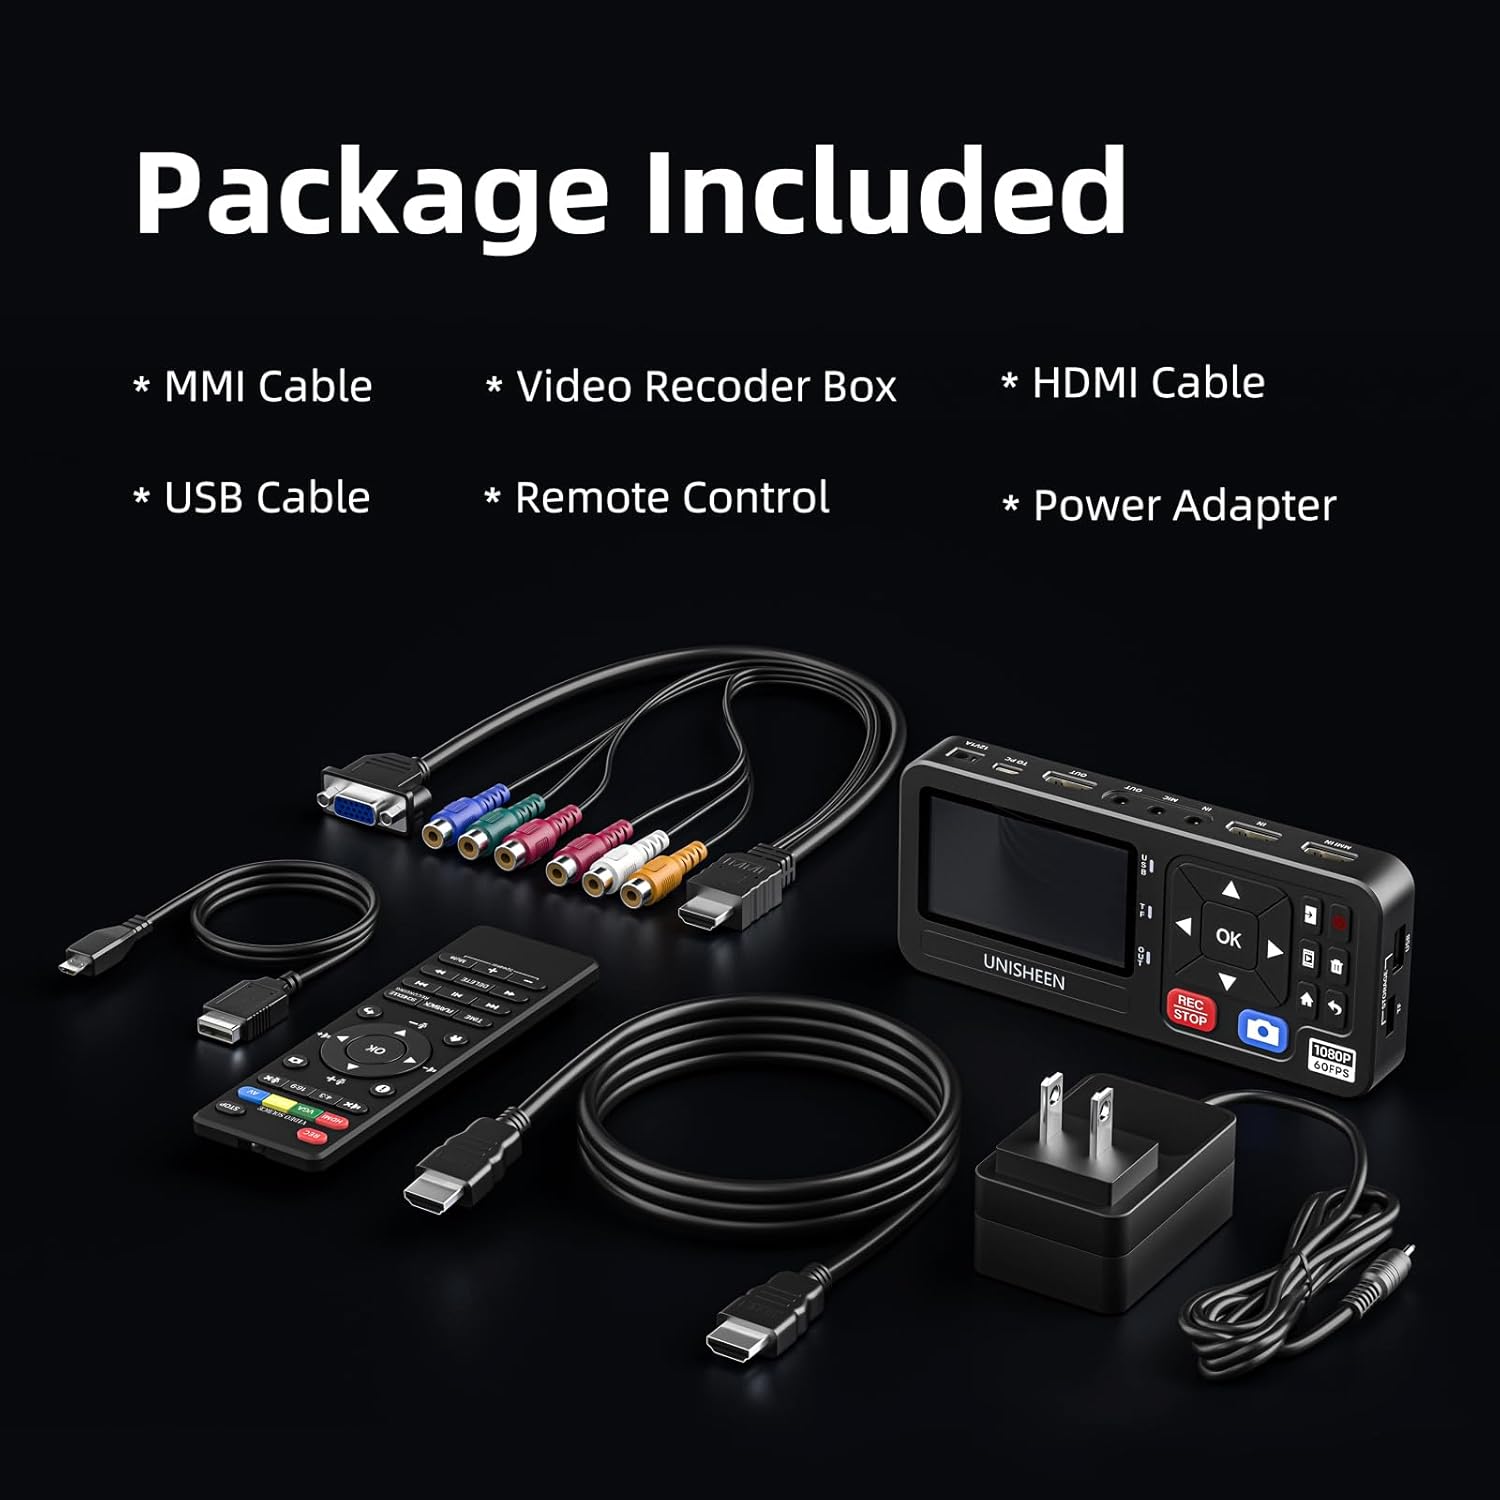
Image: All components included in the UNISHEEN UR500A-MINI package, including the main unit, various cables, remote control, and power adapter.
4. Продукт бүтүп калдыview
The UNISHEEN UR500A-MINI is a versatile video capture box designed to convert and record video from various sources to digital formats. It supports 4K input and 1080p 60FPS recording, offering multiple input options including HDMI, VGA, YPbPr, and CVBS.
4.1 Түзмөктүн жайгашуусу жана порттору

Image: A detailed diagram illustrating the various input and output ports on the UNISHEEN UR500A-MINI, including HDMI In, HDMI Loop Out, CVBS/YPbPr/VGA Input, Mic In, Line In, Audio Out, USB, TF Card slot, and Power Input.
- HDMI киргизүү: Connects to HDMI source devices (e.g., gaming consoles, Blu-ray players).
- HDMI укурук чыгышы: Connects to a monitor or TV for real-time preview киргизүү сигналынын.
- CVBS/YPbPr/VGA Input: Connects to analog video sources via the MMI cable (e.g., VCRs, camcorders).
- Микрофон: Тышкы микрофонду туташтыруу үчүн.
- Катары: Тышкы аудио киргизүү үчүн.
- Аудио чыгышы: Наушниктерди же тышкы динамиктерди туташтыруу үчүн.
- USB порт: For connecting USB storage devices (flash drives, external HDDs).
- TF карта уячасы: For inserting a TF (MicroSD) card for storage.
- Power Input (12V/1A): Кубат адаптерине туташат.
- Башкаруу баскычтары: Navigation (Up, Down, Left, Right, OK), Record/Stop, Snapshot, Menu, Home, Return.
5. Орнотуу
5.1 Кубатты туташтыруу
Connect the provided power adapter to the 12V/1A power input port on the device and plug it into a wall outlet. The device will power on automatically.

Image: The underside of the UNISHEEN UR500A-MINI showing the slot for an optional battery pack (NP-F550, NP-F750, NP-F970) and the power adapter connection, illustrating dual power options.
5.2 Киргизүү булактарын туташтыруу
Choose the appropriate cable for your source device and connect it to the corresponding input port on the UR500A-MINI.
- HDMI булагы: Use an HDMI cable to connect your source device (e.g., game console, DVD player) to the HDMI Input port.
- VGA/YPbPr/CVBS Source: Use the MMI cable to connect your analog source device (e.g., VCR, camcorder) to the MMI Input port.

Image: The UNISHEEN UR500A-MINI connected to various input sources like a VCR and a camcorder, demonstrating HDMI, VGA, CVBS, and YPbPr input capabilities.
5.3 Connecting Storage
Insert a compatible storage device into the UR500A-MINI.
- USB Drive/HDD: Plug your USB flash drive or external hard disk (up to 8TB) into the USB port.
- TF картасы: Insert a TF (MicroSD) card (up to 512GB) into the TF card slot.

Image: A close-up of the UNISHEEN UR500A-MINI's side, highlighting the USB and TF card slots, with a USB flash drive and a TF card inserted, demonstrating support for various storage types.
5.4 Connecting Output (Optional)
Алдын алаview your input source on a larger screen while recording, connect an HDMI cable from the HDMI Loop Out port to your TV or monitor.

Image: The UNISHEEN UR500A-MINI connected to a source device and a television, showing the HDMI loop-out feature for real-time preview of the recording on a larger screen.
6. Иштөө нускамалары
6.1 Негизги жаздыруу
- Ensure your input source is connected and powered on.
- Select the correct input source using the remote control or the device's navigation buttons.
- басыңыз REC/STOP button to begin recording. A red indicator will typically appear on the screen.
- басыңыз REC/STOP жазууну токтотуу үчүн кайра баскычын басыңыз.
6.2 Цикл жаздыруу
When enabled, loop recording automatically overwrites the oldest recorded files when the storage device is full, ensuring continuous recording without interruption.
- Navigate to the System Settings menu.
- Locate the "Loop Recording" option and set it to "On".

Image: The UNISHEEN UR500A-MINI display showing a video playing, with text overlay indicating "Loop Recording" and its function of ensuring continuous recording by overwriting old files.
6.3 Auto Stop Recording
This feature allows you to define a specific duration for your recording session, after which the device will automatically stop recording.
- Системанын орнотуулары менюсуна кириңиз.
- Find the "Autostop" setting and configure the desired recording duration.
6.4 Пландаштырылган жаздыруу
The device supports scheduling specific recording times and recurring schedules.
- Go to the System Settings menu.
- Select "Schedule Mode" to set up your recording schedule.

Image: The UNISHEEN UR500A-MINI display showing a video, with a clock graphic in the background, illustrating the precision capture and scheduling features for uninterrupted recordings.
6.5 Ойнотуу
Кайраview your recorded videos:
- басыңыз Үй негизги менюга кайтуу үчүн баскычты басыңыз.
- Select the playback option (usually represented by a play icon).
- Browse and select the desired video file ойнотуу үчүн.
6.6 Система орнотуулары
Access the System Settings menu to configure various parameters:

Image: A television screen displaying the UNISHEEN UR500A-MINI's System Setting menu, showing options like Show time, Record Resolution, Bitrate, File size, Loop Recording, Time Watermark, Autostop, and System time, controlled by a remote.
- Көрсөтүү убактысы: Display or hide the current time on the screen.
- Жазуунун резолюциясы: Adjust the recording resolution (e.g., 1920x1080).
- Битрейт: Configure the video bitrate for recording quality.
- File өлчөмү: максимум коюу file size for recorded segments (e.g., 4GB).
- Цикл жаздыруу: Enable or disable automatic overwriting of old files.
- Убакыт суу белгиси: Убакытты кошууamp watermark to recordings.
- Autostop: Set a duration for automatic recording cessation.
- Система убактысы: Түзмөктүн ички саатын тууралаңыз.
6.7 Алыстан башкаруу функциялары
Камтылган алыстан башкаруу ар кандай функцияларга ыңгайлуу мүмкүнчүлүк берет:
- Жаздырууну пландаштыруу
- Snapshot (take a still image)
- Динамик башкаруу
- Switch the signal source
- Жаздыруу/Токтоо
- Убакытты коюу
- Auto Stop Recording
- Артка ойнотуу
- График режими
7. Техникалык тейлөө
- Аппаратты жумшак, кургак чүпүрөк менен тазалаңыз. Суюк тазалагычтарды же аэрозолдорду колдонбоңуз.
- Порттарды чаңдан жана таштандылардан тазалаңыз.
- Аппаратты колдонбогондо салкын, кургак жерде сактаңыз.
8. Кыйынчылыктарды
| Көйгөй | Мүмкүн себеп | Чечим |
|---|---|---|
| Күч жок | Кубат адаптери туташкан эмес же туура эмес. | Кубат адаптери ишенимдүү туташтырылганын жана иштеген розеткага сайылганын текшериңиз. Башка розеткадан аракет кылып көрүңүз. |
| No video signal on screen | Incorrect input source selected; input cable loose or faulty; source device not powered on. | Verify the correct input source is selected. Check all cable connections. Ensure the source device is powered on and outputting a signal. |
| Recording fails or stops unexpectedly | Storage full; incompatible storage device; storage device faulty; auto-stop feature enabled. | Check available storage space. Ensure storage device is formatted correctly (FAT32/NTFS). Try a different storage device. Disable auto-stop or adjust its duration. |
| Пульт иштебей жатат | Batteries low or incorrectly inserted; obstruction between remote and device. | Replace remote batteries. Ensure batteries are inserted with correct polarity. Remove any obstructions. |
| Видеонун сапаты начар | Low recording resolution or bitrate settings; poor quality source signal. | Adjust recording resolution and bitrate in System Settings to higher values. Ensure the source signal is clear. |
9. Техникалык шарттар
| Өзгөчөлүк | Деталь |
|---|---|
| Модель номери | UR500A-MINI |
| Продукциянын өлчөмдөрү | 7 x 5 x 3 дюйм |
| Элемент Салмагы | 1.49 фунт |
| Аппараттык интерфейс | HDMI, USB 2.0 |
| Видео тартуунун резолюциясы | 1080p |
| Операциялык системанын шайкештиги | Linux, Mac OS (for file transfer, device operates standalone) |
| Сунушталган колдонуу | Видео жаздыруу |
| Киргизүү колдоо | 4K HDMI, CVBS, VGA, YPbPr |
| Сактоо колдоо | USB drives up to 512GB, Hard disks up to 8TB, SD cards up to 512GB |
| Recording Codec | H.264 |
| Кубат параметрлери | Power Adapter, Compatible with NP-F550, NP-F750, NP-F970 batteries (not included) |
10. Кепилдик жана колдоо
For any questions or assistance regarding your UNISHEEN UR500A-MINI, please contact the seller directly through your purchase platform. Most issues can be resolved by following the troubleshooting steps in this manual or by contacting customer support.
- Сатуучу менен байланышуу: Locate your order and click the "Contact Seller" button.
- Бузулган продукт: If you receive a damaged product, you may apply for an exchange through the Amazon platform within 30 days of purchase.