
1. Продукт бүтүп калдыview
The YOORLEAY 5-in-1 Electric Knife Sharpener is designed to restore the sharpness of various cutting tools. It features multiple sharpening slots and adjustable rotational speeds to accommodate different blade types and conditions.

Figure 1: YOORLEAY 5-in-1 Electric Knife Sharpener. This image displays the sharpener unit alongside its packaging, highlighting its compact design and the various sharpening slots.
2. Коопсуздук нускамалары
- Always place the sharpener on a stable, flat surface before use.
- Keep fingers away from the sharpening slots during operation.
- Ensure the sharpener is unplugged when not in use or during cleaning.
- Агрегатты сууга же башка суюктукка батырбаңыз.
- Балдар жетпеген жерде сактаңыз.
- Use only as directed for sharpening knives and tools.
3. Орнотуу
- Таңылганын ачуу: Carefully remove the sharpener from its packaging. Retain packaging for future storage or transport.
- Жайгашкан жери: Position the sharpener on a clean, dry, and stable countertop or work surface. Ensure there is adequate space around the unit for safe operation.
- Кубат туташуу: Plug the power cord into a standard electrical outlet. The display should illuminate, indicating the unit is ready for use.
- Алгачкы текшерүү: Before first use, inspect the sharpening slots and the ceramic polishing rod for any obstructions or damage.
4. Иштөө нускамалары
4.1 Understanding the Sharpening Slots
The sharpener features a 5-in-1 slot design, each serving a specific purpose:
- Slot 1 (Left and Right): Diamond grinding wheel for restoring the sharpness of dull blades.
- Slot 2 (Left and Right): Diamond grinding wheel for refining the edge and further restoring sharpness.
- Slot 3 (Polish): Removable ceramic polishing rod for fine-tuning edges and polishing special-shaped tools.
- Slot 4 (Scissor Slot): Diamond grinding wheel specifically for sharpening scissors.
- Slot 5 (Left and Right, Convertible): Features pull-out baffles to enlarge the slot angle to 32.5°, suitable for wider blades like chop bone knives and sushi knives.

Figure 2: Detailed diagram of the 5 sharpening slots, including their dimensions and specific functions for different blade types.
4.2 Selecting Rotational Speed
The sharpener offers three rotational speed settings: LOW, MEDIUM, and HIGH. Select the appropriate speed based on the type of blade and desired sharpening intensity.

Figure 3: Control panel displaying LOW, MEDIUM, and HIGH speed options, along with the power button and 'CLEANOUT' indicator.
4.3 Sharpening Knives (Straight, Serrated, Ceramic)
For straight blade knives (chef, forged, meat cleaver, sushi), serrated knives, and ceramic knives:
- Select the appropriate rotational speed (LOW, MEDIUM, or HIGH).
- For dull knives, begin with Slot 1. Gently insert the knife blade into the slot, ensuring it is centered.
- Pull the knife slowly and steadily towards you, maintaining light, consistent pressure. Do not push the knife away from you.
- Repeat this motion 3-5 times for each side of the blade (left and right slots).
- Улантуу Slot 2 to refine the edge, repeating the same pulling motion 3-5 times per side.
- For a polished finish, use Slot 3 (Polishing Rod). Gently pull the blade across the ceramic rod a few times.
- For wider blades like chop bone knives or sushi knives, pull out the baffles in Slot 5 to adjust the angle to 32.5° before sharpening.
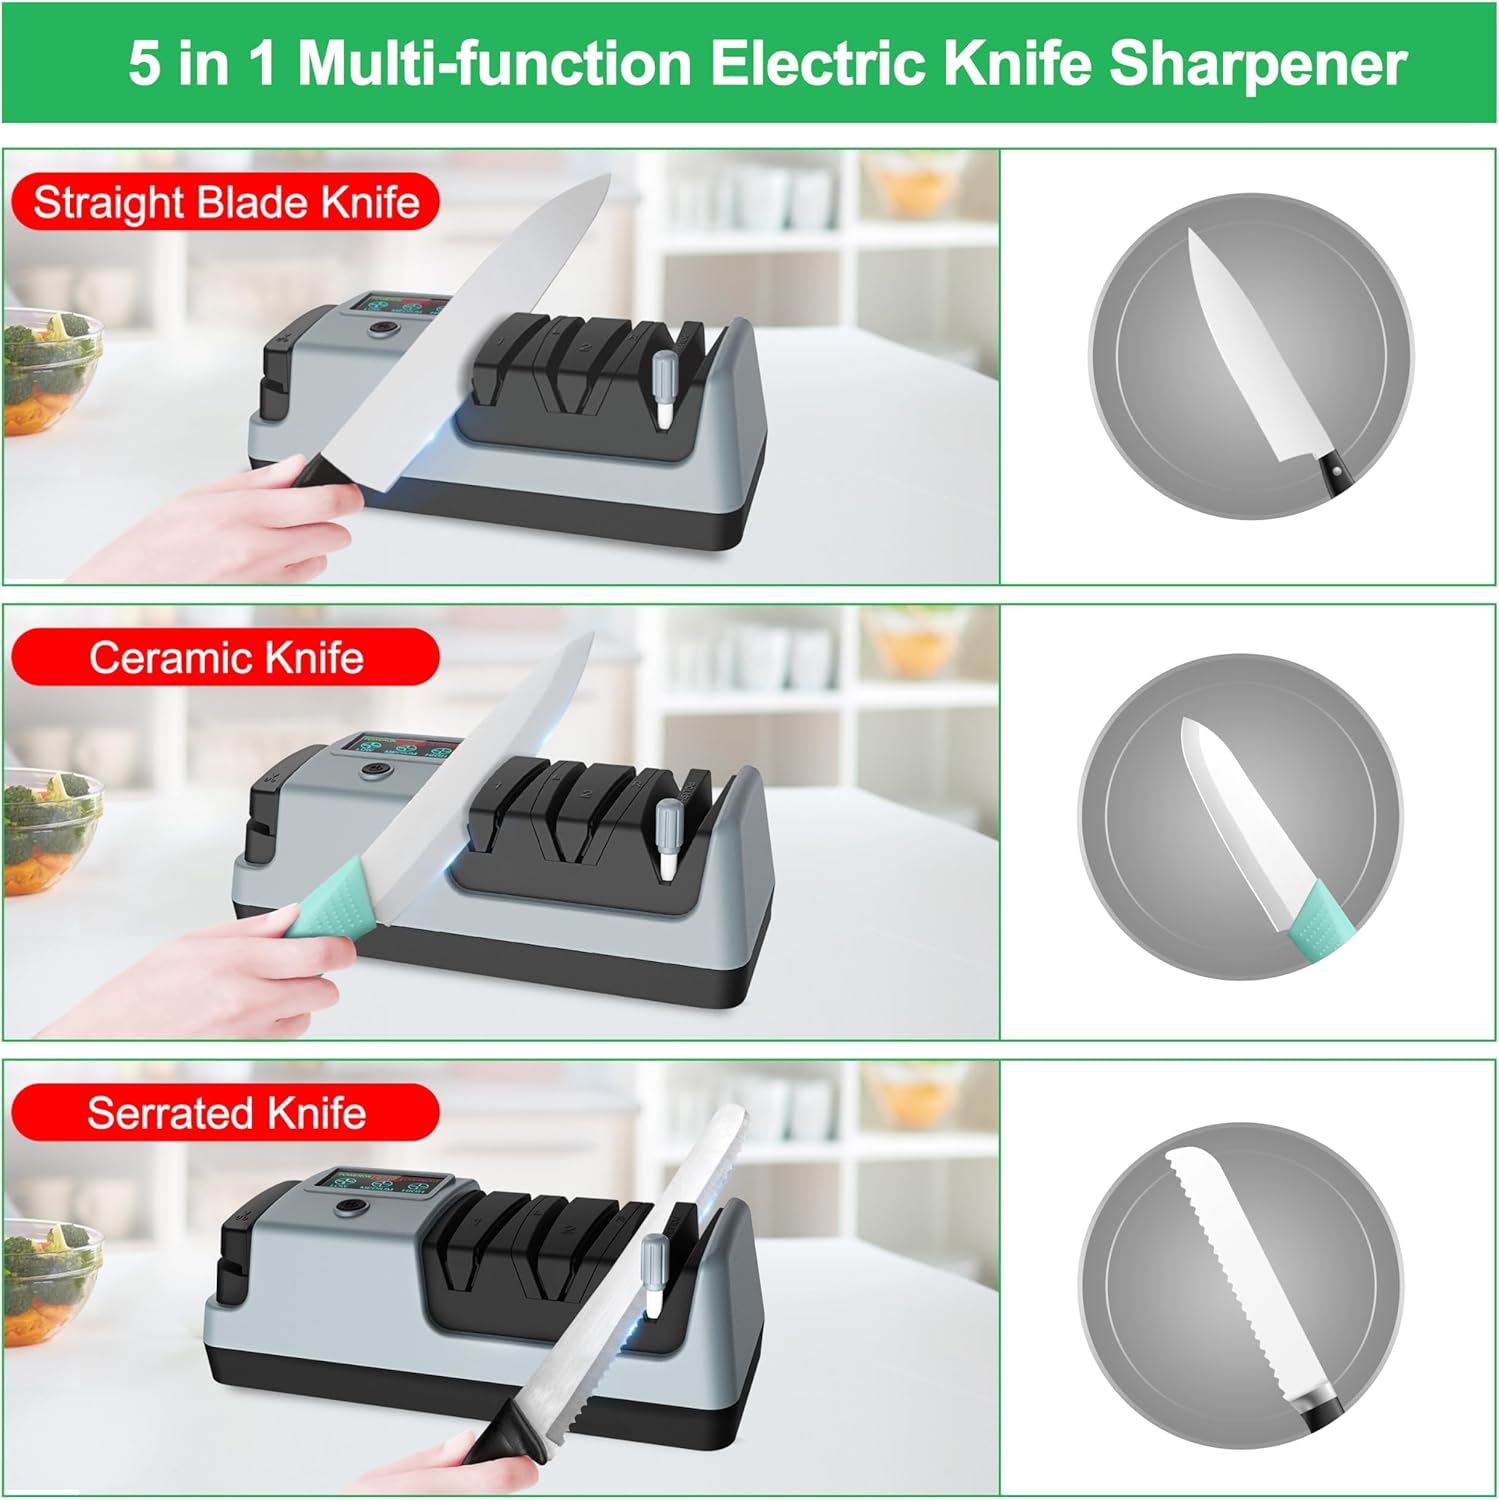
Figure 4: Visual guide demonstrating the sharpening process for straight blade, ceramic, and serrated knives using the designated slots.

Figure 5: The convertible slot with baffles pulled out, illustrating how it accommodates wider blades such as chop bone knives and sushi knives.
4.4 Sharpening Scissors and Other Tools
For scissors (kitchen, garden) and axes:
- Колдонуу Slot 4 (Scissor Slot).
- Open the scissors and insert one blade into the slot.
- Pull the blade through the slot, maintaining a consistent angle and pressure.
- Башка бычак үчүн кайталаңыз.
- For axes or other special-shaped tools, the removable ceramic polishing rod (Slot 3) can be used for manual grinding and polishing.

6-сүрөт: Мисamples of sharpening scissors, garden shears, and an axe using the dedicated scissors slot and the manual polishing rod.
Маанилүү: Always clean the blade thoroughly after sharpening to remove any metal particles.
5. Техникалык тейлөө
5.1 Cleaning the Sharpener
Regular cleaning is essential for optimal performance and longevity.
- Ажыратыңыз: Always unplug the sharpener from the power outlet before cleaning.
- Remove Metal Particles: The sharpener is equipped with a magnetic collection system for metal particles. Periodically, a 'CLEANOUT' indicator may appear on the display. To clean, locate the removable bottom cover (refer to Figure 7 for typical location). Open the cover and carefully remove accumulated metal dust and particles, often attracted to a magnet. Ensure all particles are cleared.
- Өчүрүү: Use a soft, dry cloth to wipe the exterior of the sharpener. Do not use abrasive cleaners or immerse the unit in water.
- Кайра чогултуу: Securely reattach the bottom cover after cleaning.

Сүрөт 7: Мурункуample of a removable cover on the sharpener, which may indicate access for cleaning or maintenance of internal components.
5.2 Сактоо
Store the sharpener in a dry, cool place, away from direct sunlight and moisture. Ensure it is unplugged and clean before storing.
6. Кыйынчылыктарды
- Sharpener Not Turning On:
- Ensure the power cord is securely plugged into both the sharpener and a working electrical outlet.
- Check if the power button is pressed.
- 'CLEANOUT' Notice Persists After Cleaning:
- Verify that the bottom cover was securely reattached.
- Ensure all metal particles were thoroughly removed from the magnetic collection area. Sometimes, stubborn particles may remain.
- Эгер көйгөй чечилбесе, кардарларды колдоо менен байланышыңыз.
- Grinding Wheels Lock Up or Stop Rotating:
- This can occur if excessive pressure is applied to the blade during sharpening. Use light, consistent pressure.
- Check for any foreign objects or excessive metal shavings obstructing the grinding wheels. Unplug the unit and carefully inspect the slots.
- If the problem continues, discontinue use and contact customer support.
- Knives Not Sharpening Effectively:
- Ensure you are using the correct slots (Slot 1 for initial sharpening, Slot 2 for refining).
- Verify that the appropriate rotational speed is selected for the blade type.
- Confirm that you are pulling the knife through the slot 3-5 times per side with consistent, light pressure.
- Very dull or damaged blades may require more passes or professional sharpening.
7. Техникалык шарттар
| Бренд | YOORLEAY |
| Модел | B0C89KTDP4 |
| Материал | Acrylonitrile бутадиен Styrene |
| Түс | Боз |
| Продукциянын өлчөмдөрү | 4.33"L x 10.63"W x 3.94"H |
| Элемент Салмагы | 2.16 фунт |
| Grat Type | Орто |
| Элементтердин саны | 1 |
8. Кепилдик жана колдоо
8.1 Кепилдик маалыматы
This YOORLEAY product is covered by a 2 жылдык кепилдик мөөнөтү from the date of purchase. This warranty covers manufacturing defects and issues arising from normal use. It does not cover damage caused by misuse, accidents, unauthorized modifications, or failure to follow operating instructions.
8.2 Кардарларды колдоо
For technical assistance, warranty claims, or any questions regarding your YOORLEAY 5-in-1 Electric Knife Sharpener, please contact YOORLEAY customer support. Refer to the product packaging or the official YOORLEAY webакыркы байланыш маалыматы үчүн сайт.
9. Видео ресурстар
No official product videos from the seller were available for embedding based on the provided data. Please refer to the product listing page for any available video demonstrations.