
Introduction
This user manual provides detailed instructions for the assembly, operation, and maintenance of the Walfront XR2206 Function Generator DIY Kit. This kit allows users to build a versatile function generator capable of producing sine, triangular, and square waveforms with an adjustable frequency range of 1Hz to 1MHz. It is designed for ease of assembly with all plug-in components.
1. Продукт бүтүп калдыview жана компоненттер
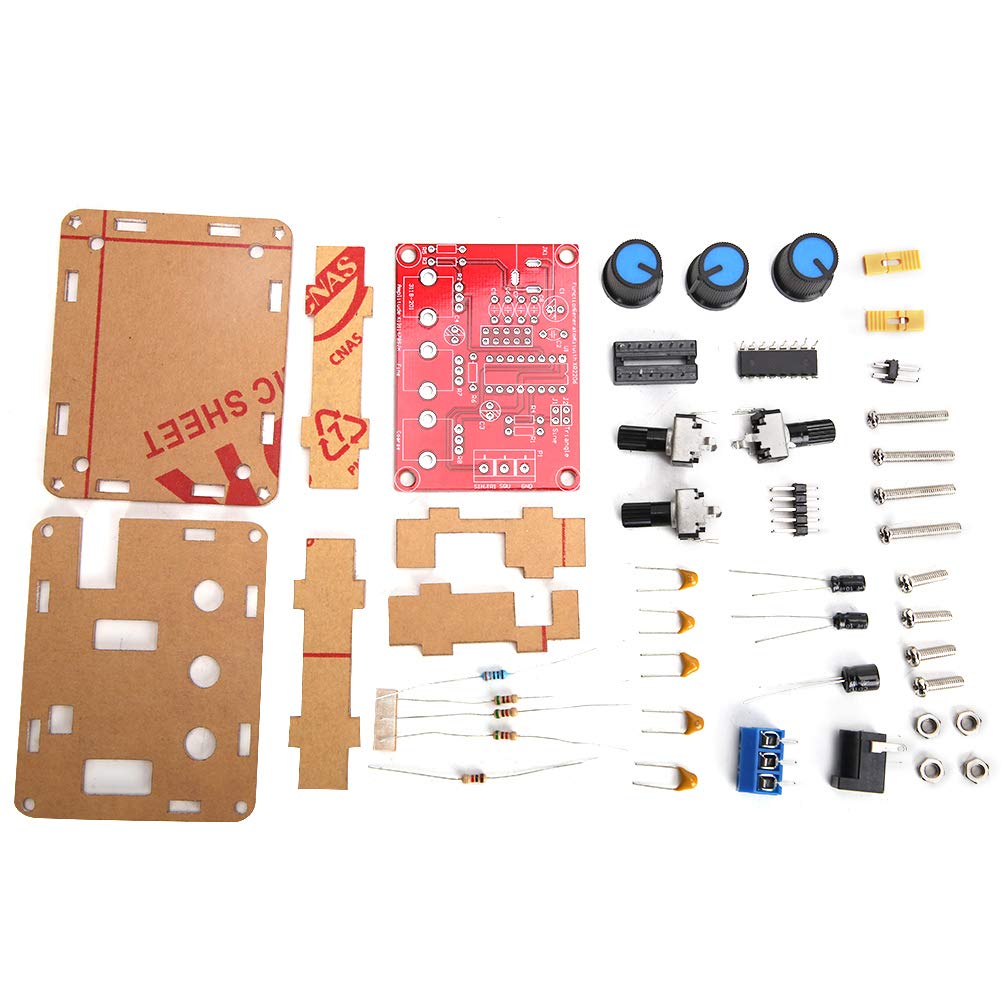
The Walfront XR2206 Function Generator DIY Kit includes all necessary electronic components and a protective shell for assembly. Below are the main components you will receive:

1.1-сүрөт: All components included in the XR2206 Function Generator DIY Kit, showing the PCB, acrylic shell pieces, potentiometers, capacitors, resistors, and other small electronic parts.
- XR2206 Integrated Circuit (IC)
- Басма схемасы (PCB)
- Acrylic Protective Shell (multiple pieces)
- Potentiometers (for frequency and ampлитудду тууралоо)
- Capacitors, Resistors, Diodes
- Power Jack and Terminal Blocks
- Орнотуу жабдуулары (бурамалар, гайкалар)
2. Монтаждоо боюнча нускамалар
This kit requires soldering and basic electronic assembly skills. Please follow these steps carefully:
- Компоненттерди даярдоо: Unpack all components and verify against the component list (refer to Figure 1.1).
- Ширетүүчү резисторлор: Identify and solder all resistors onto the PCB according to their marked values and positions.
- Solder Diodes and Capacitors: Solder the diodes (pay attention to polarity) and capacitors (electrolytic capacitors have polarity) onto the PCB.
- Solder IC Socket: Solder the IC socket for the XR2206 chip. Ensure correct orientation.
- Solder Potentiometers and Switches: Solder the potentiometers (coarse, fine, amplitude) and any switches onto the PCB.
- Solder Power Jack and Output Terminals: Solder the DC power jack and the output terminal blocks (Sine/Triangle/Square, GND) to their respective positions.
- Insert XR2206 IC: Carefully insert the XR2206 IC into its soldered socket, ensuring correct orientation (notch/dot aligns with the marking on the socket/PCB).
- Assemble Acrylic Shell:
- Remove protective film from all acrylic pieces.
- Mount the assembled PCB onto the bottom acrylic plate using the provided standoffs and screws.
- Attach the side panels and top panel, aligning the holes for the potentiometers and power/output jacks.
- Secure the shell with the remaining screws and nuts.
- Туткаларды бекитүү: Place the plastic knobs onto the potentiometer shafts.
2.1-сүрөт: The fully assembled XR2206 Function Generator, showing the clear acrylic casing and control knobs.
3. Иштөө нускамалары
Once assembled, the function generator is ready for operation. It requires a 9-12V DC power supply (not included).
- Кубат туташуу: Connect a 9-12V DC power adapter to the DC power jack on the unit.
- Чыгуу туташуу: Connect your oscilloscope or measurement device to the desired output terminals (Sine, Triangle, or Square) and the GND terminal.
- Frequency Жөнгө салуу:
- колдонуу "Coarse" potentiometer for large adjustments to the frequency range.
- колдонуу "Fine" potentiometer for precise adjustments within the selected coarse range.
- The frequency range is 1Hz to 1MHz.
- AmpЛинияны тууралоо: колдонуу "Amp" potentiometer to adjust the output signal's ampжарыктык.
- Толкун формасын тандоо: The unit produces sine, triangular, and square waveforms. The output terminals are typically labeled for direct connection.

3.1-сүрөт: Жогорку view of the assembled function generator, highlighting the Coarse, Fine, and Amplitude adjustment knobs, and the output terminals for different waveforms.
4. Техникалык тейлөө
The Walfront XR2206 Function Generator is designed for durability. Minimal maintenance is required:
- Түзмөктү таза жана чаңсыз кармаңыз. Тазалоо үчүн жумшак, кургак чүпүрөк колдонуңуз.
- Аппаратты ашыкча нымдуулуктун же экстремалдык температуранын таасиринен сактаңыз.
- Иштөө алдында бардык туташуулардын коопсуз экенин текшериңиз.
- If the acrylic casing becomes scratched, it can be polished with a plastic polish designed for acrylics.
5. Кыйынчылыктарды
If you encounter issues with your function generator, consider the following:
| Көйгөй | Мүмкүн себеп | Чечим |
|---|---|---|
| Чыгуу сигналы жок | Туура эмес электр энергиясыtage; loose connections; soldering errors. | Verify power supply (9-12V DC); check all soldered joints for cold joints or bridges; ensure output connections are correct. |
| Incorrect waveform or distorted output | Component polarity error; incorrect component value; faulty IC. | Double-check polarity of diodes and electrolytic capacitors; verify resistor and capacitor values; ensure XR2206 IC is correctly seated and not damaged. |
| Жыштык/Amplitude not adjustable | Faulty potentiometer; soldering error on potentiometer pins. | Inspect potentiometer soldering; test potentiometer functionality if possible. |
If issues persist after troubleshooting, please contact customer support.
6. Техникалык шарттар
- Модел: WALFRONTvt7uhyka6w-11
- Жыштыктарды өлчөө диапазону: 1Гц - 1МГц
- Чыгаруу толкун формалары: Sine, Triangular, Square
- Электр камсыздоо: 9-12V DC (external)
- Чечим: Five-digit (for measurement data display, if applicable to external meter)
- Өлчөмдөрү (жыйылган): Болжол менен 5.51 x 3.94 x 1.18 дюйм (14 x 10 x 3 см)
- Салмагы (чогултулган): Болжол менен 2.82 унция (80 грамм)
7. Кепилдик жана колдоо
This product is a DIY kit, and as such, warranty terms may vary. Please refer to the seller's specific warranty policy at the time of purchase. For technical support or inquiries regarding missing/defective parts, please contact Walfront customer service through the retailer where the product was purchased.
For more information, visit the official Walfront store: Walfront Store on Amazon