
1. Киришүү
Thank you for choosing the XREXS 18-inch RGB Digital Wall Clock. This manual provides detailed instructions for the proper setup, operation, and maintenance of your new clock. Please read this manual thoroughly before use to ensure optimal performance and longevity of the product. Keep this manual for future reference.
2. Продукт бүтүп калдыview
Негизги өзгөчөлүктөрү
- Чоң 18 дюймдук дисплей: Features clear, high-contrast 5.7-inch (14.5 cm) digits for easy readability from a distance.
- RGB түсүн өзгөртүү: Offers 6 monochrome modes, 4 dynamic RGB color-changing modes, and a unique daily color-changing mode.
- Көп функциялуу дисплей: Shows time, temperature, humidity, date, and day of the week.
- 8 Тилди колдоо: Day of the week display available in English, German, French, Italian, Spanish, Dutch, Russian, and Danish.
- Бир нече режимдер: Functions as a digital clock, alarm clock, large digital timer, stopwatch, and countdown timer (up to 29 hours, 59 minutes, 59 seconds).
- Жөнгө салынуучу жарыктык: 4-level manual brightness adjustment and an integrated auto-dimming sensor.
- Автоматтык жайкы убакыт (DST): Automatically adjusts for DST.
- Алыстан башкаруу: Ыңгайлуу алыстан орнотууларды тууралоо.
- Эстутум функциясы: Built-in memory retains settings during power outages with backup batteries.
- Ар тараптуу жайгаштыруу: Can be wall-mounted or placed on a table using the foldable stand.
Пакеттин мазмуну
- XREXS 18-inch RGB Digital Wall Clock (Model 099-RGB)
- Алыстан башкаруу
- Кубаттуу адаптер
- 2 x AAA Batteries (for memory backup)
- Mounting Aid
- User Manual

2.1-сүрөт: The XREXS 18-inch RGB Digital Wall Clock displaying time, temperature, humidity, date, and day, with its remote control.

2.2-сүрөт: A diagram illustrating the clock's features including alarm, temperature, humidity, DST, time, day, and date display.
3. Орнотуу
3.1 Кубат туташтыруу
- Connect the provided power adapter to the DC input port on the back of the clock.
- Plug the power adapter into a standard electrical outlet. The clock will power on and display the default time.
Эскертүү: The clock requires continuous AC power to operate. The included AAA batteries are for memory backup only and do not power the display.
3.2 Батареяны орнотуу (Эстутумдун камдык көчүрмөсү)
- Сааттын артындагы батарея отсегин табыңыз.
- Туура полярдуулукту (+/-) камсыз кылуу менен 2 AAA батарейкасын салыңыз.
- Close the battery compartment cover. These batteries will preserve your settings (time, alarm, etc.) in case of a power interruption.
3.3 Монтаждоо параметрлери
The clock can be either wall-mounted or placed on a flat surface.
- Дубалга орнотуу: Use the two keyhole slots on the back of the clock. A mounting aid is provided to assist with proper spacing for screws or nails.
- Үстөлдүн жайгашуусу: Extend the foldable stand located on the back of the clock to place it securely on a table or desk.
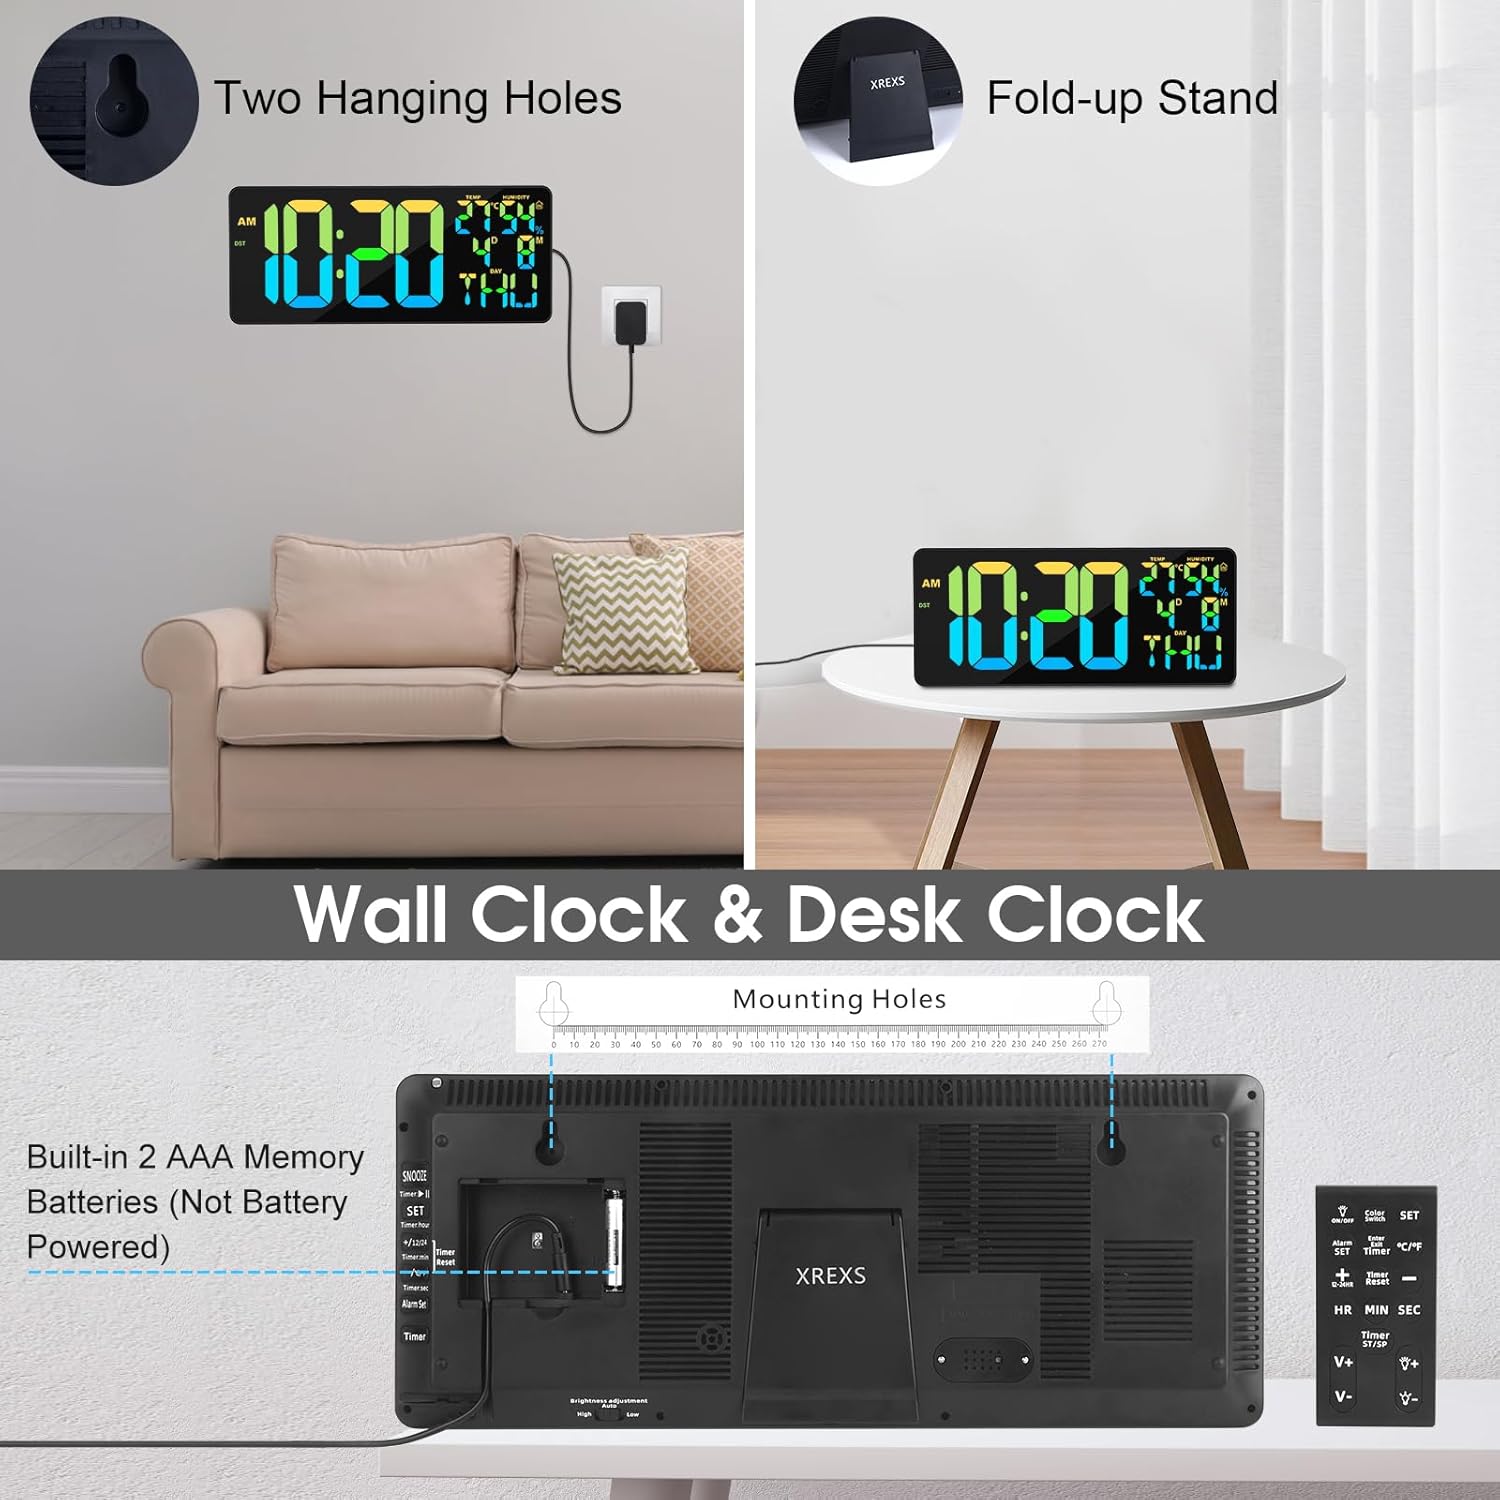
3.1-сүрөт: The back of the clock, illustrating the two hanging holes for wall mounting and the foldable stand for desk placement. The battery compartment is also visible.

3.2-сүрөт: The clock connected to its power adapter, with the remote control shown for setting adjustments.
4. Иштөө нускамалары
The clock can be operated using the remote control or the buttons on the back of the unit.
4.1 Basic Settings (Time Format, Temperature Unit, Language)
- Time Format (12/24 Hour): Press the '12/24H' button on the remote to switch between 12-hour and 24-hour display. In 12-hour format, 'AM' or 'PM' will be displayed.
- Температура бирдиги (°C/°F): Press the '°C/°F' button on the remote to toggle between Celsius and Fahrenheit.
- Day Language: Press the 'LANG' button on the remote to cycle through the 8 available languages for the day of the week display.
4.2 Убакытты жана датаны орнотуу
- Press the 'SET' button on the remote control. The hour digits will start flashing.
- Саатты жөндөө үчүн "ЖОГОРУ" же "ТӨМӨН" баскычтарын колдонуңуз.
- Press 'SET' again to move to the minute digits. Use 'UP' or 'DOWN' to adjust minutes.
- Continue pressing 'SET' to cycle through year, month, and day settings, adjusting each with 'UP' or 'DOWN'.
- Press 'SET' one last time or wait a few seconds for the settings to be saved.
4.3 Сигналды коюу
- Press the 'ALARM SET' button on the remote. The alarm hour digits will flash.
- Use 'UP' or 'DOWN' to set the desired alarm hour.
- Press 'ALARM SET' again. The alarm minute digits will flash.
- Use 'UP' or 'DOWN' to set the desired alarm minutes.
- Press 'ALARM SET' again to confirm.
- To activate/deactivate the alarm, press the 'ALARM ON/OFF' button. An alarm icon will appear/disappear on the display.
- When the alarm sounds, press any button on the remote or the clock to snooze or turn off.
4.4 Timer, Countdown, and Stopwatch Functions
Press the 'MODE' button on the remote to cycle through the different functions: Clock -> Alarm -> Timer -> Stopwatch -> Countdown.
- Таймер: In Timer mode, press 'SET' to set the desired time (hours, minutes, seconds) using 'UP'/'DOWN'. Press 'START/STOP' to begin/pause. Press 'RESET' to clear.
- Артка саноо: In Countdown mode, press 'SET' to set the desired countdown time (up to 29 hours, 59 minutes, 59 seconds). Press 'START/STOP' to begin/pause. Press 'RESET' to clear. An audible alert will sound when the countdown reaches zero.
- Секундомер: In Stopwatch mode, press 'START/STOP' to begin/pause. Press 'RESET' to clear.
4.5 Жарыктыкты жөндөө

4.1-сүрөт: The clock demonstrating its auto-dimming feature and the four levels of manual brightness adjustment.
- Кол менен тууралоо: Press the 'BRIGHTNESS' button on the remote to cycle through 4 levels of brightness (Lv.4, Lv.3, Lv.2, Lv.1) and OFF.
- Автоматтык караңгылатуу: The clock has a built-in light sensor that can automatically adjust the display brightness based on ambient light conditions. To activate/deactivate auto-dimming, press the 'AUTO DIM' button on the remote.
4.6 RGB Color Modes

4.2-сүрөт: Examples of the dynamic RGB color-changing modes and single color options available on the clock.
The clock offers 11 color modes:
- 6 Monochrome Colors (Red, Green, Blue, Yellow, Purple, Light Blue)
- 4 Dynamic RGB Changing Colors (RGB Changing, RGB Left to Right Flowing, RGB Top Downward Flowing, Random Color)
- 1 Daily Color Change Mode
Press the 'COLOR' button on the remote to cycle through these color modes. The 11th mode provides a unique daily color change for variety.
4.7 Жайкы убакыт (DST)
To activate or deactivate the automatic Daylight Saving Time function, press the 'DST' button on the remote control. When activated, the clock will automatically adjust its time forward or backward by one hour as required by DST.

4.3-сүрөт: The XREXS clock shown in various settings, demonstrating its use as a wall clock, a countdown timer for exercise, and an alarm clock in a bedroom.
5. Техникалык тейлөө
- Тазалоо: Саатты тазалоо үчүн, дисплейди акырын сүртүп,asinжумшак, кургак чүпүрөк менен сүртүңүз. Абразивдүү тазалоочу каражаттарды, эриткичтерди же химиялык чачыраткычтарды колдонбоңуз, анткени алар бетке зыян келтириши мүмкүн.
- Күч: Ensure the power adapter is securely connected. If the clock will not be used for an extended period, unplug it from the power outlet.
- Батареяны алмаштыруу: Replace the AAA backup batteries annually or if you notice settings are not retained during power outages.
- Курчап турган чөйрө: Avoid placing the clock in direct sunlight, near heat sources, or in areas with high humidity to prevent damage.
6. Кыйынчылыктарды
| Көйгөй | Мүмкүн себеп | Чечим |
|---|---|---|
| Сааттын дисплейи бош же иштебейт. | Кубат адаптеринде же кубат адаптеринде эч кандай көйгөй жок. | Ensure the power adapter is securely plugged into the clock and a working electrical outlet. Check if the outlet has power. |
| Алыстан башкаруу пульту жооп бербей жатат. | Remote batteries are dead or incorrect orientation. Obstruction between remote and clock. | Replace the remote control batteries. Ensure there are no obstacles between the remote and the clock's sensor. Point the remote directly at the clock. |
| Электр кубаты өчүрүлгөндөн кийин убакыт/орнотуулар жоголотtage. | Камдык батареялар өлүп калган же орнотулган эмес. | Install 2 new AAA batteries in the battery compartment on the back of the clock, ensuring correct polarity. |
| Дисплей өтө күңүрт же өтө жарык. | Brightness setting needs adjustment or auto-dimming is active/inactive. | Press the 'BRIGHTNESS' button on the remote to manually adjust. Press 'AUTO DIM' to toggle automatic brightness control. |
| Температура/нымдуулук көрсөткүчтөрү так эмес окшойт. | Clock placed near heat/cold source or in an area with fluctuating humidity. | Relocate the clock to a more stable environment, away from direct sunlight, vents, or high humidity areas. Allow time for readings to stabilize. |
7. Техникалык шарттар
| Өзгөчөлүк | Спецификация |
|---|---|
| Бренд | XREXS |
| Модель номери | 099-RGB |
| Дисплей өлчөмү | 18 дюйм (45.7 см) |
| Сан бийиктиги | 5.7 дюйм (14.5 см) |
| Продукциянын өлчөмдөрү (L x W x Y) | 43 x 3.81 x 17.8 см (16.9 x 1.5 x 7 дюйм) |
| Элемент Салмагы | 1.32 килограмм (2.91 фунт) |
| Материал | Пластик |
| Түс | RGB (Multi-color) |
| Power Source | AC Adapter (required for operation) |
| Камдык батареялар | 2 x AAA (included, for memory function only) |
| Стиль | Заманбап |
| Форма | Төрт бурчтуу |
8. Кепилдик жана колдоо
For warranty information or technical support, please refer to the contact details provided with your purchase or visit the official XREXS webсайт. Сатып алуу квитанциясын кепилдик дооматтары үчүн сатып алуунун далили катары сактаңыз.