
1. Киришүү
This manual provides instructions for the proper installation, operation, and maintenance of the Alphacool Y-Splitter aRGB 3-pin to 3X 3-pin Cable, 30cm. This cable is designed to expand your Addressable RGB (aRGB) lighting setup by allowing multiple aRGB components to be connected to a single 3-pin aRGB header on a mainboard or controller. Please read this manual thoroughly before use to ensure correct and safe operation.
2. Продукт бүтүп калдыview
2.1 Кутуда эмне бар
- Alphacool Y-Splitter aRGB 3-Pin to 3x 3-Pin Cable - 30cm (Model 18708)
2.2 Өзгөчөлүктөрү
- High-quality sleeved aRGB 3-pin to 3x 3-pin Y-splitter cable.
- Compatible with all Alphacool aRGB products and most mainboards and aRGB controllers.
- Cable length: 30cm.
- Connections: One 3-pin input to three 3-pin outputs.
- Түсү: Black.
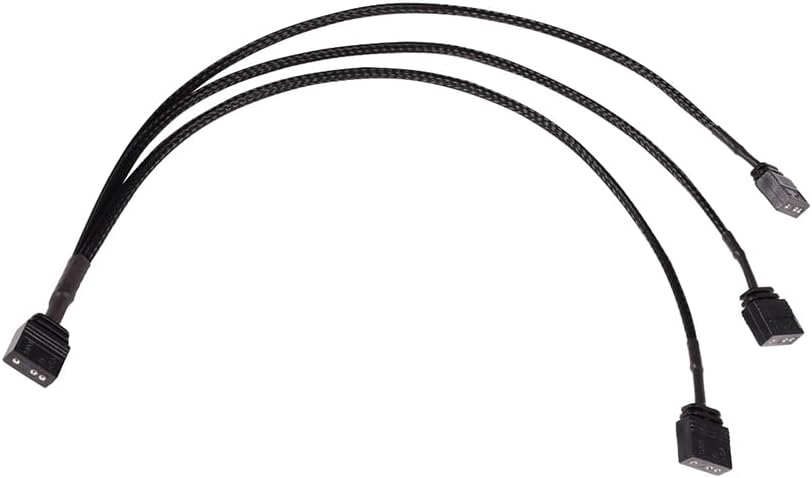
Figure 1: Alphacool Y-Splitter aRGB 3-pin to 3X 3-pin Cable. This image shows the overall design of the Y-splitter cable, featuring one input connector splitting into three output connectors, all with black sleeving.
3. Орнотуу
- Туташтыргычтарды аныктоо: Locate the 3-pin aRGB header on your mainboard or aRGB controller. Identify the 3-pin aRGB connectors on your aRGB devices (e.g., fans, LED strips).
- Киргизүүнү туташтыруу: Connect the single 3-pin male connector of the Alphacool Y-splitter cable to the 3-pin aRGB header on your mainboard or aRGB controller. Ensure the pins align correctly to avoid damage. The connector is typically keyed to prevent incorrect insertion.

Figure 2: Close-up of the male 3-pin aRGB connector (input). This image highlights the male connector that plugs into the mainboard or controller.
- Чыгуу түзмөктөрүн туташтыруу: Connect up to three aRGB devices to the three female 3-pin connectors of the Y-splitter cable. Again, ensure correct pin alignment.

Figure 3: Close-up of a female 3-pin aRGB connector (output). This image shows one of the three female connectors where aRGB devices are attached.

4-сүрөт: Мисample of 3-pin male-to-male pin connectors. These are often used to connect female aRGB headers on devices to the female outputs of the splitter.
- Байланыштарды текшерүү: Double-check all connections to ensure they are secure and correctly oriented. Incorrect connection of aRGB devices can lead to damage. This cable operates at 5V. Do not connect to 12V RGB headers.
4. Иштөө нускамалары
Once the Alphacool Y-splitter cable and your aRGB devices are correctly connected, the connected devices will operate in unison, receiving the same aRGB signal from your mainboard or controller. The lighting effects and colors are controlled via the software provided by your mainboard manufacturer or the dedicated software for your aRGB controller.
- Программалык камсыздоону көзөмөлдөө: Use your mainboard's aRGB software (e.g., ASUS Aura Sync, MSI Mystic Light, Gigabyte RGB Fusion, ASRock Polychrome Sync) or your external aRGB controller's software to customize lighting effects.
- Power Cycle: After making connections, power on your system. The aRGB devices should illuminate according to the default or previously set lighting profile.
5. Техникалык тейлөө
The Alphacool Y-splitter cable requires minimal maintenance. Follow these guidelines to ensure longevity:
- Тазалоо: Keep the cable and connectors free from dust and debris. Use a soft, dry cloth for cleaning. Do not use liquid cleaners directly on the connectors.
- Колдонуу: Avoid excessive bending or pulling of the cable, especially near the connectors, to prevent internal wire damage.
- Сактагыч: If not in use, store the cable in a dry, cool place away from direct sunlight and extreme temperatures.
6. Кыйынчылыктарды
6.1 No Lighting or Incorrect Colors
- Байланыштарды текшерүү: Ensure all 3-pin aRGB connectors are fully seated and correctly oriented. Verify that the Y-splitter's input is securely connected to the mainboard/controller and that all output devices are connected to the splitter.
- Verify Voltage: Confirm that the aRGB header on your mainboard or controller is a 5V Addressable RGB header. Connecting to a 12V RGB header will damage 5V aRGB devices and the splitter.
- Программалык камсыздоонун жөндөөлөрү: Open your mainboard's aRGB software or aRGB controller software. Ensure that the connected devices are detected and that the desired lighting effects are selected. Sometimes a software restart or driver update may be necessary.
- Түзмөктүн шайкештиги: Ensure your aRGB devices are compatible with 3-pin 5V aRGB standards.
- Test Individual Devices: If possible, test the aRGB devices directly connected to the mainboard/controller (without the splitter) to rule out issues with the devices themselves.
6.2 Бош туташуулар
- Secure Fit: Ensure all connectors are pushed in firmly. Some aRGB connectors may require a small amount of force to fully seat.
- Pin Integrity: Inspect the pins on both the cable and the devices for any bends or damage. Straighten bent pins carefully if possible, or replace damaged components.
7. Техникалык шарттар
| Өзгөчөлүк | Деталь |
|---|---|
| Бренд | Alphacool |
| Модель номери | 18708 |
| Кабелдин узундугу | 30 сантиметр |
| Туташтыргыч түрү | 3-pin aRGB (1 input to 3 outputs) |
| Тtage | 5V |
| Материал | Plastic, Sleeved |
| Түс | Кара |
| Элемент Салмагы | 0.02 килограмм (болжол менен 0.704 унция) |
8. Кепилдик жана колдоо
For warranty information and technical support, please refer to the documentation provided with your purchase or visit the official Alphacool webсайт. Кепилдик дооматтар үчүн сатып алганыңыздын далилин сактаңыз.
For further assistance, you may contact Alphacool customer support directly through their official channels.