1. Киришүү
This manual provides detailed instructions for the installation, operation, and maintenance of your Elprico H310 LGA 1151 Micro ATX DDR4 Motherboard. Please read this manual thoroughly before proceeding with installation to ensure proper setup and optimal performance.
2. Коопсуздук маалыматы
- Компоненттерди орнотуудан же алып салуудан мурун ар дайым кубат менен жабдууну розеткадан ажыратыңыз.
- Компоненттерге электростатикалык разряддын (ESD) бузулушун алдын алуу үчүн антистатикалык билек боону тагыңыз.
- Сезимтал бөлүктөргө тийбеш үчүн компоненттерди четинен кармаңыз.
- Ашыкча ысып кетүүнүн алдын алуу үчүн компьютериңиздин корпусунда туура желдетүүнү камсыз кылыңыз.
- Motherboard'ду нымдуулуктан жана экстремалдык температурадан алыс кармаңыз.
3. Продукт бүтүп калдыview
The Elprico H310 LGA 1151 Micro ATX DDR4 Motherboard is designed for desktop computers, supporting Intel 8th and 9th Generation Core processors. It features a stable power supply, high-speed H310 chipset, and rich expansion ports for versatile computing tasks.
Негизги өзгөчөлүктөрү:
- Кеңири CPU шайкештиги: Supports LGA 1151 socket for Intel 8th and 9th Generation Core processors.
- Dual-Channel DDR4 Memory: Two DDR4 DIMM slots supporting up to 32GB of RAM with effective frequencies of 1066/1333/1600 MHz.
- Туруктуу энергия менен камсыздоо: Features a three-phase power design with all solid-state capacitors and 24+8 pin power connectors for reliable operation.
- Жогорку ылдамдыктагы чипсет: Utilizes the Intel H310 chipset for stable and reliable performance.
- Интегралдык графика: Equipped with an integrated graphics processor and multiple display outputs (DVI, HDMI compatible, VGA).
- Rich Expansion Ports: Includes SATA 6Gb/s ports, NVME M.2 slot, PCIe X16 slot, PCIe X1 slot, USB 3.0/2.0, PS/2, RJ45 1000Mbps, and audio ports.
Motherboard жайгашуусу:
Below are images illustrating the various components and ports on the motherboard.

3.1-сүрөт: жогорудан ылдыйга view of the motherboard, showing the LGA 1151 CPU socket and the Intel H310 chipset area.
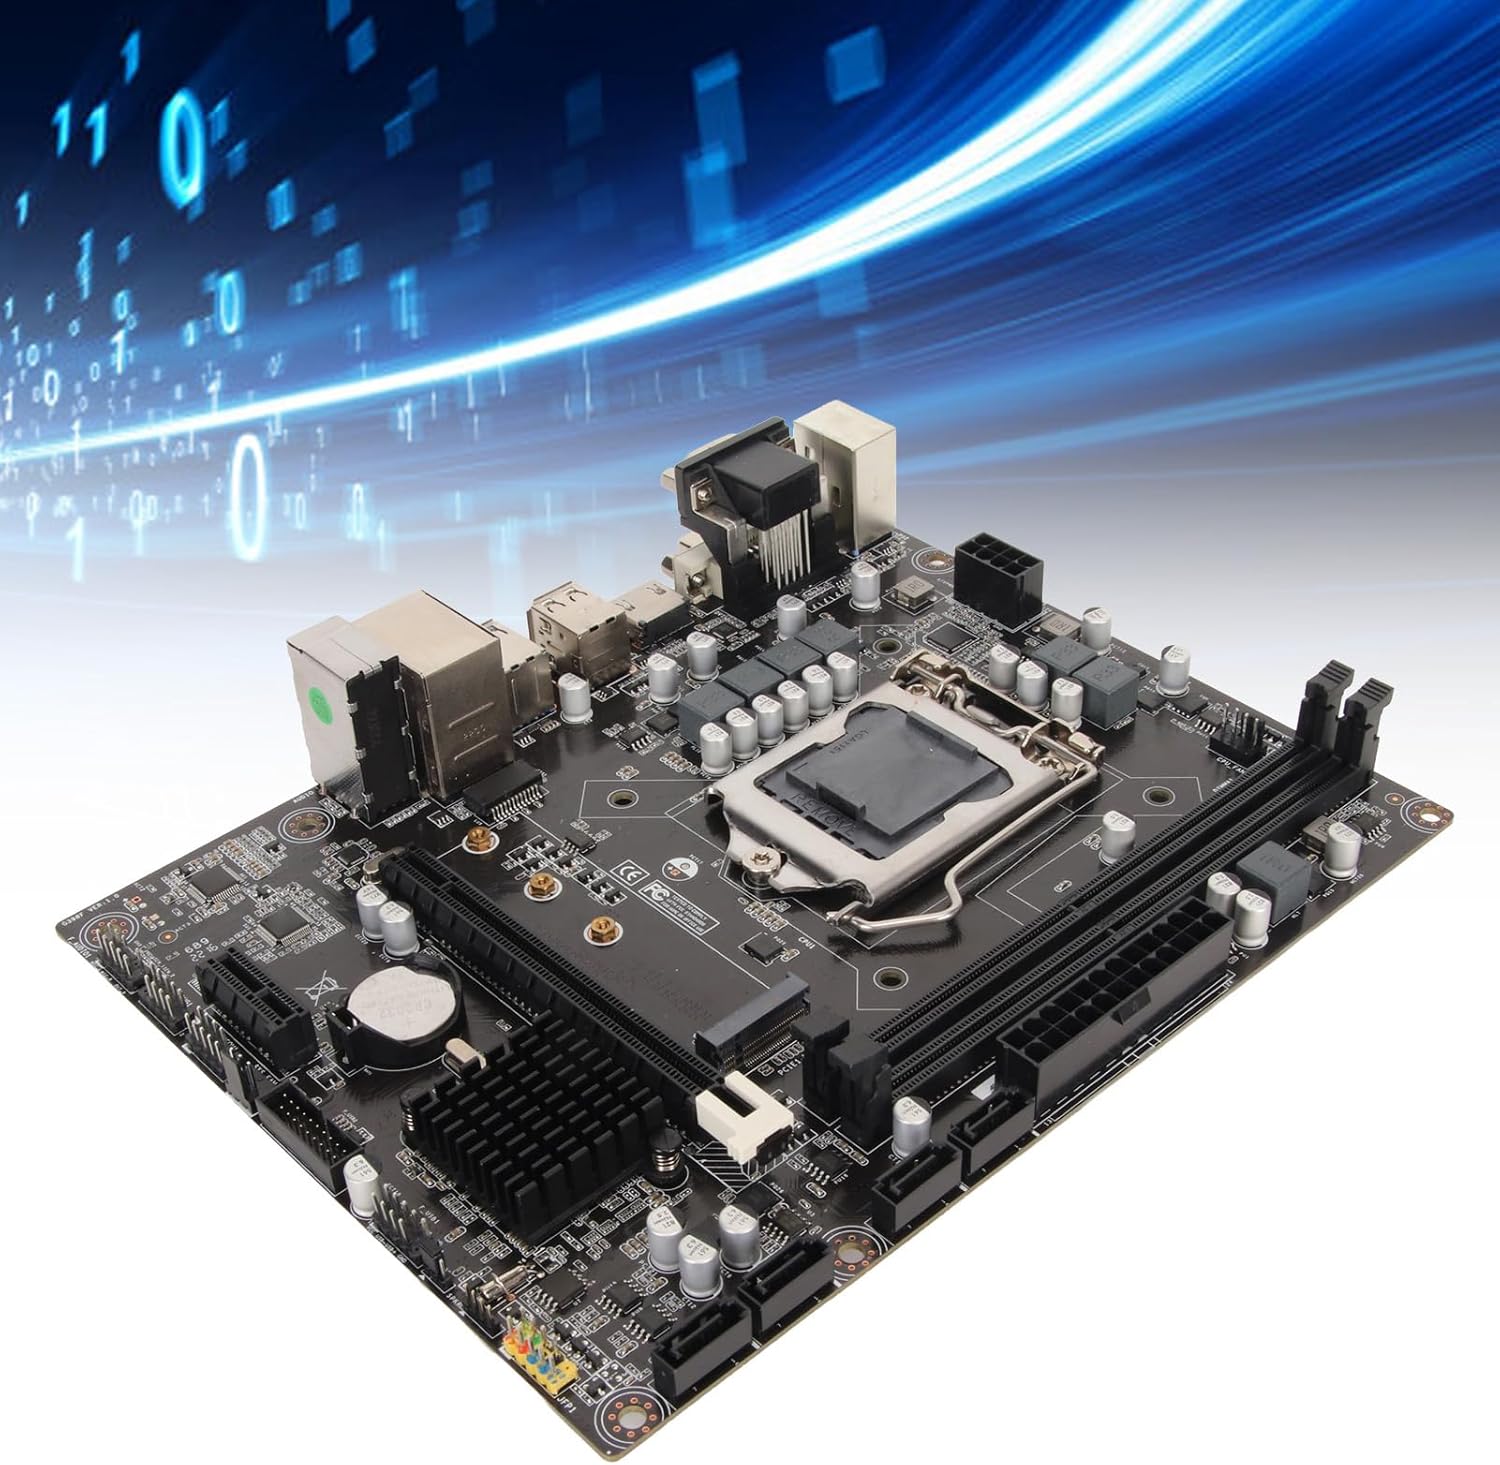
Figure 3.2: Component diagram highlighting the CPU socket, DDR4 memory slots, H310 chipset, and SATA 3.0 (6Gb/s) ports.
3.3-сүрөт: Детальдуу view of the rear I/O panel, featuring DVI, HDMI, VGA, USB 2.0/3.0, LAN, and audio jacks.
4. Орнотуу боюнча колдонмо (орнотуу)
Motherboard жана анын компоненттерин орнотуу үчүн бул кадамдарды кылдаттык менен аткарыңыз.
4.1 CPU орнотуу
- LGA 1151 CPU розеткасын энелик платадан табыңыз.
- CPU розеткасынын капкагын ачуу үчүн жүктөө рычагын акырын түртүп, аны капталга тартыңыз.
- Align the triangular mark on your Intel LGA 1151 processor with the corresponding mark on the socket.
- Процессорду мажбурлабастан розеткага этияттык менен салыңыз.
- Розетка капкагын жаап, жүктөө рычагын чыкылдагыча ордуна түртүңүз.

Figure 4.1: CPU socket area, showing the mechanism for processor installation.
4.2 RAM орнотуу
- Эки DDR4 DIMM уячасын табыңыз.
- Эстутум уясынын эки учундагы клиптерди ачыңыз.
- DDR4 эстутум модулундагы оюкту DIMM уячасындагы ачкыч менен тууралаңыз.
- Эстутумдун модулун уячага кыстаргычтар орнотулганча кыстарыңыз.
4.3 Сактагычты орнотуу
The motherboard supports both SATA and NVMe M.2 storage devices.
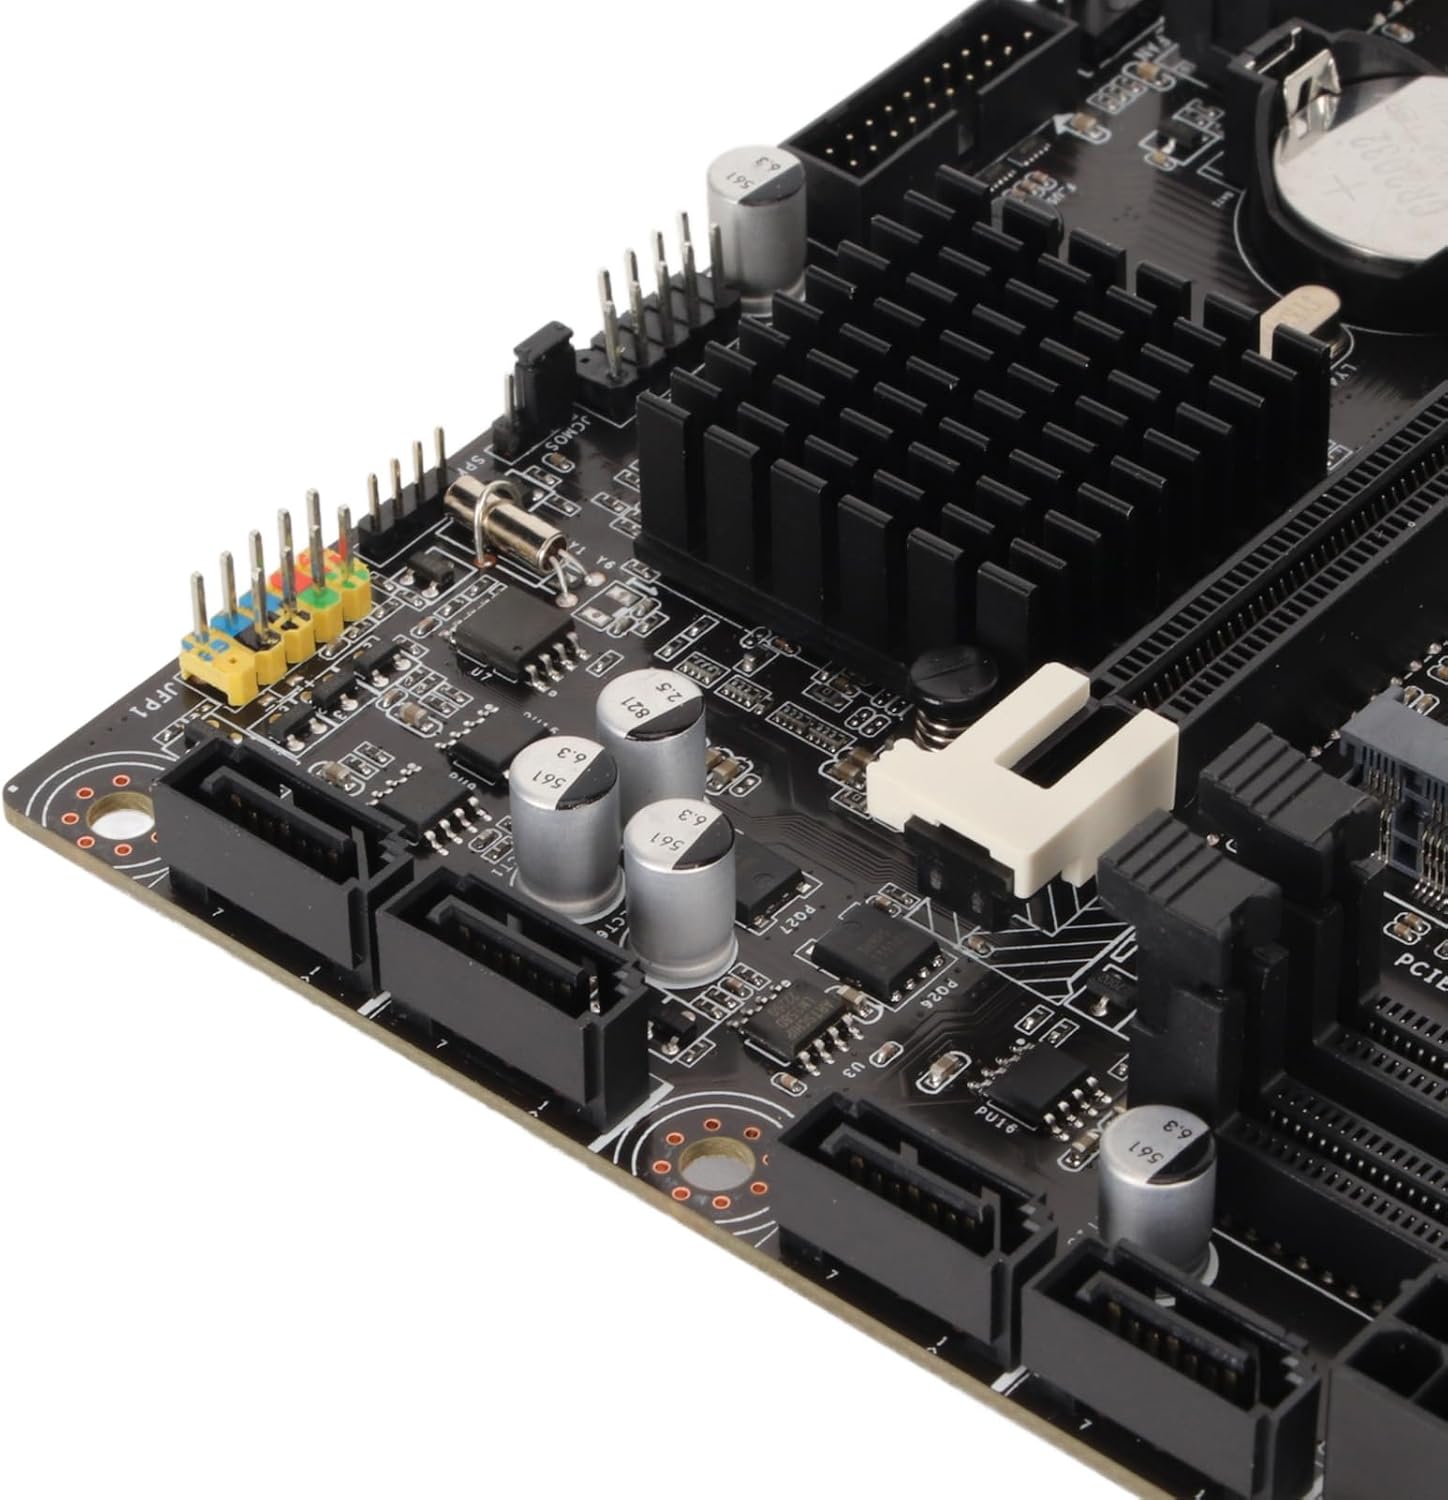
SATA дисктери:
- SATA маалымат кабелинин бир учун энелик платадагы SATA 6Gb/s портуна туташтырыңыз.
- SATA маалымат кабелинин экинчи учун SATA HDD/SSDге туташтырыңыз.
- SATA кубат кабелин кубат булагыңыздан SATA HDD/SSDге туташтырыңыз.
NVMe M.2 SSD:
- Motherboard боюнча M.2 уячасын табыңыз.
- M.2 туруучу буроону алып салыңыз.
- Insert the NVMe M.2 SSD into the slot at a 30-degree angle.
- Gently push down the SSD and secure it with the M.2 standoff screw.
4.4 Кеңейтүү картасын орнотуу (PCIe)
- Locate the PCIe X16 or PCIe X1 slots.
- Тийиштүү кеңейтүү уячасынын капкагын компьютериңиздин корпусунан алып салыңыз.
- Align your expansion card (e.g., graphics card) with the chosen PCIe slot.
- Карта толугу менен уячага отурганга чейин бекем басыңыз.
- Картаны бурама менен корпуска бекитиңиз.
4.5 Кубат туташтыруу
- Электр булагыңыздан келген 24-пиндүү ATX кубат туташтыргычын энелик платадагы негизги 24-пиндүү кубат розеткасына туташтырыңыз.
- Connect the 8-pin ATX 12V power connector from your power supply to the 8-pin power socket near the CPU.
4.6 Front Panel Connections
Connect the cables from your PC case's front panel (USB, audio, power button, reset button, LED indicators) to the corresponding headers on the motherboard. Refer to the motherboard diagram for exact header locations.
4.7 Mounting the Motherboard
- Install standoffs in your PC case according to the Micro ATX form factor.
- Carefully place the motherboard onto the standoffs, ensuring the rear I/O ports align with the case's I/O shield.
- Аналык платаны бурамалар менен бекитиңиз.

4.2-сүрөт: Жалпы view of the motherboard, illustrating its Micro ATX form factor and component placement.
5. Иштөө нускамалары
5.1 Биринчи жүктөө
After completing all hardware installations, connect your monitor, keyboard, and mouse. Power on your system. The system should display the BIOS/UEFI splash screen.
5.2 BIOS/UEFI орнотуу
BIOS/UEFI орнотуунун утилитасына кирүү үчүн, басыңыз DEL or F2 key repeatedly during the initial boot sequence. Here you can configure boot order, system time, and other advanced settings.
5.3 Драйверди орнотуу
After installing your operating system, install the necessary drivers for the chipset, integrated graphics, LAN, and audio. These drivers are typically provided on a support CD or can be downloaded from the manufacturer's webсайт.
6. Техникалык тейлөө
6.1 Тазалоо
Regularly clean your PC case and motherboard to prevent dust buildup, which can lead to overheating. Use compressed air to remove dust from fans, heatsinks, and other components. Ensure the system is powered off and unplugged before cleaning.
6.2 BIOS жаңыртуулары
Мезгил-мезгили менен өндүрүүчүнүн текшерүү website for BIOS/UEFI updates. Updates can improve system stability, add support for new hardware, or fix bugs. Follow the provided instructions carefully when updating the BIOS to avoid system damage.
7. Кыйынчылыктарды
7.1 Жалпы маселелер
- Кубат жок: Check all power connections (24-pin, 8-pin CPU, GPU, SATA) and ensure the power supply is switched on.
- Дисплей жок: Verify monitor connection, ensure graphics card (if dedicated) is properly seated and powered, and try reseating RAM modules.
- Системанын туруксуздугу/бузуулар: Check CPU and GPU temperatures, ensure RAM is correctly installed, and verify driver versions.
- Жүктөө түзмөк табылган жок: Check SATA/M.2 connections, verify boot order in BIOS/UEFI, and ensure the operating system is properly installed on the drive.
7.2 Ката коддору
If your motherboard has a diagnostic LED display or emits beep codes, consult the motherboard's specific documentation (if available) for the meaning of these codes. Common beep codes often indicate issues with RAM, CPU, or graphics.
8. Техникалык шарттар
| Өзгөчөлүк | Спецификация |
|---|---|
| Бренд | Elprico |
| Модель аты | Elpricop91byt60k7 |
| CPU розетка | LGA 1151 |
| Шайкеш процессорлор | Intel 8th Generation, 9th Generation Core Processors |
| Чипсет түрү | Intel H310 |
| RAM эс технологиясы | DDR4 |
| Memory Slots | 2 (Кош каналдуу) |
| Maximum RAM Size | 32 ГБ |
| Memory Clock Speed | 1600 МГц (натыйжалуу) |
| Шайкеш түзмөктөр | Иш столунун компьютери |
| Жалпы USB порттору | 14 (Various types, including USB 3.0/2.0) |
| Форма фактору | Micro ATX (Approx. 21.5 x 17 cm / 8.5 x 6.7 inches) |
| Интегралдык батарея | CR2032 (240 мАч) |
9. Кепилдик жана колдоо
9.1 Өндүрүүчүнүн Кепилдиги
Бул продукт менен келет Өндүрүүчүнүн кемчиликтерине каршы 1 жылдык кепилдик. Please retain your proof of purchase for warranty claims. For specific terms and conditions, refer to the warranty information provided at the time of purchase or contact the seller.
9.2 Техникалык колдоо
For technical assistance, troubleshooting, or further inquiries, please contact your retailer or the manufacturer's support channels. Information regarding spare parts availability and software updates is currently unavailable.