1. Продукт бүтүп калдыview
The Tristar Princess Dynamic Storm is a versatile cordless vacuum cleaner designed for efficient home cleaning. It features a powerful 220W brushless DC motor, providing strong suction for various surfaces. The unit can easily convert from a stick vacuum to a handheld vacuum for targeted cleaning. Its motorized brush head includes LED lights to illuminate dust and debris, ensuring thorough cleaning. The 0.6-liter dustbin offers hygienic emptying with a simple button press, minimizing contact with dirt. With a battery life of up to 30 minutes and three speed settings, this vacuum is suitable for daily cleaning tasks.
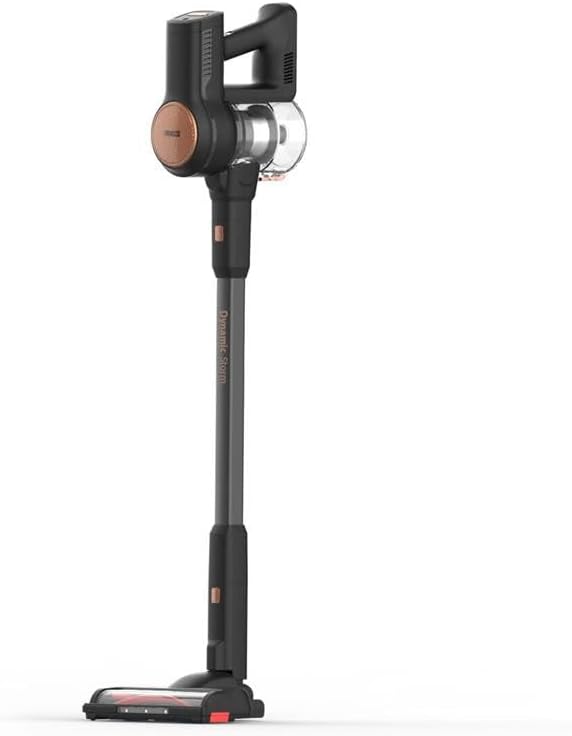
1-сүрөт: Толук view of the Princess Dynamic Storm Cordless Vacuum Cleaner.
2. Коопсуздук нускамалары
Шайманды колдонуудан мурун бардык коопсуздук көрсөтмөлөрүн кунт коюп окуп чыгыңыз. Келечекте колдонуу үчүн бул колдонмону сактап коюңуз.
- Кубат адаптери жергиликтүү электр менен камсыздооңузга шайкеш келерин текшериңиз.
- Чаң соргучту нымдуу беттерде же суюктуктарды алуу үчүн колдонбоңуз.
- Чачты, кенен кийимдерди, манжаларды жана дененин бардык бөлүктөрүн тешиктерден жана кыймылдуу бөлүктөрдөн алыс кармаңыз.
- Do not pick up burning or smoking materials, such as cigarettes, matches, or hot ashes.
- Do not use without the dustbin and filters properly in place.
- Бул шайман физикалык, сезүү же акыл-эс жөндөмү начар же тажрыйбасы жана билими жок адамдар (анын ичинде балдар) үчүн, эгерде алардын коопсуздугуна жооптуу адам тарабынан көзөмөлсүз же шайманды колдонуу боюнча көрсөтмө болбосо, колдонууга арналбайт.
- Балдар шайман менен ойнобошу үчүн аларды көзөмөлгө алуу керек.
- Өндүрүүчүлөр сунуштаган аксессуарларды гана колдонуңуз.
3. Пакеттин мазмуну
Пакетте бардык компоненттер бар экенин текшериңиз:
- Main Vacuum Unit (motor and dustbin assembly)
- Узартуу түтүгү
- Motorized Brush Head with LED Lights
- Жарака куралы
- Эмерек щеткасы
- Заряддоо адаптери
- Wall Mount (if included, check packaging)
- User Manual
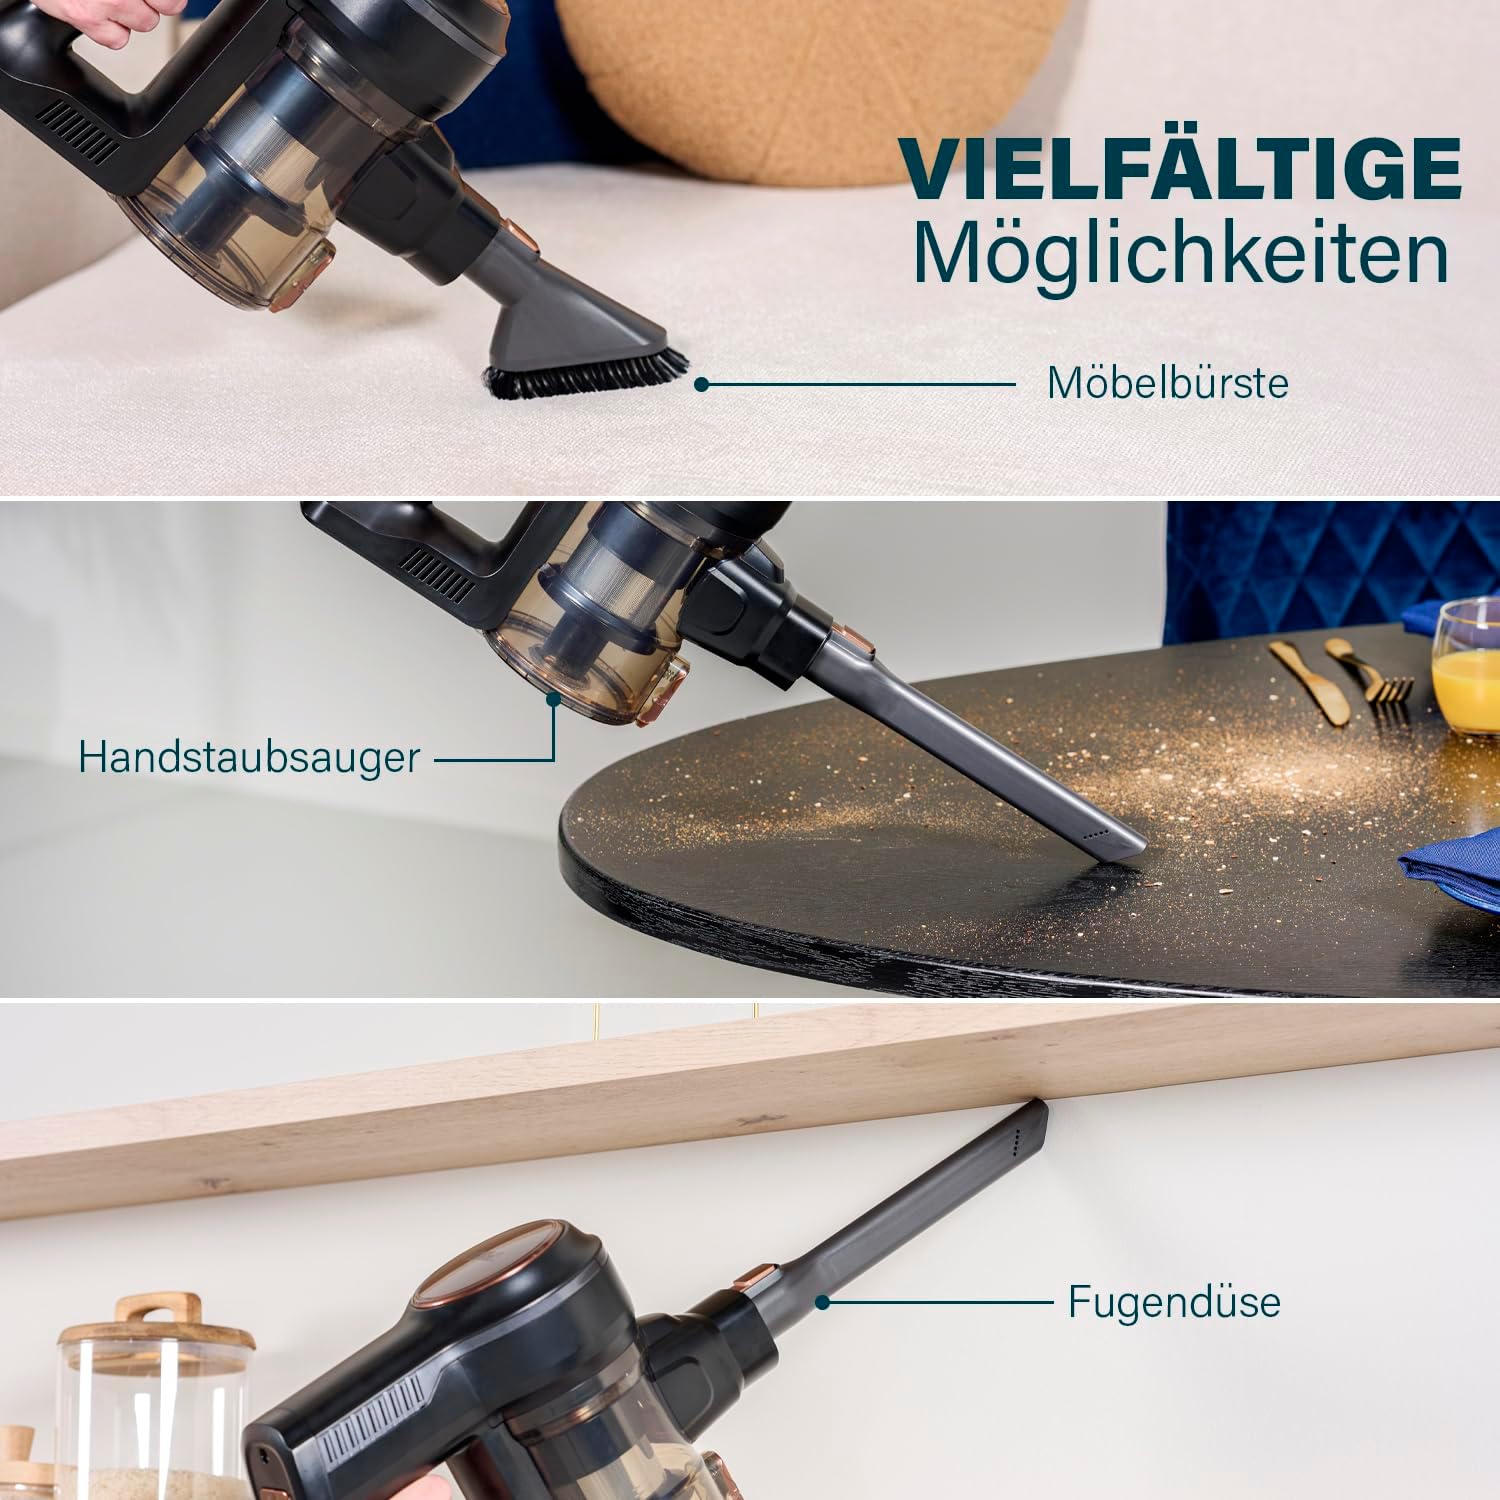
Figure 2: The vacuum cleaner shown with its versatile attachments, including the furniture brush, handheld vacuum configuration, and crevice tool.
4. Монтаж жана Орнотуу
4.1 Вакуумду чогултуу
- Узартуу түтүгүн тиркөө: Кеңейтүүчү түтүктү негизги вакуумдук түзүлүшкө бекем чыккыча кыстарыңыз.
- Attach the Motorized Brush Head: Connect the motorized brush head to the other end of the extension tube, ensuring it clicks firmly.
- Кол режими: For handheld use, detach the extension tube and connect accessories like the crevice tool or furniture brush directly to the main vacuum unit.
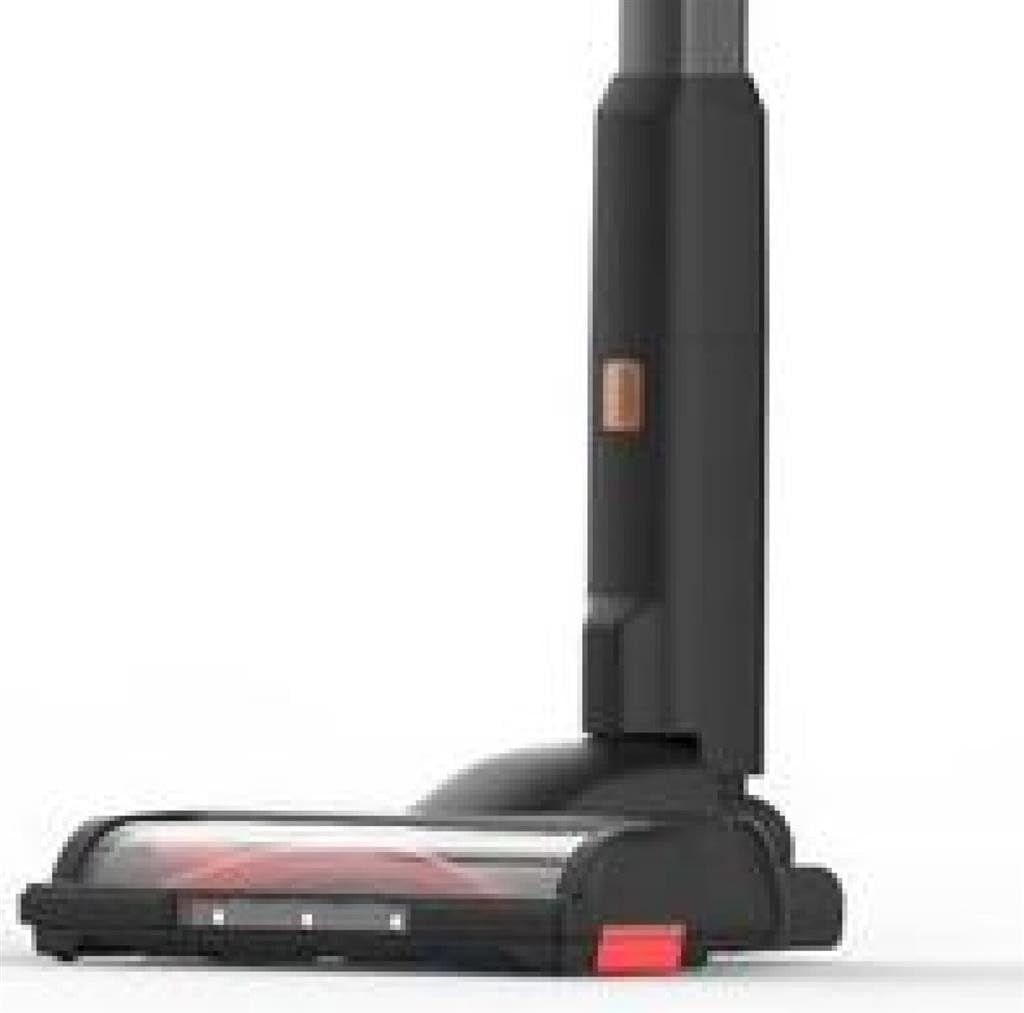
Сүрөт 3: Жакын пландан view of the motorized brush head, showing its design and LED lights.
4.2 Батареяны заряддоо
Before first use, fully charge the vacuum cleaner. A full charge takes approximately 105 minutes.
- Connect the charging adapter to the charging port on the main vacuum unit.
- Адаптерди розеткага сайыңыз.
- The charging indicator light will show the charging status. Refer to the indicator light section in the manual for specific light patterns.
- Толук заряддалгандан кийин адаптерди ажыратыңыз.
5. Иштөө нускамалары
5.1 Күйгүзүү/өчүрүү жана ылдамдыкты тандоо
- Күйгүзүү: Press the power button located on the main unit to turn on the vacuum cleaner. It will start in the lowest speed setting.
- Ылдамдыкты өзгөртүү: Press the speed selection button (if separate) or press the power button again to cycle through the 3 available speed settings (Low, Medium, High).
- Өчүрүү: Press the power button until the unit turns off.
5.2 Using the Motorized Brush Head with LED Lights
The motorized brush head is ideal for cleaning various floor types, including hard floors and carpets. The integrated LED lights illuminate dust and debris, making it easier to spot and clean hidden dirt.

Figure 4: The motorized brush head with its LED lights activated, highlighting dust and debris on the floor.
5.3 Аксессуарларды колдонуу
The included accessories enhance the vacuum's versatility:
- Жарака куралы: Use for narrow gaps, corners, and hard-to-reach areas.
- Эмерек щеткасы: Ideal for cleaning upholstery, curtains, and delicate surfaces.
These accessories can be attached directly to the main vacuum unit for handheld use or to the extension tube for extended reach.
5.4 Stable Parking Mode
The vacuum cleaner is designed with a stable parking mode, allowing it to stand upright on its own without needing to be leaned against a wall or placed in a dock. This provides convenient temporary storage during cleaning breaks.

Figure 5: The Princess Dynamic Storm vacuum cleaner standing upright independently, demonstrating its stable parking mode.
6. Техникалык тейлөө
Үзгүлтүксүз тейлөө оптималдуу иштешин камсыз кылат жана чаң соргучуңуздун иштөө мөөнөтүн узартат.
6.1 Таштанды кутусун бошотуу
Empty the 0.6-liter dustbin regularly, especially when the MAX line is reached, to maintain suction power.
- Hold the main vacuum unit over a trash can.
- Press the dustbin release button to open the bottom flap of the dustbin.
- Allow the contents to fall into the trash. Close the flap securely.

Figure 6: Illustration of the hygienic dustbin emptying process, showing the dustbin detached and being emptied with a button press.
6.2 Фильтрлерди тазалоо
The filters should be cleaned regularly to prevent clogging and maintain suction. It is recommended to clean them after every few uses.
- Twist and pull to remove the dustbin from the main unit.
- Чыпка топтомун таштанды челектен чыгарыңыз.
- Бош чаңды кетирүү үчүн чыпкаларды таштанды челектин үстүнө акырын басыңыз.
- If necessary, rinse the filters under cold running water. Ensure they are completely dry before reassembling.
- Reassemble the filters and dustbin, then reattach to the main unit.
6.3 Щетка түрмөгүн тазалоо
Щетканын рулонунда чачырап кеткен же таштандылардын бар-жогун мезгил-мезгили менен текшерип туруңуз. Тазалоо үчүн:
- Чаң соргучту өчүрүп, розеткадан ажыратыңыз.
- Locate the brush roll access cover on the bottom of the motorized brush head.
- Open the cover (refer to diagrams in the full manual if available) and remove the brush roll.
- Carefully cut and remove any tangled hair or fibers using scissors.
- Reinsert the brush roll and close the access cover securely.
7. Кыйынчылыктарды
Чаң соргучуңузда көйгөйлөргө туш болсоңуз, төмөнкү жалпы көйгөйлөрдү жана чечимдерди караңыз:
| Көйгөй | Мүмкүн себеп | Чечим |
|---|---|---|
| Вакуум күйбөйт | Батарея түгөндү Кубат баскычы туура басылган жок | Батареяны толук заряддаңыз Кубат баскычы бекем басылганын текшериңиз |
| Азайтылган соруу күчү | Таштанды челек толуп калды Фильтрлер тыгылып калган Hose or nozzle is blocked | Таштандыларды бошотуңуз Чыпкаларды тазалаңыз же алмаштырыңыз Бардык бөгөттөрдү текшерип, жок кылыңыз |
| Щетка түрмөгү айланбайт | Brетка түрмөгү тыгылып калды Brush roll motor issue | Clean hair and debris from the brush roll Эгер көйгөй чечилбесе, кардарларды колдоо кызматына кайрылыңыз |
| Батарея заряддалбай жатат | Заряддоочу туура эмес туташтырылган Заряддоочу же батарейка туура эмес | Ensure charger is securely connected to vacuum and outlet Жардам алуу үчүн кардарларды колдоо бөлүмүнө кайрылыңыз |
8. Техникалык шарттар
- Модель номери: 01.339390.01.001
- Бренд: Tristar (Manufacturer: Princess)
- Күч: 220 Watts (Brushless DC Motor)
- Тtage: 21.6 вольт
- Батарея түрү: 1 Литий-ион (кошулган)
- Иштөө убактысы: 30 мүнөткө чейин
- Заряддоо убактысы: Болжол менен 105 мүнөт
- Ылдамдыктардын саны: 3
- Таштанды урнасынын сыйымдуулугу: 0.6 литр
- Өлчөмдөрү (L x W x Y): 23 x 21 x 112 см
- Элемент Салмагы: 1 килограмм
- Ызы-чуу деңгээли: 1 Decibel (as per product specifications)
- Чыпка түрү: Диск чыпкасы
- Өзгөчөлүктөр: Portable, Cordless, Motorized brush with LEDs, Stable parking
- Сунушталган беттер: Бардык кабаттар
- International Article Code (UPC): 08712836981461
9. Кепилдик жана колдоо
This product comes with a standard manufacturer's warranty. For detailed warranty information, please refer to the warranty card included in your product packaging or visit the official Tristar/Princess website. For technical support, spare parts, or service inquiries, please contact the customer service department using the contact information provided in your warranty documentation.