1. Киришүү
The Walfront MPPT Solar Charge Controller is designed to efficiently manage power flow from your solar panels to your battery bank, optimizing charging performance for off-grid solar systems. This manual provides essential information for the safe and effective installation, operation, and maintenance of your 50A MPPT solar charge controller.

Image 1.1: Walfront MPPT Solar Charge Controller 50A. This image shows the front view of the orange and black controller, featuring an LCD screen displaying PV, Battery, and Load information, along with 'ESC' and 'SET' buttons.
2. Негизги өзгөчөлүктөрү
- High Efficiency MPPT Tracking: Features MPPT tracking efficiency greater than 99% and a maximum conversion efficiency of up to 98%, maximizing energy harvest from solar panels.
- Wide 180V PV Input and Auto Voltagэлектрондук таануу: Supports a maximum solar input voltage of 180V (at 25℃) and automatically recognizes 12V, 24V, 36V, and 48V battery systems. Compatible with battery voltag9Вдан 64Вга чейин.
- Clear LCD Display and Smart Protection: Built-in LCD provides real-time system data (voltage, current, operating status). Includes temperature compensation and multiple protection features for safe operation.
- Low No-Load Loss and Reliable Performance: No-load loss of ≤0.4W conserves energy. Designed for reliable operation in temperatures from -10℃ to 65℃ and altitudes up to 3000 meters.
- Орнотуу жана колдонуу оңой: Auto-recognition feature simplifies setup. Compact design allows for straightforward mounting.

Image 2.1: Automatic Voltage Identification. This image highlights the controller's ability to automatically identify 12V, 24V, 36V, and 48V systems, shown with various solar panel application examples.
3. Коопсуздук маалыматы
Please read all instructions carefully before installation and operation. Failure to follow these safety guidelines may result in personal injury, damage to the controller, or other equipment.
- Ensure all wiring is correctly polarized and securely connected. Loose connections can cause overheating and damage.
- Always connect the battery first, then the solar panel, and finally the load. Disconnect in the reverse order.
- Do not connect the solar panel array to the controller without a battery connected.
- Системанын томун камсыз кылууtage of the solar panel and battery are compatible with the controller's specifications.
- Контроллерди күйүүчү материалдардан жана тике күндүн нурунан алыс, жакшы желдетилген жерге орнотуңуз.
- Avoid touching live terminals. Use insulated tools during installation.
- This device is not waterproof. Protect it from moisture and water exposure.
4. Пакеттин мазмуну
Төмөндө тизмеленген нерселердин баары пакетиңизге камтылганын текшериңиз:
- 1 x Walfront MPPT Solar Charge Controller (50A)
- 4 х бурамалар
- 4 x Кеңейтүүчү бурамалар
- 1 х Колдонуучунун колдонмосу (бул документ)
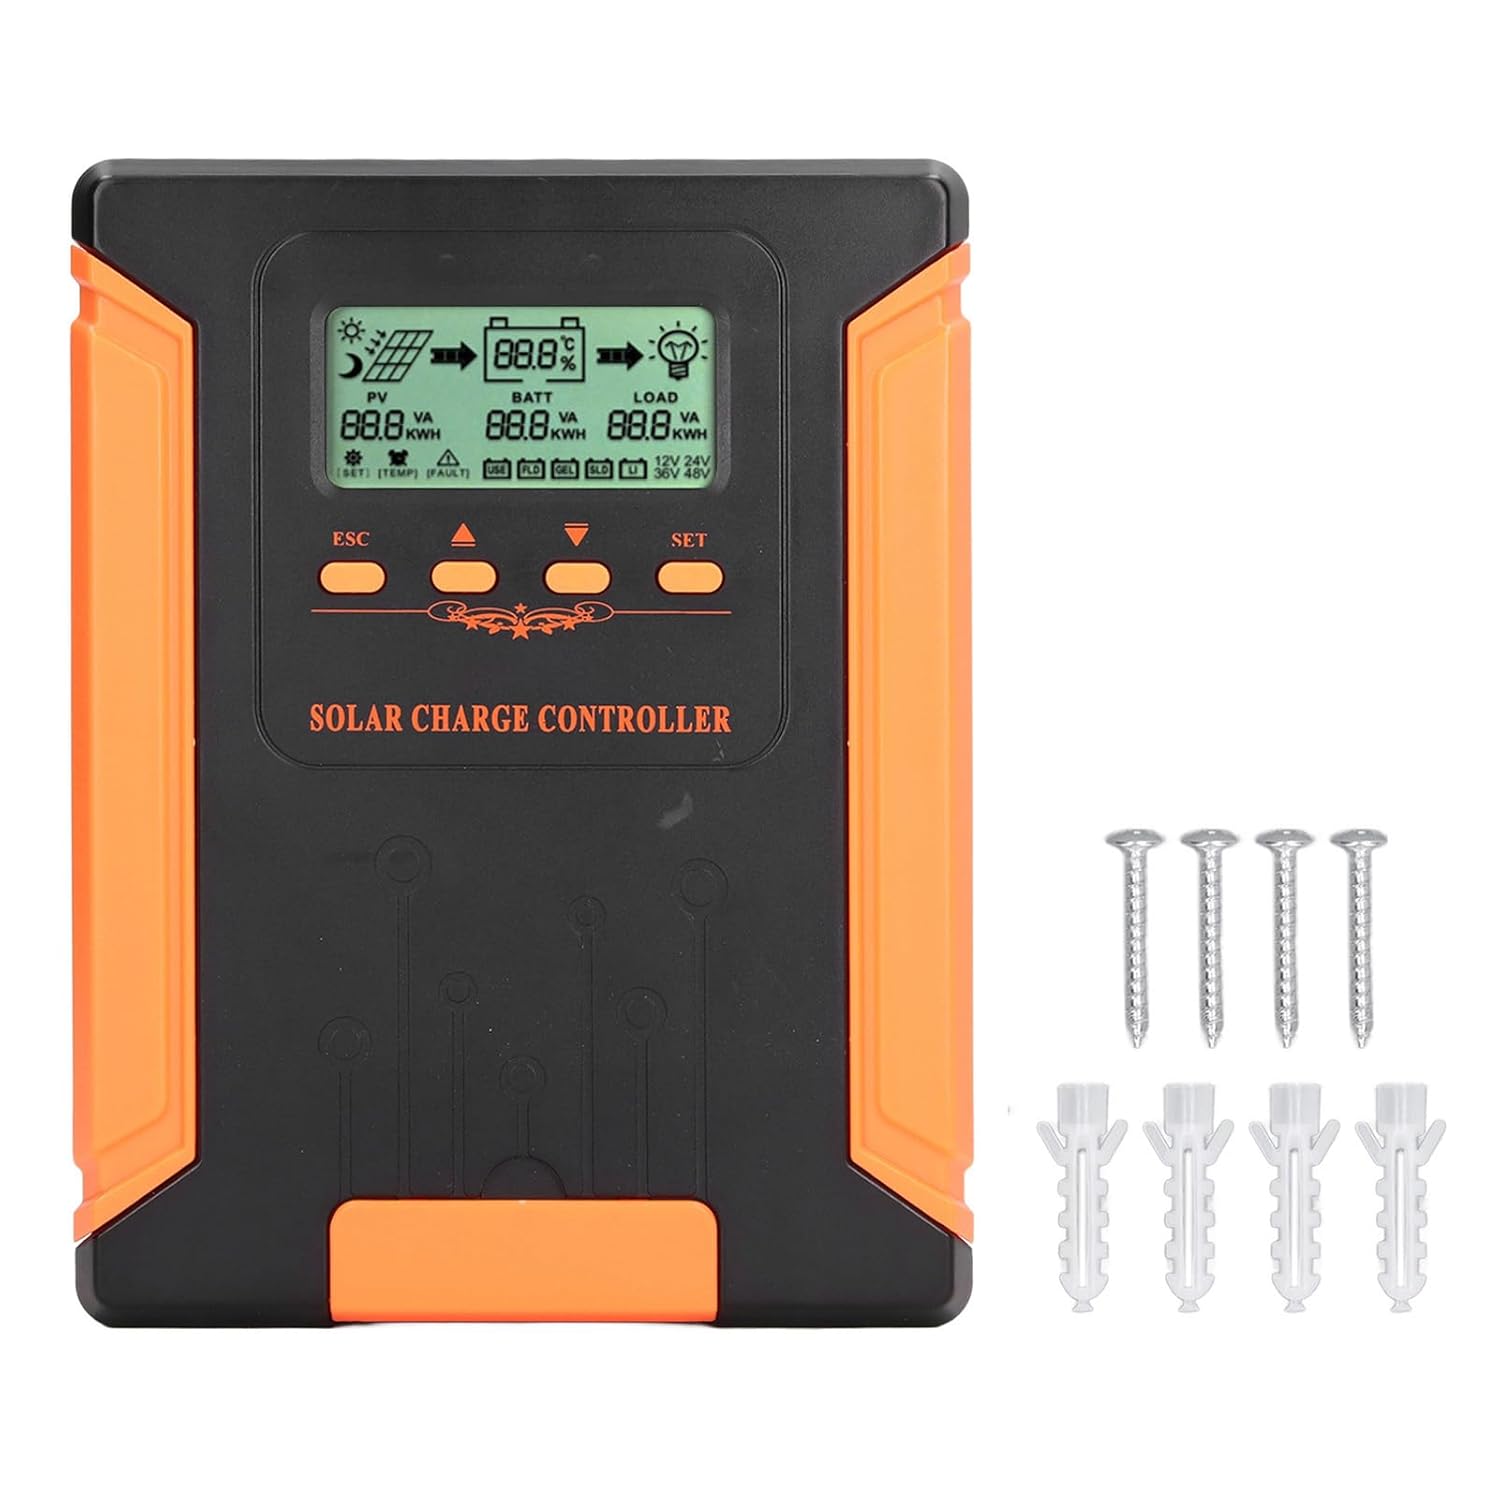
Image 4.1: Package Contents. This image displays the solar charge controller alongside the mounting screws and expansion screws provided in the package.
5. Орнотуу жана орнотуу
Follow these steps for proper installation of your solar charge controller.
5.1 Контроллерди орнотуу
- Кургак, жакшы желдетилген, тике күндүн нурунан, жогорку температурадан жана нымдуулуктан корголгон жерди тандаңыз.
- Ensure there is sufficient space around the controller for heat dissipation, especially around the cooling fins.
- Mount the controller vertically on a solid surface using the provided screws.
5.2 Зымдарды туташтыруу
Refer to the wiring diagrams below for correct connection sequence. Always connect in the following order:
- Батареяны туташтыруу: Connect the battery to the controller's battery terminals. Ensure correct polarity (+ to + and - to -). The controller will automatically detect the battery voltage.
- Күн панелин туташтыруу: Connect the solar panel array to the controller's PV terminals. Ensure correct polarity.
- Connect the DC Load (Optional): Туруктуу токтун жүгүн контроллердин жүк терминалдарына туташтырыңыз. Туура полярдуулукту текшериңиз.
To disconnect the system, follow the reverse order: disconnect load, then solar panel, then battery.

Image 5.1: Basic System Connection Diagram. This diagram illustrates the connection order: 1. Battery Assembly, 2. Solar Panel Assembly, 3. DC Load. It also shows an AC Load and Inverter connected to the Battery Assembly.

Image 5.2: Detailed System Wiring Diagram. This diagram provides a more comprehensive view of a solar power system, including solar panels, battery, inverter (AC Output/Input), and various AC loads like laptops, lights, air conditioners, televisions, and fans.
6. Иштөө нускамалары
The controller features an LCD display and control buttons for monitoring and configuration.
6.1 LCD дисплей
The LCD screen provides real-time information about your solar system, including:
- PV (Photovoltaic) Status: Киргизүү тtage, current, and power from solar panels.
- BATT (Battery) Status: Батарея көлөмүtage, charging current, and state of charge.
- LOAD Status: Output current and power to the DC load.
- System Voltage: Automatically detected battery system voltage (12V/24V/36V/48V).
- Ката көрсөткүчтөрү: Displays fault codes or warnings if issues occur.
6.2 Башкаруу баскычтары
The controller has three buttons: ESC, Up/Down arrows, and SET.
- ESC баскычы: Used to exit current menu or cancel an operation.
- Өйдө/ылдый баскычтары: Used to navigate through menu options or adjust parameter values.
- SET баскычы: Used to enter a menu, confirm a selection, or save changes to parameters.

Image 6.1: Control Buttons. This close-up image shows the 'ESC', 'Up arrow', 'Down arrow', and 'SET' buttons on the controller's front panel.
7. Техникалык тейлөө
Regular maintenance ensures optimal performance and longevity of your solar charge controller.
- Тазалоо: Periodically clean the controller's exterior with a dry cloth. Ensure the cooling fins are free from dust and debris to maintain proper heat dissipation.
- Байланыштары: Check all wiring connections regularly to ensure they are tight and free from corrosion.
- Текшерүү: Inspect the controller for any signs of physical damage, overheating, or unusual odors.
- Курчап турган чөйрө: Орнотуу чөйрөсү кургак жана жакшы желдетилип турушун камсыз кылыңыз.

Image 7.1: Cooling Fins. This close-up shows the cooling fins on the top of the controller, which are crucial for heat dissipation and require regular cleaning.
8. Кыйынчылыктарды
Контроллериңизде көйгөйлөргө туш болсоңуз, төмөнкү жалпы көйгөйлөрдү жана чечимдерди караңыз:
| Көйгөй | Мүмкүн себеп | Чечим |
|---|---|---|
| Controller display is off | Батарея туташтырылган эмес же батареянын көлөмү жокtage өтө төмөн. | Ensure battery is connected correctly and has sufficient charge (above 9V). |
| No charging current from PV | Solar panels not connected, insufficient sunlight, or PV polarity reversed. | Check PV connections and polarity. Ensure adequate sunlight. Verify PV voltage диапазонунда. |
| Жүк иштебейт | Load disconnected, load current too high, or load polarity reversed. | Check load connections and polarity. Ensure load current does not exceed controller's rating. |
| Батарея толук заряддалган жок | Insufficient solar input, undersized solar array, or battery issues. | Increase solar panel capacity or check for shading. Inspect battery health. |
9. Техникалык шарттар
Below are the technical specifications for the Walfront MPPT Solar Charge Controller 50A.
| Параметр | Спецификация |
|---|---|
| System Voltage | 12V / 24V / 36V / 48V Auto |
| Кубатталуучу токтун номиналы | 50A |
| No Load Loss | ≤0.4W |
| Solar Maximum Input Voltage | 180V (at 25℃), 150V (at -25℃) |
| Батарея Voltage Диапазон | 9-64V |
| Максималдуу Power Point Voltage Диапазон | Батарея Voltage +2Вдан 150Вга чейин |
| Конверсиянын эффективдүүлүгү | ≤98% |
| MPPT Tracking Efficiency | >99% |
| Температураны компенсациялоо коэффициенти | -2mv/℃/2V (default value) |
| Иштөө температурасы | -10 градустан 65 градуска чейин |
| Коргоо даражасы | IP21 |
| Бийиктик | ≤3000 Meter / 9842.5ft |

Image 9.1: Model Comparison Table. This table provides a comparison of rated charging current and solar panel maximum input power for CM-50 (50A) and CM-60 (60A) models across different system voltages.
10. Кепилдик жана колдоо
Кепилдик маалыматы жана техникалык колдоо үчүн, сатып алуу учурунда берилген документтерди караңыз же сатуучуга кайрылыңыз. Сатып алганыңыздын далили катары сатып алуу дүмүрчөгүңүздү сактаңыз.