
1. Киришүү
The Cuifati OBD Smart Gauge Display is an advanced vehicle information display system designed to enhance driving safety and awareness. Featuring a dual system (OBD and GPS), it provides real-time data such as speed, fuel consumption, voltage, altitude, and more. This device is equipped with LED ambient lighting and multiple customizable display interfaces to suit various user preferences and vehicle types.
Негизги өзгөчөлүктөр төмөнкүлөрдү камтыйт:
- Эки системанын иштеши: Supports both OBD2 and GPS modes for comprehensive vehicle data.
- Реалдуу убакыт режиминдеги маалыматтарды көзөмөлдөө: Displays critical information like speed, RPM, water temperature, voltage, fuel consumption, and more.
- Ыңгайлаштырылуучу интерфейстер: Offers multiple display styles to personalize your driving experience.
- LED чөйрө жарыктандыруу: Provides visual cues for normal operation (blue) and alarms (red flashing).
- Кеңири шайкештик: Supports 10 OBD2 protocols, compatible with most vehicles manufactured after 2005 (European) or 2008 (other regions). GPS mode is universally applicable.
2. Пакеттин мазмуну
Пакетте бардык буюмдар бар экенин текшериңиз:
- 1 x Cuifati OBD Smart Gauge Display Host
- 1 x OBD Connection Line (1.5m/4.9ft)
- 2 x эки тараптуу лента
- 1 x Орнотуу ачкычы
- 1 x Англис тили боюнча колдонмо (бул документ)

Image: The Cuifati OBD Smart Gauge Display unit shown with its connection cable, double-sided tape, and installation wrench.
3. Орнотуу жана орнотуу
The Cuifati OBD Smart Gauge Display offers flexible installation options. The OBD2 interface is typically located on the driver's side, approximately 30cm (11.8 inches) from the center of the dashboard.
- От алдыргычты өчүрүңүз унааңыздын.
- Locate the OBD2 interface сиздин унааңызда.
- Connect the provided OBD cable to the vehicle's OBD2 interface.
- Connect the other end of the OBD cable to the OBD interface on the smart gauge display.
- Position the display unit on your dashboard. You can use the included double-sided tape for a secure flat dashboard mount or consider alternative mounting methods if preferred.
- Carefully hide the OBD cable along the A-pillar or under the dashboard trim to ensure it does not obstruct driving.
- Turn on the ignition switch. The device will power on and begin operation.

Image: Illustration showing two common installation methods: flat on the dashboard or mounted on the windshield.
4. Иштөө нускамалары
4.1 Dual System Functionality (OBD+GPS)
The device operates with a dual system, automatically detecting the available connection:
- OBD System: Communicates strictly in accordance with SAE J1939 Protocol Standard. This CAN communication system is stable and can read over 100 data items from your car, including speed, RPM, water temperature, voltage, fuel consumption, and more.
- GPS системасы: When OBD data is unavailable or for universal compatibility, the GPS system provides data such as speed, date, time, altitude, driving direction, latitude, longitude, and number of satellites.

Image: A conceptual diagram showing the integration of OBD and GPS chips for dual system functionality.
4.2 Ambient Light Function
The integrated LED ambient lighting provides visual feedback on the device's status:
- Кадимки операция: The light illuminates normally after booting, displaying a blue color. The brightness adjusts with the surrounding environment.
- Ойготкуч абалы: When an alarm condition is triggered (e.g., overspeed, high water temperature), the light turns red and flashes, maintaining its brightest state for clear visibility.
- Жарыктыкты көзөмөлдөө: The brightness can be manually adjusted or turned off. Even if turned off, it will still flash red in case of an alarm.

Image: A visual guide detailing the blue light for normal operation and red flashing for alarm conditions.
4.3 Display Interfaces and Data Points
The device offers multiple display interfaces, allowing you to customize the information presented. You can switch between these interfaces to view various data points relevant to your driving needs.

Сүрөт: Коллаж көрсөтүүasing nine distinct display interfaces, each presenting vehicle data in a different visual layout.
Common data points that can be displayed include:
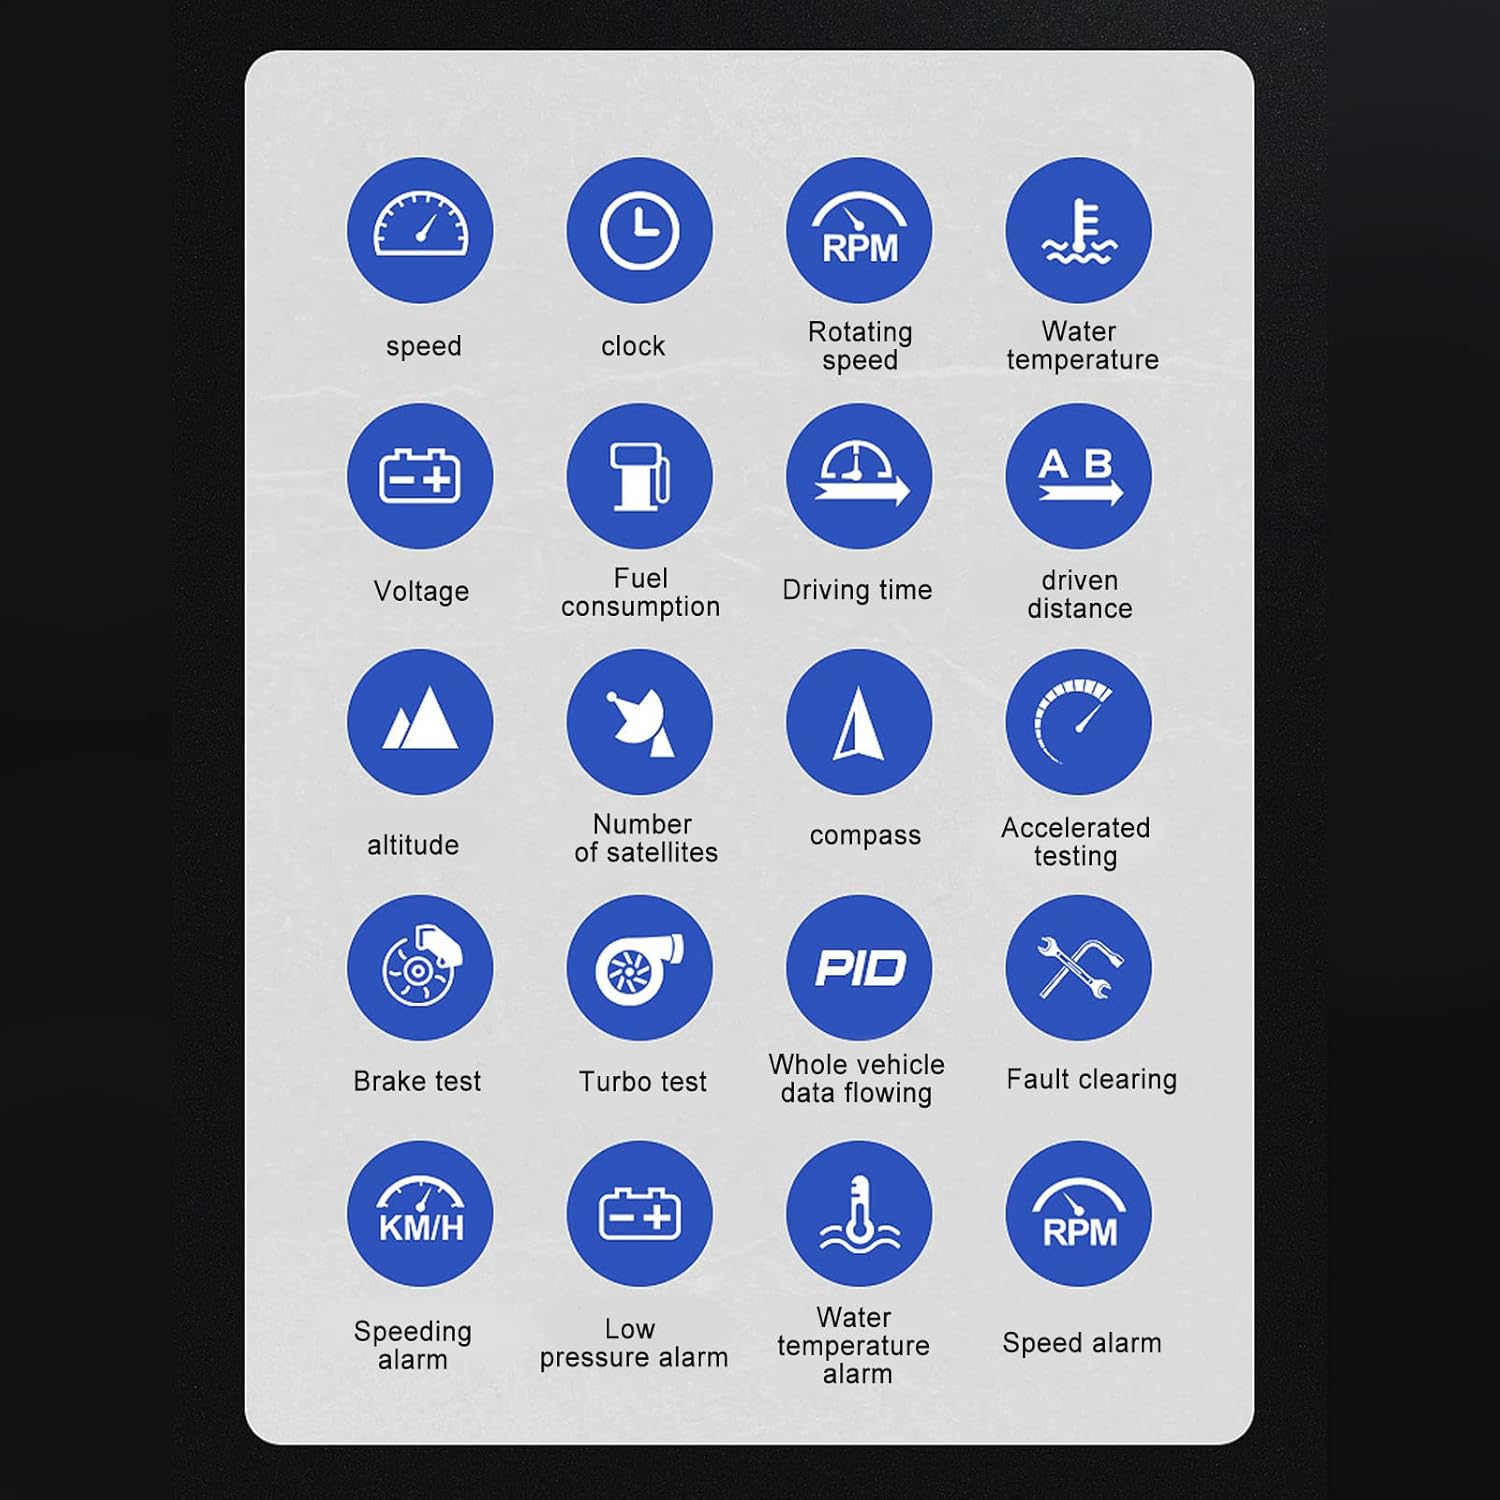
Image: A grid of icons representing various measurable parameters such as speed, clock, RPM, water temperature, voltage, fuel consumption, driving time, driven distance, altitude, number of satellites, compass, accelerated testing, brake test, turbo test, whole vehicle data flowing, fault clearing, speeding alarm, low pressure alarm, water temperature alarm, and speed alarm.
5. Техникалык тейлөө
To ensure the longevity and optimal performance of your Cuifati OBD Smart Gauge Display, follow these maintenance guidelines:
- Тазалоо: Use a soft, dry cloth to clean the display screen and exterior. Avoid abrasive cleaners or solvents that could damage the surface.
- Экологиялык шарттар: Аппаратты экстремалдык температурага, түз күндүн нуруна көпкө же жогорку нымдуулукка дуушар кылуудан алыс болуңуз.
- Кабельге кам көрүү: Ensure the OBD connection cable is not pinched or excessively bent, which could damage the internal wiring.
- Коопсуз орнотуу: Periodically check that the device is securely mounted to prevent it from dislodging during driving.
6. Кыйынчылыктарды
If you encounter issues with your Cuifati OBD Smart Gauge Display, refer to the following common problems and solutions:
- Түзмөк күйбөйт:
- Ensure the OBD cable is securely connected to both the device and the vehicle's OBD2 port.
- Verify that the vehicle's ignition is turned on.
- Check the vehicle's OBD2 port for any damage or loose connections.
- No data displayed in OBD mode:
- Confirm your vehicle is OBD2 compliant (European cars after 2005, other regions after 2008).
- Ensure the OBD cable is fully inserted.
- Try restarting the vehicle and the device.
- If OBD data is still not available, the device should automatically switch to GPS mode.
- Inaccurate GPS data (speed, altitude):
- Аппараттын таза болушун текшериңиз view of the sky to receive satellite signals. Obstructions like tunnels or dense urban areas can affect GPS accuracy.
- Allow a few minutes for the GPS to acquire sufficient satellites after power-on.
- Ambient light not functioning correctly:
- Check device settings to ensure the ambient light feature is enabled and not manually turned off.
- If an alarm condition is present, the light should flash red regardless of brightness settings.
7. Техникалык шарттар
| Өзгөчөлүк | Спецификация |
|---|---|
| Бренд | Cuifati |
| Модель номери | CUIFATInbifq9u5ye |
| Элемент түрү | OBD Smart Gauge Display |
| Материал | PC+ABS (Acrylonitrile Butadiene Styrene) |
| Орнотуу жери | Куралдар тактасы |
| Кош система | OBD+GPS |
| OBD Connection Line Length | 1.5 м / 4.9 фут |
| OBD System Protocol | SAE J1939 (Supports 10 OBD2 Protocols) |
| Айланадагы жарык функциясы | Blue (Normal), Red Flashing (Alarm), Adjustable Brightness |
| Элемент Салмагы | 10.1 унция (287 грамм) |
| Дата биринчи жеткиликтүү | 25-август, 2023-жыл |
8. Кепилдик жана колдоо
For warranty information, please refer to the documentation provided at the time of purchase or contact your retailer. Specific warranty terms and conditions may vary.
If you require technical assistance or have questions not covered in this manual, please contact Cuifati customer support through their official channels or the platform where the product was purchased.