
1. Киришүү
The PGST Wireless Home Alarm System (Model Pg105-2geu-d) is a comprehensive security solution designed for home and office environments. This system integrates GSM 2G and Wi-Fi connectivity, offering reliable alarm notifications via SMS and app pushes. It supports smart home integration with Google Assistant, Amazon Alexa, and Tuya Smart Life, providing enhanced control and monitoring capabilities. This manual provides detailed instructions for setting up, operating, and maintaining your alarm system.
2. Пакеттин мазмуну
Before proceeding with the installation, please verify that all components are present in the package:
- 1x Alarm Host (Main Control Panel)
- 3x PIR кыймыл детекторлору
- 6x Door and Window Sensors
- 2x алыстан башкаруу
- 2x RFID Cards
- 1x SOS баскычы
- 1x Siren

Image: PGST Wireless Home Alarm System control panel and included accessories.
3. Орнотуу жана орнотуу
3.1. Powering On and SIM Card Installation
To power on the alarm host, connect it to a power source using the provided adapter. For GSM functionality, insert a 2G SIM card into the designated slot on the back of the main control panel. Ensure the SIM card is correctly oriented before closing the cover.

Сүрөт: Арткы view of the alarm host with the SIM card slot visible.

Сүрөт: деталдуу view of the alarm host's back panel, indicating the SIM card slot and other connections.
3.2. Тармак конфигурациясы (Wi-Fi)
The alarm system can be connected to your home Wi-Fi network for app control and notifications. Follow these steps to configure the Wi-Fi connection:
- Open the back cover of the alarm host and insert the special data cable into the alarm base.
- On the alarm host, navigate to the menu: Wi-Fi > Soft APP Configure.
- Download the 'Smart Life' app from your phone's app store and enable Bluetooth on your phone.
- In the Smart Life app, tap the '+' option to add a device.
- Select the 'Security Protection Sensor' category, then choose 'Alarm (Wi-Fi)'.
- Select your 2.4GHz Wi-Fi network and enter the password. Tap 'Next'.
- Confirm the Wi-Fi credentials and proceed.
- The app will prompt you to reset the device. Press and hold the RESET button on the alarm host for 5 seconds until the indicator light flashes rapidly. Confirm 'Fast flashing' in the app.
- The device will connect. Once connected, tap 'Done'.
Video: This video demonstrates the process of connecting the PGST alarm system to your Wi-Fi network using the Smart Life application. It shows how to open the device, insert the SIM card, access the app, add a device, select the alarm type, enter Wi-Fi credentials, and confirm the connection.

Image: Visual guide for Wi-Fi setup using the Smart Life app.
4. Иштөө нускамалары
4.1. Control Panel Overview
The main control panel features a 2.4-inch TFT display and a keypad for direct operation. Key elements include:
- Баяндамачы: For audible alerts and voice prompts.
- SOS баскычы: For emergency alerts.
- RFID Card Sensing Area: For arming/disarming with RFID cards.
- Баскычтоп: For entering codes and navigating menus.
- Arm/Disarm Buttons: Dedicated buttons for system status changes.
- Чабыттоо баскычтары: Up/Down, Back/Cancel, Confirm.

Image: Main button functions and interfaces of the control panel.
4.2. Куралдануу жана куралсыздандыруу
The system can be armed or disarmed using the control panel, remote controls, RFID cards, or the Smart Life/Tuya app.
- Кол (Алыскы режим): Activates all sensors. Use when leaving the premises.
- Үйдө калуу режими (Калуу режими): Activates perimeter sensors (e.g., door/window sensors) while allowing movement inside.
- Куралсыздандыруу: Сигнализация системасын өчүрөт.

Image: Real-time control through the Smart Life application.
4.3. Sensor Functions
The system includes various sensors to detect intrusions and emergencies:
- PIR кыймыл детекторлору: These sensors detect movement within their coverage area (typically 110 degrees). Place them in strategic locations to cover entry points or valuable areas.
- Door and Window Sensors: These two-part sensors trigger an alarm when the contact between them is broken, indicating an open door or window. Install them on doors and windows.
- SOS баскычы: A portable button for immediate emergency alerts. Pressing it will trigger the alarm and send notifications.
- RFID карталары: Use these cards to quickly arm or disarm the system by swiping them over the RFID sensing area on the control panel.
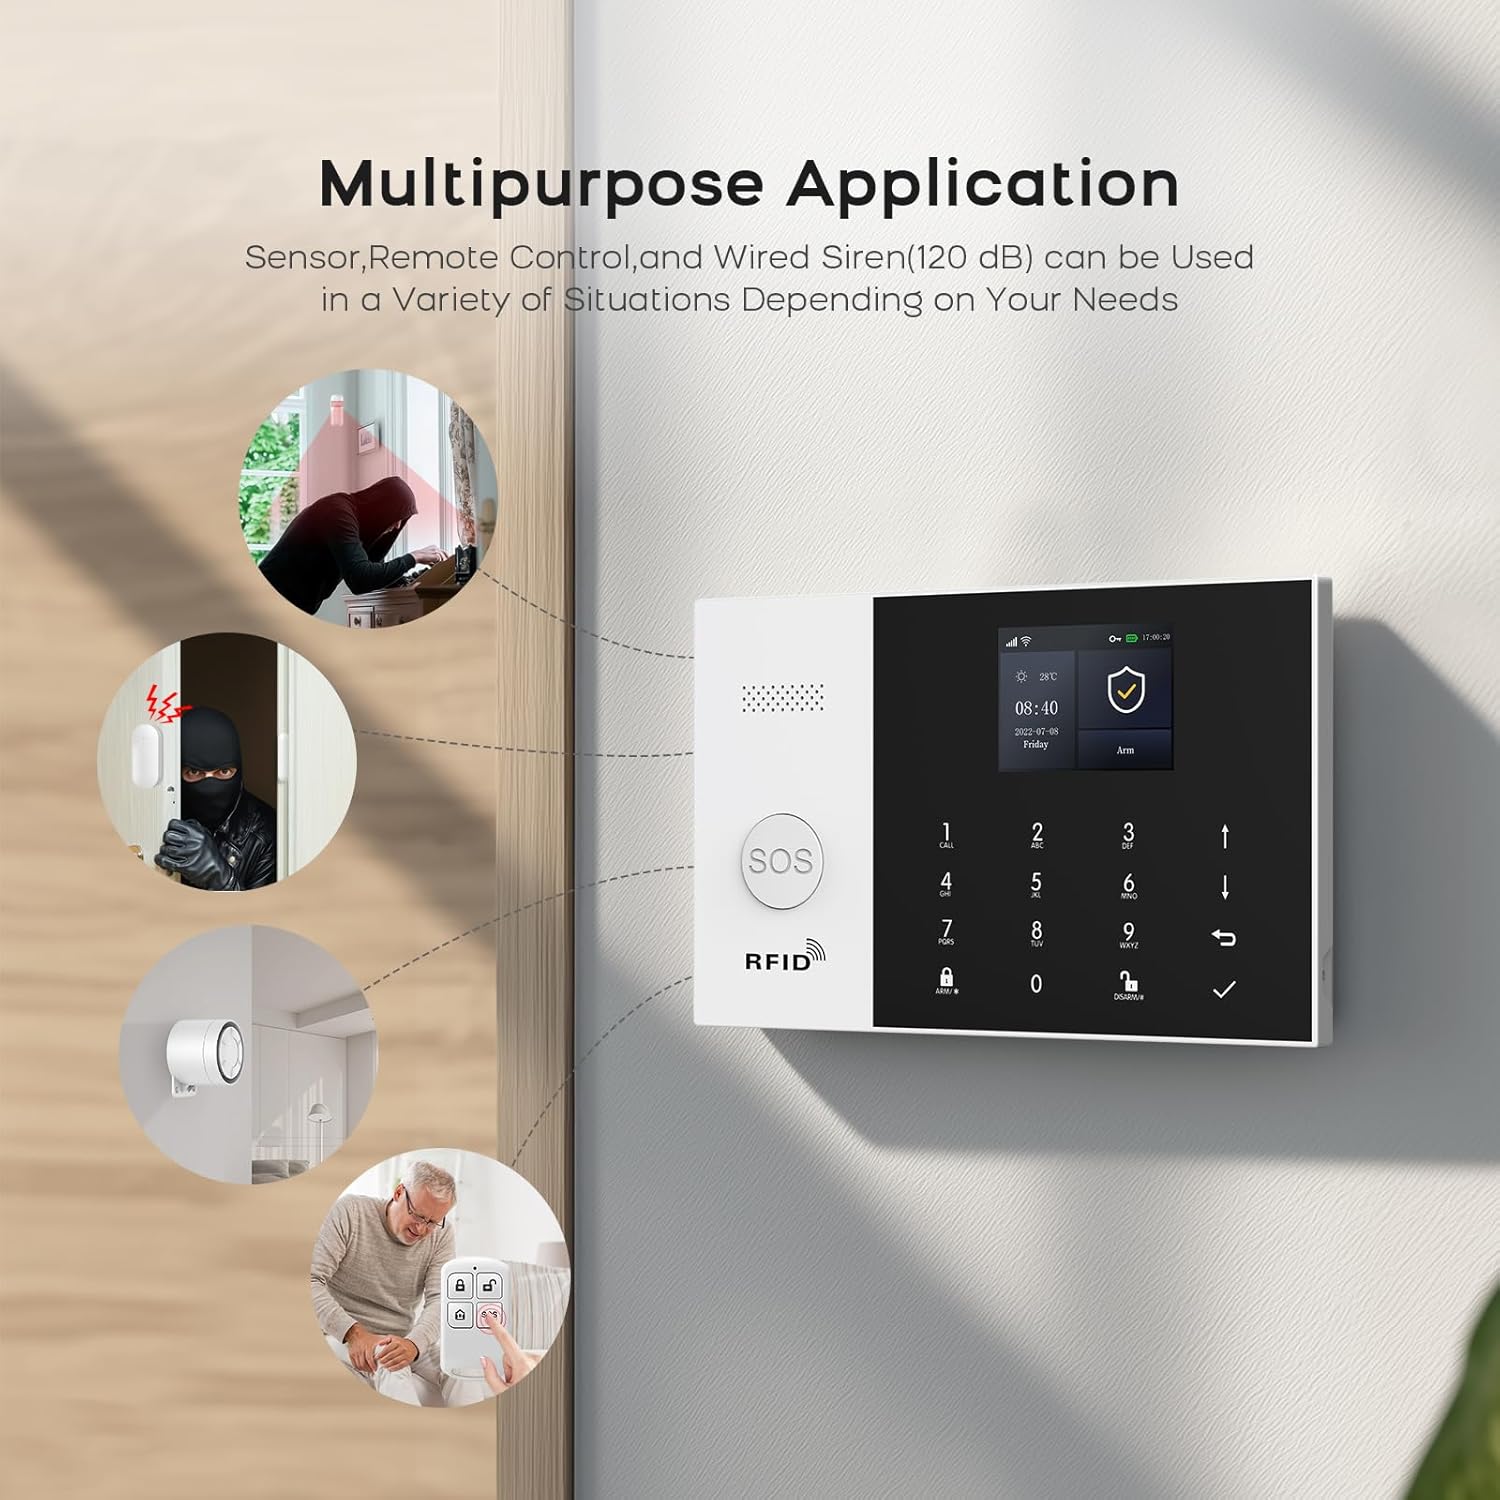
Image: Multipurpose application of PGST alarm system components.

Image: PIR motion detector in action, providing high sensitivity detection.
4.4. Ойготкуч эскертмелери
When an alarm is triggered, the system provides multiple notification methods:
- SMS and Phone Calls: The central panel, with an inserted GSM SIM card, will send SMS alerts and make calls to up to 5 pre-set phone numbers.
- Колдонмонун Push эскертмелери: The Smart Life/Tuya app will send instant push notifications to your smartphone.
- Сирена: The included siren will emit a loud audible alarm (120dB) to deter intruders and alert those nearby.
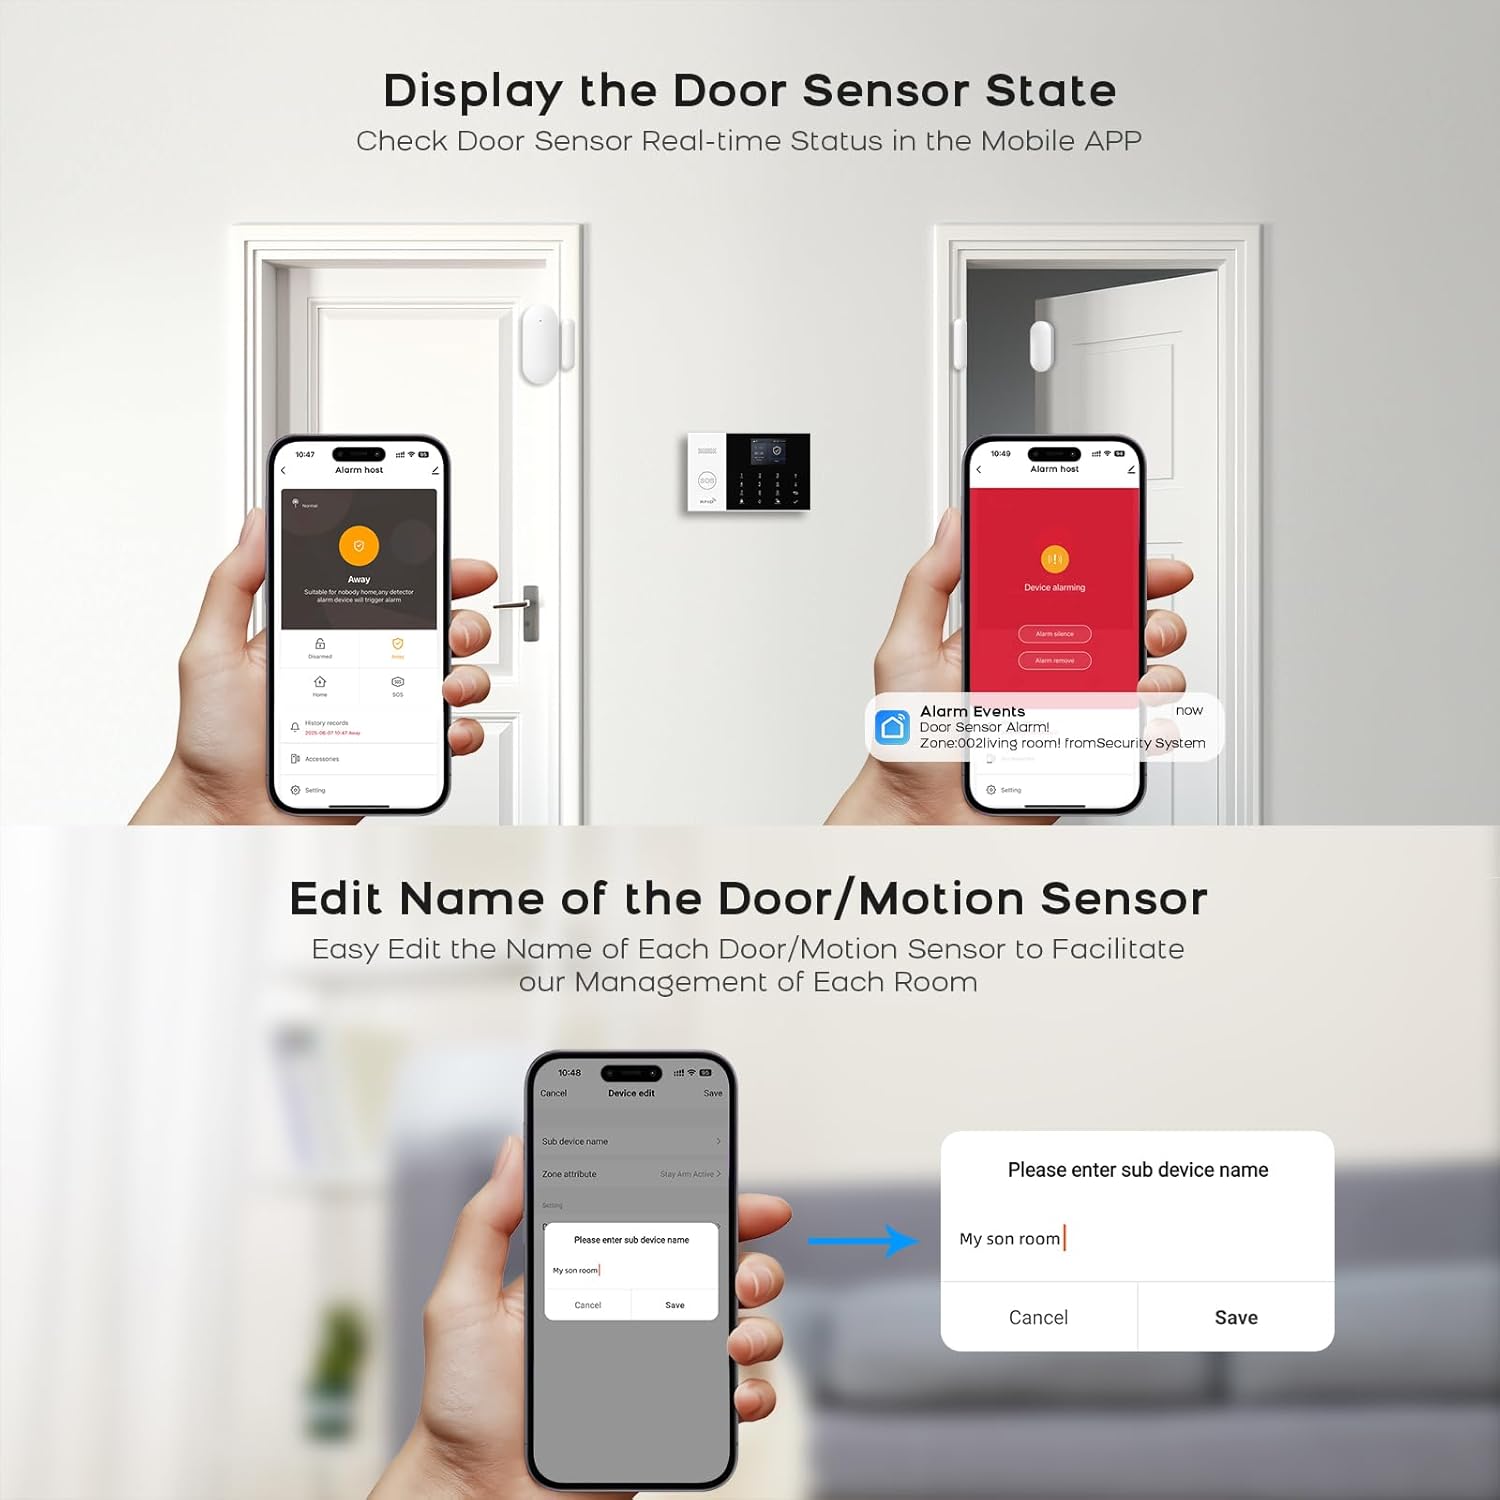
Image: System sending alerts to pre-set family numbers.

Image: APP Alert Message Push notification on a smartphone.
4.5. Smart Home интеграциясы
The PGST alarm system is compatible with popular smart home platforms:
- Tuya Smart Life колдонмосу: Full control over alarm modes, accessory naming, and system settings.
- Amazon Alexa жана Google Жардамчысы: Use voice commands for arming and disarming the system.

Image: Voice control integration with Amazon Alexa and Google Assistant.
5. Техникалык тейлөө
5.1. Батареяны башкаруу
The alarm host includes a built-in lithium-ion battery, providing approximately 3 hours of backup power during outages. The system will alert you to low battery levels. Ensure the system is regularly connected to power to keep the battery charged.

Image: Built-in battery feature for uninterrupted operation.
5.2. Anti-Prying Switch
The alarm host is equipped with an anti-prying switch. If the host is tampered with or forcibly removed from its mounting, this switch will trigger an alarm, providing an additional layer of security.
6. Кыйынчылыктарды
If you encounter issues with your PGST Wireless Home Alarm System, consider the following common troubleshooting steps:
- Кубат жок: Ensure the power adapter is securely connected and the outlet is functional. Check the built-in battery charge level.
- Wi-Fi туташуу маселелери: Verify your Wi-Fi network is 2.4GHz. Ensure the Wi-Fi password is correct. Try restarting your router and the alarm host.
- SMS/чалуулар жөнүндө эскертүүлөр жок: Check if the GSM SIM card is properly inserted and has an active plan with sufficient credit. Ensure the network signal is strong. Verify the alarm phone numbers are correctly configured in the system settings.
- Сенсор иштебей жатат: Check the sensor's battery level. Ensure the sensor is within range of the alarm host. For door/window sensors, confirm the two parts are aligned correctly. For PIR sensors, ensure there are no obstructions.
- Колдонмону башкаруу көйгөйлөрү: Ensure your smartphone has an active internet connection. Verify the Smart Life/Tuya app is updated to the latest version. Re-pair the device with the app if necessary.
- Жалган ойготкучтар: Check sensor placement to avoid triggering by pets or environmental factors (e.g., strong drafts, direct sunlight on PIR sensors). Adjust sensor sensitivity if available.
If problems persist, please refer to the detailed troubleshooting section in the full product manual or contact customer support.
7. Техникалык шарттар
| Өзгөчөлүк | Спецификация |
|---|---|
| Бренд | PGST |
| Модель номери | Pg105-2geu-d |
| Power Source | Батарея менен иштейт |
| Шайкеш түзмөктөр | Смартфон |
| Байланыш технологиясы | Wireless and Wired (GSM 2G, Wi-Fi) |
| Ойготкуч түрү | Аудио жана кыймыл |
| Башкаруу ыкмасы | Remote (App, Remote Control) |
| Батареянын орточо иштөө мөөнөтү | 3 саат (резервдик) |
| Орнотуу ыкмасы | Өзүн чаптама |
| Батареянын курамы | Литий ион |
| Келип чыккан өлкө | Кытай |

Image: PGST alarm system control panel with display and dimensions.
8. Кепилдик жана колдоо
This PGST product comes with a standard manufacturer's warranty. For specific warranty details, including duration and coverage, please refer to the warranty card included in your product packaging or visit the official PGST website. For technical support, troubleshooting assistance, or any product-related inquiries, please contact PGST customer service through the contact information provided on their official website or within the Smart Life/Tuya application.