
1. Киришүү
This manual provides detailed instructions for the installation, operation, and maintenance of your EVTSCAN Digital Thermoregulator. This device is designed to precisely control heating equipment, such as wall-mounted boilers and gas boilers, ensuring a stable and energy-efficient temperature environment. Please read this manual thoroughly before installation and use to ensure proper function and safety.
2. Коопсуздук маалыматы
Түзмөккө зыян келтирбөө же жеке жаракат алууну алдын алуу үчүн ар дайым төмөнкү коопсуздук чараларын сактаңыз:
- Орнотуудан же техникалык тейлөөдөн мурун электр кубаты өчүрүлгөнүн текшериңиз.
- Эгер электр зымдары жөнүндө күмөн санасаңыз, орнотууну квалификациялуу адис аткарышы керек.
- Аппаратты сууга же ашыкча нымдуулукка дуушар кылбаңыз.
- Use only the specified battery type (2 AA batteries) and ensure correct polarity.
- Аппаратты күйүүчү материалдардан алыс кармаңыз.
3. Продукт бүтүп калдыview
The EVTSCAN Digital Thermoregulator features a clear LCD display for easy monitoring and a simple interface for temperature control. Its compact design allows for discreet integration into your living space.

Сүрөт 3.1: Алдыңкы view of the Digital Thermoregulator. The LCD screen displays current settings and room temperature, with a rotary knob below for adjustments.
Негизги компоненттер:
- LCD дисплей: Shows set temperature, room temperature, time, and operational icons.
- Control Knob/Button: Менюларды багыттоо жана жөндөөлөрдү тууралоо үчүн колдонулат.
- Батарея бөлүмү: Located on the rear or side for 2 AA batteries.
- Электр өткөргүч терминалдары: For connection to the heating system.
4. Техникалык шарттар
| Өзгөчөлүк | Спецификация |
|---|---|
| Модел | EVTSCANok0g9ct2zq |
| Кубат режими | 2 AA батарейкалар (киргизилген эмес) |
| Screen Accuracy | 0.5 ℃ |
| Зонд сенсору | NTC (10к) 1% |
| Байланыш сыйымдуулугу | Greater than 30-230 V DC working voltage, lower current. Reference: 5 A 30 V (HF relay) or 2 A 30 V (NEC relay) |
| Температураны көрсөтүү диапазону | 1ден 40 ℃ге чейин |
| Default Temperature Adjustment Range | 5ден 35 ℃ге чейин |
| Иштөө температурасы диапазону | 0ден 50 ℃ге чейин |
| Иштеп жаткан программа | Set once a week |
| Чыгуу | Которуу реле |
| Материал | Жалынга каршы поликарбонат |
| Салмагы | 170 г |
5. Орнотуу жана орнотуу
The EVTSCAN Digital Thermoregulator is designed for simple installation. Follow these steps carefully:
5.1. Таңгактан чыгаруу жана текшерүү
Carefully remove all components from the packaging. Verify that all items listed in the package contents are present and undamaged.
- 1 Digital Temperature Controller
- 2 Бурама
5.2. Батареяны орнотуу
The device requires 2 AA batteries for operation. These are not included in the package.
- Locate the battery compartment on the back of the thermoregulator.
- Батарея уясынын капкагын ачыңыз.
- Туура полярдуулукту (+/-) камсыз кылуу менен 2 AA батарейкасын салыңыз.
- Батарея уясынын капкагын бекем жабыңыз.

5.1-сүрөт: Бурчтуу view of the thermoregulator, illustrating its compact size and potential location for battery access or mounting points.
5.3. Монтаждоо жана зымдар
The thermoregulator is designed for wall mounting. Ensure the power to your heating system is turned off before proceeding with wiring.
- Choose a suitable location on an interior wall, away from direct sunlight, drafts, or heat sources that could affect temperature readings.
- Mount the backplate (if detachable) to the wall using the provided screws.
- Connect the thermoregulator to your boiler or heating system according to the wiring diagram provided with your boiler and the thermoregulator's terminal markings. This typically involves connecting the switching relay output to the boiler's control input.
- Secure the thermoregulator onto the mounted backplate.
Эскертүү: For wiring, consult a qualified electrician if you are unfamiliar with electrical installations.
6. Иштөө нускамалары
The EVTSCAN Digital Thermoregulator uses a microcomputer control technology to maintain your desired temperature efficiently.
6.1. Powering On and Initial Display
Once batteries are installed, the LCD display will illuminate, showing the current room temperature, set temperature, and time.
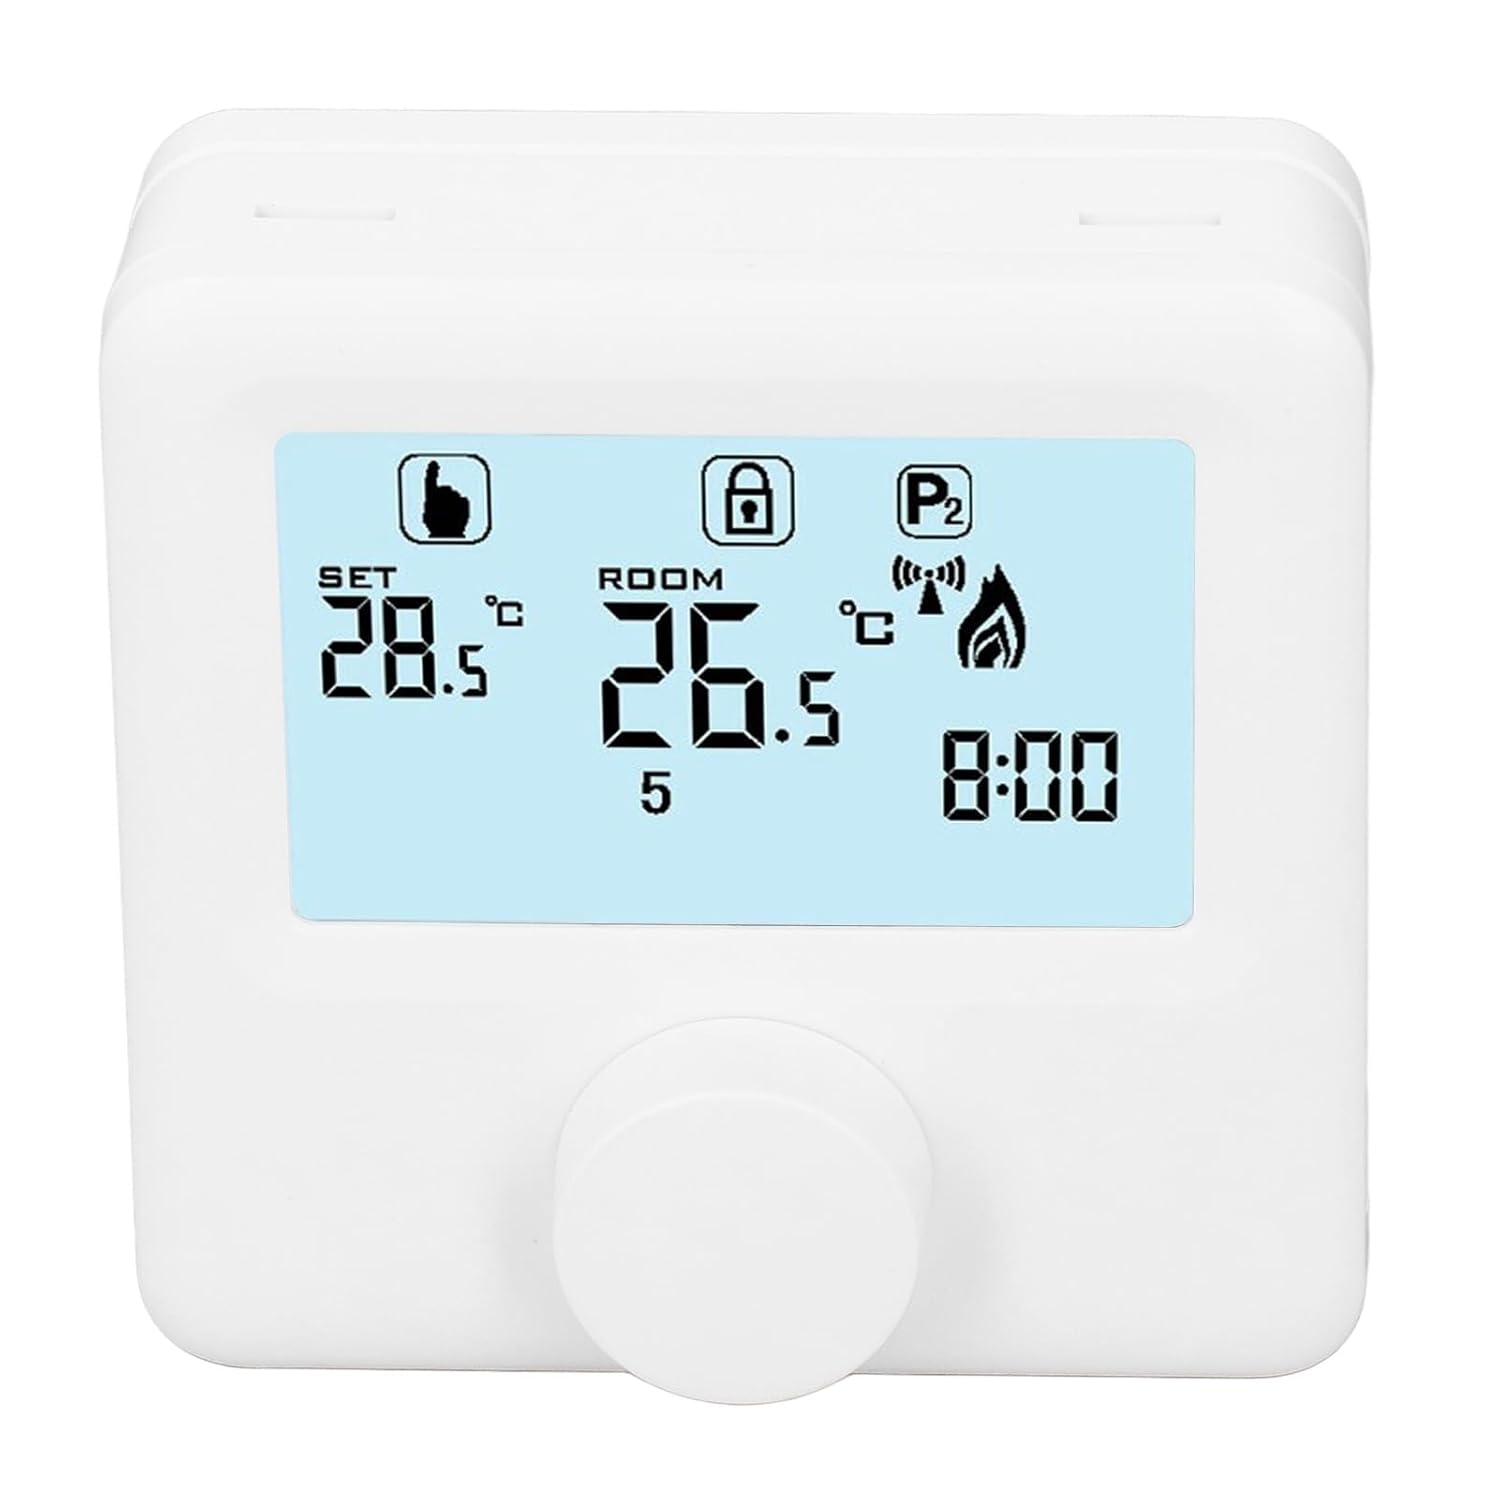
6.1-сүрөт: Детальдуу view of the LCD display. It shows the set temperature (SET), room temperature (ROOM), a lock icon, a program icon (P2), a signal icon, a flame icon indicating heating, and the current time.
6.2. Температураны орнотуу
Каалаган температураны тууралоо үчүн:
- Rotate the control knob to increase or decrease the set temperature. The "SET" value on the display will change accordingly.
- The device will automatically activate or deactivate the heating system to maintain the set temperature within the range of 1 to 40 ℃. The default adjustment range is 5 to 35 ℃.
6.3. Апталык графикти программалоо
The thermoregulator supports a weekly programming schedule. This allows you to set different temperatures for various times of the day across the week.
- Press and hold the control knob (or a designated button, if available) to enter programming mode.
- Use the control knob to navigate through days of the week and time slots.
- Adjust the desired temperature for each programmed period.
- Confirm your settings to save the weekly program. The device will then operate according to this schedule.
6.4. Understanding Display Icons
- ЖӨНДӨӨ: Indicates the target temperature you have set.
- БӨЛМӨ: Учурдагы чөйрөнүн бөлмө температурасын көрсөтөт.
- Flame Icon: Жылытуу системасы активдүү болгондо күйөт.
- Кулпу сүрөтчөсү: May indicate a keypad lock feature to prevent accidental changes.
- P1/P2 Icon: Indicates the current program mode (e.g., P1 for comfort, P2 for economy, or specific weekly program segments).
- Сигнал сөлөкөтү: May indicate wireless communication status if applicable.
7. Техникалык тейлөө
Regular maintenance ensures the longevity and optimal performance of your thermoregulator.
- Тазалоо: Аппаратты жумшак, кургак чүпүрөк менен сүртүңүз. Абразивдүү тазалагычтарды же эриткичтерди колдонбоңуз.
- Батареяны алмаштыруу: Replace batteries when the low battery indicator appears on the display. Always replace both batteries simultaneously with new AA batteries.
- Сенсор аянты: Ensure the temperature sensor area (usually a small vent on the device) is free from dust and obstructions for accurate readings.
8. Кыйынчылыктарды
If you encounter issues with your EVTSCAN Digital Thermoregulator, refer to the following common problems and solutions:
- Дисплей бош:
- Батареялар туура орнотулганын текшериңиз.
- Эски батарейкаларды жаңысына алмаштырыңыз.
- Жылытуу системасы жооп бербей жатат:
- Ensure the thermoregulator is powered on and the flame icon is displayed when heating is expected.
- Verify wiring connections to the boiler are secure and correct.
- Check the boiler's power supply and status.
- Ensure the set temperature is higher than the current room temperature.
- Туура эмес температура көрсөткүчтөрү:
- Ensure the device is not exposed to direct sunlight, drafts, or heat sources.
- Clean any dust or debris from the sensor area.
- Cannot change settings:
- Check if the lock icon is displayed. If so, refer to the operating instructions to unlock the keypad.
Эгер көйгөй чечилбесе, кардарларды колдоо менен байланышыңыз.
9. Кепилдик жана колдоо
Specific warranty information for this product is not provided in the available data. Please refer to the product packaging or the retailer's webкепилдик маалымат үчүн сайт.
For technical support or further assistance, please contact EVTSCAN customer service through their official channels or the retailer from whom you purchased the product.
You can visit the EVTSCAN store on Amazon for more information: EVTSCAN Store