
Introduction
The Xenocam Smart Lock XX01 offers a secure and convenient 5-in-1 keyless entry solution for your home or office. This manual provides detailed instructions for installation, operation, maintenance, and troubleshooting to ensure optimal performance and security.
The lock supports multiple unlocking methods including 360° fingerprint ID, smartphone app control, anti-peep keypad, IC card fob, and traditional mechanical key. It is designed for various applications such as home interior doors, office interior doors, hotel apartment doors, and entry doors.
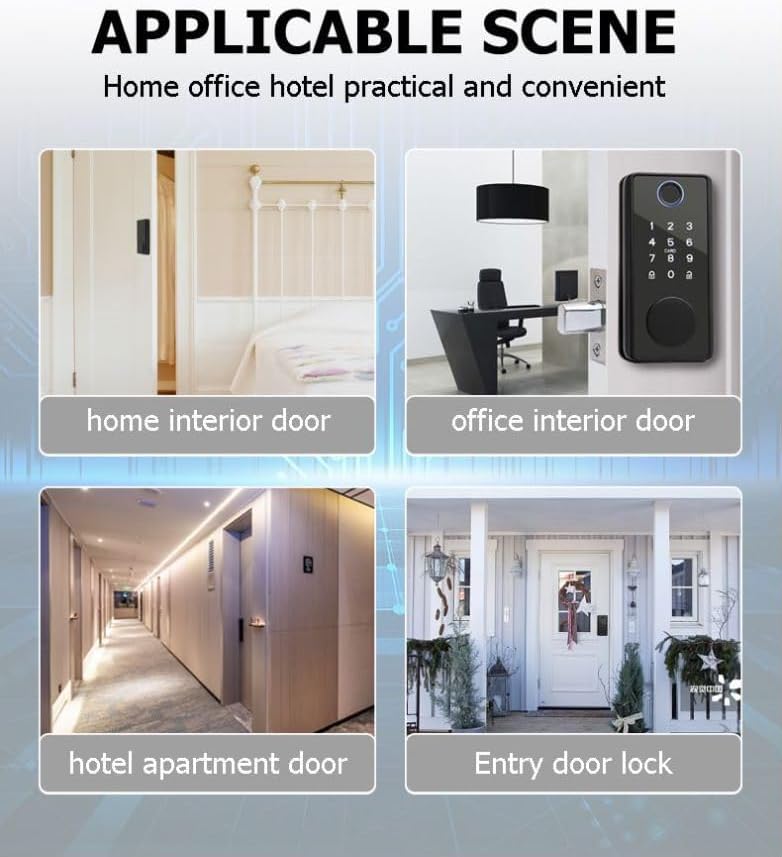
Figure 1: Applicable scenes for the Xenocam Smart Lock, demonstrating its versatility for various door types.
Пакеттин мазмуну
Орнотууну баштоодон мурун, бардык компоненттердин бар экендигин текшериңиз:
- Front Lock Panel
- Rear Lock Panel
- Lock Body (Deadbolt Latch)
- Mounting Plate (Gasket)
- Gusset Plate
- Buckle Shell
- Бурамалар (ар кандай өлчөмдөгү)
- IC Cards (Fobs)
- Механикалык ачкычтар
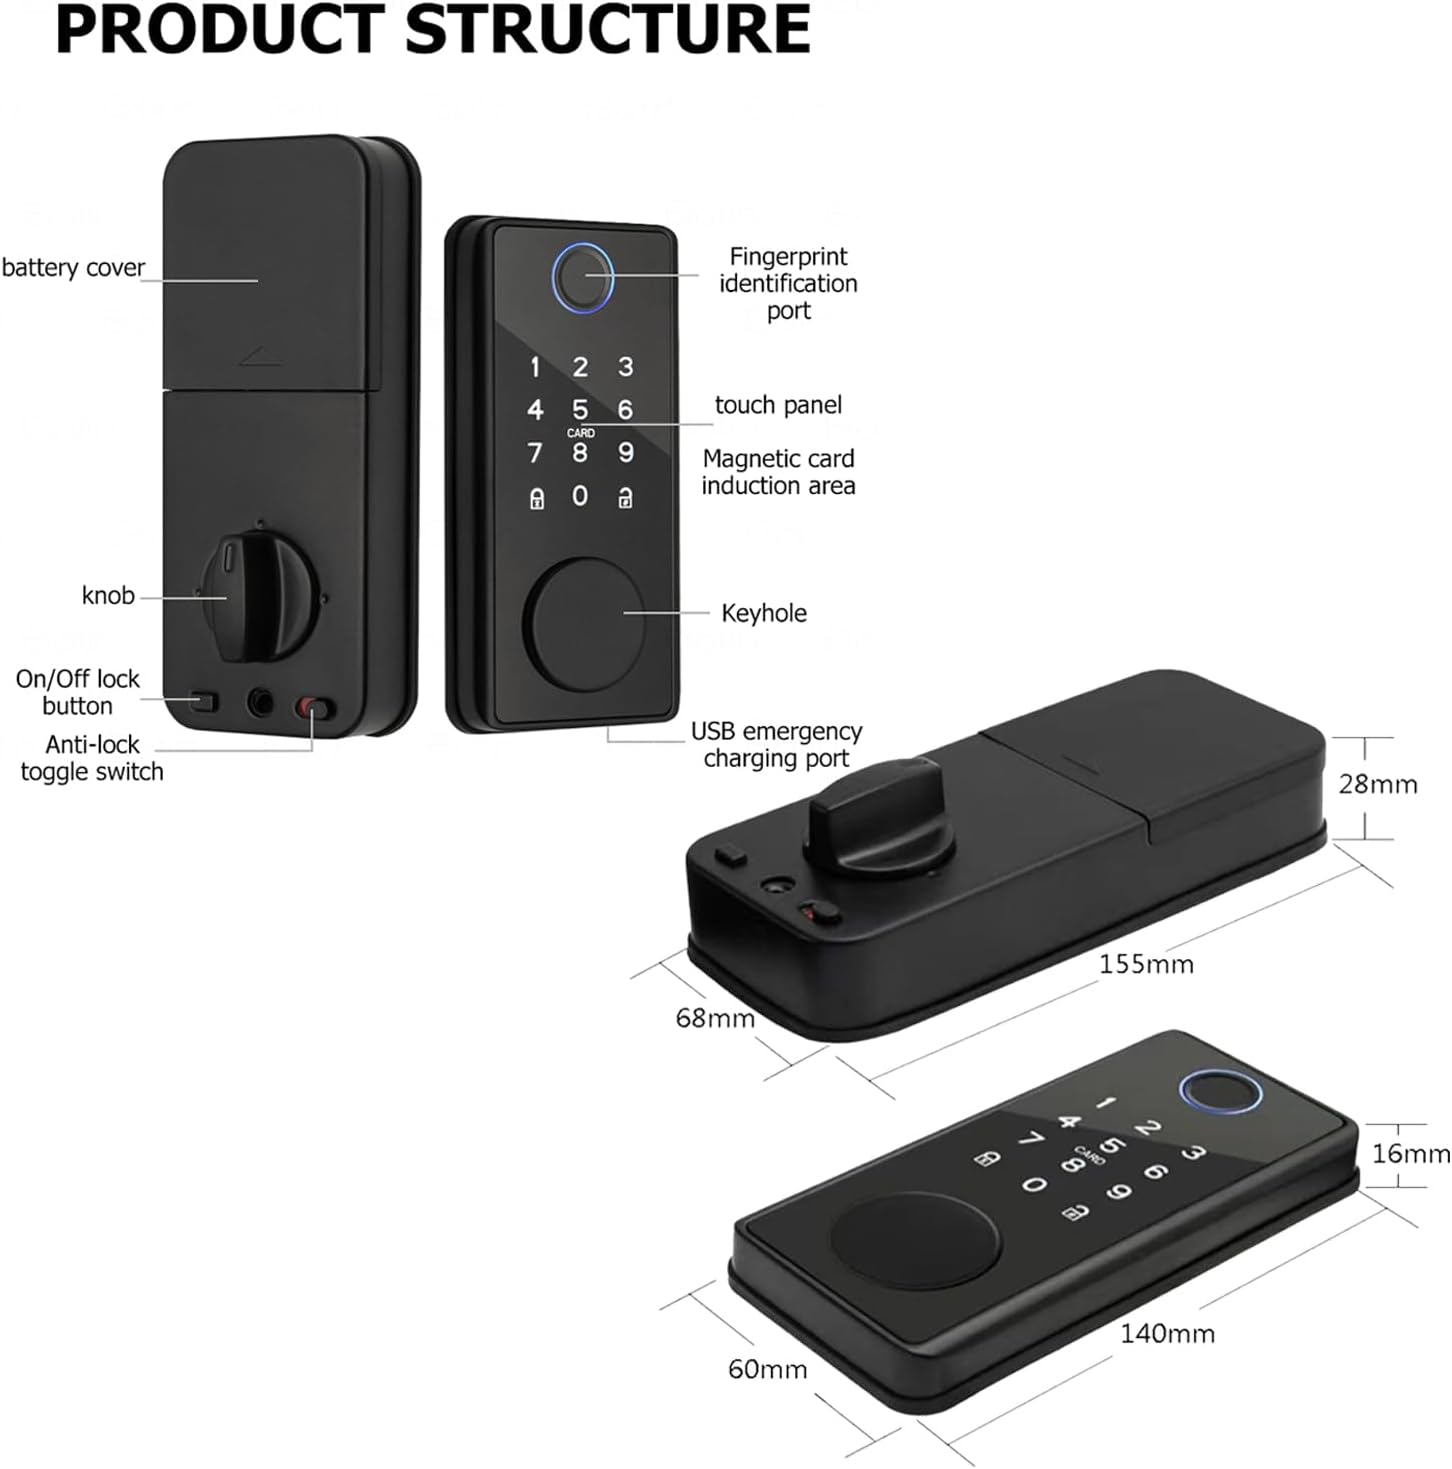
2-сүрөт: Детальдуу view of the product structure and included components.

Figure 3: Lock body dimensions and adjustable latch mechanism for enhanced security.
Орнотуу боюнча колдонмо
This section provides step-by-step instructions for installing your Xenocam Smart Lock. Ensure your door thickness is between 35-85mm for proper fitment. For visual guidance, please refer to the installation video below.
Орнотуу боюнча видео үйрөткүч
Video 1: Smart Lock Installation Tutorial. This video demonstrates the complete installation process for the Xenocam Smart Lock.
Этап-этабы менен нускамалар:
- Prepare the Lock: Open the rear lock battery case cover.
- Кулпу корпусун орнотуу: Insert the lock body into the door edge. Secure it by unscrewing the lock body with the provided screws.
- Install the Front Lock: Keep the lock cylinder ruler in a vertical position. Carefully pass the data line through the door hole first to prevent damage. Insert the front lock into the door.
- Монтаждоо плитасын орнотуу: Place the bottom mounting plate over the lock cylinder and secure it with the opposite-pull screws.
- Маалымат кабелдерин туташтыруу: Connect the data cables from the front lock to the rear lock. Arrange any excess data lines neatly into the door seam.
- Install the Rear Lock: Align the rear lock with the lock cylinder and mounting plate. Ensure the knob is correctly oriented (vertical for left-opening doors, horizontal for right-opening doors). Secure the rear lock by installing the rear locking screws.
- Батареяны орнотуу: Insert four AAA alkaline batteries into the battery compartment.
- Батарея капкагын жабуу: Put the battery case cover back on.
- Test Lock Switch: Test the lock switch to ensure correct left and right directions. Check the knob for smooth operation.
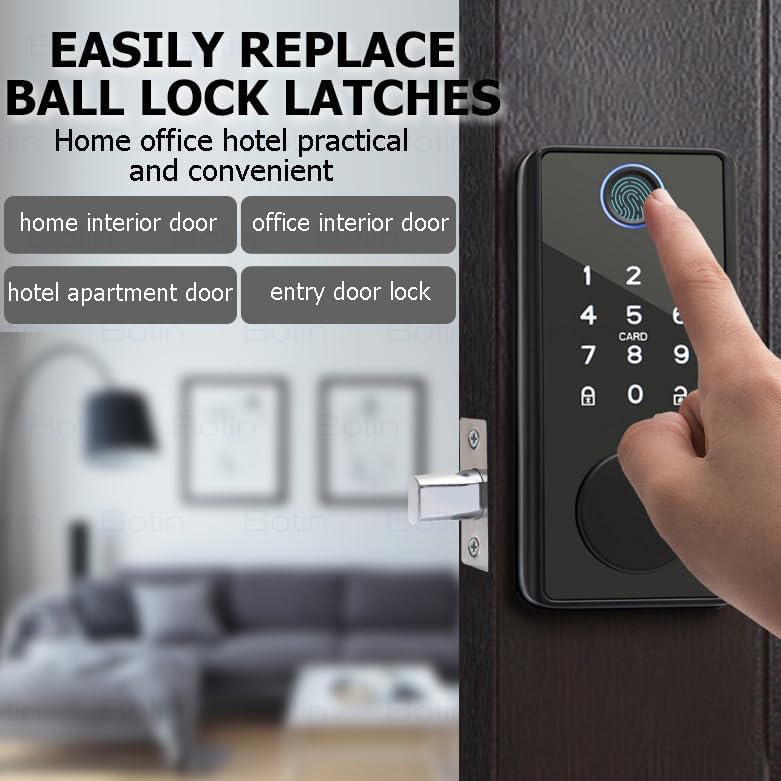
Figure 4: The lock is designed for easy replacement of existing ball lock latches.
Иштөө нускамалары
The Xenocam Smart Lock offers five methods for unlocking your door:
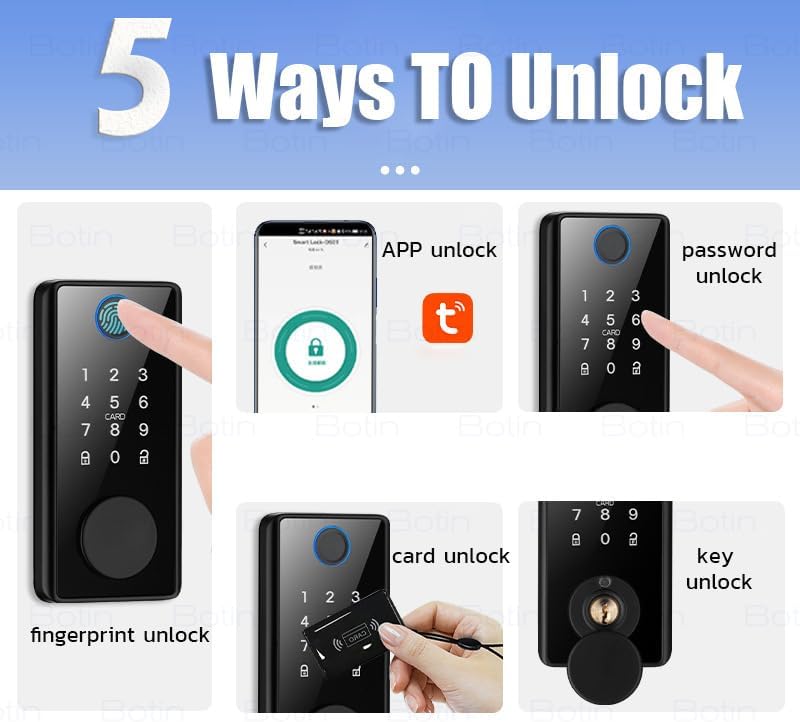
Figure 5: The five primary methods for unlocking your smart lock.
1. Манжа изи менен кулпуну ачуу
- Place your registered finger on the fingerprint sensor. The lock will recognize your fingerprint in approximately 0.3 seconds and unlock the door.
- The lock supports 360° fingerprint ID for quick and reliable access.
2. App Control (Tuya or TT App)
Control your smart lock remotely via your smartphone using the Tuya or TT app. This feature allows for advanced access management and real-time monitoring.
- Алыстан кулпуну ачуу: Generate eKeys and grant access to visitors from anywhere.
- Колдонуучуну башкаруу: Create up to 200 user codes (temporary or permanent) for family, friends, or guests.
- реалдуу убакыт эскертмелери: Receive alerts on your phone regarding lock activity and view the event history.
- Автоматтык кулпулоо: Set the lock to automatically lock after a specified period via the app.
- One-Touch Auto-Lock: Press and hold any key on the keypad for 2 seconds to instantly lock the door.

Figure 6: App interface for managing your smart lock, including temporary passwords and fingerprint users.
3. Anti-Peep Keypad
- Enter your passcode followed by the '#' key.
- To prevent others from guessing your code, you can enter random digits before or after your actual passcode. For example, if your code is 123456, you can enter 987123456098#.
4. IC Card (Fob) Unlock
- Present a registered IC card to the card reader area on the lock. The lock will beep and unlock.
- IC cards are easy to manage and can be used by individuals who may have difficulty with fingerprints, such as children or the elderly.

Figure 7: Using an IC card for convenient door access.
5. Механикалык ачкычты ачуу
- In case of emergency or battery depletion, use the provided mechanical key to unlock the door manually.
Автоматтык кулпулоо өзгөчөлүгү
The lock is equipped with an automatic locking mechanism. After closing the door, the deadbolt will automatically extend, securing your home without manual intervention.

Figure 8: The smart lock automatically secures the door upon closing.
Техникалык тейлөө
Proper maintenance ensures the longevity and reliable operation of your smart lock.
Батарея башкаруу
- The lock operates on 4 AAA alkaline batteries, providing up to 1 year of battery life under normal usage.
- A low-battery reminder will alert you when the batteries need replacement. Replace all four batteries simultaneously for best performance.
- Өзгөчө кырдаалдардын күчү: In case of complete battery depletion, a Type-C emergency boot option is available. Connect a power bank to the Type-C port on the front panel to temporarily power the lock and gain access. Note: The battery must be removed for charging if using rechargeable batteries.
Жалпы кам көрүү
- Clean the lock's surface with a soft, dry cloth. Avoid using abrasive cleaners or solvents.
- Ensure the fingerprint sensor and keypad are free from dirt or debris for optimal recognition.
- Кулпуну ашыкча нымдуулукка же түздөн-түз суу чачууга дуушар кылбаңыз.
Проблемаларды чечүү
If you encounter issues with your Xenocam Smart Lock, refer to the following common problems and solutions:
| Көйгөй | Мүмкүн себеп | Чечим |
|---|---|---|
| Кулпу жооп бербейт | Батареялар өлүп калган; Батареяны туура эмес орнотуу | Replace all 4 AAA batteries; Ensure batteries are inserted with correct polarity. |
| Манжа изи таанылган жок | Fingerprint sensor dirty; Unregistered fingerprint; Finger wet/damaged | Clean sensor; Register fingerprint via app; Ensure finger is clean and dry. |
| Баскычтоп жооп бербей жатат | Keypad dirty; Incorrect code entered | Clean keypad surface; Re-enter correct code. |
| Колдонмого туташуу маселелери | Bluetooth off; Lock out of range; App not updated | Ensure Bluetooth is on; Move closer to the lock; Update app to latest version. |
| Lock mechanism stiff | Improper installation; Door frame misalignment | Review installation steps (refer to video); Check door and frame alignment. |
| Ойготкуч күтүүсүздөн үн чыгарат | Tamper attempt; Multiple incorrect entries | Check for signs of tampering; Ensure correct entry methods are used. |
Бул чечимдерди колдонуу аракетинен кийин көйгөй чечилбесе, кардарларды колдоо кызматына кайрылыңыз.
Техникалык шарттар
| Өзгөчөлүк | Деталь |
|---|---|
| Модель аты | Smart Deadbolt Lock (DS01) |
| Бренд | XENOCAM |
| Кулпу түрү | joldar, |
| Кулпуну ачуу ыкмалары | Fingerprint, App Control, Keypad, IC Card, Mechanical Key |
| Материал | Металл |
| Түс | Кара |
| Эшиктин калыңдыгынын шайкештиги | 35-85мм |
| Power Source | 4 x AAA щелочтуу батарейкалар (киргизилген эмес) |
| Өзгөчө кырдаалдардын күчү | Type-C USB порту |
| Байланыш | Bluetooth |
| Элементтин өлчөмдөрү (L x W x Y) | 2.56 x 6.54 x 1.55 дюйм |
| Элемент Салмагы | 2.2 фунт |
Кепилдик жана колдоо
Xenocam products are designed for reliability and performance. For specific warranty details, please refer to the warranty card included with your product or visit the official Xenocam webсайт.
For technical assistance, troubleshooting, or any questions regarding your smart lock, please contact Xenocam customer support through the contact information provided on the product packaging or the official website. Please have your model number (DS01) and purchase details ready when contacting support.