1. Киришүү
This manual provides detailed instructions for the installation, operation, and maintenance of your darkFlash DRX70 ATX Mid-Tower Gaming PC Case. Please read this manual thoroughly before beginning assembly to ensure proper setup and safe usage. Retain this manual for future reference.
2. Коопсуздук маалыматы
- Орнотуудан же тейлөөдөн мурун ар дайым бардык компоненттерден электр кубатын ажыратыңыз.
- Handle tempered glass panels with care to prevent breakage.
- Avoid exposing the case to extreme temperatures or humidity.
- Майда тетиктерди жана бурамаларды балдардан алыс кармаңыз.
- Ensure proper grounding for all electrical components.
3. Пакеттин мазмуну
Сиздин пакетте бардык компоненттер бар экенин текшериңиз:
- darkFlash DRX70 ATX Mid-Tower PC Case
- 3 x 120mm Fixed RGB Fans (pre-installed in front)
- Кошумча кутуча (бурамаларды, тирөөчтөрдү, кабель байлагычтарды ж.б. камтыйт)
- User Manual
4. Продукт бүтүп калдыview
The darkFlash DRX70 is an ATX mid-tower case designed for optimal airflow and component visibility. It features a magnetic mesh front panel for enhanced air intake and a tempered glass side panel to showcase your build.
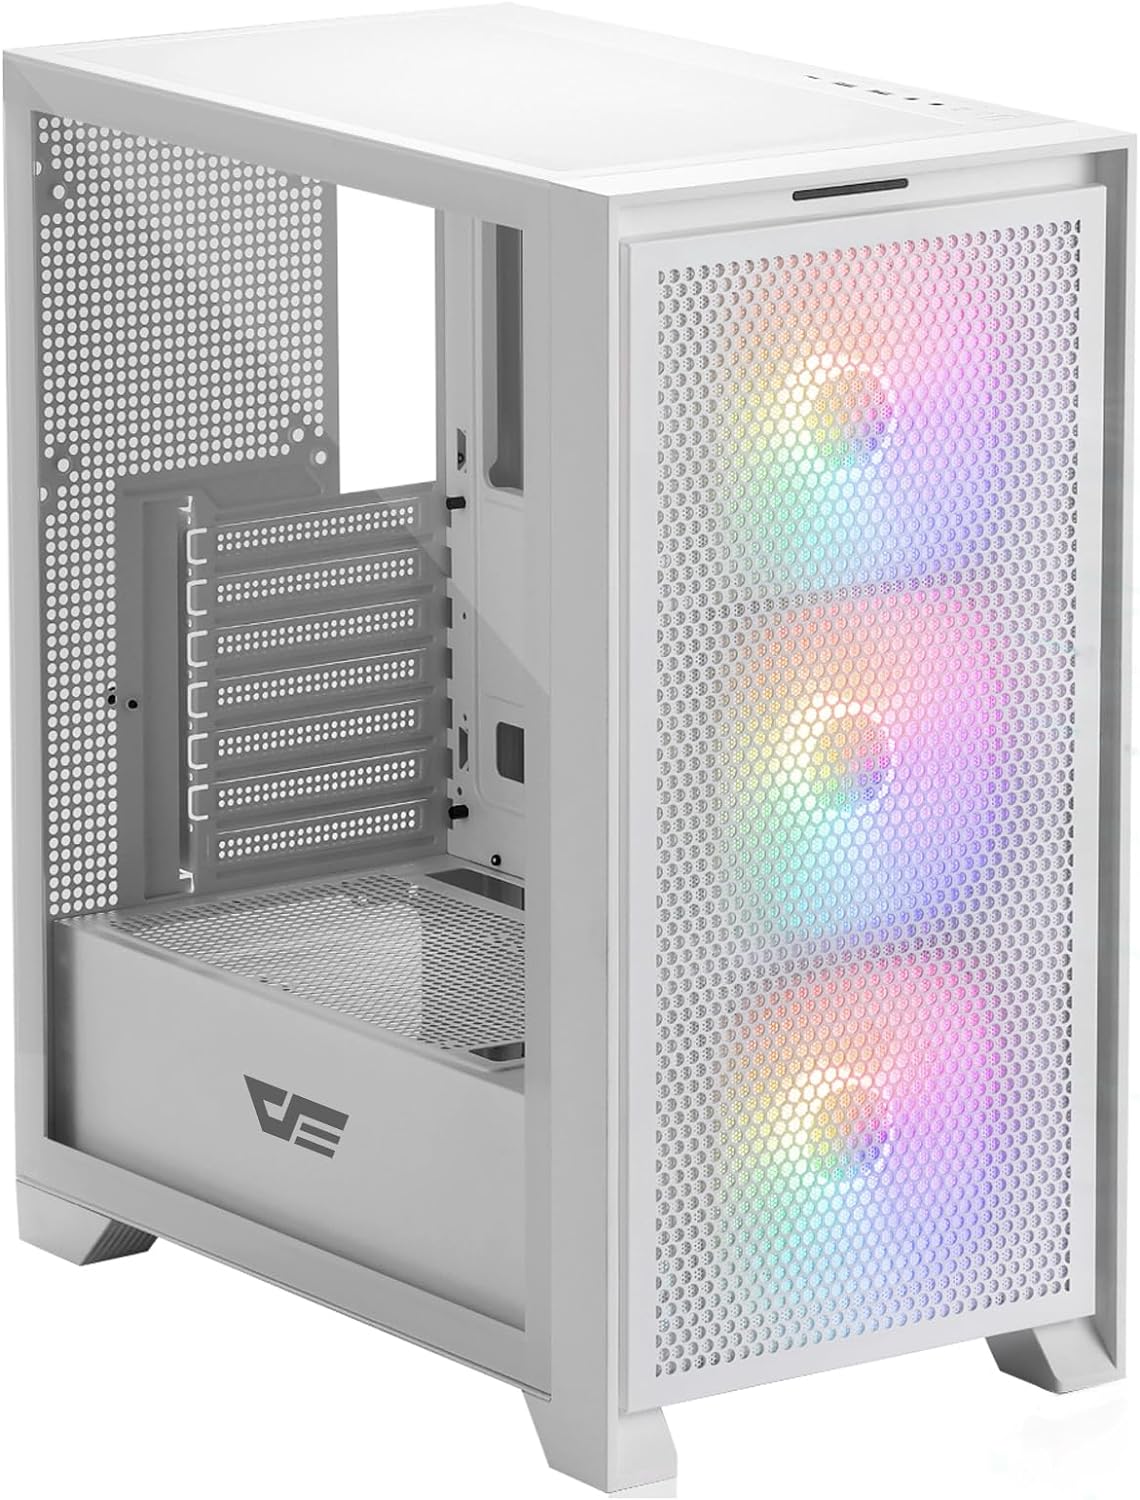
4.1-сүрөт: алдыңкы жагы view of the darkFlash DRX70 PC case with pre-installed RGB fans.
Негизги өзгөчөлүктөрү:
- Magnetic Mesh Front Panel: Optimizes air intake and is easily removable for cleaning.
- Температуралуу айнек каптал панели: ачык-айкын камсыз кылат view ички компоненттеринин.
- Pre-installed 3x120mm Fixed RGB Fans: Enhances cooling and adds aesthetic lighting. Note: Lighting is fixed, not addressable.
- Чаң чыпкалары: Magnetic dust filters on top and bottom for easy maintenance.
- Anti-slip Bottom Structure: Ар кандай беттерде туруктуулукту камсыз кылат.
- USB 3.0 Ready: Convenient front I/O panel connectivity.
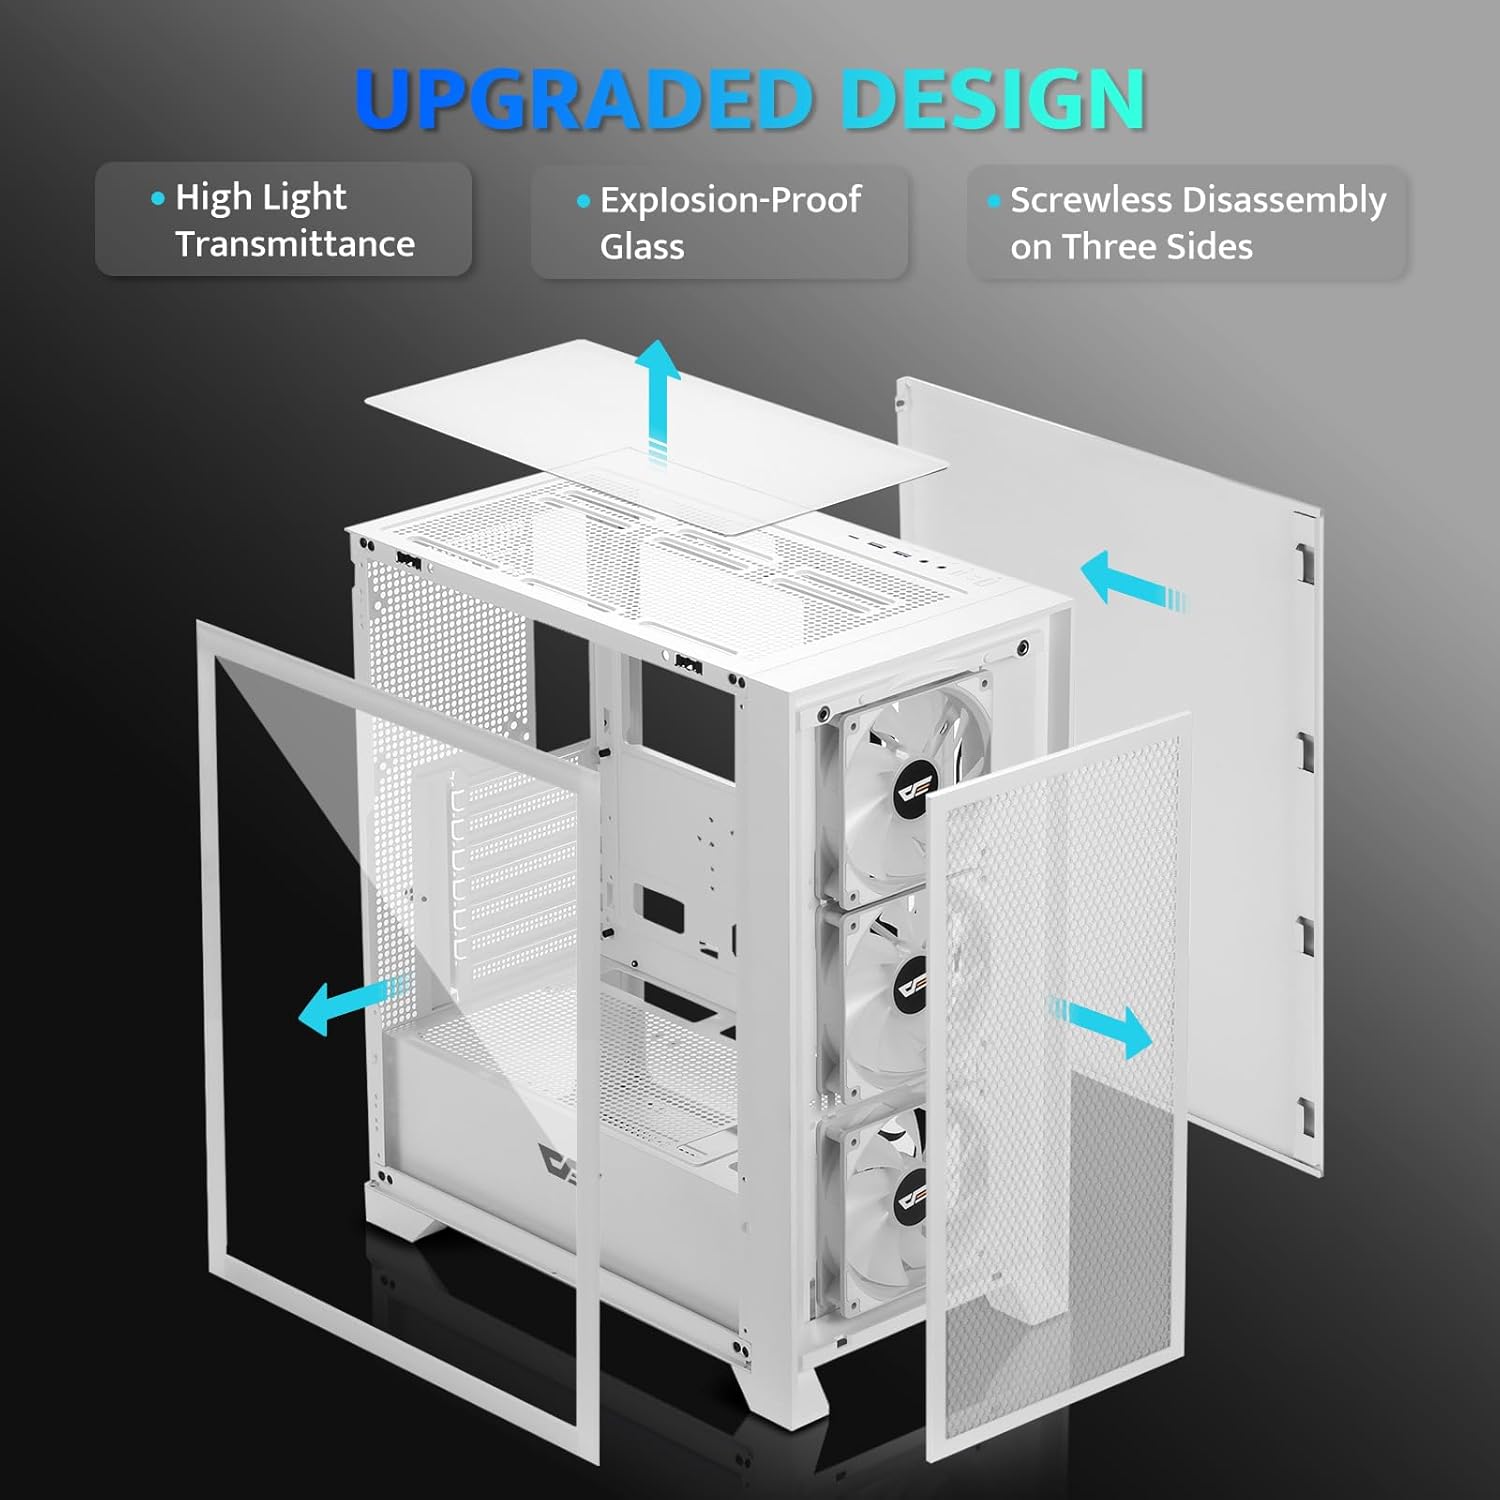
4.2-сүрөт: жарылган view illustrating the removable panels for easy access and assembly.

Figure 4.3: Detail of the magnetic mesh front panel, designed for optimal airflow and easy removal.

Figure 4.4: Airflow channels within the DRX70 case, demonstrating efficient cooling paths.

Figure 4.5: The top I/O panel featuring USB 3.0, USB 2.0, HD Audio jacks, Reset, and Power buttons.
5. Орнотуу жана орнотуу
Follow these general steps for assembling your PC within the DRX70 case. Refer to your individual component manuals for specific installation details.
5.1 Ишти даярдоо
- Корпусту туруктуу, тегиз бетке коюңуз.
- Remove the tempered glass side panel by unscrewing the thumb screws and carefully sliding it off.
- Remove the magnetic mesh front panel by gently pulling it away from the chassis.
- Remove the rear side panel by unscrewing the thumb screws and sliding it back.
5.2 Компонентти орнотуу
- Motherboard: Install the necessary standoffs for your motherboard form factor (ATX, M-ATX, ITX). Carefully place the motherboard into the case and secure it with screws.
- Энергия менен камсыздоо бирдиги (PSU): Install the PSU into its designated compartment at the bottom rear of the case. Secure it with screws from the rear.
- Сактоочу дисктер: Install 2.5" SSDs or 3.5" HDDs into the drive bays. The case supports 1x 2.5" SSD and 2x 2.5"/3.5" HDDs.
- Графикалык карта (GPU): Install your graphics card into the appropriate PCIe slot on the motherboard and secure it. The case supports GPUs up to 350mm in length.
- Муздатуу: The case comes with 3x 120mm fixed RGB fans pre-installed in the front. Additional fans or a 280mm radiator can be installed as per the specifications.
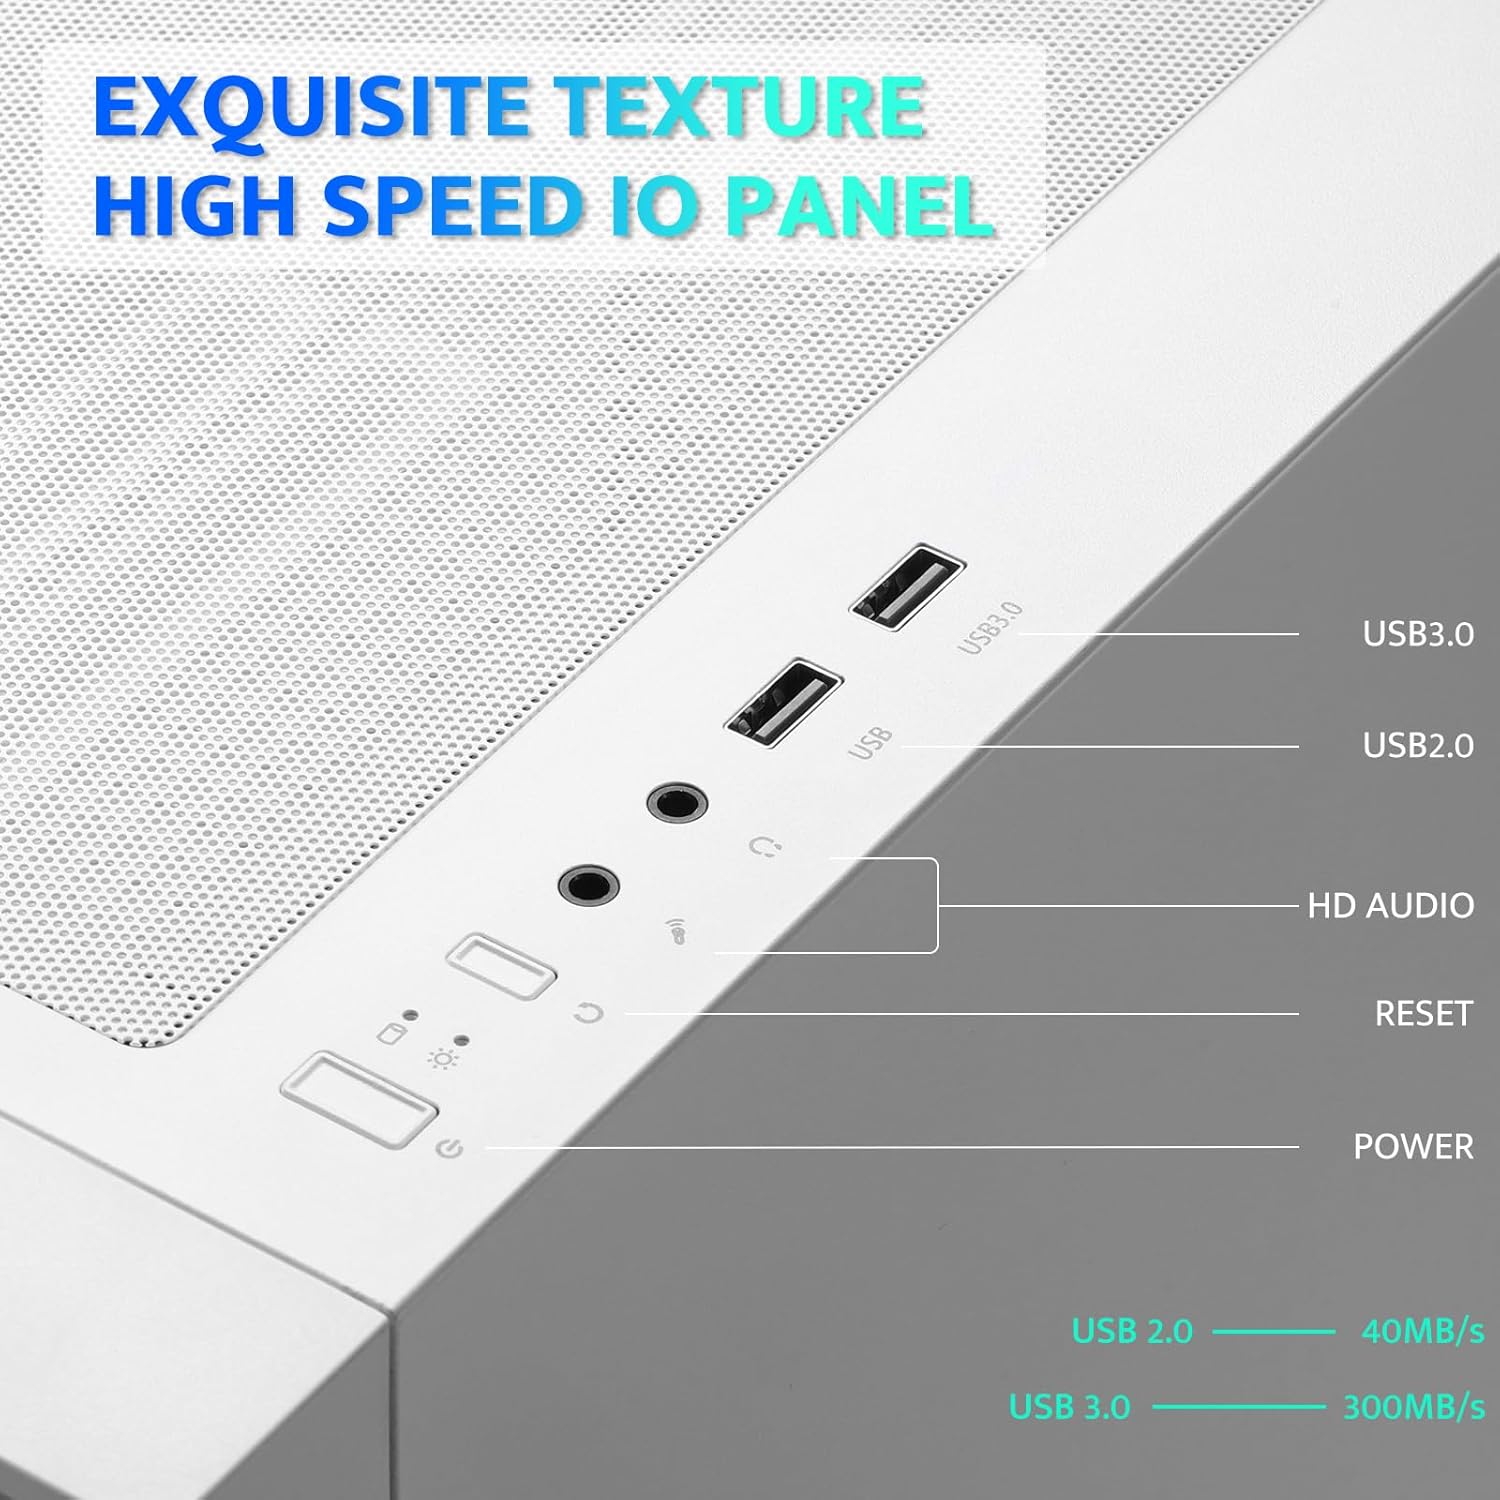
Figure 5.1: Internal layout with maximum component dimensions for CPU cooler, GPU, PSU, and radiator support.
5.3 Кабелди башкаруу
Utilize the cable routing cutouts and tie-down points behind the motherboard tray to manage cables. This improves airflow and aesthetics. The DRX70 is designed to simplify cable management by allowing most connectors to be routed to the rear of the motherboard.

Figure 5.2: Illustration of cable management optimization, showing how cables can be concealed behind the motherboard tray.
6. Иштөө нускамалары
Бардык компоненттер орнотулуп, туташтырылгандан кийин, сиз тутумуңузду иштете аласыз.
6.1 Күйгүзүү/өчүрүү
- басыңыз Күч button on the top I/O panel to turn on your PC.
- To turn off, use the operating system's shutdown function or press and hold the Күч button for several seconds.
6.2 Front I/O Panel Functions
- USB 3.0 порт: шайкеш түзмөктөр менен жогорку ылдамдыктагы маалыматтарды берүү үчүн.
- USB 2.0 порт: Стандарттык USB түзмөктөр үчүн.
- HD Audio Jacks: Кулакчындарды жана микрофондорду туташтыруу үчүн.
- Калыбына келтирүү баскычы: Системаны кайра иштетүү үчүн.
6.3 Желдетүүчүнүн иштеши
The pre-installed 120mm fans provide cooling and feature fixed RGB lighting. These fans operate continuously when the system is powered on. The RGB lighting pattern is not user-addressable.
7. Техникалык тейлөө
Үзгүлтүксүз тейлөө сиздин PC компоненттеринин оптималдуу иштешин жана узак иштөөсүн камсыз кылууга жардам берет.
7.1 Чаң чыпкаларын тазалоо
The DRX70 case includes magnetic dust filters on the front and top panels, and a panel dust filter at the bottom. These should be cleaned periodically to prevent dust buildup and maintain airflow.
- Gently pull the magnetic dust filters off the chassis.
- Use a soft brush or compressed air to remove accumulated dust.
- Reattach the filters.

Figure 7.1: Magnetic dust filter for easy removal and cleaning.
7.2 Жалпы тазалоо
Корпустун сыртын жумшак менен сүртүңүз, гamp кездеме. Каптоого же чыңалган айнекке зыян келтире турган катуу химиялык заттарды же абразивдүү материалдарды колдонуудан алыс болуңуз.
8. Кыйынчылыктарды
If you encounter issues with your PC case, consider the following common solutions:
- Кубат жок: Ensure the PSU is properly connected to the wall outlet and the power switch on the PSU is in the 'ON' position. Verify all internal power cables (24-pin ATX, CPU, GPU) are securely connected. Check front panel power button connections to the motherboard.
- Айланбаган күйөрмандар: Confirm that the fan power cables are correctly connected to the motherboard or fan controller.
- USB порттору иштебейт: Check that the USB headers from the front I/O panel are correctly plugged into the motherboard.
- Audio Jacks Not Working: Ensure the HD Audio cable from the front I/O panel is correctly connected to the motherboard's audio header.
For persistent issues, consult the manuals for your individual PC components or seek professional assistance.
9. Техникалык шарттар
| Өзгөчөлүк | Спецификация |
|---|---|
| Модель аты | DRX70M ATX Computer Case |
| Бренд | darkFlash |
| Иштин түрү | Ара Tower |
| Motherboard шайкештиги | ATX, M-ATX, ITX |
| Өлчөмдөрү (LxWxH) | 15 x 9 x 18.1 дюйм (381 x 228.6 x 459.7 мм) |
| Элемент Салмагы | 11.6 фунт (5.26 кг) |
| Материал | Metal, Plastic, Tempered Glass |
| Алдын ала орнотулган күйөрмандар | 3 x 120mm Fixed RGB Fans (Front) |
| Max Fan Support | 8 күйөрманга чейин |
| Радиатор колдоо | Up to 280mm (Top), 120mm (Rear) |
| CPU муздаткычтын максималдуу бийиктиги | 180мм |
| Максималдуу GPU узундугу | 350мм |
| Сактоочу жайлар | 1x 2.5" SSD, 2x 2.5"/3.5" HDD |
| Алдыңкы I / O порттору | 1x USB 3.0, 1x USB 2.0, HD Audio, Power, Reset |
10. Кепилдик жана колдоо
darkFlash provides a 1-year assurance for computer cases. This warranty covers manufacturing defects and ensures product quality. For warranty claims or technical support, please contact darkFlash customer service through their official webпродукт сатылып алынган сайт же сатуучу.
Кепилдикти текшерүү үчүн сатып алганыңыздын далилин сактап коюңуз.