
1. Киришүү
This manual provides essential information for the safe and efficient operation of your OMTech 60W CO2 Laser Engraver, Model SH-G570. Please read all instructions carefully before operating the machine. Proper understanding and adherence to these guidelines will ensure optimal performance and longevity of your laser engraver.
2. Коопсуздук боюнча көрсөтмөлөр
Operating a CO2 laser engraver involves potential hazards. Always prioritize safety to prevent injury or damage to the equipment. This device is a Laser Class 2 product with 0.827 mW output power.
- Көздү коргоо: Always wear appropriate laser safety glasses when operating the machine. Never look directly into the laser beam.
- Вентиляция: Ensure adequate ventilation to remove fumes and smoke generated during engraving and cutting. Use the integrated air assist and an external exhaust system.
- Материалдык шайкештик: CO2 лазерлери үчүн бекитилген материалдарды гана оюп же кесиңиз. Уулуу түтүн чыгаруучу же тез күйүүчү материалдардан алыс болуңуз.
- Өрт коопсуздугу: Keep a fire extinguisher nearby. Never leave the machine unattended during operation.
- Электр коопсуздугу: Ensure the machine is properly grounded and connected to a suitable power supply. Avoid operating in wet conditions.
- Шашылыш токтотуу: Авариялык токтотуу баскычынын жайгашкан жери жана иштеши менен таанышыңыз.
- Safe Observation: Utilize the flame-resistant viewing window to monitor the engraving process safely.
3. Орнотуу
Follow these steps to set up your OMTech 60W CO2 Laser Engraver:
- Пакеттен чыгаруу: Carefully remove the laser engraver and all accessories from its packaging. Inspect for any shipping damage.
- Жайгашкан жери: Place the machine on a stable, level surface in a well-ventilated area. Ensure sufficient space around the machine for operation and maintenance.
- Суу муздаткычын туташтыруу: Connect the included water chiller (e.g., CW-5200) to the laser tube according to the chiller's instructions. Ensure the chiller is filled with distilled water and operating correctly to maintain optimal laser tube temperature.
- Чыгаруу системасы: Connect the exhaust fan and ducting to the machine and vent it outdoors or to a suitable filtration system.
- Аба жардам: Connect the air assist pump to the machine. This helps prevent flare-ups and keeps the lens clean during operation.
- Кубат туташуу: Электр кабелин машинага, андан кийин жерге туташтырылган электр розеткасына туташтырыңыз.
- Компьютерге туташуу: Connect the laser engraver to your computer using a USB cable or Ethernet cable.
- Программалык камсыздоону орнотуу: Install the LightBurn software on your computer. Follow the software's installation guide for proper setup and configuration.
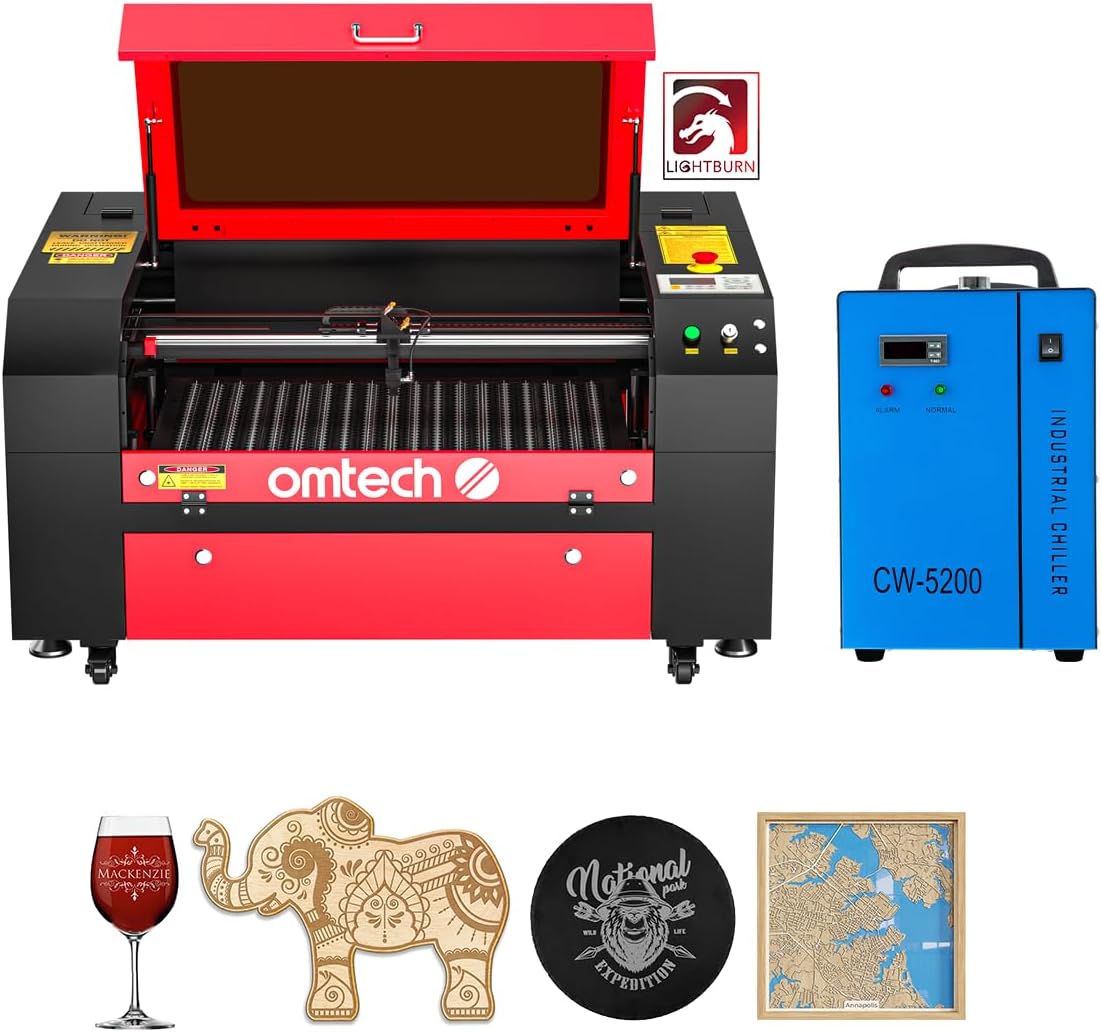
Figure 3.1: OMTech 60W CO2 Laser Engraver in a workshop setting, ready for operation. The machine is red and black, with a water chiller visible on the right.

Figure 3.2: The OMTech CW-5200 Water Chiller, an essential component for maintaining the laser tube's temperature during operation.
4. Иштөө нускамалары
Operating your laser engraver involves preparing your design, setting machine parameters, and monitoring the process.
- Материалды жүктөө: Place your material onto the honeycomb or aluminum blade bed. Secure it to prevent movement during engraving. The 20"x28" (500x700 mm) work area accommodates most projects. Use the four-way pass-through doors for larger and longer items.
- Motorized Workbed Adjustment: Use the motorized workbed to adjust the height for proper focus. This ensures optimal engraving and cutting quality for various material thicknesses.
- Дизайнды даярдоо (LightBurn):
- Import or create your design in LightBurn.
- Set the appropriate layer parameters (speed, power, DPI) based on your material and desired effect.
- Utilize LightBurn's features for image processing, such as dithering or halftone settings for photo engraving.
- Фокусту тууралоо: Perform a focus test to ensure the laser beam is precisely focused on the material surface.
- Гравюраны/кесүүнү баштоо: Initiate the job from LightBurn. Monitor the process through the flame-resistant viewтерезе.

Figure 4.1: The motorized workbed allows for easy height adjustment to focus on materials of varying thicknesses.

Figure 4.2: The laser engraver features dual engraving beds (honeycomb and aluminum blade) with a 20"x28" work area. Four-way pass-through doors facilitate working with larger items.

Figure 4.3: The flame-resistant viewтерезе гравировкалоо процессин коопсуз көзөмөлдөөгө мүмкүндүк берет.
Video 4.1: Tutorial on how to laser engrave a photo with a CO2 Laser Engraver. This video demonstrates the process of preparing an image and using the laser for photo-realistic engraving.
Video 4.2: Demonstration of laser engraving and cutting on acrylic mirror for a DIY project. This video showcases material-specific techniques and results.
5. Техникалык тейлөө
Regular maintenance ensures the longevity and consistent performance of your laser engraver.
- Линзаларды жана күзгүлөрдү тазалоо: Regularly clean the laser lens and mirrors with specialized lens cleaning solution and wipes to maintain beam quality.
- Жумушчу төшөктү тазалоо: Clean the honeycomb and aluminum blade beds frequently to remove debris and residue, which can affect engraving quality and fire safety.
- Суу муздаткычын тейлөө: Check the water level and quality in the chiller regularly. Replace distilled water as needed to prevent algae growth and ensure efficient cooling.
- Аба жардам системасы: Inspect the air assist nozzle and tubing for blockages or damage.
- Чыгаруу системасы: Clean the exhaust fan and ducting to ensure efficient smoke and fume extraction.
- Лазердик түтүктүн иштөө мөөнөтү: The high-performance DC tube delivers 60W of power for up to 1,000 hours of usage and doubles its lifespan when consistently used at lower settings. Monitor its performance and replace when necessary.

Figure 5.1: The high-performance DC laser tube, offering a high-efficiency laser beam with a lifespan of up to 2000 hours under optimal conditions.
6. Кыйынчылыктарды
Бул жерде кээ бир жалпы маселелер жана алардын мүмкүн болуучу чечимдери:
- Uneven Engraving/Cutting:
- Check material flatness on the workbed.
- Verify laser focus is correctly set for the material thickness.
- Ensure mirrors and lens are clean and properly aligned.
- Weak Laser Output:
- Confirm laser power settings in LightBurn are appropriate for the material.
- Check water chiller temperature; overheating can reduce laser power.
- Inspect the laser tube for any visible damage or signs of aging.
- Машина жооп бербейт:
- Verify all power connections and ensure the machine is turned on.
- Check USB/Ethernet cable connection to the computer.
- Restart LightBurn software and the laser engraver.
- Ашыкча түтүн/буун:
- Ensure the exhaust fan is operating at full capacity and ducts are clear.
- Verify air assist is active and properly directed at the engraving/cutting point.
7. Техникалык шарттар
| Өзгөчөлүк | Деталь |
|---|---|
| Бренд | OMTech |
| Модель номери | SH-G570 |
| Лазердик күч | 60W CO2 DC Tube |
| Жумуш аймагы | 20" x 28" (500 x 700 мм) |
| Max. Оюунун ылдамдыгы | 600 мм/с (23.6 ипс) |
| Макс. Гравюра тереңдиги | Металл эмес материалдарда 0.4 дюйм (10 мм) |
| Жумушчу керебет | Motorized Autolift, Honeycomb & Aluminum Blade Beds |
| Өтүү | Four-way pass-through doors |
| Байланыш | USB кабели, Ethernet кабели, USB флеш-диск, оффлайн |
| Программалык камсыздоонун шайкештиги | LightBurn (included), CorelDRAW, AutoCAD |
| Элемент Салмагы | 223 фунт |
| Продукциянын өлчөмдөрү | 48.8 x 34.3 x 26.4 дюйм |
| Лазердик класс | 2-класс, 0.827 мВт чыгуу кубаттуулугу |

7.1-сүрөт: OMTech 60W CO2 лазердик гравёрунун негизги мүнөздөмөлөрү.
8. Кепилдик
For detailed warranty information regarding your OMTech 60W CO2 Laser Engraver, please refer to the official OMTech webсайтына же өнүмүңүз менен кошо берилген кепилдик картасына кайрылыңыз. Кепилдик шарттары жана жоболору ар кандай болушу мүмкүн.
9. Колдоо
Should you require technical assistance, have questions about operation, or need to order replacement parts, please contact OMTech customer support. You can find contact information and additional resources on the official OMTech webсайт: OMTech Store.
Видео 9.1: Бүттүview of OMTech laser engravers, highlighting their suitability for various users and applications. This video provides general information about the brand's product range.