
1. Продукт бүтүп калдыview
The Cuifati ITX Computer Motherboard H6 ME is designed for compact computing systems, offering essential features for a reliable and efficient build. This motherboard supports LGA 1155 CPUs and DDR3 memory, providing a stable foundation for various applications.
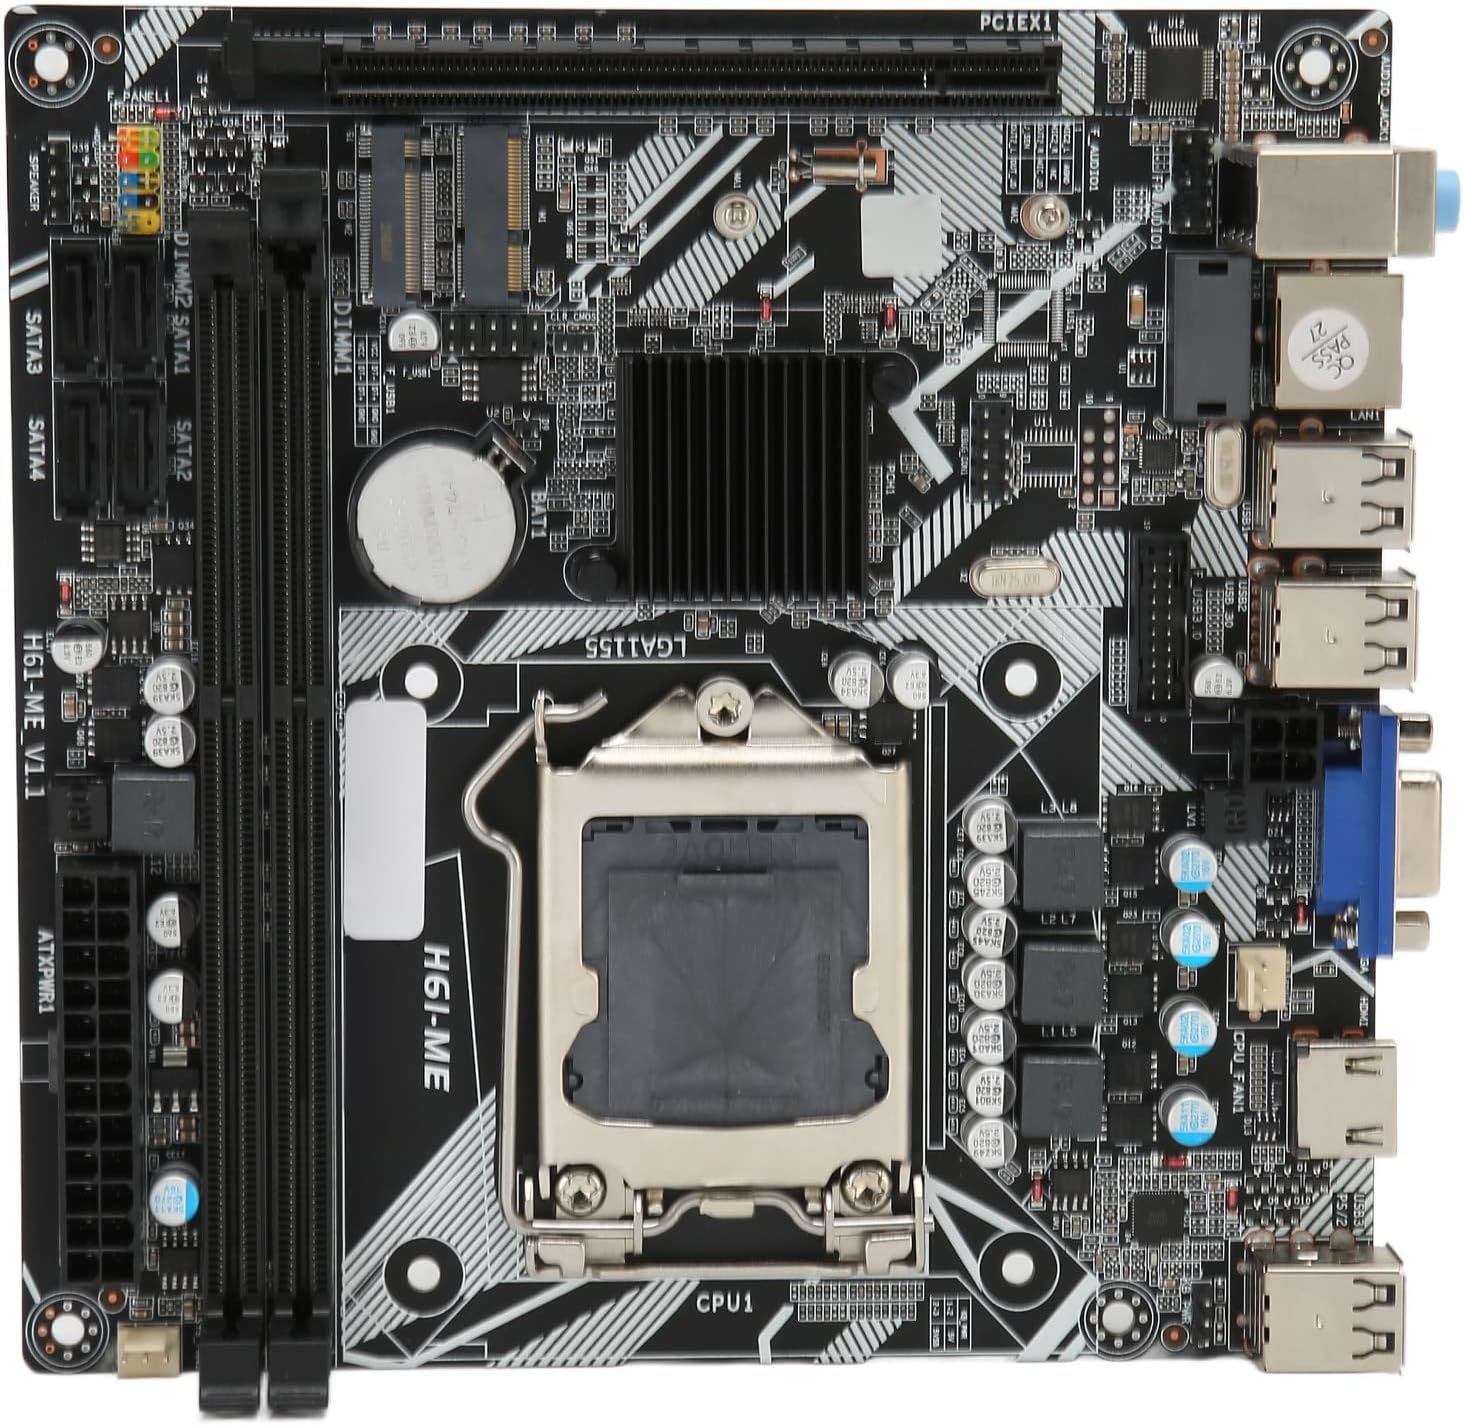
Figure 1: Cuifati ITX Computer Motherboard H6 ME (Top View)
2. Негизги өзгөчөлүктөрү
- LGA 1155 CPU Slot: Supports LGA 1155 processors for stable performance.
- Multiphase Power Design: Features stable and accurate multiphase power delivery for improved CPU performance.
- HD Video Output: Equipped with VGA and HD Multimedia Interface (HDMI) for digital high-definition video output.
- Кош канал DDR3 эс тутуму: Incorporates two DDR3 memory slots, supporting up to 16GB, enhancing overall system performance.
- Multiple USB2.0 Interfaces: Provides 10 USB2.0 interfaces (4 front, 6 rear) for extensive peripheral connectivity.
- Сактоо параметрлери: Includes 4 SATA2.0 ports and M.2 NVME support for various storage solutions.
- PCIe 16X уячасы: Features a PCIe 16X slot for dedicated graphics cards or other expansion cards.
3. Пакеттин мазмуну
Орнотууну улантуудан мурун пакетте бардык элементтер бар экенин текшериңиз.
- 1 x Cuifati LGA 1155 Motherboard (H6 ME)
- 1 x Metal I/O Plate
- 1 x SATA Connecting Cable

Figure 2: Motherboard and Included Accessories
4. Орнотуу жана орнотуу
This section provides instructions for installing the Cuifati H6 ME motherboard into your computer system. Ensure your system is powered off and unplugged before beginning any installation.
4.1. Компонентти идентификациялоо
Familiarize yourself with the layout of the motherboard and its various connectors.

Figure 3: Motherboard Component Diagram
- CPU уячасы (LGA 1155): For installing your Intel LGA 1155 processor.
- DDR3 Slots: Two slots for DDR3 memory modules.
- PCIe 16X уячасы: графикалык карталар же башка кеңейтүү карталары үчүн.
- SATA2.0 Ports: Four ports for connecting SATA storage devices (HDDs/SSDs).
- NVME M.2 Slot: For high-speed NVME M.2 SSDs.
- Алдыңкы панелдин туташтыргычтары: Pins for power switch, reset switch, HDD LED, and power LED.
- USB2.0 Headers: Алдыңкы панелдин USB порттору үчүн.
- 24-пин ATX Power Connector: Негизги электр энергиясы менен камсыздоо.
- 4-пин CPU электр туташтыргычы: CPU үчүн кошумча күч.
- Арткы I/O порттору: USB, VGA, HDMI, LAN, Audio ports.
4.2. Орнотуу кадамдары
- Ишти даярдоо: Ensure your computer case is ready for motherboard installation. Install standoffs if necessary.
- Install the I/O Shield: Snap the metal I/O plate into the corresponding opening in your computer case.
- CPU орнотуу:
- CPU розеткасынын рычагын ачып, коргоочу капкагын алып салыңыз.
- Carefully align your LGA 1155 CPU with the socket, ensuring the notches on the CPU match the keys on the socket.
- Процессорду розеткага акырын салыңыз. Аны мажбурлаба.
- CPUну бекитүү үчүн розетка рычагын жабыңыз.
- CPU муздаткычын орнотуу: Apply thermal paste (if not pre-applied) and install your CPU cooler according to its manufacturer's instructions. Connect the CPU fan cable to the "CPU FAN" header on the motherboard.
- Орнотуу эстутум (RAM):
- DDR3 эс тутум уячаларынын эки учундагы клиптерди ачыңыз.
- DDR3 эстутум модулундагы оюкту уячадагы ачкыч менен тегиздеңиз.
- Эстутум модулунун эки учуна кысылганчалар орнотулганга чейин катуу басыңыз.
- Motherboard орнотуу: Бурама тешиктерин тирөөчтөр менен тегиздеп, энелик платаны корпуска этияттык менен салыңыз. Энелик платаны бурама менен бекитиңиз.
- Connect Power Supply Cables:
- Электр булагыңыздан келген 24-пиндүү ATX кубат кабелин энелик платадагы негизги кубат туташтыргычына туташтырыңыз.
- Connect the 4-pin CPU power cable to the CPU power connector.
- Сактагыч түзмөктөрдү орнотуу: Connect your SATA HDDs/SSDs to the SATA2.0 ports using the provided SATA cable. If using an NVME M.2 SSD, install it into the M.2 slot and secure it with the screw.
- Графикалык картаны орнотуу (кошумча): If using a dedicated graphics card, insert it into the PCIe 16X slot and secure it. Connect any necessary PCIe power cables from your power supply.
- Алдыңкы панелдик кабелдерди туташтыруу: Connect the power switch, reset switch, HDD LED, and power LED cables from your case to the corresponding pins on the motherboard's front panel header. Refer to the motherboard diagram (Figure 3) for pin assignments.
- Connect USB and Audio Cables: Connect front panel USB and audio cables to their respective headers on the motherboard.

Figure 4: PCIe 16X Slot for Expansion Cards
5. Иштөө нускамалары
Бардык компоненттер орнотулуп, туташтырылгандан кийин, сиз тутумуңузду иштете аласыз.
5.1. Баштапкы күйгүзүү
- Мониторуңузду, клавиатураңызды жана чычканыңызды арткы киргизүү/чыгаруу панелиндеги тиешелүү портторго туташтырыңыз.
- Plug in the power cable to your power supply and turn on the power supply switch.
- Компьютериңиздин корпусундагы кубат баскычын басыңыз.
- Система жүктөлүшү керек жана сиз мониторуңузда жыйынтыкты көрүшүңүз керек.
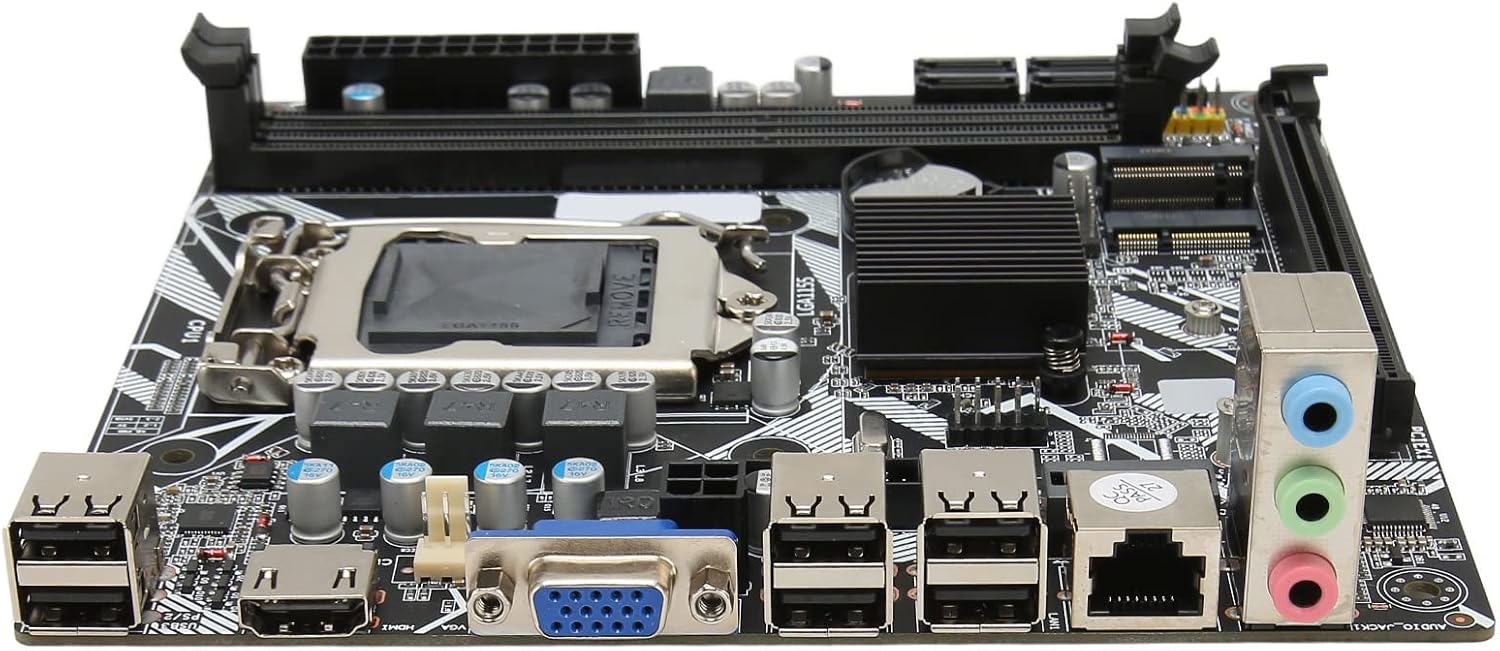
5-сүрөт: Арткы киргизүү/чыгаруу порттору
5.2. BIOS/UEFI Орнотуу
BIOS/UEFI орнотуу утилитасын ачуу үчүн, белгиленген баскычты басыңыз (адатта DEL or F2) repeatedly during the initial boot sequence. From the BIOS, you can configure system settings, boot order, and monitor hardware status.
5.3. Операциялық системаны орнотуу
Once the system is stable, you can proceed with installing your preferred operating system (e.g., Windows, Linux) from a bootable USB drive or DVD.
6. Техникалык тейлөө
Туура тейлөө энелик платаңыздын иштөө мөөнөтүн узартып, оптималдуу иштешин камсыздай алат.
- Чаңды тазалоо: Кысылган абаны колдонуп, компьютериңиздин ичиндеги чаңды, айрыкча желдеткичтер менен радиаторлордун чаңын дайыма тазалаңыз. Тазалоодон мурун системанын өчүрүлгөнүн жана розеткадан ажыратылганын текшериңиз.
- Кабелдик башкаруу: Аба агымын жакшыртуу жана тоскоолдуктарды болтурбоо үчүн кабелдердин тыкан өткөрүлүшүн текшериңиз.
- BIOS жаңыртуулары: Мезгил-мезгили менен өндүрүүчүнүн текшерүү webBIOS жаңыртуулары үчүн сайт. BIOS'ту зарыл болгон учурда гана жаңыртып, системанын туруксуздугуна жол бербөө үчүн көрсөтмөлөрдү кылдаттык менен аткарыңыз.
- Экологиялык шарттар: Operate the motherboard in a well-ventilated area, away from direct sunlight, excessive heat, and moisture.
7. Кыйынчылыктарды
Бул бөлүм сиз кабылышы мүмкүн болгон жалпы көйгөйлөрдү карайт.
- Кубат жок:
- Check if the power supply is plugged in and switched on.
- Verify that the 24-pin and 4-pin power cables are securely connected to the motherboard.
- Ensure the front panel power switch cable is correctly connected to the motherboard header.
- Дисплей жок:
- Confirm that the monitor is connected to the correct video output (VGA or HDMI) on the motherboard or graphics card.
- RAM модулдарын кайра орнотуңуз. Бир гана RAM модулу орнотулуп, жүктөөгө аракет кылыңыз.
- Графикалык картаны кайра орнотуңуз (эгер бар болсо).
- Ensure the CPU is properly seated and the CPU cooler is installed correctly.
- Системанын туруксуздугу/бузуулар:
- Ашыкча ысып кеткендигин текшериңиз. Процессордун муздаткычы жана каптын күйөрмандары иштеп жатканын текшериңиз.
- Test memory modules for errors using diagnostic tools.
- Бардык драйверлердин (чипсет, графика ж.б.) жаңыртылгандыгын текшериңиз.
- Перифериялык түзмөк аныкталган жок:
- Перифериялык түзүлүштү башка USB портуна туташтырууга аракет кылыңыз.
- Ensure necessary drivers are installed for the peripheral.
- Check BIOS settings to ensure USB ports are enabled.
8. Техникалык шарттар
| Өзгөчөлүк | Description |
|---|---|
| Motherboard Model | H6 ME |
| Motherboard түрү | ITX |
| CPU Slot Type | LGA 1155 |
| Memory Slots | DDR3 x 2 |
| Эс тутумдун максималдуу сыйымдуулугу | 16 ГБ чейин |
| SATA порттору | SATA2.0 x 4 |
| Графикалык картанын уячасы | PCIe 16X |
| USB интерфейстери | USB2.0 x 10 (4 Front, 6 Rear) |
| Кеңейтүү интерфейстери | VGA x 1, HD Multimedia Interface (HDMI) x 1, M.2, NVME M.2, DEBUG Pin x 1 |
| Sound Audio Card | Realtek ALC662 Sound Chip |
| Тармак картасы | 100M Network Card |
| Ички батарея | 240mAh CR2032 x 1 |
| Элемент Салмагы | 1.13 фунт |
| Пакеттин өлчөмдөрү | 8.27 x 7.87 x 1.97 дюйм |
| Модель номери | CUIFATI6wgctin4bz |
9. Кепилдик жана колдоо
For warranty information or technical support, please refer to the retailer where the product was purchased or visit the official Cuifati webсайт. Кепилдик дооматтар үчүн сатып алганыңыздын далилин сактаңыз.
Өндүрүүчү: КУИФАТИ
Биринчи жеткиликтүү болгон күнү: 19-декабрь, 2023-жыл
For additional assistance, you may contact Cuifati customer service through their official channels.