Introduction
This manual provides detailed instructions for the installation, operation, and maintenance of your ASHATA H511 VD4 Motherboard. Please read this manual thoroughly before proceeding with installation to ensure correct setup and optimal performance. Keep this manual for future reference.
Коопсуздук маалыматы
Ар дайым төмөнкү коопсуздук чараларын сактаңыз:
- Disconnect power from your computer before installing or removing any components.
- Компоненттерге электростатикалык разряддын (ESD) бузулушун алдын алуу үчүн антистатикалык билек боону тагыңыз.
- Сезимтал компоненттерге тийбеш үчүн, энелик платаны четтеринен кармаңыз.
- Ашыкча ысып кетүүдөн сактануу үчүн компьютериңиздин ичинде туура желдетүүнү камсыз кылыңыз.
- Motherboard нымга же экстремалдык температурага дуушар кылбаңыз.
Пакеттин мазмуну
Verify that all items are present in your ASHATA H511 VD4 Motherboard package:
- ASHATA H511 VD4 Motherboard
- I / O Shield
- SATA маалымат кабелдери (2x)
- Колдонуучунун Колдонмосу (бул документ)
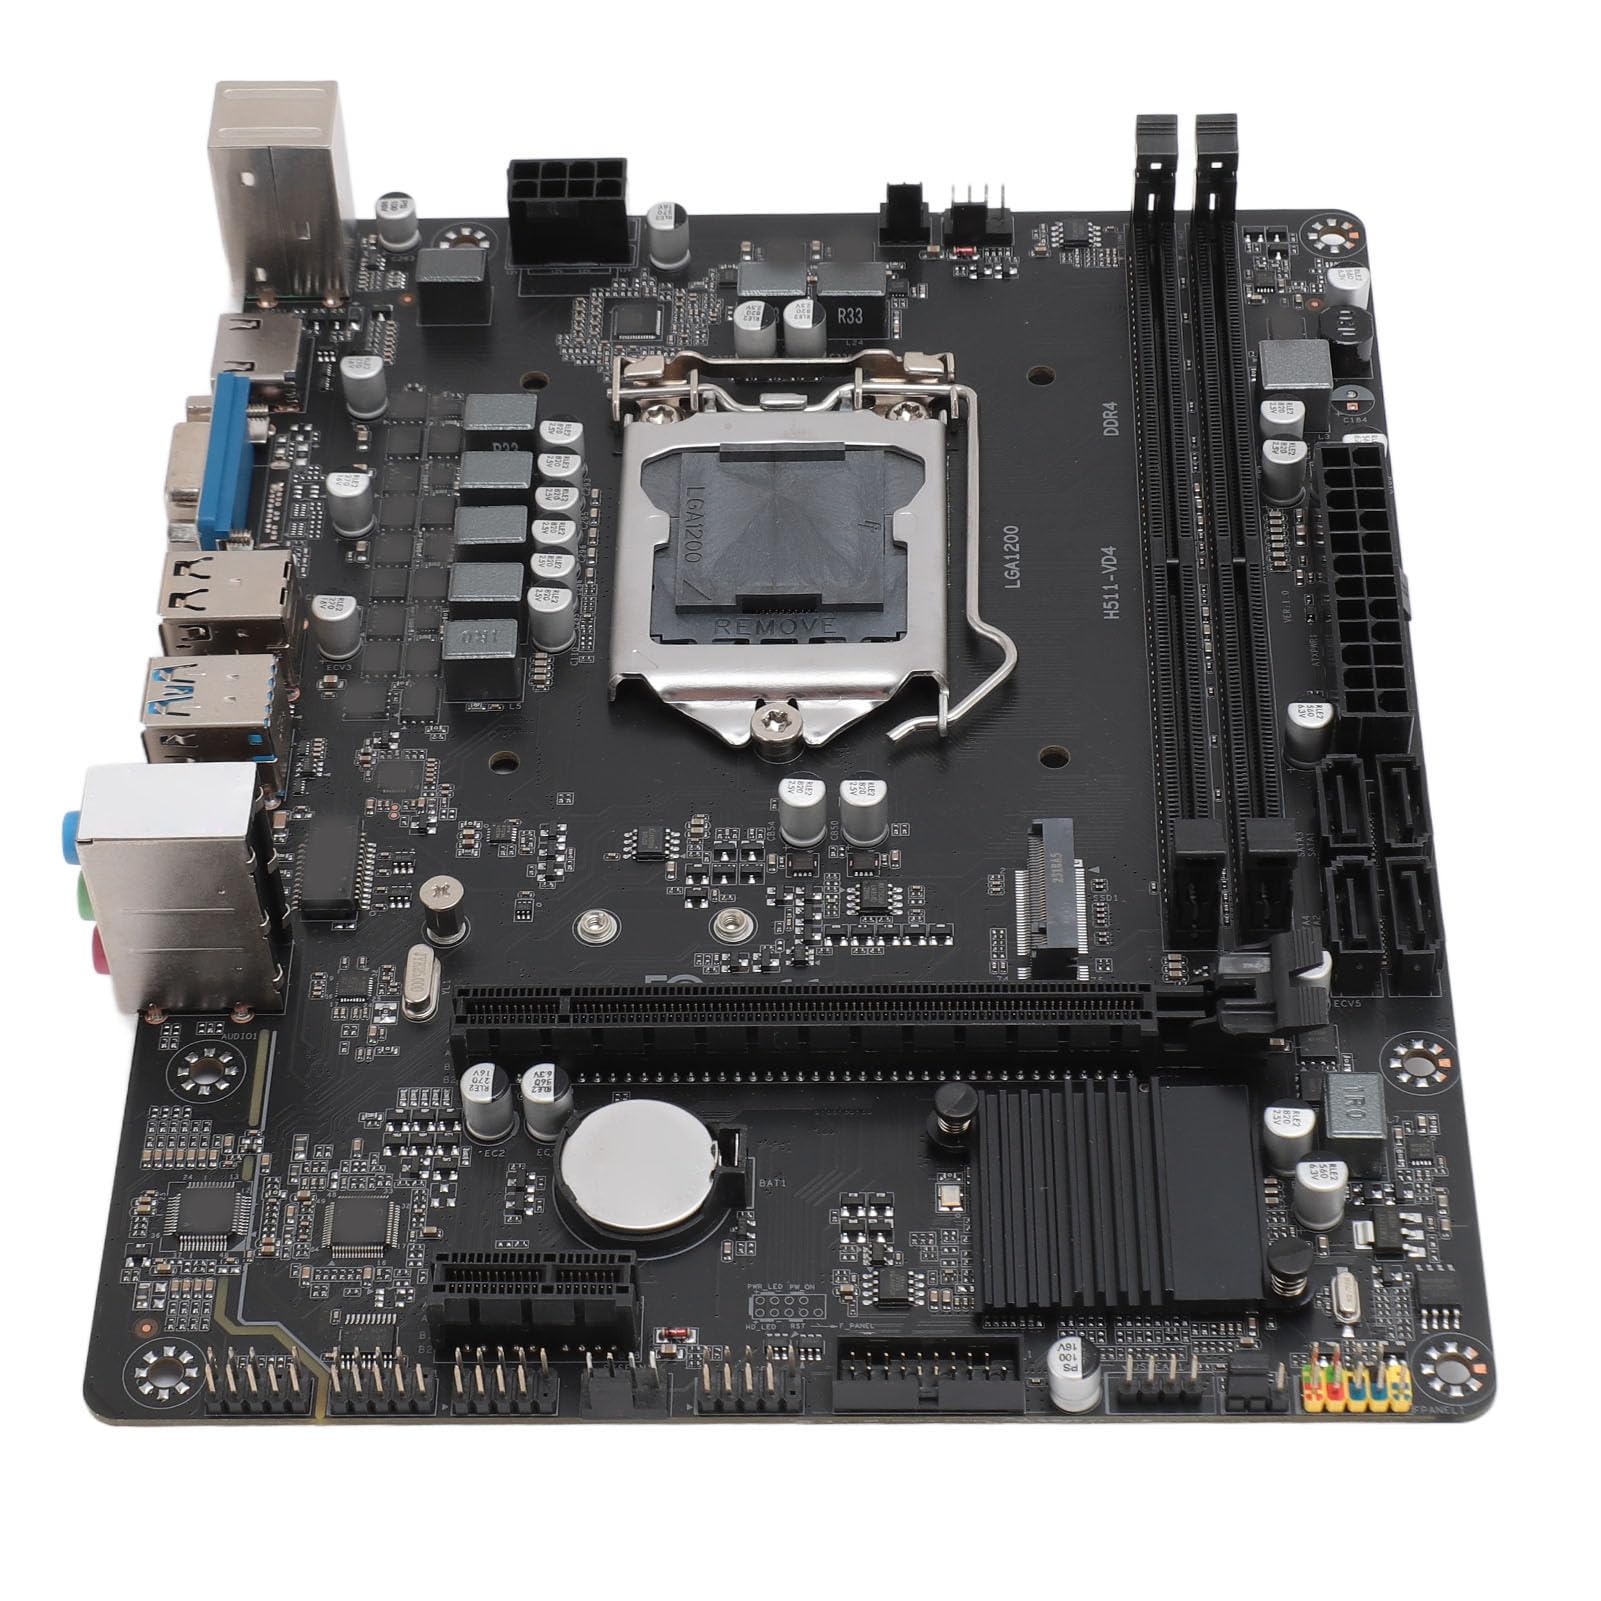
Image: ASHATA H511 VD4 Motherboard, including the I/O shield and two SATA data cables, as typically found in the product package.
Продукт бүттүview
The ASHATA H511 VD4 Motherboard is designed for desktop PCs, supporting 10th/11th generation Intel CPUs with an LGA1200 socket. It features dual-channel DDR4 memory slots and multiple expansion interfaces.

Сүрөт: жогорудан төмөнгө view of the ASHATA H511 VD4 Motherboard, showing the LGA1200 CPU socket, DDR4 memory slots, PCIe slots, and various headers.

Сүрөт: бурчтуу view of the ASHATA H511 VD4 Motherboard, highlighting the rear I/O panel with USB ports, video outputs, and audio jacks.
Негизги компоненттер:
- LGA1200 CPU розеткасы: Supports 10th and 11th Generation Intel Core processors.
- DDR4 Memory Slots: Dual-channel support for DDR4 SDRAM.
- PCIe x16 слоту: Графикалык карталар үчүн.
- PCIe x1 Slots: Кеңейтүү карталары үчүн.
- M.2 Slot: High-speed storage interface.
- SATA порттору: Сактагыч түзмөктөрдү туташтыруу үчүн.
- Арткы I/O порттору: USB ports, LAN, audio jacks, video outputs (VGA, HDMI if integrated graphics are used).
Орнотуу жана орнотуу
1. Ишти даярдоо:
Install the I/O shield into the rear opening of your PC case. Ensure it is securely snapped into place.
2. Motherboard орнотуу:
- Энелик платаны компьютериңиздин корпусундагы тирөөчтөр менен тегиздеңиз.
- Carefully lower the motherboard onto the standoffs, ensuring the I/O ports align with the I/O shield.
- Secure the motherboard with screws into the standoffs. Do not overtighten.
3. Installing the CPU:
- CPU розеткасынын рычагын ачыңыз.
- Carefully place the CPU into the socket, aligning the golden triangle on the CPU with the triangle on the socket. Do not force it.
- Процессорду бекитүү үчүн CPU розеткасынын рычагын жабыңыз.
- Термикалык пастаны сүйкөңүз жана CPU муздаткычын өндүрүүчүнүн көрсөтмөлөрүнө ылайык орнотуңуз.
4. Installing Memory (RAM):
- DDR4 эс тутум уячаларынын эки учундагы клиптерди ачыңыз.
- Align the notch on the RAM module with the notch in the memory slot.
- RAM модулунун эки учуна клиптер орнотулганга чейин катуу басыңыз.
- For dual-channel performance, install modules in matching slots (refer to motherboard diagram for specific slot pairing).
5. Сактагыч түзмөктөрдү орнотуу:
- M.2 SSD: Insert the M.2 SSD into the M.2 slot at an angle, then push it down and secure it with the provided screw.
- SATA дисктери: Connect SATA data cables from the motherboard's SATA ports to your SSDs/HDDs. Connect power cables from your power supply to the drives.
6. Installing Graphics Card (Optional):
- PCIe x16 уячасында кармоочу клипти ачыңыз.
- Графикалык картаны уяча менен тегиздеп, ал ордуна чыкылдаганча бекем басыңыз.
- Картаны бурама менен корпуска бекитиңиз.
- Connect PCIe power cables from your power supply to the graphics card if required.
7. Кубат менен жабдууну туташтыруу:
- 24 пин ATX кубат туташтыргычын кубат булагыңыздан энелик платага туташтырыңыз.
- 8-пин (же 4-пин) CPU электр туташтыргычын энелик платага туташтырыңыз.
8. Connecting Front Panel Headers:
Connect the front panel connectors (Power SW, Reset SW, HDD LED, Power LED, USB, Audio) to their respective headers on the motherboard. Refer to the motherboard's silkscreen labels for correct orientation.
Иштөө нускамалары
Биринчи жүктөө:
- Бардык компоненттер орнотулуп, туташтырылгандан кийин, мониторуңузду, клавиатураңызды жана чычканды туташтырыңыз.
- Turn on the power supply and then press the power button on your PC case.
- Система BIOS/UEFI интерфейсине жүктөлүшү же операциялык системаны орнотуу процессин башташы керек.
BIOS/UEFI Орнотуу:
During boot-up, press the designated key (usually Del or F2) to enter the BIOS/UEFI setup. Here you can configure boot order, system time, fan speeds, and other advanced settings. Save changes before exiting.
Драйверди орнотуу:
After installing your operating system, install the necessary drivers for the motherboard chipset, LAN, audio, and any integrated graphics. These drivers are typically available on the manufacturer's website or included on a driver CD/USB (if provided).
Техникалык тейлөө
- Чаңды тазалоо: Кысылган абаны колдонуп, компьютериңиздин ичиндеги чаңды, өзгөчө желдеткичтер менен радиаторлордун чаңын дайыма тазалаңыз. Тазалоодон мурун системанын өчүрүлгөнүн жана розеткадан ажыратылганын текшериңиз.
- BIOS/UEFI жаңыртуулары: Periodically check the ASHATA webBIOS/UEFI жаңыртуулары үчүн сайт. Жаңыртуулар туруктуулукту, шайкештикти жана иштин натыйжалуулугун жакшырта алат. Системанын бузулушун болтурбоо үчүн жаңыртуу боюнча көрсөтмөлөрдү кылдаттык менен аткарыңыз.
- Драйвер жаңыртуулары: Оптималдуу иштешин жана жаңы программалык камсыздоо жана жабдык менен шайкештигин камсыз кылуу үчүн тутумуңуздун драйверлерин жаңыртып туруңуз.
- Кабелдик башкаруу: Аба агымын жакшыртуу жана тоскоолдуктарды болтурбоо үчүн ички кабелдердин тыкан башкарылышын камсыз кылыңыз.
Проблемаларды чечүү
- Кубат жок:
- Check if the power supply is switched on and properly connected to the motherboard (24-pin and 8-pin/4-pin CPU power).
- Ensure the front panel power switch cable is correctly connected to the motherboard header.
- Башка система же электр менен жабдууну сыноочу менен кубат менен камсыздоону текшериңиз.
- Дисплей жок:
- Verify that the monitor is connected to the correct video output (either integrated graphics or dedicated graphics card).
- Графикалык картаны жана RAM модулдарын кайра орнотуңуз.
- Бир гана RAM таякчасы менен жүктөөгө аракет кылыңыз.
- Check if the CPU power cable is securely connected.
- Системанын туруксуздугу/бузуулар:
- Ашыкча ысып кеткендигин текшериңиз. CPU муздаткычы туура орнотулганын жана желдеткичтер иштеп жатканын текшериңиз.
- RAM бузулганын текшерүү үчүн эстутум диагностикалык куралдарын иштетиңиз.
- Бардык айдоочулар жаңыртылганын текшериңиз.
- Check for loose cables or connections.
- Перифериялык түзмөк аныкталган жок:
- Перифериялык түзмөк туура портко туура туташкандыгын текшериңиз.
- Перифериялык түзүлүш үчүн эң акыркы драйверлерди орнотуңуз.
- Test the peripheral on another port or another computer.
Техникалык шарттар
| Өзгөчөлүк | Спецификация |
|---|---|
| Бренд | АШАТА |
| Модел | H511 VD4 |
| CPU розетка | LGA1200 (Supports 10th/11th Gen Intel Core) |
| Эс тутум технологиясы | DDR4 SDRAM |
| Memory Clock Speed | 2833 МГц (макс.) |
| Эс тутум каналдары | Кош канал |
| Графикалык карта интерфейси | Integrated, PCI, PCI-Express x16 |
| Сактагыч интерфейси | M.2, SATA |
| Электр камсыздоо | 6-фазалык электр менен жабдуу |
| ASIN | B0CS6QDQ35 |
| Биринчи жеткиликтүү күн | 18-февраль, 2025-жыл |
Кепилдик жана колдоо
For warranty information and technical support, please refer to the documentation provided with your purchase or visit the official ASHATA webсайт. Кепилдик дооматтар үчүн сатып алганыңыздын далилин сактаңыз.
Өндүрүүчү: АШАТА
Webсайт: www.ashata.com (Эскертүү: Бул толтургуч URLТуура колдоо алуу үчүн продуктуңуздун таңгагын же расмий документтерин караңыз. webсайт.)