
1. Киришүү
This manual provides detailed instructions for the setup, operation, and maintenance of your TELLUR Shade Wireless Mouse (Model 491261). This mouse features multi-device connectivity, silent click buttons, RGB lighting, and adjustable DPI settings for enhanced productivity and comfort across various operating systems.
2. Пакеттин мазмуну
Пакетиңизде бардык буюмдар бар экенин текшериңиз:
- 1 x TELLUR Shade Wireless Mouse
- 1 x Nano receiver (USB-A)
- 1 x Type-C заряддоо кабели
- 1 x Колдонуучунун колдонмосу (бул документ)

Image: The TELLUR Shade Wireless Mouse, accompanied by its USB Nano receiver and Type-C charging cable, illustrating the complete package contents.
3. Продукт бүтүп калдыview
Familiarize yourself with the components of your TELLUR Shade Wireless Mouse:

Сүрөт: жогорудан төмөнгө view of the TELLUR Shade Wireless Mouse, highlighting the left and right silent click buttons, the main scroll wheel, DPI adjustment button, and the multi-device switch button.
- Сол чыкылдатуу баскычы: Тынч операция.
- Оң баскычты чыкылдатуу: Тынч операция.
- Scroll Wheel (Main): Вертикалдык жылдыруу үчүн.
- DPI жөндөө баскычы: Cycles through DPI settings (800/1200/1600/2400/3200).
- Multi-Device Switch Button: Toggles between connected devices (1, 2, 3, 4).
- Алга баскычы: Алга карай жылдырат web браузерлер же file изилдөөчүлөр.
- Артка баскычы: Артка карай багыт алат web браузерлер же file изилдөөчүлөр.
- Horizontal Scroll Wheel: For horizontal scrolling.
- Windows Home Button: Minimizes all windows to show the desktop; pressing again restores them.
- USB-C заряддоо порту: Located on the front for recharging the internal battery.
- Кубат которгучу: On/Off switch on the bottom of the mouse.
- Nano Receiver Storage: Compartment on the bottom for storing the USB receiver.
4. Орнотуу
4.1. Чычканды заряддоо
Before initial use, ensure the mouse is fully charged. Connect the provided Type-C charging cable to the USB-C port on the front of the mouse and the other end to a USB power source (e.g., computer USB port, USB wall adapter).

Сүрөт: каптал view of the TELLUR Shade Wireless Mouse, clearly showing the USB-C charging port located at the front for convenient recharging.
The RGB lighting may indicate charging status. A full charge typically provides approximately 20 days of average use.
4.2. Түзмөккө туташуу
The TELLUR Shade Wireless Mouse supports up to 4 devices simultaneously via Bluetooth and a 2.4GHz USB Nano receiver. Turn on the mouse using the power switch on the bottom.
4.2.1. 2.4GHz Wireless Connection (USB Nano Receiver)
- Locate the USB Nano receiver stored in the compartment on the bottom of the mouse.
- Plug the Nano receiver into an available USB-A port on your computer.
- Press the Multi-Device Switch Button on the mouse to select one of the 2.4GHz channels (usually indicated by a specific LED color or number).
- The mouse should automatically connect. If not, ensure the mouse is powered on and try replugging the receiver.
4.2.2. Bluetooth байланышы (BT1, BT2, BT3)
- Press the Multi-Device Switch Button to select one of the Bluetooth channels (BT1, BT2, or BT3). The corresponding indicator light will flash.
- Press and hold the Multi-Device Switch Button for 3-5 seconds until the indicator light flashes rapidly. This puts the mouse into pairing mode.
- Түзмөгүңүздө (компьютер, планшет, смартфон) Bluetooth жөндөөлөрүнө өтүп, жаңы түзмөктөрдү издеңиз.
- Select "TELLUR Shade Mouse" or a similar name from the list of available devices.
- Once paired, the indicator light on the mouse will stop flashing and remain solid for a few seconds before turning off.
Repeat these steps for additional Bluetooth devices on BT2 and BT3 channels.
5. Иштөө нускамалары
5.1. Түзмөктөрдүн ортосунда которулуу
To switch between connected devices, simply press the Multi-Device Switch Button. The mouse will cycle through the 2.4GHz channel and the three Bluetooth channels (BT1, BT2, BT3).
5.2. DPI сезгичтигин тууралоо
Press the DPI Adjustment Button to cycle through the available DPI settings: 800, 1200, 1600, 2400, and 3200 DPI. Each press will change the cursor speed, allowing you to find your preferred sensitivity.
5.3. RGB жарыкты башкаруу
The mouse features customizable RGB lighting. To change the RGB lighting mode or turn it off, simultaneously press the Forward and Backward buttons located on the side of the mouse. Continue pressing to cycle through different lighting effects or to disable the lighting.

Сүрөт: Жакын план view of the TELLUR Shade Wireless Mouse, highlighting the side buttons (Forward and Backward) and the integrated RGB lighting strip.
5.4. Using the Windows Home Button
The dedicated Windows Home Button (often located near the thumb rest) allows for quick desktop access. Pressing this button will minimize all open windows, revealing your desktop. Pressing it again will restore the previously open windows.
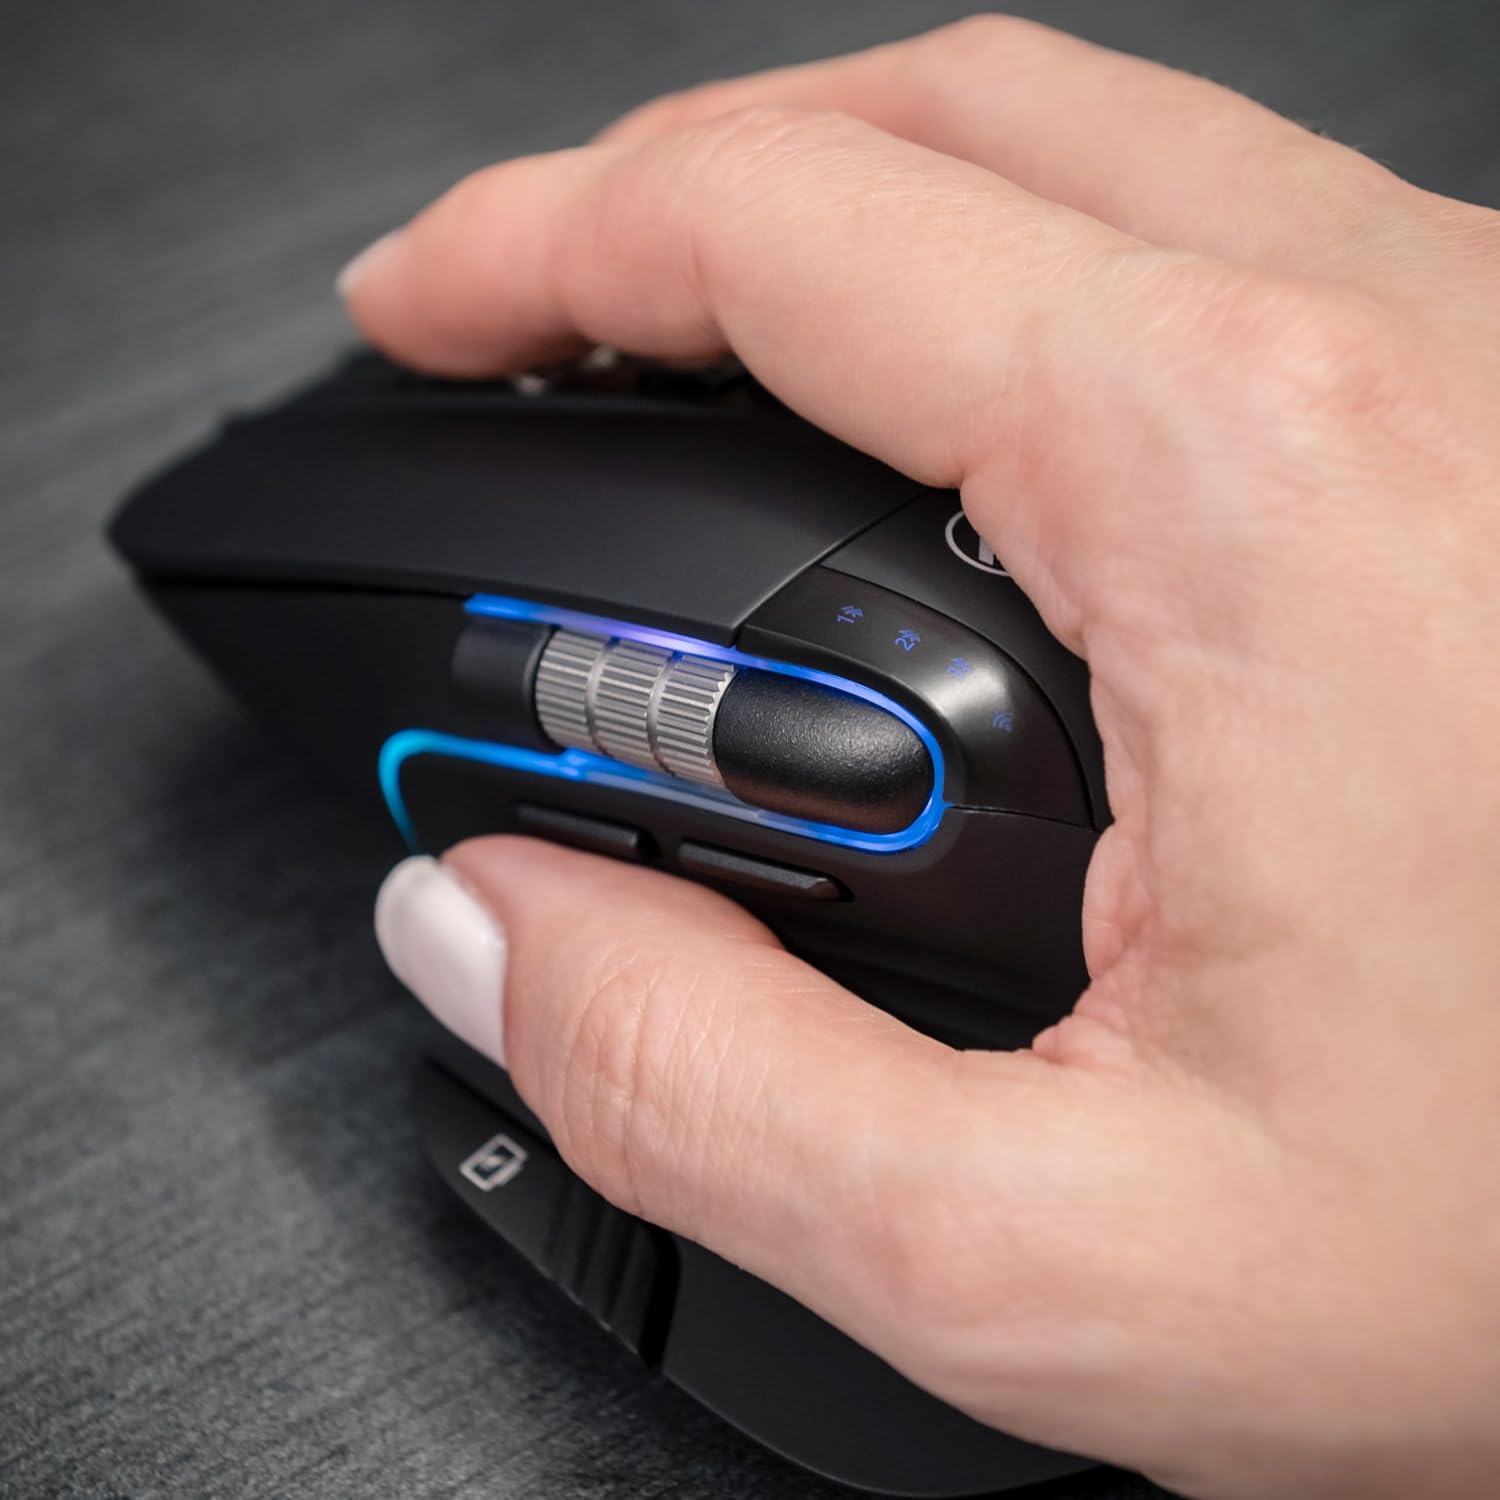
Image: A hand operating the TELLUR Shade Wireless Mouse, demonstrating the ergonomic grip and the placement of the Windows Home button accessible by the thumb.
6. Техникалык тейлөө
- Тазалоо: Чычканды тазалоо үчүн жумшак, кургак чүпүрөктү колдонуңуз. өжөр кир үчүн, бир аз гamp чүпүрөктү колдонсо болот, бирок аппаратка ным кирбеши керек.
- Сактагыч: When not in use for extended periods, turn off the mouse to conserve battery life. Store it in a cool, dry place.
- Батареяга кам көрүү: Avoid fully discharging the battery frequently. Recharge when the battery indicator is low.
- Экстремалдуу шарттарды болтурбоо: Чычканды экстремалдык температурага, түз күндүн нуруна же жогорку нымдуулукка дуушар кылбаңыз.
7. Кыйынчылыктарды
7.1. Чычкан жооп бербейт
- Чычкан күйгүзүлгөнүн текшериңиз.
- Батареянын деңгээлин текшерип, керек болсо чычканды заряддаңыз.
- Verify that the correct connection channel (2.4GHz, BT1, BT2, or BT3) is selected using the Multi-Device Switch Button.
- For 2.4GHz connection, ensure the Nano receiver is securely plugged into a working USB port. Try a different USB port.
- For Bluetooth connection, ensure Bluetooth is enabled on your device and try re-pairing the mouse.
- Компьютериңизди же түзмөгүңүздү өчүрүп күйгүзүңүз.
7.2. Үзгүлтүксүз туташуу
- Ensure the mouse is within the effective range (up to 10 meters).
- Башка зымсыз түзмөктөрдүн (мисалы, Wi-Fi роутерлери, башка Bluetooth түзмөктөрү) кийлигишүүсүн азайтыңыз.
- Avoid using the mouse on metallic surfaces, which can interfere with wireless signals.
7.3. Курсордун кыймылы маселелери
- Чычкандын түбүндөгү оптикалык сенсорду тазалаңыз.
- Чычканды таза, чагылдырылбаган бетке же чычкан аянтчасына колдонуңуз.
- Adjust the DPI setting using the DPI Adjustment Button.
7.4. RGB жарыктандыруу иштебей жатат
- Чычкан күйгүзүлгөнүн текшериңиз.
- Press the Forward and Backward buttons simultaneously to cycle through lighting modes or to turn it on if it was previously off.
- Check battery level; low battery might disable RGB lighting to conserve power.
8. Техникалык шарттар
| Бренд | TELLUR |
| Модель аты | TL491261 |
| Модель номери | 491261 |
| Байланыш технологиясы | Bluetooth, 2.4GHz Wireless (via Nano receiver) |
| Кыймылды аныктоо | Оптикалык |
| DPI сезгичтиги | 800/1200/1600/2400/3200 DPI |
| баскычтардын саны | 8 (including silent click, DPI, multi-device switch, forward/backward, horizontal scroll, Windows Home) |
| Колдун багыты | Эки тараптуу |
| Өзгөчөлүктөр | Silent Click, RGB Light, Multi-device (4 devices), Lightweight, Portable |
| Шайкеш түзмөктөр | Personal Computer, Laptop, Smartphones, Tablets |
| Операциялык системаны колдоо | Windows, Mac, iOS, Android, Linux |
| Зымсыз диапазон | 10 метрге чейин |
| Power Source | Батарея менен иштейт (USB-C аркылуу кайра заряддоого болот) |
| Батареянын орточо иштөө мөөнөтү | Болжол менен 20 күн |
| Материал | Пластик |
| Элемент Салмагы | 0.29 килограмм |
9. Кепилдик жана колдоо
For warranty information and technical support, please refer to the warranty card included with your product or visit the official TELLUR webсайт. Сатып алуу квитанциясын кепилдик дооматтары үчүн сатып алуунун далили катары сактаңыз.
Contact information for support can typically be found on the manufacturer's webсайтында же продуктунун таңгагында.