1. Киришүү
This manual provides detailed instructions for the installation, operation, and maintenance of your DEWIN Tuya WiFi Smart Over/Under Voltage Protector. This device is designed to safeguard your electrical appliances from damage caused by voltage fluctuations and overcurrent conditions, offering intelligent protection and remote control capabilities.
The protector automatically disconnects power during abnormal voltage or current events and reconnects when conditions return to normal, ensuring continuous protection for your electrical system.
2. Коопсуздук маалыматы
ЭСКЕРТҮҮ: Электр тогуна урунуу коркунучу. Орнотуу жана техникалык тейлөө иштерин квалификациялуу адистер гана аткарышы керек.
- Түзмөктү орнотуудан же тейлөөдөн мурун ар дайым электр кубатынан ажыратыңыз.
- Бардык зымдарды туташтыруу коопсуз жана жергиликтүү электр коддоруна ылайык экенин текшериңиз.
- Эгер аппарат бузулуп калса, аны иштетпеңиз.
- This device is designed for indoor use in dry environments.
- Киргизилген томду текшериңизtage and current ratings of your electrical system match the device specifications.
3. Продукциянын өзгөчөлүктөрү
- Автоматтык коргоо: Instantly cuts power during overvoltage, undervolvoltage, or overcurrent conditions to protect appliances. Automatically restores power when conditions normalize.
- WiFi алыстан башкаруу: Control the device remotely via a mobile phone application (Tuya platform) from anywhere with a signal.
- Real-time LED Display: Vivid LED screen displays real-time voltage (V), current (A), power (kW), and power factor (cosφ) for clear monitoring.
- Adjustable Protection Parameters: Manually set overvoltage, undervolvoltage, overcurrent, and leakage protection values to customize protection levels.
- Automatic Reset Function: Configurable recovery delay for automatic power restoration.
- High Current Impact Resistance: Built-in 63A magnetic latching relay prevents burnout from large current impacts.
- Intelligent Anti-Interference: Smart chips improve anti-interference capabilities.
- DIN темир жолго орнотулган: Designed for easy installation on standard DIN rails.
4. Пакеттин мазмуну
- 1 x DEWIN Tuya WiFi Smart Over/Under Voltage Protector
- 1 x User Manual
5. Техникалык шарттар
| Продукт аты | WiFi Intelligent Reclosing Protector |
| Модель номери | IYCQAQCXA-109919-03 |
| Материал | ABS |
| Киргизүү көлөмүtage | AC 140-300 В. |
| Overvoltage Protection Value | 230-300 V (Default: 270 V) |
| Undervoltage Protection Value | 140-210 V (Default: 170 V) |
| Ашыкча ток коргоо | 63 A (Default: 40 A) |
| Leaking Protection Value | 10-99 mA (Default: 30 mA) |
| Recovery Delay | 1-500 seconds (Default: 30 seconds) |
| Electrical & Mechanical Life | ≥ 100,000 жолу |
| Өзүн-өзү керектөө | ≤ 2 Вт |
| Өлчөмдөрү (L x W x Y) | 95 x 45 x 52 мм (болжол менен 9.5 x 4.5 x 5.2 см) |
| Салмагы | 250 г |

Image: Product dimensions and a summary of key specifications.
6. Орнотуу жана орнотуу
The DEWIN Smart Over/Under Voltage Protector is designed for DIN rail mounting. Ensure power is disconnected before proceeding with installation.
6.1 Электр өткөргүч схемасы

Image: Wiring diagram illustrating the connection of the protector between a main power switch and an air switch, with incoming (IN) and outgoing (OUT) live (L) and neutral (N) lines.
The device supports a 'top-in and bottom-out' wiring configuration. Connect the incoming live (L) and neutral (N) lines to the 'IN' terminals at the top of the device. Connect the outgoing live (L) and neutral (N) lines to the 'OUT' terminals at the bottom of the device, leading to your protected circuit or appliances.
- Кирүүчү күч: Connect the main power supply (Live and Neutral) to the 'IN' terminals.
- Outgoing Power: Connect the load (Live and Neutral) to the 'OUT' terminals.
- Байланыштардын бошоп калышына жана ысып кетишине жол бербөө үчүн бардык туташуулардын бекем жана коопсуз экенин текшериңиз.
6.2 DIN темир жолду орнотуу

Сүрөт: Арткы view of the protector, highlighting the guide rail buckle for DIN rail installation.
The device features a guide rail buckle for easy and secure attachment to a standard DIN rail. Simply align the device with the DIN rail and press firmly until it clicks into place.
7. Иштөө нускамалары
7.1 Product Interface Overview

Image: Detailed diagram of the protector's front panel, showing the LED display, indicator lights (V, A, L, WiFi, Pulse), and control buttons (Manual Switch, SET, T, WiFi).
The front panel includes an LED display, indicator lights, and control buttons:
- LED дисплей: Реалдуу убакыт режиминде электр параметрлерин көрсөтөт.
- Индикатор жарыктары:
- V: Үстүнөн/астынан томtage protection indicator light.
- A: Overcurrent protection indicator light.
- L: Leakage protection indicator light.
- WiFi: WiFi indicator light.
- Импульс: Electricity meter pulse indicator light.
- Manual Switch (Power Button): Turns the device on/off manually.
- SET баскычы: Used to enter the setting interface (press and hold for 3 seconds).
- T Key: Test button (press and hold for 3 seconds to test leakage).
- WiFi ачкычы: Used in conjunction with the T key to configure the wireless network (press T + WiFi for 3 seconds).
7.2 Көрсөтүү режимдери
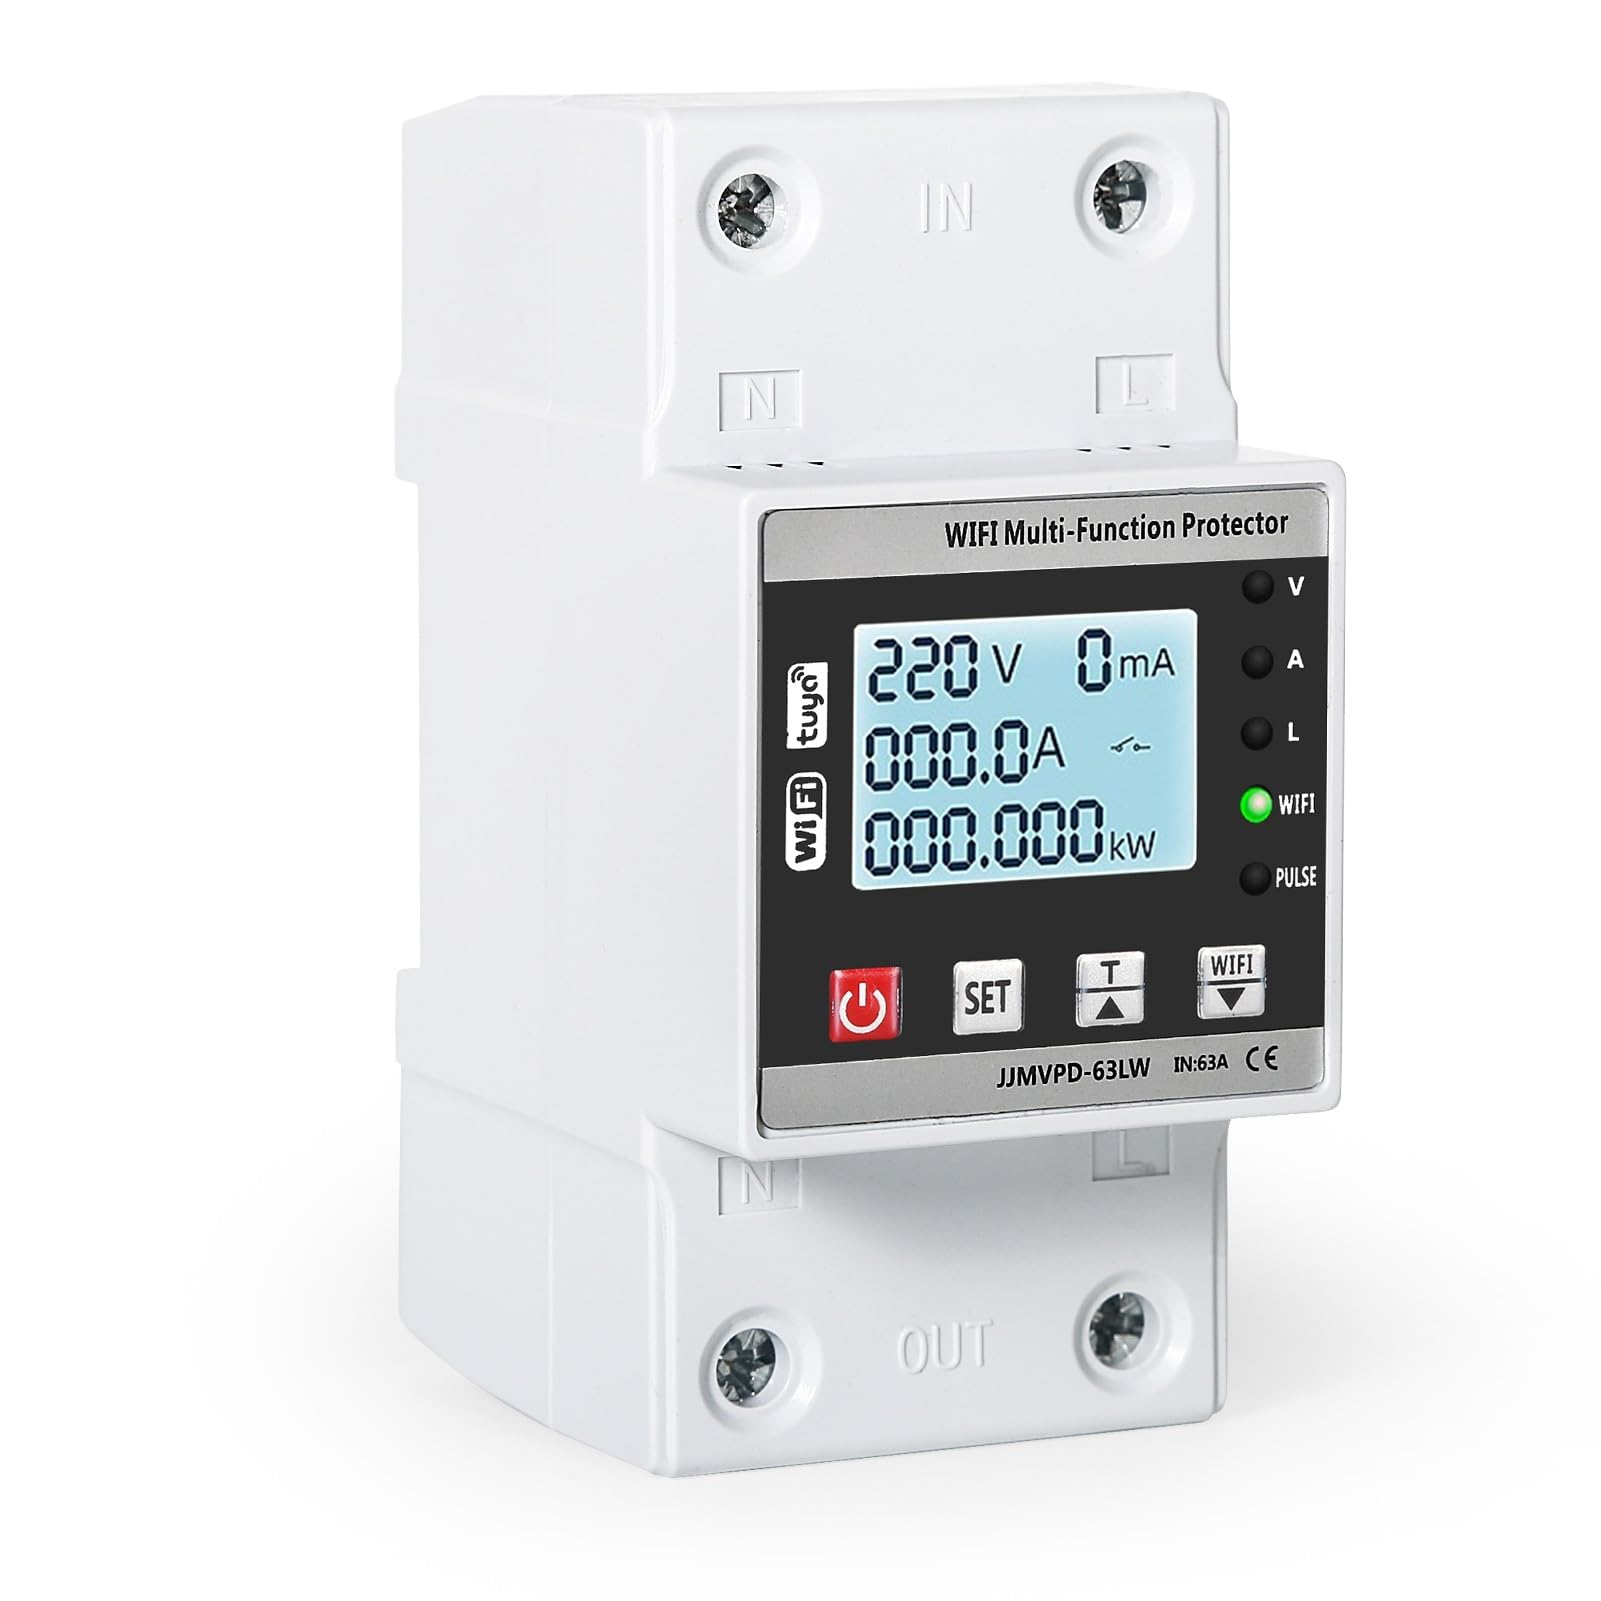
Image: The protector's display cycling through electricity consumption (kWh), instantaneous power (kW), and power factor (cosφ) readings.
The LED display cycles through various parameters:
- Electricity Display (kWh): Shows total electricity consumption.
- Power Display (kW): Shows instantaneous power usage.
- Power Factor Display (cosφ): Shows the power factor.
- Тtage (V) and Current (A): Also displayed in real-time.
7.3 Кол менен иштетүү
- басыңыз Кол менен которуу (power button) briefly to manually turn the power on or off.
8. Конфигурация жана Орнотуулар
The device allows for manual adjustment of protection parameters and WiFi network configuration.
8.1 Adjusting Protection Values
- басып, кармап туруңуз SET button for 3 seconds to enter the setting interface.
- колдонуу SET жана T buttons to navigate through the parameters (overvoltage, undervolvoltage, overcurrent, leakage protection, recovery delay).
- Adjust the values as needed. Refer to the specifications section for default and adjustable ranges.
- Confirm your settings to save them.
8.2 WiFi Network Configuration
- Ensure your mobile device has the Tuya Smart app installed and you have an active 2.4GHz WiFi network.
- басып, кармап туруңуз T баскычы жана WiFi button simultaneously for 3 seconds to initiate WiFi pairing mode. The WiFi indicator light will flash.
- Follow the instructions in the Tuya Smart app to add the device to your network.
- Once connected, you can remotely monitor and control the protector via the app.
9. Техникалык тейлөө
- Regularly inspect the device for any visible damage or loose connections.
- Аппаратты таза жана чаңдан алыс кармаңыз. Тазалоо үчүн кургак, жумшак чүпүрөктү колдонуңуз.
- Абразивдүү тазалагычтарды же эриткичтерди колдонбоңуз.
- Ашыкча ысып кетүүнүн алдын алуу үчүн аппараттын айланасында туура желдетүүнү камсыз кылыңыз.
10. Кыйынчылыктарды
| Көйгөй | Мүмкүн себеп | Чечим |
|---|---|---|
| Түзмөк күйбөйт. | No incoming power; loose wiring; device fault. | Check main power supply. Verify all wiring connections. If problem persists, contact support. |
| Түзмөк тез-тез бузулуп калат. | Overvoltage, undervolvoltage, or overcurrent condition; sensitive protection settings. | Check electrical parameters on the display. Adjust protection values if necessary (refer to Section 8.1). Investigate the cause of voltage/current fluctuations. |
| WiFi indicator not flashing/connecting. | Incorrect WiFi password; 5GHz network; device too far from router; incorrect pairing mode. | Ensure you are using a 2.4GHz WiFi network. Re-enter pairing mode (Section 8.2). Check WiFi signal strength. Verify WiFi password. |
| Пульт иштебей жатат. | No internet connection on phone or device; app issue. | Check internet connectivity for both your phone and the device. Restart the Tuya Smart app. |
11. Кепилдик жана колдоо
For warranty information and technical support, please refer to the purchase documentation or contact your retailer. Keep your proof of purchase for any warranty claims.