
1. Киришүү
The M5Stack M5StickC PLUS2 is a compact and versatile IoT development kit, serving as an advanced iteration of the M5StickC PLUS. It integrates the ESP32-PICO-V3-02 main controller, offering robust wireless capabilities. This device is designed for rapid prototyping and development across various applications, featuring a rich set of integrated hardware components within its small form factor.
2. Продукт бүтүп калдыview
The M5StickC PLUS2 integrates numerous components into a miniature design. Key features include:
- Негизги контролер: ESP32-PICO-V3-02 with integrated Wi-Fi.
- Дисплей: 1.14-inch TFT screen with 135x240 resolution, driven by ST7789V2.
- Сенсорлор: 6-axis IMU (MPU6886).
- Байланыш: Infrared (IR) transmitter.
- Аудио: Microphone (SPM1423-PDM) and passive buzzer.
- Убакыт: Real-Time Clock (RTC) BM8563.
- Колдонуучу интерфейси: Three programmable buttons (A, B, C) and an LED indicator.
- Күч: Integrated 200 mAh Lithium Polymer battery, rechargeable via USB-C.
- Кеңейтүү: External 8-pin header and HY2.0-4P connector for M5Stack HAT and Unit series products.
- Монтаждоо: Integrated magnet for easy attachment.
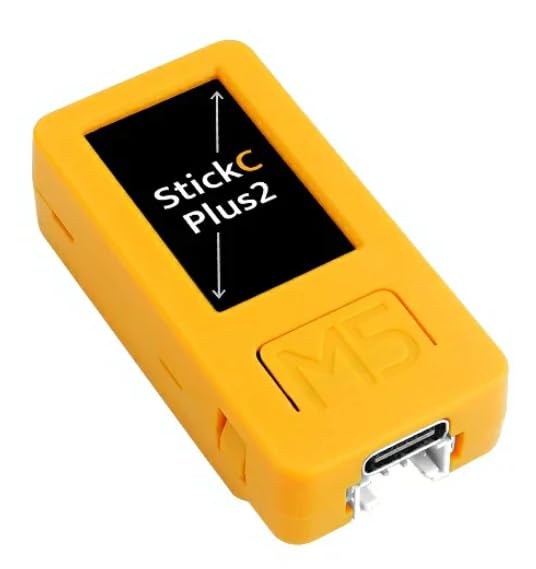
Figure 1: Detailed diagram of the M5StickC PLUS2, highlighting its various components and pin assignments.

2-сүрөт: Жогорку view of the M5StickC PLUS2, illustrating the pinout for the external header and labels for internal components like the ESP32 chip, display driver, and battery.
3. Орнотуу
3.1 Алгачкы заряддоо
Before first use, ensure the M5StickC PLUS2 is fully charged. Connect the device to a standard 5V USB power source using a USB-C cable. The charging indicator (if available) will provide feedback on the charging status.
3.2 Компьютерге туташуу
To program or communicate with the M5StickC PLUS2, connect it to your computer using a USB-C data cable. The device will appear as a serial port.

3-сүрөт: Төмөнкү view of the M5StickC PLUS2, highlighting the USB-C port for charging and programming, and the HY2.0-4P connector.
3.3 Программалык камсыздоо чөйрөсүн орнотуу
The M5StickC PLUS2, powered by the ESP32-PICO-V3-02, supports various development environments. Common choices include the Arduino IDE with ESP32 board support or the ESP-IDF (Espressif IoT Development Framework).
- Драйверди орнотуу: Your operating system (Windows, MacOS, Linux) may require specific drivers for the USB-to-serial chip (likely CH9102) to recognize the device. These drivers are typically available on the M5Stack official website or from the chip manufacturer.
- IDE Configuration: Follow the official M5Stack documentation or community guides to configure your chosen IDE (e.g., Arduino IDE) to work with ESP32 boards and the M5StickC PLUS2 specifically. This usually involves adding board URLs and installing necessary libraries.
- Микропрограмманы жүктөө: Once your environment is set up, you can compile and upload your code to the device via the USB-C connection.
4. Иштөө нускамалары
4.1 Күйгүзүү/өчүрүү
үчүн күйгүзүү the device, briefly press the side button labeled 'C'. To өчүрүү the device, press and hold Button C for approximately 6 seconds until the screen turns off.
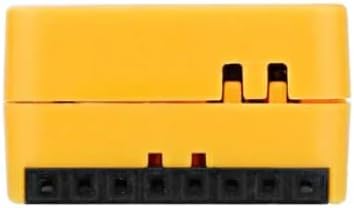
4-сүрөт: Каптал view of the M5StickC PLUS2, indicating the location of the power button (Button C).
4.2 Баскыч функциялары
The M5StickC PLUS2 features three programmable buttons:
- Баскыч А: General purpose button, typically located on the front face below the screen.
- B баскычы: General purpose button, typically located on the front face below the screen, next to Button A.
- C баскычы: Located on the side. Primarily functions as the power control button, but can also be programmed for short press actions.
4.3 Дисплейди колдонуу
The 1.14-inch TFT LCD provides a visual interface for displaying information, sensor readings, or custom graphics. Its 135x240 resolution allows for clear text and simple graphical elements. Programming libraries are available to control the display content.
4.4 Интегралдык перифериялык түзүлүштөр
The device includes several integrated peripherals that can be accessed and controlled via programming:
- Infrared (IR) Transmitter: Use for sending IR signals to control compatible devices.
- Микрофон: Capture audio input for sound detection or voice processing.
- LED: A programmable indicator light for status feedback.
- IMU (Inertial Measurement Unit): Provides 3-axis accelerometer and 3-axis gyroscope data for motion sensing applications.
- Коңгуроо: Generate audible tones for alerts or simple sound effects.
- RTC (Реалдуу убакыт): Keep accurate time and date, even when the main power is off.
4.5 Кеңейтүү порттору
The M5StickC PLUS2 offers several options for expanding its functionality:
- External 8-Pin Header: This header provides access to various GPIO pins and power lines (GND, 5V, G26, G36/G25, G0, BAT, 3V3, 5V) for connecting external sensors, actuators, or custom circuits.
- HY2.0-4P Connector: This port is compatible with M5Stack Unit series modules, allowing for easy plug-and-play expansion with a wide range of sensors and accessories.
- HAT Compatibility: The device is designed to work with M5Stack HAT series products, which can be stacked on top to add specific functionalities like LoRa, GPS, or other communication modules.

5-сүрөт: Каптал view of the M5StickC PLUS2, showing the 8-pin external expansion header.

6-сүрөт: Башка тарап view of the M5StickC PLUS2, showing the opposite side.
5. Техникалык тейлөө
5.1 Батареяга кам көрүү
To prolong the life of the integrated Lithium Polymer battery:
- Аппаратты экстремалдык температурага (ысык же муздак) тийгизбеңиз.
- Батареянын узак убакыт бою толук зарядсызданышына жол бербеңиз.
- Түзмөктү тез-тез колдонбосоңуз да, аны үзгүлтүксүз кубаттап туруңуз.
5.2 Тазалоо
Use a soft, dry, anti-static cloth to clean the exterior of the device. Avoid using liquids, solvents, or abrasive cleaners, as these can damage the components or finish.
5.3 Сактоо
When not in use, store the M5StickC PLUS2 in a cool, dry place, away from direct sunlight, excessive heat, and moisture. Ensure the device is powered off before storage.
6. Кыйынчылыктарды
This section addresses common issues you might encounter with your M5StickC PLUS2.
- Түзмөк күйбөй жатат: Ensure the battery is sufficiently charged. Connect the device to a reliable 5V USB-C power source and allow it to charge for some time before attempting to power it on again.
- USB туташуу маселелери: If your computer does not recognize the device or you experience problems uploading firmware, verify that the correct USB-to-serial drivers (e.g., for CH9102) are installed for your operating system. Try using a different USB-C cable or a different USB port on your computer.
- Дисплей иштебейт: If the screen remains blank, check your code to ensure the ST7789V2 display is correctly initialized and that data is being sent to it.
- Микропрограмманы жүктөөдө ката кетти: Confirm that the correct board and serial port are selected in your development environment. Ensure the device is not in a state that prevents programming (e.g., a crashed program).
- Перифериялык түзүлүштөр жооп бербейт: Double-check your wiring for external components and ensure your code correctly initializes and interacts with the specific integrated peripheral (e.g., IMU, IR, Mic).
For more detailed troubleshooting steps and community support, refer to the official M5Stack documentation and online forums.
7. Техникалык шарттар
| Өзгөчөлүк | Деталь |
|---|---|
| Бренд | M5Stack |
| Модель аты | M5StickC PLUS2 |
| Негизги контроллер | ESP32-PICO-V3-02 (Core M Family) |
| Байланыш технологиясы | Инфракызыл, Wi-Fi |
| Дисплей | 1.14-inch TFT LCD, 135x240 resolution (ST7789V2) |
| ӨИК | 6-axis MPU6886 |
| Микрофон | SPM1423-PDM |
| RTC | BM8563 |
| Батарея | 200 mAh integrated Lithium Polymer |
| USB порттору | 1 (USB-C for charging/programming) |
| Операциялык системалар | FreeRTOS (compatible with Windows, MacOS, Linux development environments) |
| RAM эс технологиясы | LPDDR3 |
| Өндүрүүчү бөлүгүнүн номери | K054 |
7.1 Пакеттин мазмуну
The M5StickC PLUS2 package typically includes:
- M5StickC PLUS2 device with integrated 200 mAh Lithium Polymer battery
- Камтылган 6-ок IMU
- RTC
- Микрофон
- IR өткөргүч
- Buttons
- 1.14 дюймдук LCD
8. Кепилдик маалыматы
M5Stack products typically come with a limited manufacturer's warranty. For specific warranty terms, conditions, and duration, please refer to the official M5Stack website or the documentation provided at your point of purchase. Keep your proof of purchase for warranty claims.
9. Колдоо
For technical support, detailed documentation, tutorials, and community resources related to the M5StickC PLUS2, please visit the official M5Stack website. Online forums and community groups dedicated to M5Stack products and ESP32 development can also provide valuable assistance for development-related queries and project ideas.