1. Киришүү
This manual provides detailed instructions for the installation, operation, and maintenance of your Vanxse VS-NXS612 2K 4MP PoE AI Box Bullet IP Security Camera. This camera features 4-megapixel resolution, a 6-12mm varifocal lens, Power over Ethernet (PoE) capability, and advanced AI functions for human and vehicle detection. Please read this manual thoroughly before using the product to ensure proper setup and functionality.
2. Продукт бүтүп калдыview
Негизги өзгөчөлүктөрү:
- 2K 4MP Ultra HD чечилиши: Provides clear 2304x1296 resolution for detailed surveillance.
- 6-12mm F1.6 Varifocal Lens: Allows for adjustable wide-angle to long-distance viewing.
- Ethernet аркылуу күч (PoE): Simplifies installation by transmitting power and data through a single Ethernet cable.
- Өркүндөтүлгөн жасалма интеллектти аныктоо: Supports human and vehicle motion detection, face record, and alerts.
- Multi-platform Remote Access: View live feeds and recordings via mobile app (Xmeye), PC client, or web браузер.
- Compatible with NVRs: Works with multiple 4K PoE NVRs.
Кутуда эмне бар:
- 1x Vanxse VS-NXS612 Network Box Camera with 6-12mm Lens
- 1x USB Disk (contains CMS software and user manual)
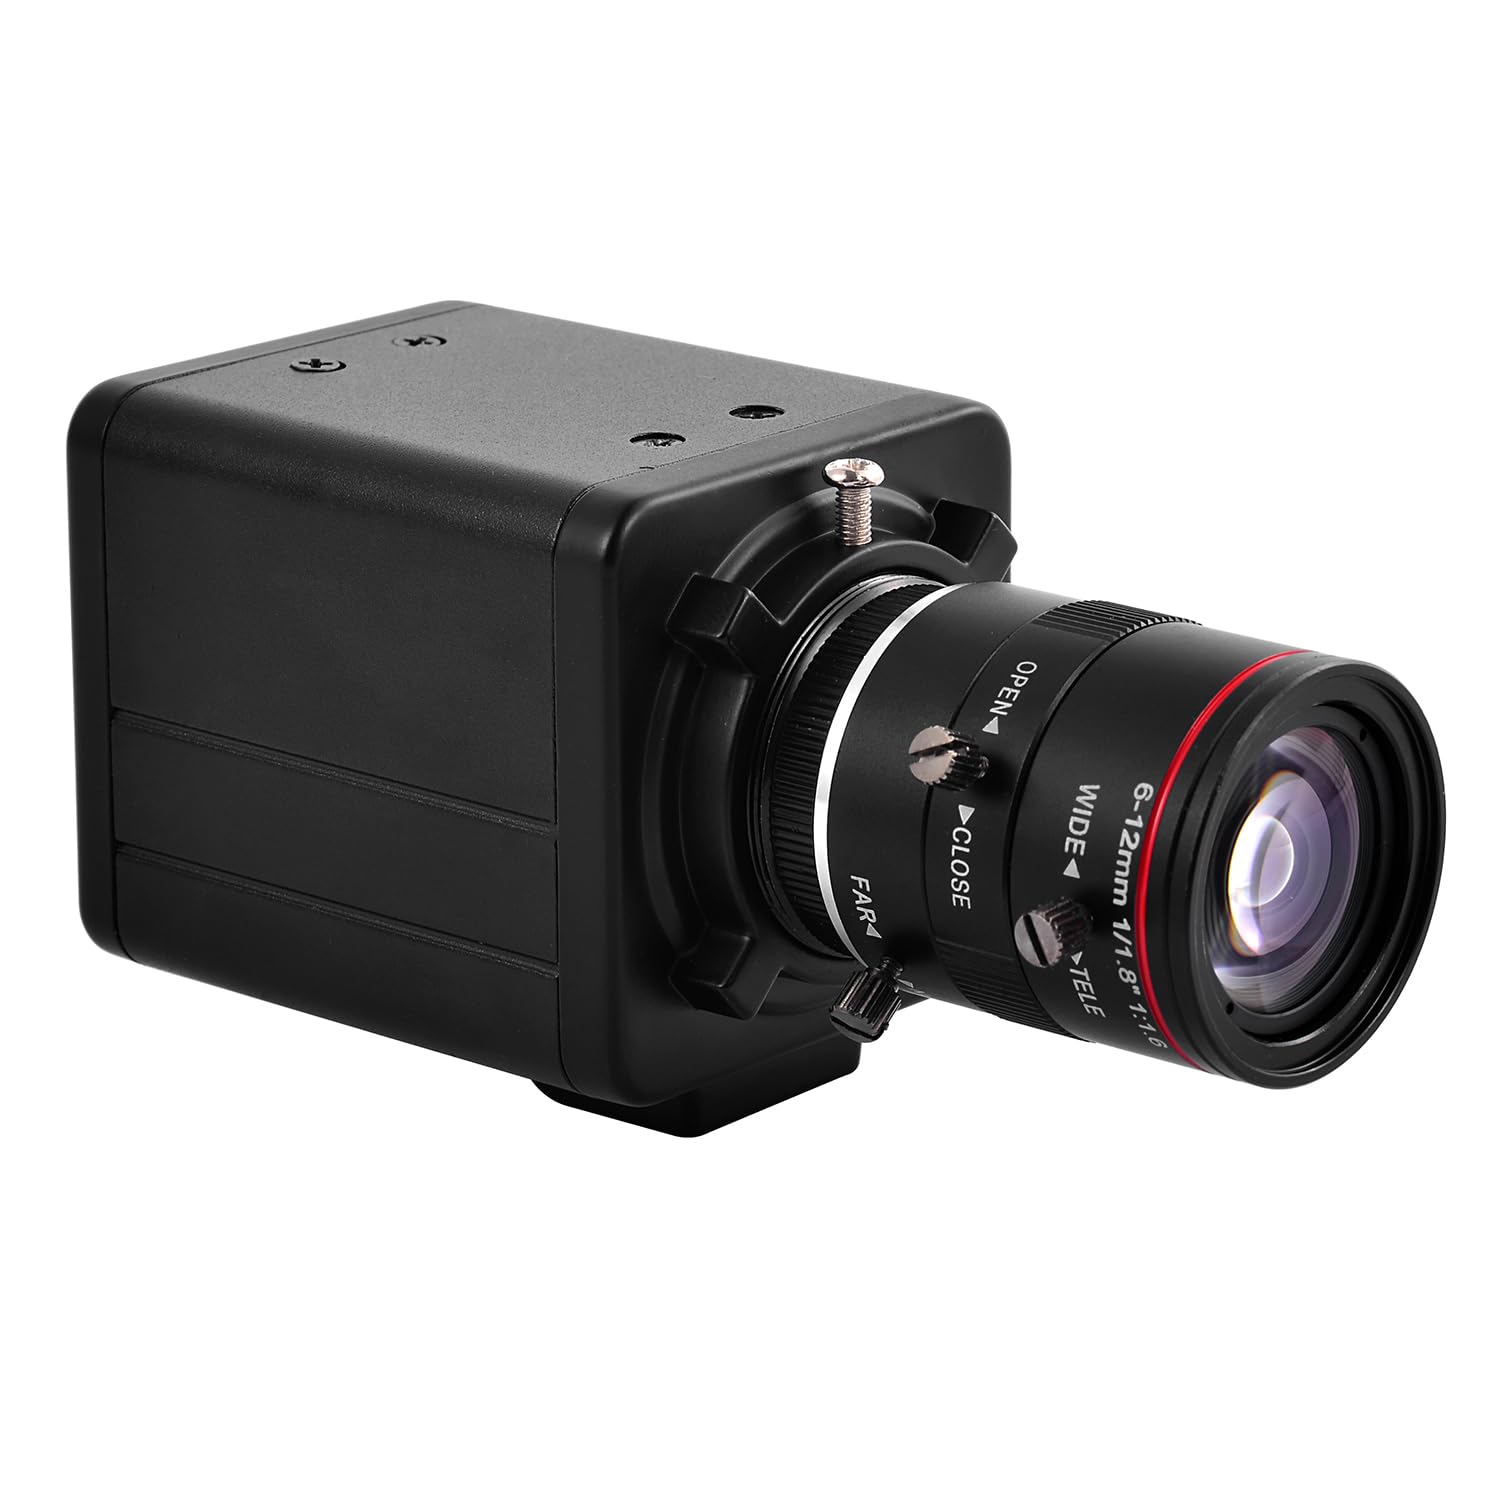
Сүрөт 2.1: Алдыңкы view of the Vanxse VS-NXS612 camera with its varifocal lens.

Figure 2.2: ашыкview of the camera's main features including human/vehicle detection, motion detection, PoE, and 2K 4MP resolution.
3. Орнотуу
3.1 Физикалык орнотуу
The camera supports various mounting options including hoisting, wall mounting, and vertical mounting. The bracket hole installation block can be repositioned on the front or bottom of the camera for flexibility.

Figure 3.1: Camera dimensions for planning installation space.

Figure 3.2: Details on bracket installation and interface connections, including the DC 48V PoE Ethernet port and spare DC12V power input.
3.2 Power and Network Connection (PoE Plug and Play)
This camera supports Power over Ethernet (PoE), allowing both power and data transmission through a single Ethernet cable. This simplifies installation, especially in locations without a nearby power outlet. Connect the camera to a PoE NVR, PoE switch, or a router with a PoE injector.

Figure 3.3: Connection diagrams illustrating how to connect the camera with a PoE NVR, PoE switch, or a standard router.
3.3 Мобилдик тиркеменин туташуусу
Алыскы үчүн viewing and management, download the 'Xmeye' mobile application (or 'Linklemo' as shown in some diagrams) on your iPhone or Android smartphone. Follow the in-app instructions to register an account and add your camera.
- Download the 'Xmeye' or 'Linklemo' app from the App Store or Google Play.
- Колдонмону ачып, каттоо эсебин каттаңыз жана кириңиз.
- Add devices by connecting the camera to your NVR or switch first.
- Successfully add the camera to enjoy live video.

Figure 3.4: Step-by-step guide for connecting the camera to the mobile application.
Download Linklemo for iOS: App Store
Download Linklemo for Android: Google Play
3.4 PC Client and Web Браузерге кирүү
The camera can also be accessed via a PC client (CMS software provided on the USB disk) or through a web browser (e.g., IE, Chrome, Firefox) by typing www.star4live.com. The CMS software allows for managing multiple cameras in one place.

Figure 3.5: Remote access options including mobile app, PC client, and web браузер.
4. Иштөө нускамалары
4.1 Adjusting Zoom and Focus
The camera features a 6-12mm varifocal lens, allowing you to manually adjust the zoom and focus to suit different installation positions and viewing requirements. This adjustment is done directly on the lens barrel.

Сүрөт 4.1: Жакын пландан view of the 6-12mm varifocal lens, showing adjustment rings for wide/tele and near/far focus.

Figure 4.2: Illustrates how zoom and focus can be adjusted for different surveillance needs.
4.2 AI Human and Vehicle Motion Detection
The camera's advanced AI technology supports human and vehicle motion detection. When human or vehicle movements are detected, they are marked on the screen, and the camera sends alerts to your phone or mailbox. This feature helps reduce false alarms from non-relevant movements.

4.3-сүрөт: Мисample of a human detection alert displayed on a mobile phone, highlighting the detected human in a red box.
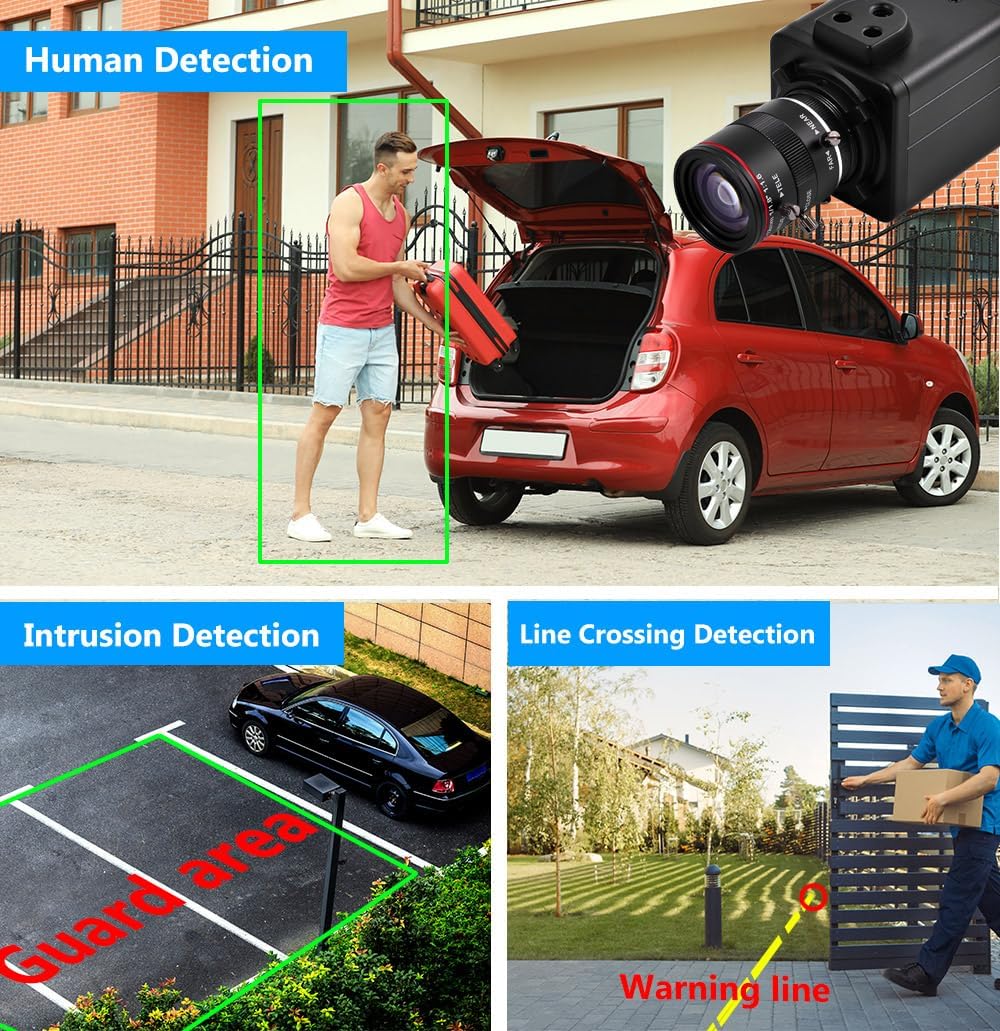
Сүрөт 4.4: Visual examples of human detection, intrusion detection (guard area), and line crossing detection.
4.3 Face Record and Playback
The camera supports face record functionality, allowing it to detect and record faces. This feature can be used for later playback and identification.

Figure 4.5: Demonstrates face detection and the ability to playback recorded video segments based on detected faces.
5. Техникалык тейлөө
Үзгүлтүксүз техникалык тейлөө камераңыздын оптималдуу иштешин жана узак мөөнөттүү иштешин камсыз кылат.
- Линзаны тазалоо: Gently clean the camera lens with a soft, lint-free cloth. For stubborn dirt, use a lens cleaning solution designed for optical surfaces. Avoid abrasive materials that could scratch the lens.
- Турак жайды тазалоо: Камера корпусун жарнама менен сүртүңүзamp кездеме. Катуу химиялык заттарды же эриткичтерди колдонбоңуз.
- Программалык камсыздоонун жаңыртуулары: Мезгил-мезгили менен өндүрүүчүнүн текшерүү website or app for available firmware updates. Keeping the firmware updated can improve performance, add new features, and enhance security.
- Кабелдик текшерүү: Regularly inspect all cables for any signs of wear, damage, or loose connections. Ensure all connections are secure.
- Курчап турган чөйрөнү коргоо: While rated for indoor/outdoor use, ensure the camera is installed in a location that minimizes direct exposure to extreme weather conditions to prolong its lifespan.
6. Кыйынчылыктарды
If you encounter issues with your Vanxse VS-NXS612 camera, refer to the following common troubleshooting steps.
6.1 No Video Feed / Offline Camera
- Күчтү текшерүү: Ensure the camera is receiving power. If using PoE, verify the PoE NVR or switch is functioning correctly and the Ethernet cable is securely connected. If using a DC12V adapter, ensure it is plugged in and working.
- Тармак туташуусун текшерүү: Confirm the Ethernet cable is properly connected to both the camera and the network device (NVR/switch/router). Test the cable if possible.
- Тармак конфигурациясы: Verify the camera's IP address and network settings are correct and not conflicting with other devices on your network. Use the CMS software or ONVIF tools to check network parameters.
- Түзмөктөрдү кайра жүктөө: Try restarting the camera, NVR/switch, and router.
6.2 Poor Image Quality / Unclear Video
- Таза линза: Ensure the camera lens is clean and free from dust, smudges, or condensation.
- Adjust Focus and Zoom: Manually adjust the varifocal lens for optimal focus and desired zoom level.
- Жарыктандыруу шарттары: Ensure adequate lighting in the surveillance area. The camera has WDR (Wide Dynamic Range) for challenging lighting, but extreme conditions can still affect quality.
- Резолюция орнотуулары: Check the video resolution settings in the app or CMS software to ensure it is set to 2K 4MP.
6.3 Кыймылды аныктоо иштебей жатат / Жалган сигналдар
- Сезимталдуулук жөндөөлөрү: Adjust the motion detection sensitivity in the camera's settings via the app or CMS software.
- аныктоо зоналары: Configure specific detection zones to exclude areas with constant, irrelevant movement (e.g., trees swaying).
- Жасалма интеллект функциясын иштетүү: Ensure human and vehicle detection features are enabled in the settings.
6.4 Video Lag / Delay
- Тармак өткөрүү жөндөмдүүлүгү: Check your network's bandwidth. Insufficient bandwidth can cause video lag, especially with high-resolution streams.
- Тармактын тыгыны: Reduce other network activities that might be consuming bandwidth.
- NVR/Viewing Device Performance: Ensure your NVR or viewing device has sufficient processing power to handle the 4MP video stream.
- Микропрограмма: Камеранын микропрограммасы жаңыртылганын текшериңиз.
6.5 Web Interface Issues
- Браузердин шайкештиги: кирүүгө аракет кылыңыз web interface with different browsers (e.g., IE, Chrome, Firefox). Some interfaces may require specific browser plugins.
- Плагинди орнотуу: If prompted, install any necessary browser plugins or drivers for the web interface to function correctly.
- Тармакка кирүү: Ensure the camera has proper network access and is not blocked by firewalls.
7. Техникалык шарттар
| Модель номери | VS-NXS612 |
| Резолюция | 4 мегапиксел (2304x1296) |
| Объектив | 1/1.8" F1.6 6-12mm Varifocal Lens |
| Байланыш | Ethernet, Wired, PoE |
| Өзгөчөлүктөр | 6-12mm Varifocal Lens, Face Recognize, HD Resolution, Mini Size, Motion Sensor, Human/Vehicle Detection, WDR |
| Ички/тышкы колдонуу | Ички, сырткы |
| Шайкеш түзмөктөр | Desktop, Digital Video Recorder, Laptop, Smartphone, Tablet |
| Controller Type | Xmeye |
| Тоо түрү | Шыпка орнотуу/Дубалга орнотуу |
| Форма фактору | Ок |
| Эскертүү түрү | Кыймыл гана |
| Натыйжалуу дагы эле чечим | 4 депутат |
| Башкаруу ыкмасы | Алыстан |
| Зымсыз технология | POE |
| Видео тартуунун резолюциясы | 1920p (Note: Product title states 2K 4MP, 1920p is 2MP. Please refer to product packaging for exact resolution.) |
| Power Source | Corded Electric/POE |
| Элементтин өлчөмдөрү | 4 x 1.8 x 1.8 дюйм |
| Видео тартуу форматы | MPEG-4 |
8. Кепилдик жана колдоо
8.1 Кепилдик маалыматы
Warranty details for the Vanxse VS-NXS612 camera are typically provided at the point of purchase or included with the product packaging. Please retain your proof of purchase for warranty claims. For specific warranty terms and conditions, refer to the documentation provided by your retailer or contact Vanxse customer support.
8.2 Кардарларды колдоо
For technical assistance, troubleshooting, or any questions regarding your Vanxse security camera, please contact Vanxse customer support through their official website or the contact information provided in your product documentation. You may also find helpful resources and FAQs on the Vanxse brand store page on Amazon.