1. Киришүү
Thank you for choosing the OBZ Mini Bluetooth Barcode Scanner. This compact and versatile device is designed to efficiently scan 1D and 2D barcodes, enhancing productivity in various environments such as retail, warehousing, and inventory management. This manual provides detailed instructions for setup, operation, and maintenance to ensure optimal performance.

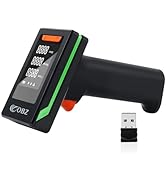
Image 1.1: The OBZ Mini Bluetooth Barcode Scanner's ultra-mini pocket design, highlighting its portability and lightweight nature. Dimensions are shown as 90mm/3.5in length, 30mm/1.2in width, and 21mm/0.8in thickness. A wrist lanyard is included for secure carrying.
Негизги өзгөчөлүктөрү:
- Компакт жана көчмө: Ultra-mini size (3.5*1.18*0.78 inches) and lightweight (1.5oz) for easy carrying.
- 3-бирде туташуу: Supports Bluetooth, 2.4G Wireless, and USB Wired connections.
- Өркүндөтүлгөн декоддоо: Upgraded CMOS sensor and decoding chip for fast and accurate scanning of 1D/2D barcodes from paper and electronic screens.
- Кеңири шайкештик: Works with Mac OS, Windows, iOS, Android, PC, and POS systems.
- Multiple Data Upload Modes: Instant Upload, Automatic Storage, and Inventory Storage modes.
- Батареянын узак иштөө мөөнөтү: Equipped with an 800mAh battery for extended operation.
2. Продукт бүтүп калдыview
Familiarize yourself with the components of your OBZ Mini Bluetooth Barcode Scanner.

Сүрөт 2.1: Детальдуу view of the scanner's components, including the Trigger Button, Power Port, Buzzer, Hanging Rope Hole, Scan Lens, LED 1 (Bluetooth Light), and LED 2 (Power Light).
3. Орнотуу
3.1 Сканерди кубаттоо
Before first use, fully charge the scanner. Connect the scanner to a USB power source using the provided USB cable. The LED indicator will show charging status.
3.2 Туташуу режимдери
The scanner offers three connection methods: Bluetooth, 2.4G Wireless, and USB Wired. Choose the mode that best suits your device and environment.

Image 3.1: The 3-in-1 connection options for the scanner, showing Bluetooth and 2.4GHz wireless connections with a maximum range of 100m/330ft, and a USB wired connection. Compatible devices include smartphones, tablets, laptops, and PCs.
3.3 Bluetooth жупташтыруу
Bluetooth аркылуу туташуу үчүн, бул кадамдарды аткарыңыз:
- Turn on the scanner by pressing the trigger button.
- Scan the 'Bluetooth Connection' barcode from your instruction manual (or the provided setup sheet).
- For Windows/Linux PCs: Scan the 'Bluetooth Setup Code' (Image 3.2) first. Then, scan the 'Pairing Code I' and 'Pairing Code II' in sequence.
- For iOS/Android devices (phones/tablets) and Mac OS: Directly scan 'Pairing Code I' and 'Pairing Code II' in sequence.
- On your host device (PC, tablet, phone), go to Bluetooth settings and search for 'RB_Scanner_HID'. Select it to pair.
- Once paired, the scanner's Bluetooth LED will turn solid blue.
Note: For Mac OS, Bluetooth connection is not directly supported. Use the 2.4G wireless USB dongle connection with an adapter if necessary.

Image 3.2: Barcodes for Bluetooth setup. The top barcode is for computer Bluetooth connection only. The bottom two barcodes are for pairing in sequence.
3.4 2.4G зымсыз байланыш
2.4G зымсыз аркылуу туташуу үчүн:
- Insert the 2.4G USB dongle into your computer's USB port.
- Сканерди күйгүзүңүз. Ал автоматтык түрдө донглго туташышы керек.
- The scanner's LED will indicate a successful connection.
3.5 USB зымдуу туташуусу
To connect via USB wired mode:
- Connect the scanner directly to your computer using the USB cable.
- The scanner will function as a plug-and-play device.
4. Иштөө нускамалары
4.1 Штрихкоддорду сканерлөө
To scan a barcode, point the scanner's lens at the barcode and press the trigger button. A successful scan will be indicated by a beep and/or vibration (if enabled).

Image 4.1: The scanner in use, demonstrating its ability to read various 1D (e.g., PDF417, ISSN/ISBN) and 2D (e.g., QR Code, Aztec, DataMatrix) barcodes from both physical labels and digital screens.
4.2 Колдоого алынган штрих-коддун түрлөрү
The scanner supports a wide range of 1D and 2D barcode symbologies, including but not limited to:
- 1D: UPC/EAN, Code 128, Code 39, Code 93, Code 11, Interleaved 2 of 5, Industrial 2 of 5, Matrix 2 of 5, Standard 2 of 5, Codabar, MSI, GS1 DataBar.
- 2D: QR Code, PDF417, MicroPDF417, DataMatrix, Aztec, Maxicode.
It can also effectively scan damaged, distorted, colorful, reflective, and inverse barcodes.

Image 4.2: Visual representation of the scanner's upgraded 2X faster reading speed, capable of processing various 1D and 2D barcode types without missing scans.
4.3 Маалыматтарды жүктөө режимдери
The scanner offers three data upload modes:
- Ыкчам жүктөө режими: Barcode data is immediately transmitted to your connected device upon scanning.
- Automatic Storage Mode / Inventory Mode: Scanned data is stored internally in the scanner's memory. This mode supports storing up to 200,000 characters. Data can be uploaded to your device later when needed.
To switch between modes, refer to the specific configuration barcodes in your product manual.

Image 4.3: Illustration of the two primary data upload modes: Instant Upload, where data is sent directly to a connected device, and Automatic Storage/Inventory Mode, where data is saved internally for later upload.
4.4 Скандоо режимдери
The scanner supports three scanning modes:
- Ачкыч триггер режими: Scan by pressing the trigger button for each barcode.
- Автоматтык сезүү режими: The scanner automatically detects and scans barcodes when they are presented within its field of view.
- Үзгүлтүксүз режим: Сканер тынымсыз сканерлөө нурун чыгарып, аныктаган ар кандай штрих-кодду сканерлейт.
Refer to the configuration barcodes in your product manual to select your preferred scanning mode.
5. Конфигурация параметрлери
The scanner offers various customization options to tailor its functionality to your specific needs. These options are typically configured by scanning special barcodes found in the detailed instruction booklet that came with your scanner.
5.1 Үн жана титирөө жөндөөлөрү
You can adjust the volume of the scanner's beep or enable/disable vibration feedback for scan confirmations.

Image 5.1: Configuration options for sound volume (Low, Medium, High, Turn off) and vibration (on/off) feedback.
5.2 Data Formatting
Customize how scanned data is outputted, including:
- Prefix/Suffix: Сканерленген маалыматтарга чейин же андан кийин ыңгайлаштырылган белгилерди кошуңуз.
- End Character: Configure the end character (e.g., CR&LF for a new line, TAB).
- Barcode Conversion: Convert certain barcode types if needed.
Сүрөт 5.2: Мисamples of data formatting with prefixes and suffixes, demonstrating how to add date, time, or custom text to scanned barcode data.
5.3 Башка орнотуулар
Additional settings may include transmission speed, multi-language keyboard support, and factory default reset.
6. Техникалык тейлөө
6.1 Батареяга кам көрүү
The scanner is equipped with a Lithium Polymer battery. To prolong battery life:
- Батареяны бат-баттан толук кубаттап калуудан алыс болуңуз.
- Charge the scanner regularly, even if not in constant use.
- Сканерди узак убакытка колдонбогондо салкын, кургак жерде сактаңыз.

Image 6.1: The scanner features an 800mAh high-capacity battery, providing approximately 6 hours of scanning time.
6.2 Тазалоо
Use a soft, dry cloth to clean the scanner's exterior. For the scan lens, use a lens cleaning cloth to avoid scratches. Do not use abrasive cleaners or solvents.
7. Кыйынчылыктарды
Сканериңизде көйгөйлөргө туш болсоңуз, төмөнкү жалпы көйгөйлөрдү жана чечимдерди караңыз:
| Көйгөй | Мүмкүн себеп | Чечим |
|---|---|---|
| Сканер күйбөйт. | Батарея аз. | Сканерди кеминде 2 саат кубаттаңыз. |
| Bluetooth аркылуу жупташтыруу мүмкүн эмес. | Incorrect pairing sequence or mode. | Ensure you have scanned the correct Bluetooth setup codes for your operating system (refer to Section 3.3). Try unpairing and re-pairing. |
| Scanner not recognized in 2.4G wireless mode. | USB dongle not properly inserted or faulty. | Ensure the dongle is fully inserted. Try a different USB port. |
| Штрихкоддорду сканерлөө мүмкүн эмес. | Barcode damaged, poor lighting, or incorrect scanning mode. | Ensure the barcode is clear and well-lit. Adjust scanning distance. Check if the correct scanning mode is selected (refer to Section 4.4). |
| Сканерленген маалыматтар туура эмес же толук эмес. | Incorrect data formatting settings. | Review and adjust data formatting options (prefix/suffix, end character) using the configuration barcodes in your manual (refer to Section 5.2). |
For more complex issues, please refer to the comprehensive configuration guide provided with your scanner or contact customer support.
8. Техникалык шарттар
| Өзгөчөлүк | Деталь |
|---|---|
| Продукциянын өлчөмдөрү | 3.5 x 1.2 x 0.8 дюйм |
| Элемент Салмагы | 3.84 унция |
| Батареялар | 1 Литий Полимердик батарейка талап кылынат (киргизилген) |
| Шайкеш түзмөктөр | iPhone, iPad, smart phone, tablet, laptop, computer, POS, iOS, Android, Mac OS, Windows, Linux |
| Power Source | Battery-Powered, Corded Electric |
| Байланыш технологиясы | Bluetooth, 2.4G зымсыз байланыш, USB кабели |
| Өндүрүүчү | OBZ |
| Дата биринчи жеткиликтүү | 12-май, 2024-жыл |
9. Кепилдик жана колдоо
9.1 Кепилдик маалыматы
Your OBZ Mini Bluetooth Barcode Scanner comes with a standard manufacturer's warranty. Please retain your proof of purchase for warranty claims. For specific warranty terms and conditions, refer to the documentation included with your product or visit the official OBZ webсайт.
9.2 Кардарларды колдоо
If you require further assistance, technical support, or have questions not covered in this manual, please contact OBZ customer service through the retailer's platform or the official OBZ support channels. Provide your product model and purchase details for efficient service.