
1. Киришүү
This manual provides essential information for the safe and effective operation of your LONGER RAY5 10W Laser Engraver and Cutter, along with its protective enclosure. Please read this manual thoroughly before assembly and use to ensure proper functionality and safety.

Image 1.1: The LONGER RAY5 10W Laser Engraver and Cutter shown alongside its protective enclosure, fan, and exhaust hose. Various engraved and cut samples are displayed below the engraver, including a phone case, a leather bracelet, rings, a small wooden house, and a glass jar.
Пакеттин мазмуну
Сиздин пакетте бардык компоненттер бар экенин текшериңиз:
- LONGER RAY5 10W Laser Engraver
- Protective Laser Engraver Enclosure
- Exhaust Fan and Hose
- Кубаттуу адаптер жана кабелдер
- USB кабели
- Коопсуздук көз айнек
- Material Samples for Testing
- Колдонуучунун Колдонмосу (бул документ)
- Куралдар
2. Коопсуздук боюнча көрсөтмөлөр
WARNING: Laser radiation can cause eye damage and skin burns. Always wear appropriate safety goggles and operate the machine in a well-ventilated area.
- Көздү коргоо: Always wear the provided safety goggles when the laser is active. Never look directly at the laser beam.
- Вентиляция: Operate the laser engraver in a well-ventilated area or use the provided enclosure with its exhaust system to remove smoke and fumes.
- Өрт коркунучу: Laser engraving and cutting can generate heat and sparks, potentially causing fires. Do not leave the machine unattended during operation. Keep a fire extinguisher nearby.
- Материалдык шайкештик: Only engrave or cut materials specified as safe for laser processing. Avoid materials that produce toxic fumes or are highly flammable (e.g., PVC, certain plastics).
- Балдар жана үй жаныбарлары: Балдарды жана үй жаныбарларын операциядан алыс кармаңыз.
- Шашылыш токтотуу: Familiarize yourself with the location of the emergency stop button or power switch to quickly shut down the machine if necessary.
- Туруктуу бети: Place the engraver on a stable, level, and non-flammable surface.

Image 2.1: This image illustrates two key safety features. On the left, a laser engraver is shown with safety goggles placed over the laser path, indicating 'Eyes Protection' and the recommendation to wear protective glasses to avoid eye irritation. On the right, the laser engraver is shown with a flame detection icon, indicating 'Thermal Protection' and the auto-shutdown feature if a flame is detected or the engraving area overheats.

Image 2.2: This image highlights two additional safety mechanisms. On the left, a close-up of the laser engraver's frame shows a 'Limit Switch' designed to prevent abrasion caused by collision between equipment and the edge of the working area. On the right, the engraver is shown with a hand icon, indicating 'Movement Protection' which automatically shuts down the machine if it detects movement during operation.
3. Продукт бүтүп калдыview
LONGER RAY5 10W Laser Engraver
The LONGER RAY5 10W is a high-power diode laser engraver and cutter featuring a compressed laser spot for fine detail and efficient cutting. It includes a 32-bit motherboard for enhanced performance and supports offline control via an app.

Image 3.1: The LONGER RAY5 10W Laser Engraver is displayed with its control screen and several examples of engraved items, including a wooden phone case, a leather bracelet, metal rings, a small wooden house, and a glass jar, demonstrating its versatility across various materials.
Laser Engraver Enclosure with Vent
The included enclosure is designed to enhance safety and improve the working environment by containing smoke, odors, and reducing noise. It features an integrated exhaust system for effective ventilation.
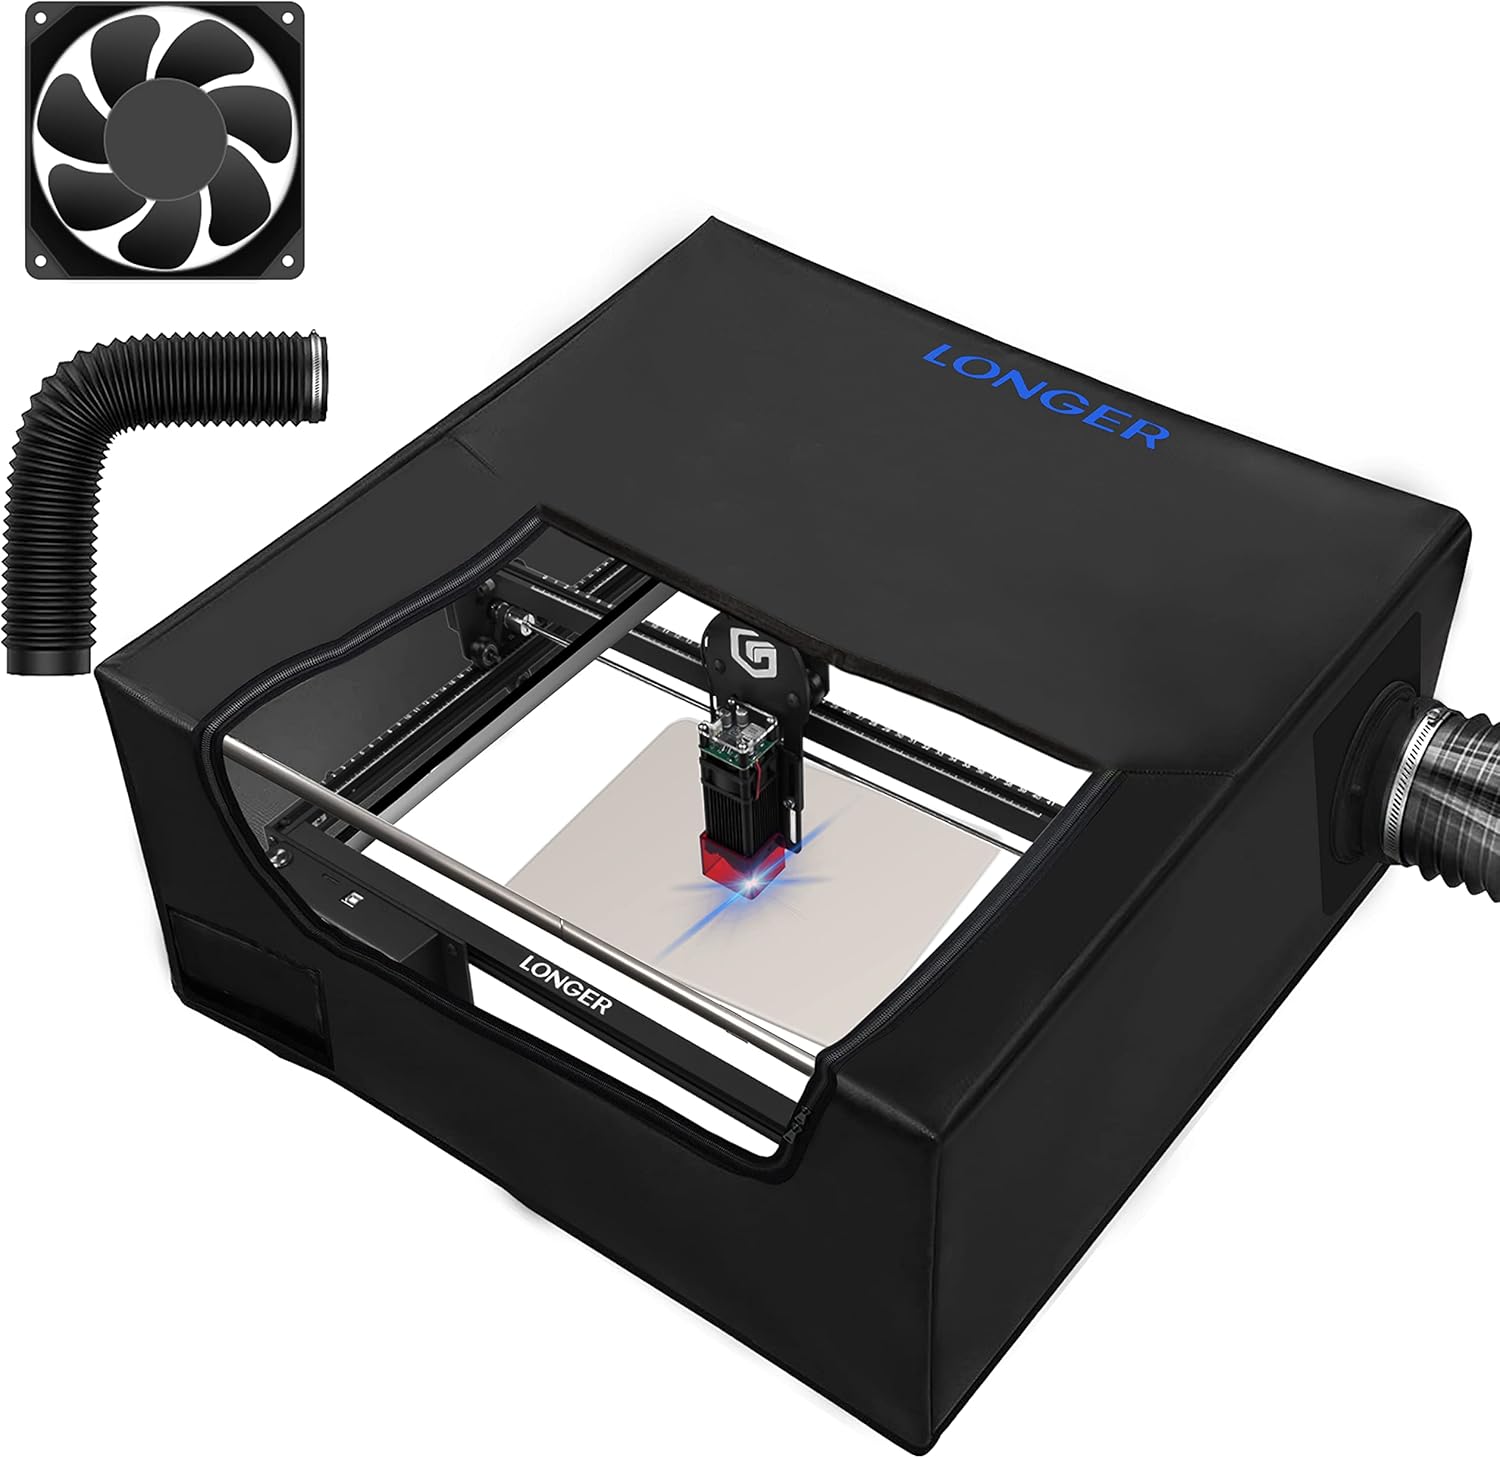
Image 3.2: The black protective enclosure for the laser engraver is shown with a visible exhaust fan and flexible hose. The enclosure features a transparent viewing window, allowing observation of the engraving process while providing protection.
4. Орнотуу
4.1. Assembly of the Laser Engraver
- Бардык компоненттерди таңгактан чыгарып, пакеттин мазмунун тизме менен текшериңиз.
- Follow the detailed assembly instructions provided in the separate assembly guide to construct the laser engraver frame.
- Install the laser module onto the gantry, ensuring it is securely fastened.
- Connect all necessary cables (power, USB, motor cables) according to the diagrams.
4.2. Enclosure Setup
- Place the assembled laser engraver inside the protective enclosure.
- Attach the exhaust fan to the designated port on the enclosure.
- Connect the flexible exhaust hose to the fan and route it to an outdoor vent or a suitable air filtration system. Ensure the hose is free of kinks.
- Plug in the power adapter for the exhaust fan.
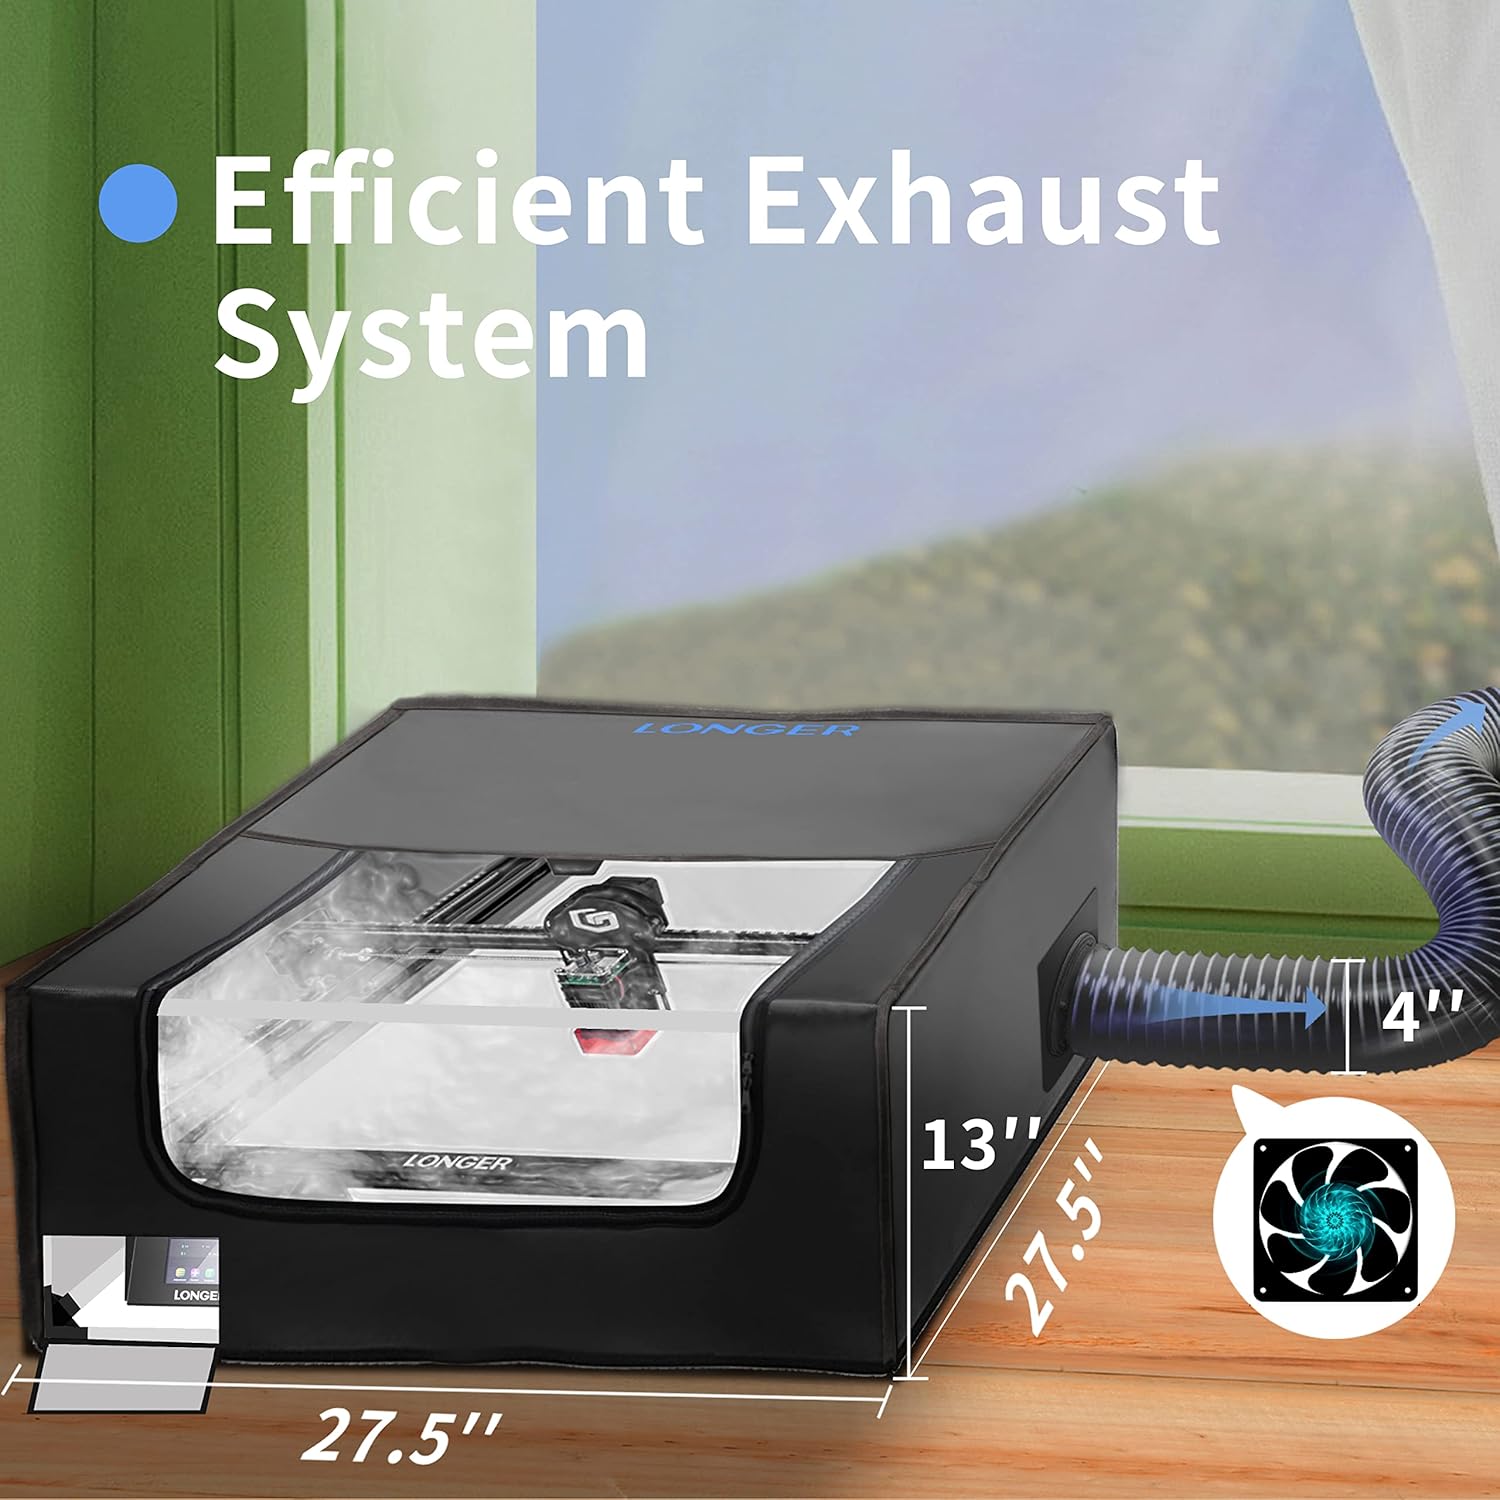
Image 4.1: This image displays the laser engraver enclosure with its 'Efficient Exhaust System'. The enclosure has dimensions of approximately 27.5 inches in width and depth, and 13 inches in height. A flexible exhaust hose, approximately 4 inches in diameter, is connected to the side of the enclosure, leading to an external fan, illustrating how smoke and odors are vented away from the workspace.
5. Иштөө нускамалары
5.1. Программаны орнотуу жана туташтыруу
The LONGER RAY5 10W is compatible with popular laser control software such as LaserGRBL and LightBurn. It also supports offline control via the MKSLaser App.
- ЖК туташуусу: Download and install LaserGRBL or LightBurn from their official websites. Connect the engraver to your computer via USB.
- Wi-Fi/App Control: For app control, ensure the engraver and your mobile device are connected to the same Wi-Fi network. Download the MKSLaser App and follow the in-app instructions for connection.
- TF картасы: You can also load G-code files directly onto a TF card and insert it into the engraver for offline operation.

Image 5.1: This image illustrates the wide compatibility of the LONGER RAY5 10W laser engraver. It shows icons for Wi-Fi, USB Cable, APP, and TF Card, indicating various connection methods. Below these, logos for LaserGRBL and LightBurn are displayed, highlighting software compatibility. On the right, a laptop, tablet, and smartphone screens show the MKSLaser App interface and design software, demonstrating how the device can be controlled and operated.
5.2. Preparing for Engraving/Cutting
- Материалды жайгаштыруу: Place your material securely on the working surface. Ensure it is flat and does not move during operation.
- Фокусту тууралоо: Adjust the laser focus according to the material thickness. Refer to your software or the engraver's touch screen for guidance.
- Design Loading: Дизайныңызды жүктөңүз file (JPG, PNG, BMP, G-code, SVG, GIF, NC, GC) into the software or via TF card.
- Параметр орнотуулары: Set appropriate laser power, speed, and passes based on the material type and desired effect. Start with lower settings and adjust as needed.

Image 5.2: This image highlights the 3.5-inch touch screen interface of the LONGER RAY5 10W laser engraver, designed for simple operation. Various screen displays are shown, including controls for laser power (1% to 100%), movement adjustments (X, Y, Z axes), and file selection, demonstrating the intuitive user interface.
5.3. Ишти баштоо
- Ensure all safety precautions are observed, including wearing safety goggles and activating the exhaust system.
- Initiate the engraving or cutting process through your chosen software or the engraver's control panel.
- Monitor the process closely. If any issues arise, use the emergency stop or power switch immediately.
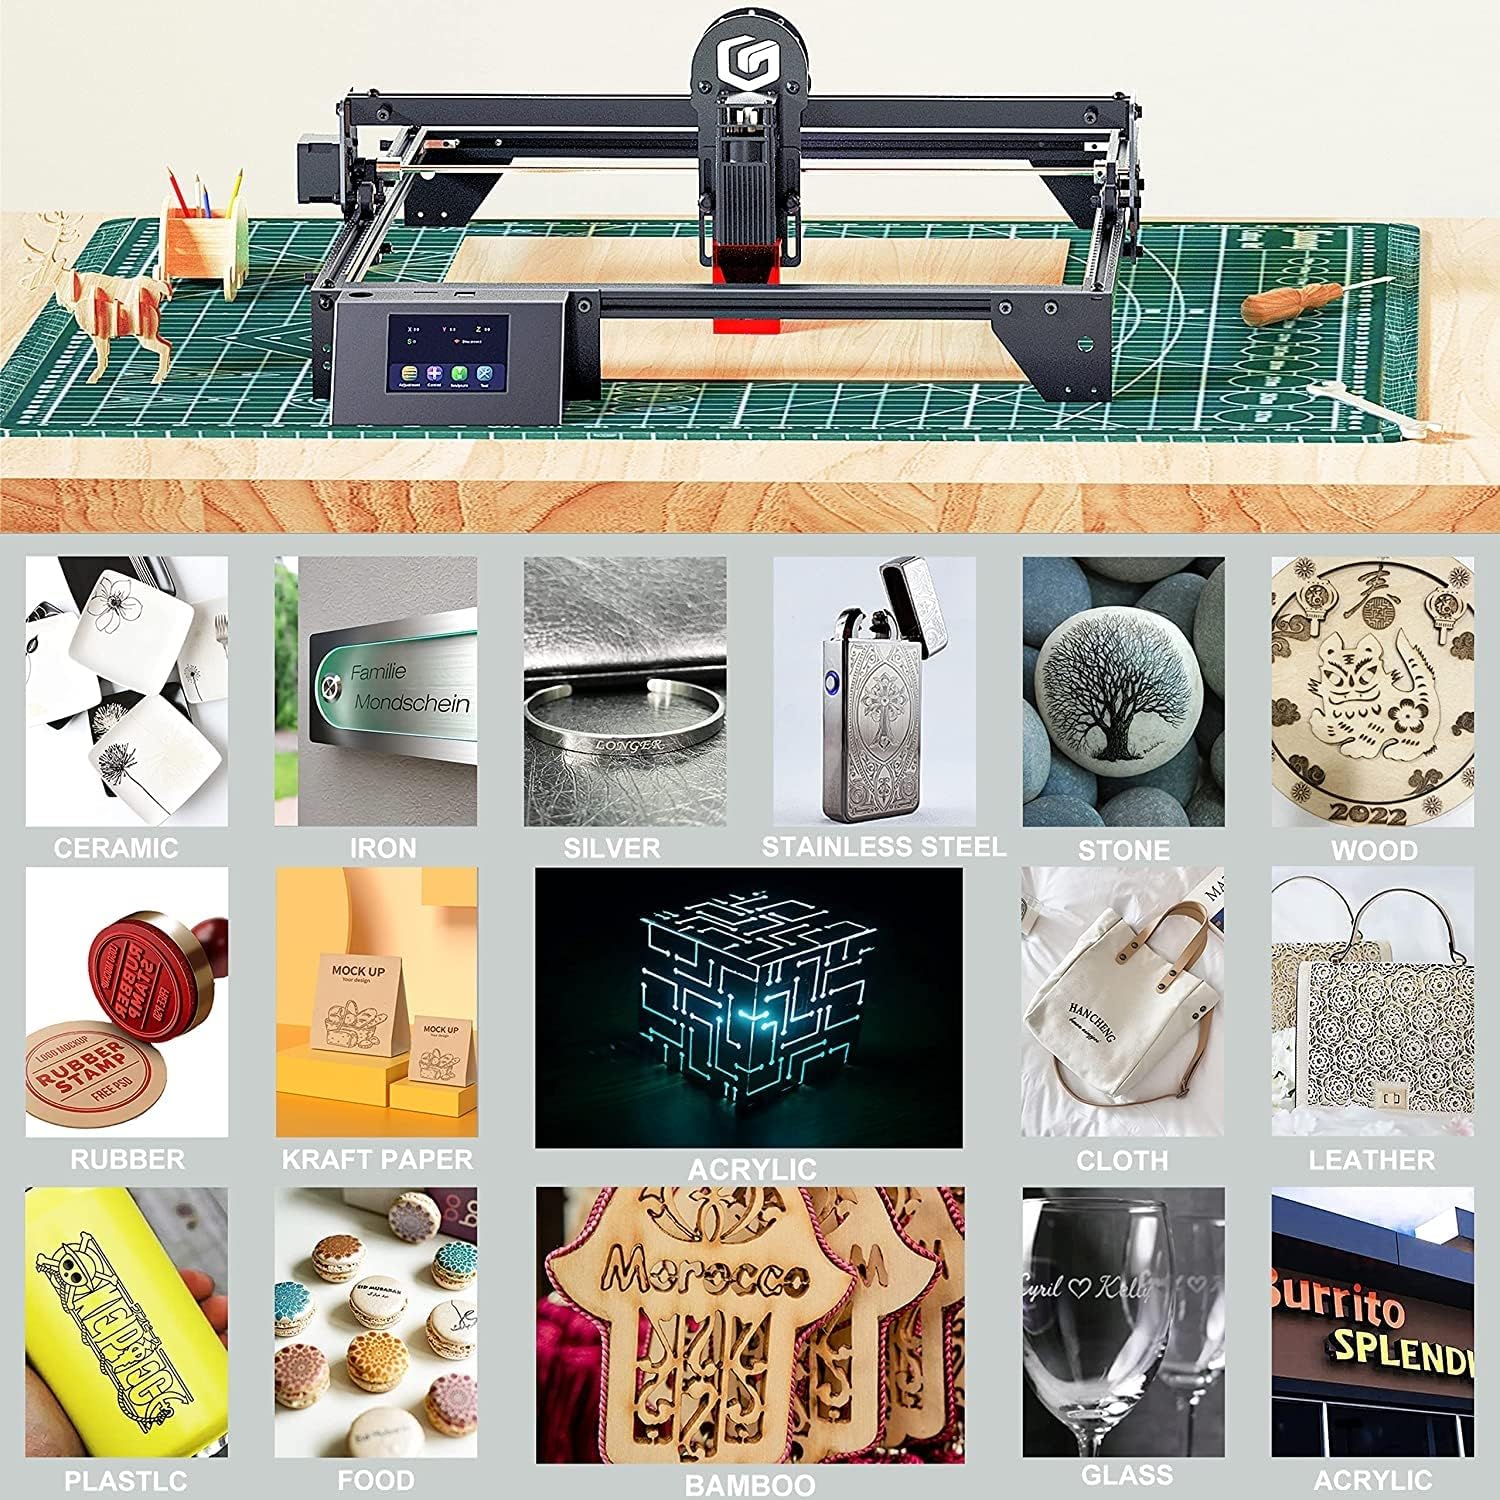
Image 5.3: This image displays a grid of various materials that can be processed by the LONGER RAY5 10W laser engraver. Examples include ceramic, iron, silver, stainless steel, stone, wood, rubber, kraft paper, acrylic, cloth, leather, plastic, food, bamboo, and glass, showcasing the wide range of applications for both engraving and cutting.
6. Техникалык тейлөө
Үзгүлтүксүз тейлөө сиздин лазердик оюгучуңуздун узак иштөөсүн жана оптималдуу иштешин камсыздайт.
- Линзаны тазалоо: Periodically clean the laser lens with a soft, lint-free cloth and lens cleaning solution. A dirty lens can reduce laser power and accuracy.
- Темир жолду тазалоо: Keep the guide rails and wheels free of dust and debris. Use a soft brush or cloth. Lubricate moving parts as recommended by the manufacturer.
- Чыгаруу системасы: Regularly check and clean the exhaust fan and hose to ensure efficient smoke and fume extraction.
- Программалык камсыздоонун жаңыртуулары: Өндүрүүчүнү текшериңиз webиштин натыйжалуулугун жогорулатуу же жаңы функцияларды кошуу үчүн жеткиликтүү болгон программалык камсыздоонун жаңыртуулары үчүн сайт.
7. Кыйынчылыктарды
Бул бөлүм сиз кабылышы мүмкүн болгон жалпы көйгөйлөрдү карайт.
- Лазердик чыгаруу жок:
- Check if the laser module is properly connected and powered.
- Ensure safety features (e.g., limit switches, movement sensor) are not triggered.
- Verify laser power settings in your software.
- Гравюра/кесүү сапаты начар:
- Adjust laser focus.
- Лазердик линзаны тазалаңыз.
- Experiment with different power and speed settings for your material.
- Материалдын тегиз жана бекем орнотулганын текшериңиз.
- Machine Not Connecting to Software:
- USB кабелинин туташуусун текшериңиз.
- Install necessary drivers for the engraver.
- Ensure correct COM port is selected in the software.
- For Wi-Fi, confirm both devices are on the same network.
- Ашыкча түтүн/жыт:
- Verify the exhaust fan is operating correctly and the hose is properly vented.
- Ensure the enclosure is sealed.
- Check material compatibility; some materials produce more fumes.
For further assistance, refer to the official Longer support resources.
8. Техникалык шарттар
| Өзгөчөлүк | Спецификация |
|---|---|
| Лазердик чыгаруу күчү | 10 Вт |
| Гравюра аянты | 400mm x 400mm (approx. 15.7" x 15.7") |
| Engraving Speed (Max) | 10000мм/мин |
| Гравюра тактыгы | 0.01мм |
| Лазердик Spot өлчөмү | 0.06mm x 0.06mm (Compressed) |
| Motherboard | 32-бит |
| Контролдоо ыкмалары | USB, Wi-Fi (App), TF Card |
| Шайкеш программалык камсыздоо | LaserGRBL, LightBurn, MKSLaser App |
| Колдоого алынган File Форматтар | JPG, PNG, BMP, G-code, SVG, GIF, NC, GC |
| Enclosure Dimensions (Approx.) | 27.5" L x 27.5" W x 13" H |
| Enclosure Exhaust Hose Diameter | 4" |

Image 8.1: This image illustrates the 'Updated Compressed Laser Technology' of the RAY5 10W, highlighting its small spot size of 0.06x0.06mm compared to others at 0.15x0.15mm. It also demonstrates cutting capabilities: 14mm Basswood and 6mm Acrylic, showcasing the precision and power of the laser.

Image 8.2: This image compares the engraving speed and accuracy of the RAY5 10W (left) with other models (right). The RAY5 10W achieves 10000mm/min engraving speed with an accuracy of 0.01mm, producing a detailed cat portrait. The 'Others' section shows a less detailed engraving at 6000mm/min, emphasizing the superior performance of the RAY5 10W.
9. Кепилдик жана колдоо
LONGER products are designed for reliability and performance. For warranty information, please refer to the warranty card included with your product or visit the official Longer webсайт.
If you encounter any issues or require technical assistance, please contact Longer customer support through their official channels. When contacting support, please have your product model (RAY5 10W) and purchase information ready.
Онлайн ресурстар:
- Official Longer Webсайт: www.longer3d.com
- Support Email: Refer to your product documentation