
1. Киришүү
This user manual provides comprehensive instructions for the installation, configuration, and operation of your KuWFi CPE120 and CPE130 2.4G Wireless WiFi Bridge and Outdoor Access Point. Please read this manual carefully before using the device to ensure proper setup and optimal performance. Keep this manual for future reference.
2. Продукт бүтүп калдыview
The KuWFi CPE120 and CPE130 are 300Mbps outdoor wireless devices designed to extend Wi-Fi coverage over long distances, up to 1KM. They support Point-to-Point (PTP) and Point-to-Multi-Point (PTMP) connections, functioning as both a wireless bridge and an access point. These devices are built for outdoor use, featuring waterproof, dustproof, and lightning protection.
2.1. CPE120 Features
- 300Mbps Outdoor Wireless WiFi Bridge.
- Supports 1KM Long Range WiFi Extender functionality.
- LED display for configuring PTP/PTMP connections.
- Supports AP and Bridge operation modes.
- Waterproof, dustproof, and lightning protection.
- Иштөө температурасы: -30 ℃ дан 55 ℃ чейин.
2.2. CPE130 Features
- Economic 300Mbps outdoor CPE.
- LED display support for 1KM Long Range.
- Improved wireless networking for extended coverage.
- Seamless wireless connectivity for homes and secondary buildings.
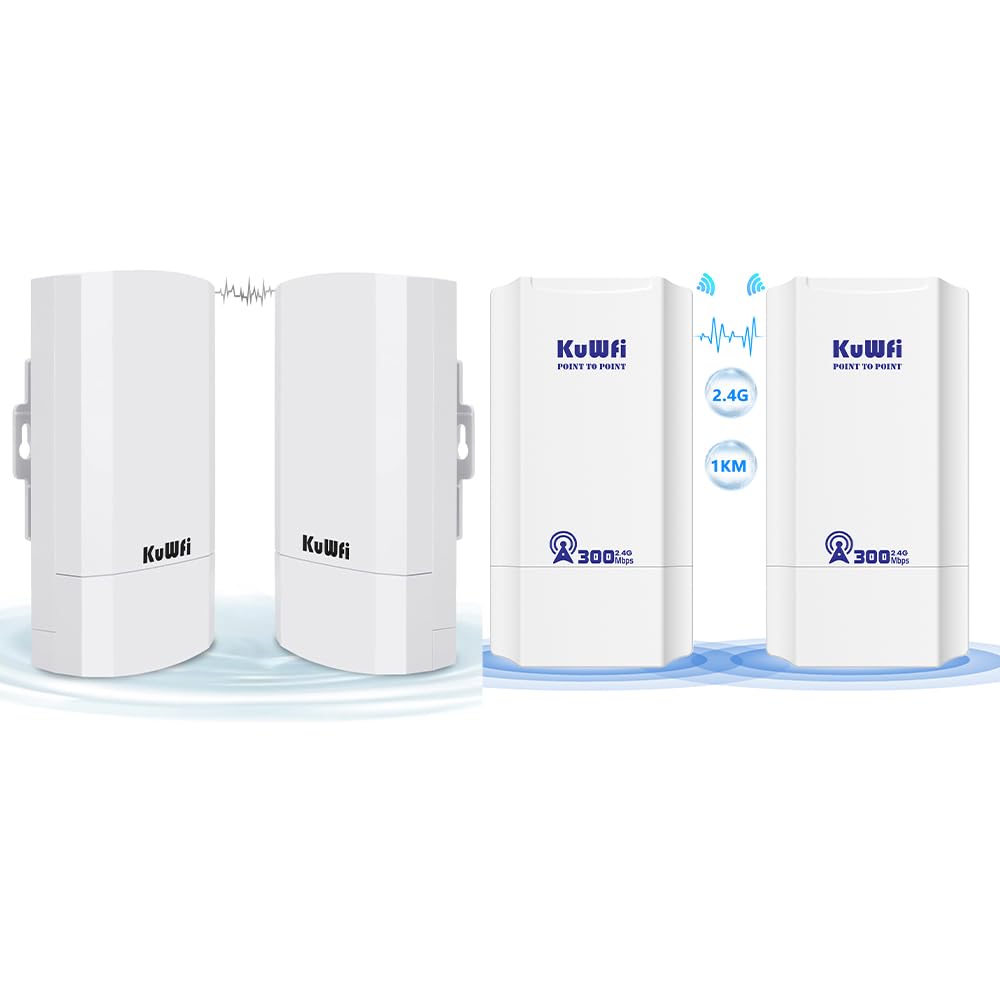
Figure 2.1: KuWFi CPE120/CPE130 Wireless Bridge Devices.

Figure 2.2: KuWFi CPE device highlighting 1KM long-range capability.
3. Пакеттин мазмуну
Пакетти ачкандан кийин, төмөндө көрсөтүлгөн нерселердин бардыгы бар экенин жана жакшы абалда экендигин текшериңиз:
- KuWFi CPE120/CPE130 Wireless Bridge Device(s)
- PoE (Power over Ethernet) Injector(s)
- Ethernet кабели(лери)
- Mounting Accessories (e.g., zip ties)
- Колдонуучунун Колдонмосу (бул документ)

Figure 3.1: Included accessories and device dimensions.
4. Техникалык жабдыктар бүттүview
Familiarize yourself with the physical components of the CPE device.
4.1. Порттор жана индикаторлор
Each CPE device features the following ports and LED indicators on its underside:
- WAN порт: Used for connecting to the network (e.g., router, NVR) and for Power over Ethernet (PoE) input.
- LAN порту: Used for connecting to client devices (e.g., IP camera, PC).
- RESET баскычы: Used to reset the device to factory defaults. Press and hold for approximately 5-10 seconds while the device is powered on.
- LED дисплей: A digital display showing configuration status (e.g., '8.8.8.8' for Master, '8.8.8.9' for Slave, or other status codes).
- Индикатор жарыктары:
- Power LED: Кубаттын абалын көрсөтөт.
- WAN LED: WAN портунун активдүүлүгүн көрсөтөт.
- LAN LED: LAN портунун ишин көрсөтөт.
- Сигнал күчү LEDs: Multiple LEDs indicating wireless signal strength.

Figure 4.1: CPE Device Ports and Indicators (Master and Slave examples).

4.2-сүрөт: Детальдуу view of CPE device ports and controls.
5. Орнотуу жана орнотуу
The KuWFi CPE devices can be configured for Point-to-Point (PTP) or Point-to-Multi-Point (PTMP) connections. One device will act as the Устат, and the other(s) as Кул(лар).
5.1. Basic Connection Diagram (PTP)
For a basic Point-to-Point setup, you will need two CPE devices. One acts as the Master, connected to your network source (e.g., router), and the other as the Slave, connected to your client device (e.g., IP camera, PC).
- Master Device Setup:
- Connect an Ethernet cable from your router/NVR to the WAN port of the Master CPE device.
- Power the Master CPE device using the provided PoE injector.
- Ensure the LED display on the Master device shows the correct configuration (e.g., '8.8.8.8').
- Slave Device Setup:
- Connect an Ethernet cable from the LAN port of the Slave CPE device to your client device (e.g., IP camera, PC).
- Power the Slave CPE device using the provided PoE injector.
- Ensure the LED display on the Slave device shows the correct configuration (e.g., '8.8.8.9').
- Монтаждоо: Mount the devices outdoors in a clear line of sight for optimal signal transmission. Use the provided mounting accessories.

Figure 5.1: Point-to-Point Extended Network Diagram.

Figure 5.2: Point-to-Point and Point-to-Multi-Point Extended Camera Monitoring Range.
Figure 5.3: Wireless Bridge Master and Slave Connection Examples.
5.2. Configuring Master/Slave Roles
The CPE devices typically use an LED display for initial configuration. Refer to the device's quick start guide or the manufacturer's website for specific steps on how to set one device as Master and the other(s) as Slave(s) using the LED display or a web интерфейс.
- Мастер: Connects to the main network source (e.g., router).
- Кул: Connects to the remote client device(s).
6. Иштөө режимдери
The KuWFi CPE devices support two primary operating modes:
- AP (кирүү чекити) режими: In this mode, the device acts as a wireless access point, broadcasting a Wi-Fi signal for other devices to connect to. This is typically used when the CPE is connected to a wired network and needs to provide wireless access.
- Көпүрө режими: In this mode, the device creates a wireless link between two wired networks or extends a wired network wirelessly. This is the primary mode for PTP/PTMP connections, where one CPE bridges the network to another CPE.
7. Техникалык тейлөө
To ensure the longevity and optimal performance of your KuWFi CPE devices, follow these maintenance guidelines:
- Тазалоо: Periodically clean the exterior of the devices with a soft, dry cloth. Do not use liquid cleaners or aerosols.
- Программалык камсыздоонун жаңыртуулары: Check the KuWFi official webсайт (www.kuwfi.com) for the latest firmware updates. Keeping the firmware updated can improve performance, add new features, and fix bugs.
- Курчап турган чөйрөнү коргоо: Ensure the devices are securely mounted and protected from extreme weather conditions beyond their specified operating range.
8. Кыйынчылыктарды
If you encounter issues with your KuWFi CPE devices, refer to the following common troubleshooting steps:
- Кубат жок:
- Ensure the PoE injector is properly connected and receiving power.
- Бардык кабелдик байланыштарды текшериңиз.
- Тармак туташуусу жок:
- Verify that the Master and Slave devices are correctly configured (e.g., LED display shows correct codes).
- Check the WAN/LAN LED indicators for activity.
- Ensure there is a clear line of sight between the Master and Slave devices.
- Try resetting both devices to factory defaults and reconfiguring them.
- Confirm that the connected router/NVR is functioning correctly.
- Алсыз сигнал/Жай ылдамдык:
- Adjust the alignment of the devices to ensure optimal signal strength.
- Check for obstructions between the devices.
- Ensure the distance between devices does not exceed the recommended range (1KM).
- Башка 2.4 ГГц зымсыз түзмөктөрдүн кийлигишүүсүн азайтыңыз.
- Кирүү мүмкүн эмес Web Interface (if applicable):
- Ensure your computer is connected to the CPE's LAN port or a network segment that can reach the CPE's IP address.
- Verify the CPE's default IP address (refer to the quick start guide or device label).
- Temporarily disable your computer's firewall.
For further assistance, please visit the KuWFi support webсайтка же кардарларды тейлөөгө кайрылыңыз.
9. Техникалык шарттар
| Өзгөчөлүк | Description |
|---|---|
| Бренд | KuWFi |
| Модель аты | CPE120, CPE130 |
| Өзгөчө өзгөчөлүк | Кирүү чекитинин режими, WPS |
| Жыштык тилкесинин классы | Бир тилкелүү (2.4 ГГц) |
| Зымсыз байланыш стандарты | 802.11n |
| Шайкеш түзмөктөр | Ноутбук, персоналдык компьютер, смартфон, планшет |
| Байланыш технологиясы | Wi-Fi |
| Антенна түрү | Оңдолду |
| Коопсуздук протоколу | WPS (Wi-Fi корголгон орнотуу) |
| Башкаруу ыкмасы | Touch (referring to LED display interaction) |
| LAN портунун өткөрүү жөндөмдүүлүгү | 1000 Мбит/сек |
| Maximum Upstream Data Transfer Rate | 300 Мегабит секундасына |
| Is Modem Compatible | Жок |
| Камтуу | 1KM Long Range |
| Иштөө температурасы | -30 градустан 55 градуска чейин |
| Сактоо температурасы | -40 градустан 70 градуска чейин |
| Суу өткөрбөйт/чаң өткөрбөйт | Ооба |
| Lightning Protection | Ооба |
10. Коопсуздук маалыматы
Сураныч, төмөнкү коопсуздук чараларын сактаңыз:
- Аппаратты ачпаңыз casinг. Бардык тейлөөлөрдү квалификациялуу кызматкерлерге тапшырыңыз.
- Ensure proper grounding for lightning protection.
- Use only the power adapter and PoE injector provided by the manufacturer.
- Avoid placing the device near heat sources or in direct sunlight for prolonged periods.
- Keep the device away from water or excessive humidity.
11. Кепилдик жана колдоо
Specific warranty information is not provided within this manual. For details regarding warranty coverage, technical support, or customer service, please refer to the product packaging, the official KuWFi webсайт (www.kuwfi.com), or contact your retailer.