
1. Киришүү
This manual provides detailed instructions for the installation, operation, and maintenance of your GAMEON Midnight I Series Mid Tower Gaming PC Case. Please read this manual thoroughly before beginning installation to ensure proper setup and to maximize the performance and lifespan of your product. Keep this manual for future reference.
2. Коопсуздук маалыматы
- Always disconnect the power supply from the wall outlet before performing any installation or maintenance inside the PC case.
- Handle the tempered glass panels with care. Tempered glass, while durable, can shatter if dropped or subjected to sharp impacts.
- Avoid exposing the case to extreme temperatures or high humidity.
- Do not attempt to modify the case or its components. Unauthorized modifications may void your warranty and pose safety risks.
- Майда тетиктерди жана бурамаларды балдардан алыс кармаңыз.
3. Пакеттин мазмуну
Төмөндө тизмеленген нерселердин баары пакетиңизде бар экенин текшериңиз:
- GAMEON Midnight I Series Mid Tower Gaming PC Case
- 7 x 120mm ARGB PWM Cooling Fans (pre-installed)
- Accessory Box (containing screws, cable ties, and other mounting hardware)
- ARGB/PWM Fan Controller and Remote Control
- Колдонуучунун Колдонмосу (бул документ)
4. Продукт бүтүп калдыview
The GAMEON Midnight I Series PC case is designed for optimal cooling and aesthetic appeal, featuring tempered glass panels and pre-installed ARGB PWM fans.

Figure 4.1: Internal layout of the PC case, highlighting the spacious interior for component installation.

Figure 4.2: Rear and top internal view, illustrating fan placement and overall structure.
4.1 ARGB+PWM Case Fans
The case comes with 7 pre-installed 120mm ARGB PWM fans, providing efficient cooling and customizable lighting. The fans are controlled via an included ARGB/PWM controller and remote.

Figure 4.3: ARGB+PWM fan features and fan mounting support. The front supports 360mm water cooling. Fan mounts include 3x120mm for PSU cover, 3x120mm for bottom, 3x120mm for top, and 1x120mm for rear.
4.2 Алдыңкы киргизүү/чыгаруу порттору
The front panel provides convenient access to essential ports for connectivity.
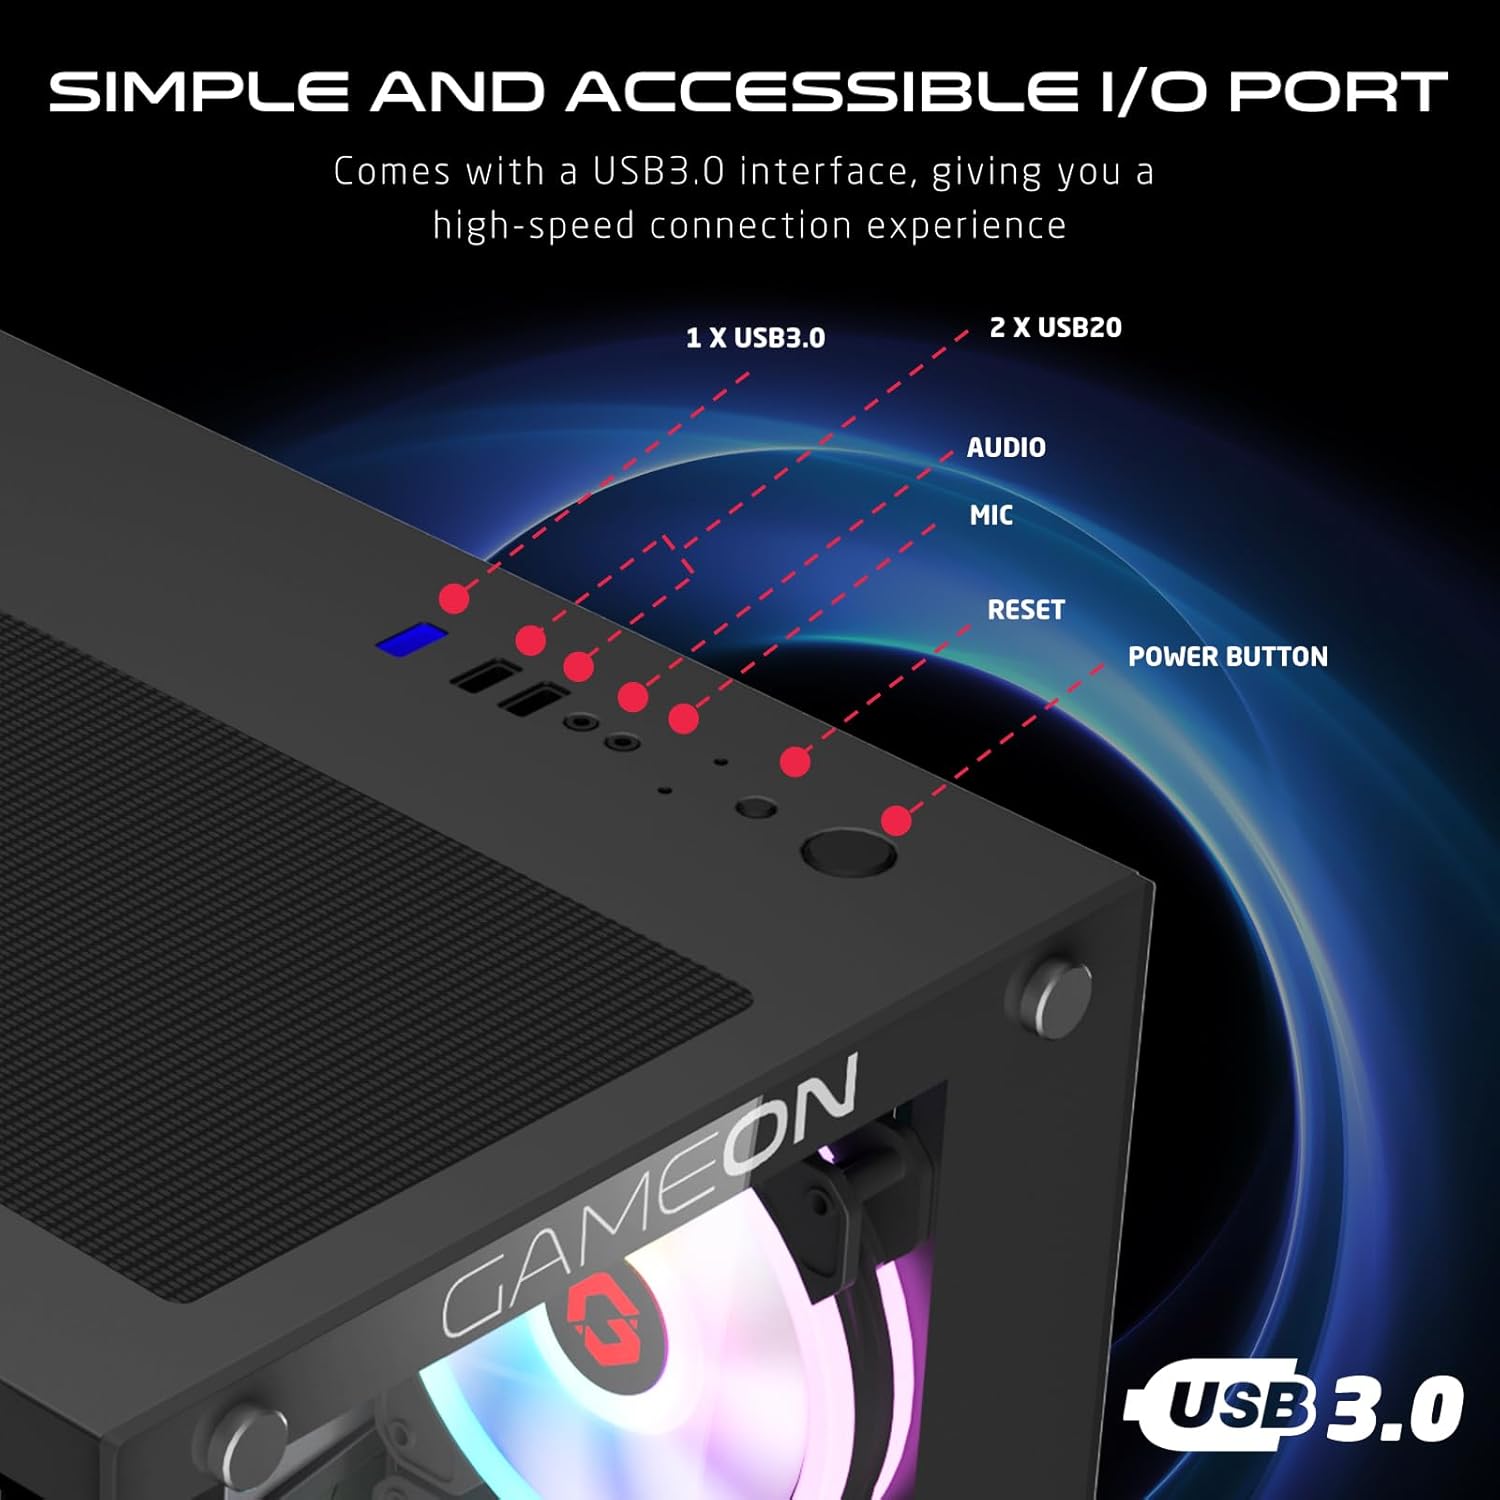
Figure 4.4: Front I/O ports, including 1x USB 3.0, 2x USB 2.0, Audio jack, Microphone jack, Reset button, and Power button.
4.3 Cooling and Construction
The case is designed with an optimized cooling solution, featuring multiple fan mounts and durable tempered glass panels.

Figure 4.5: Optimized cooling solution with massive air intake and exhaust. Features 7 pre-installed fans and durable tempered glass construction.
4.4 Compatibility and Drive Support
The case offers wide compatibility for various motherboard form factors and ample drive bay support.

Figure 4.6: Motherboard compatibility includes ATX, M-ATX, and ITX. Drive bay support for 2x HDD and 2x SSD. Also shown are the front panel header connections.
5. Орнотуу нускамалары
Follow these steps to install your components into the GAMEON Midnight I Series PC case.
5.1 Ишти даярдоо
- Корпусту тегиз, туруктуу бетке коюңуз.
- Carefully remove the tempered glass side panel(s) by unscrewing the thumb screws and gently sliding the panel off. Set them aside in a safe place.
- Remove any internal packaging materials.
5.2 Motherboard орнотуу
- I/O калканын (эгер энелик платаңызга алдын ала орнотулбаган болсо) корпустун арткы тешигине орнотуңуз.
- Align your motherboard with the standoffs inside the case. Ensure the standoffs match your motherboard's form factor (ATX, M-ATX, ITX).
- Берилген бурамалар менен энелик тактаны бекитиңиз.
5.3 Электр менен камсыздоо блогун (PSU) орнотуу
- Корпустун ылдыйкы артындагы PSU монтаждоо аймагын табыңыз.
- Slide your PSU into position from the rear of the case.
- Secure the PSU with the provided screws.
5.4 Дискти орнотуу (HDD/SSD)
The case supports 2x 3.5" HDDs and 2x 2.5" SSDs.
- 3.5 дюймдук катуу дисктер үчүн: Locate the drive cage, typically near the PSU shroud. Slide the HDD into the drive bay and secure it with screws.
- 2.5 дюймдук SSD дисктери үчүн: Mount the SSDs to the designated mounting points, usually on the back of the motherboard tray or within the drive cage, using the provided screws.
5.5 Видеокартаны жана кеңейтүү картасын орнотуу
- Керектүү PCIe уячасынын капкактарын корпустун арткы бөлүгүнөн алып салыңыз.
- Графикалык картаңызды же башка кеңейтүү карталарын энелик платаңыздагы тиешелүү PCIe уячаларына салыңыз.
- Карталарды бурамалар менен бекитиңиз.
5.6 Кабелди башкаруу
Кабелдерди башкаруу үчүн энелик плата лотогунун артындагы кабелдерди өткөрүү кесиктерин жана байлоочу чекиттерди колдонуңуз. Бул аба агымын жана эстетиканы жакшыртат.
5.7 Connecting Front Panel I/O and Fans
- Connect the front panel cables (Power SW, Reset SW, HDD LED, Power LED, USB 3.0, USB 2.0, HD Audio) to their corresponding headers on your motherboard. Refer to your motherboard manual for header locations.
- Ensure the pre-installed ARGB fans are connected to the included ARGB/PWM controller. Connect the controller to a SATA power connector from your PSU and a 3-pin ARGB header (if available) and a 4-pin PWM header on your motherboard for software control, or use the remote for standalone control.
6. Иштөө нускамалары
6.1 Күйгүзүү/өчүрүү
- After all components are installed and cables connected, replace the side panels.
- Connect your monitor, keyboard, mouse, and power cable to the PSU.
- Press the Power button on the front panel to turn on your PC.
- To turn off, use the operating system's shutdown function or press and hold the Power button for several seconds.
6.2 ARGB Fan Control
Алдын ала орнотулган ARGB желдеткичтерин эки жол менен башкарууга болот:
- Алыстан башкаруу: Use the included remote to cycle through various lighting effects, adjust brightness, and change fan speed.
- Энелик плата программасы: If the ARGB controller is connected to a compatible 3-pin ARGB header on your motherboard, you can synchronize lighting effects with your motherboard's RGB software (e.g., ASUS Aura Sync, MSI Mystic Light Sync, ASRock Polychrome RGB, Gigabyte RGB Fusion).
7. Техникалык тейлөө
Үзгүлтүксүз тейлөө сиздин PC корпусуңуздун оптималдуу иштешин жана узак иштөөсүн камсыз кылууга жардам берет.
7.1 Чаң чыпкасын тазалоо
The case includes dust filters to prevent dust buildup. It is recommended to clean them every 1-3 months, depending on your environment.
- Locate the dust filters (e.g., top, bottom, front).
- Чыпкаларды акырын алып салыңыз.
- Clean them using compressed air, a soft brush, or by rinsing with water (ensure they are completely dry before re-installing).
- Re-attach the dust filters.
7.2 Жалпы тазалоо
- жумшак колдонуу, damp Корпустун сырткы беттерин сүртүү үчүн чүпүрөк колдонуңуз. Абразивдүү тазалоочу каражаттардан алыс болуңуз.
- For tempered glass panels, use a glass cleaner and a microfiber cloth to avoid streaks.
7.3 Вентиляторду тазалоо
Periodically inspect the fan blades for dust accumulation. Use compressed air to gently clear dust from the fan blades and grilles.
8. Кыйынчылыктарды
If you encounter issues with your PC case, refer to the following common problems and solutions.
8.1 Fans Not Spinning or ARGB Not Working
- кубат туташуу текшерүү: Ensure the ARGB/PWM controller is properly connected to a SATA power connector from your PSU.
- Check Fan Connections: Verify that all fans are securely connected to the ARGB/PWM controller.
- Алыстан башкаруунун батареясы: If using the remote, check if its battery needs replacement.
- Энелик плата программасы: If using motherboard software for control, ensure the controller is connected to the correct ARGB header and the software is installed and configured correctly.
- Күйөрман багыты: Оптималдуу аба агымы үчүн желдеткичтердин туура багытталганын текшериңиз (чыгаруу/чыгаруу).
8.2 Front I/O Ports Not Functioning
- Check Motherboard Connections: Ensure all front panel cables (USB 3.0, USB 2.0, HD Audio) are correctly and securely connected to their respective headers on the motherboard. Refer to your motherboard manual.
8.3 PC Not Powering On
- Power Button Connection: Verify the Power SW cable from the front panel is correctly connected to the motherboard's front panel header.
- PSU Connection: PSU розеткага туура туташтырылганын жана PSUдогу кубат которгучу "ON" абалында экенин текшериңиз.
- Internal Power Cables: Check that all necessary power cables (24-pin ATX, CPU, GPU) are securely connected to the motherboard and components.
9. Техникалык шарттар
| Өзгөчөлүк | Спецификация |
|---|---|
| Модель аты | GO-EMPERORII-M (Midnight I Series) |
| Иштин түрү | Ара Tower |
| Материал | Температуралуу айнек |
| Түс | Кара |
| Продукциянын өлчөмдөрү (L x W x Y) | 44 x 28 x 42.7 см |
| Элемент Салмагы | 6.45 кг |
| Motherboard Support | ATX, Micro ATX, ITX |
| Алдын ала орнотулган күйөрмандар | 7 x 120 мм ARGB PWM желдеткичтери |
| Fan Size | 120мм |
| Муздатуу ыкмасы | Air, Water (supports up to 360mm radiator in front) |
| Drive Bays | 2 x 3.5" катуу диск, 2 x 2.5" SSD |
| Алдыңкы I / O порттору | 1 x USB 3.0, 2 x USB 2.0, Audio, Mic, Reset, Power |
| Кошумча функциялар | Dust Filters, ARGB Controller with Remote |
10. Кепилдик жана колдоо
This product comes with a standard manufacturer's warranty. For specific warranty terms and conditions, please refer to the documentation provided with your purchase or contact GAMEON customer support. For technical assistance or further inquiries, please visit the official GAMEON webсайтка же алардын колдоо каналдарына кайрылыңыз.