
Introduction
This manual provides essential information for the setup, operation, maintenance, and troubleshooting of your GIGABYTE MO34WQC2 34-inch QD-OLED Curved Gaming Monitor. Please read this manual thoroughly before using the product to ensure correct usage and optimal performance.
The GIGABYTE MO34WQC2 monitor features a 34-inch curved QD-OLED display, offering a 0.03ms GTG response time and a 240 Hz refresh rate for smooth visual experiences. It includes Type-C KVM functionality, allowing seamless switching between multiple devices.
Негизги өзгөчөлүктөрү:
- 3rd Gen QD-OLED Panel: Delivers high image quality and gaming performance.
- GIGABYTE OLED Care: AI-based algorithm to minimize burn-in risks with adjustable settings.
- 240 Гц жаңыртуу ылдамдыгы жана 0.03 мс жооп берүү убактысы: Ensures ultra-smooth motion clarity and responsiveness.
- Life-Like Colors: Features 1.5M:1 contrast ratio, 99% DCI-P3 color gamut, and 10-bit color depth.
- VESA DisplayHDR True Black 400 & ClearMR 13000: Provides realistic contrast and top-tier motion clarity.
- AMD FreeSync Premium Pro: Reduces screen tearing and stuttering, especially in HDR content.
- Тактикалык өзгөчөлүктөрү: Includes Game Assist (timer, crosshairs, PIP/PBP), Black Equalizer 2.0, and Dashboard for enhanced gameplay.
- 3 жылдык кепилдик: Covers panel burn-in (terms may vary by region).
Орнотуу нускамалары
1. Пакеттен чыгаруу жана чогултуу
Carefully remove the monitor and all components from the packaging. Place the monitor face down on a soft, clean surface to prevent scratches.

This image shows the GIGABYTE MO34WQC2 monitor with its stand, viewed from the front. The monitor is curved and displays a vibrant, colorful image.
Стендди бекитүү:
- Монитор панелине стенд мойнуна бекитиңиз. Анын ордуна коопсуз чыкылдатуусун камсыз кылыңыз.
- Тирөөчтүн негизин тирөөчтүн моюнуна бекитип, негиздин түбүндөгү бураманы бекемдеңиз.
Alternatively, the monitor supports VESA 100x100mm wall mounts. Refer to the image below for VESA mounting points.

This image illustrates the adjustable stand of the GIGABYTE MO34WQC2 monitor, showing its tilt range (-5° to +20°) and height adjustment (130mm). A close-up inset highlights the VESA 100x100mm mounting area on the back of the monitor.
2. Туташтыруучу кабельдер
Connect the necessary cables to the monitor's I/O ports. Ensure all connections are firm.

This diagram shows the input/output ports on the back of the GIGABYTE MO34WQC2 monitor. Ports include HDMI 2.1 (in), DP 1.4 (in), USB Type-C (DP Alt), Mic, Headphone, USB 3.2 (Upstream), and USB 3.2 (Downstream).
- Кубат кабели: Электр кабелин мониторго жана розеткага туташтырыңыз.
- Video Input: Connect your PC or gaming console using an HDMI 2.1, DisplayPort 1.4, or USB Type-C cable.
- USB Upstream: For KVM functionality and USB hub use, connect a USB 3.2 Upstream cable from your PC to the monitor.
- Аудио: Connect headphones or external speakers to the Headphone jack if desired.
Иштөө нускамалары
1. Күйгүзүү/өчүрүү
Мониторду күйгүзүү же өчүрүү үчүн, адатта, анын арткы же астыңкы жагында жайгашкан кубат баскычын басыңыз. Монитор күйүп турганда кубат индикаторунун жарыгы күйөт.
2. Экрандагы дисплей (OSD) навигациясы
The monitor features a joystick control for navigating the OSD menu. This joystick is typically located on the back of the monitor.
- Пресс: Enter OSD menu / Confirm selection.
- Өйдө/төмөн: Меню параметрлерин чабыттоо.
- Сол оң: Adjust settings / Navigate sub-menus.
3. KVM Функционалдыгы
The built-in KVM (Keyboard, Video, Mouse) switch allows you to control multiple devices (e.g., a desktop PC and a laptop) with a single keyboard and mouse connected to the monitor. To use KVM, ensure both devices are connected to the monitor via video input (HDMI/DP/USB-C) and the USB Upstream cable from the primary device.

This image shows the GIGABYTE MO34WQC2 monitor connected to a desktop PC via HDMI/DP and a laptop via USB Type-C, illustrating how the Type-C KVM feature allows switching between devices with a single button press.
Switch between connected devices using the dedicated KVM button or through the OSD menu.
4. Дисплей орнотуулары
Ар кандай дисплей жөндөөлөрүн тууралоо үчүн OSD менюсуна кириңиз:
- Сүрөт: Жарыктык, Контраст, Курчтук, Түс температурасы.
- Түсү: Gamma, Hue, Saturation.
- Оюн: Overdrive, FreeSync Premium Pro, Black Equalizer 2.0, Crosshair, Timer.
- Киргизүү: Select input source (HDMI, DisplayPort, USB-C).
- Система: Language, OSD Timeout, Power LED.
5. GIGABYTE OLED Care
The monitor includes AI-based OLED Care features to prevent burn-in. These settings can be accessed and adjusted via the OSD menu. It is recommended to keep these features enabled for optimal panel longevity.
Техникалык тейлөө
1. Мониторду тазалоо
- Тазалоодон мурун ар дайым мониторду өчүрүп, электр шнурун сууруп коюңуз.
- Жумшак, түксүз кездемени жеңил колдонуңуз dampсуу же абразивдүү эмес экран тазалагыч менен иштетиңиз.
- Тазалоочу каражатты түз экранга чачпаңыз.
- Катуу химиялык заттарды, эриткичтерди же абразивдүү материалдарды колдонуудан алыс болуңуз.
2. OLED панелине кам көрүү
To prolong the life of your QD-OLED panel and minimize the risk of burn-in, utilize the GIGABYTE OLED Care features available in the OSD menu. These features include pixel shift, static image detection, and pixel refresh cycles. Regular use of these functions is recommended.
Проблемаларды чечүү
Мониторуңузда көйгөйлөргө туш болсоңуз, төмөнкү жалпы көйгөйлөрдү жана чечимдерди караңыз:
| Көйгөй | Мүмкүн чечим |
|---|---|
| Экранда сүрөт жок | Ensure the power cable is securely connected and the monitor is powered on. Verify the video input cable (HDMI, DP, USB-C) is properly connected to both the monitor and the source device. Select the correct input source via the OSD menu. |
| Сүрөттүн жыпылыктап же бурмаланып турушу | Check video cable connections. Ensure the graphics card drivers are up to date. Try a different video cable or port. Disable or adjust FreeSync Premium Pro settings in the OSD if experiencing issues. |
| Түстөр туура эмес көрүнөт | Adjust color settings (brightness, contrast, color temperature) in the OSD menu. Ensure HDR is correctly configured on your source device and monitor. |
| Burn-in or image retention | Utilize the GIGABYTE OLED Care features in the OSD menu, such as Pixel Refresh or Static Image Detection, to mitigate these issues. Avoid displaying static images for extended periods. |
| KVM not switching devices | Ensure the USB Upstream cable is connected from the primary device to the monitor. Verify all video inputs are correctly connected. Check KVM settings in the OSD menu. |
Техникалык шарттар
| Өзгөчөлүк | Деталь |
|---|---|
| Бренд | GIGABYTE |
| Модель номери | MO34WQC2-SA |
| Screen Size | 34 дюйм |
| Резолюция | WQHD 3440 x 1440 |
| Аспект катышы | 21:9 |
| Дисплей түрү | QD-OLED |
| Жаңыртуу ылдамдыгы | 240 Гц |
| Жооп убактысы | 0.03 Milliseconds (GtG) |
| Контраст катышы | 1,500,000:1 |
| Түс гаммасы | 99% DCI-P3 |
| HDR колдоо | VESA DisplayHDR Чыныгы Кара 400 |
| Adaptive Sync | AMD FreeSync Premium Pro |
| Байланыш | 2x HDMI 2.1, 1x DisplayPort 1.4, 1x USB Type-C (DP Alt Mode), 2x USB 3.2 (Downstream), 1x USB 3.2 (Upstream), Headphone Jack |
| Түзөтүүлөр | Height, Tilt |
| VESA тоосу | 100x100мм |
| Өлчөмдөрү (W x D x H) | 31.96" x 9.65" x 23.42" (стенд менен) |
| Салмагы | 21.7 фунт |
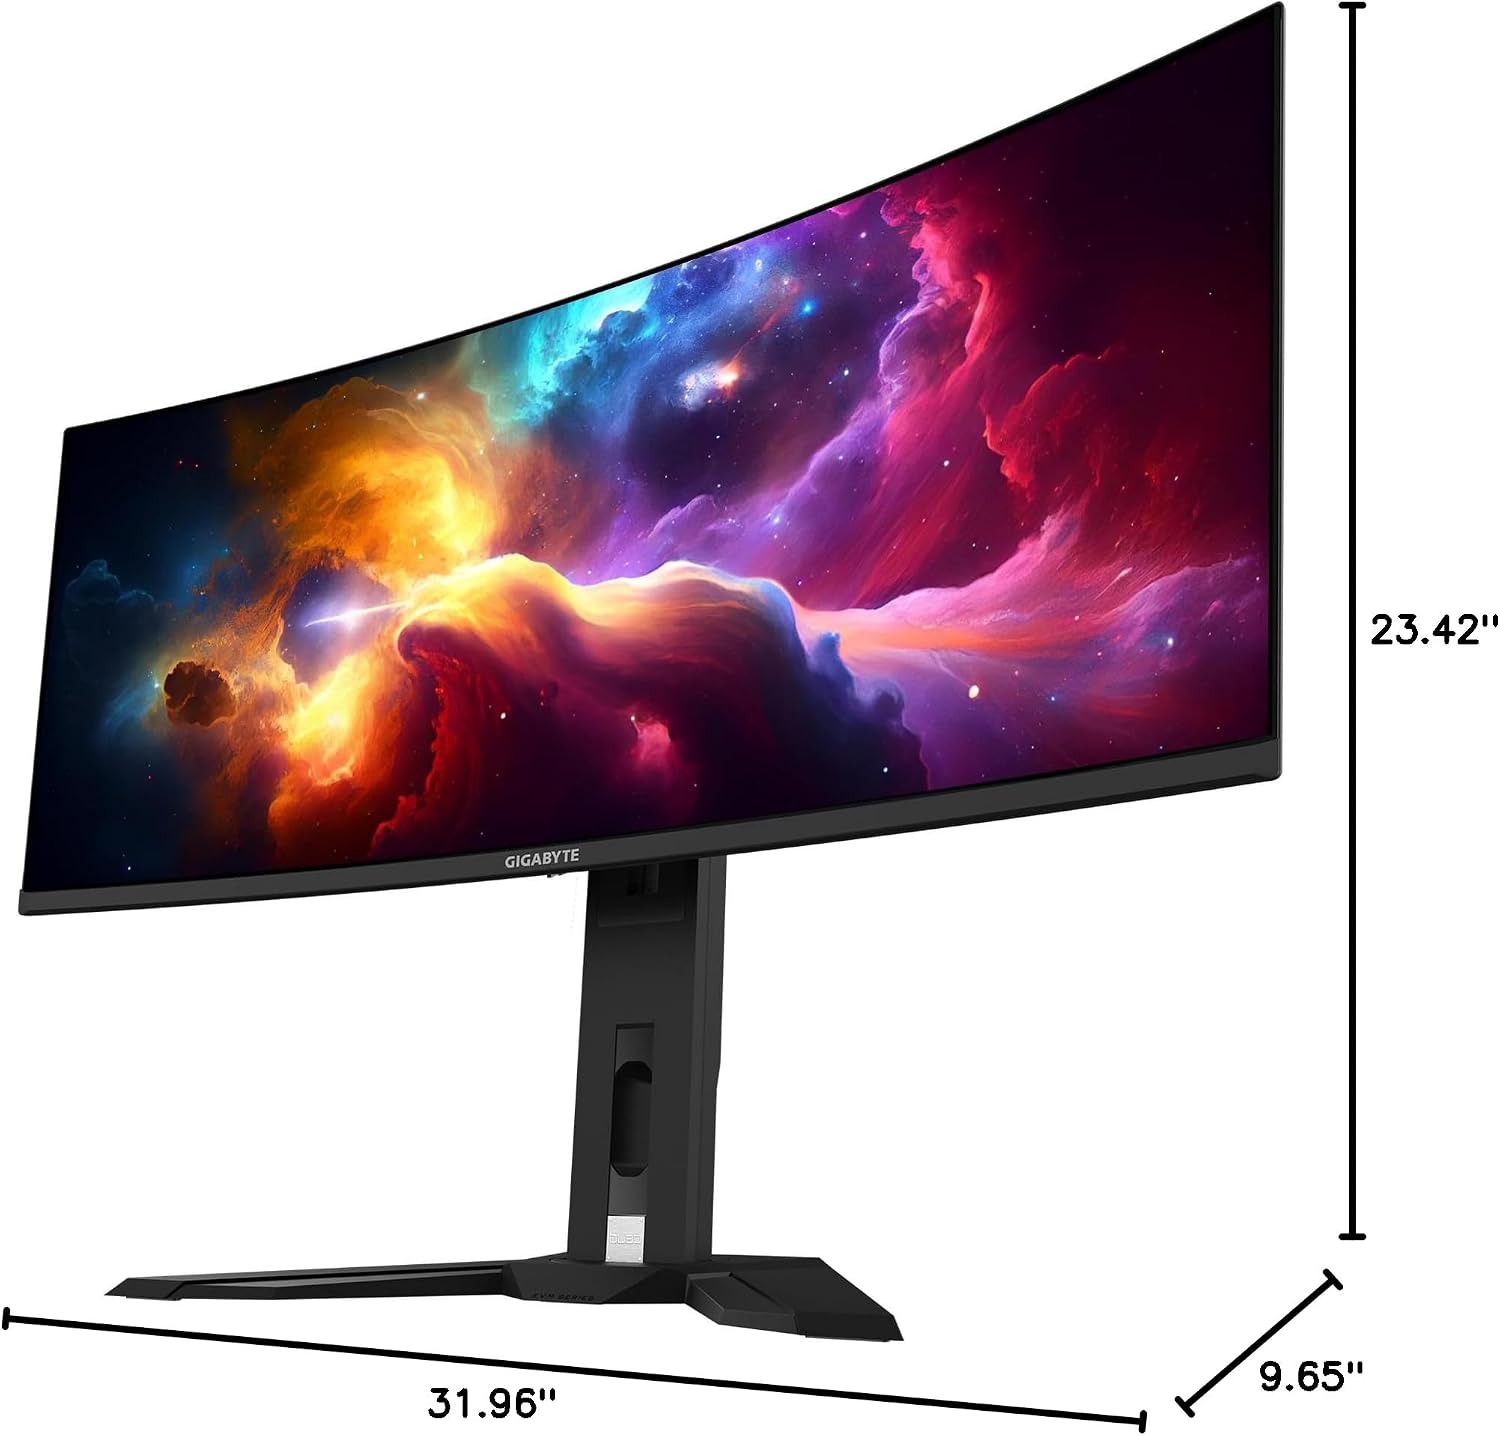
This image provides a diagram of the GIGABYTE MO34WQC2 monitor's dimensions, showing a width of 31.96 inches, a depth of 9.65 inches, and a height of 23.42 inches (including the stand).
Кепилдик жана колдоо
Кепилдик маалымат
Your GIGABYTE MO34WQC2 monitor comes with an extended 3-year manufacturer warranty. This warranty includes coverage for panel burn-in, supported by the AI-based GIGABYTE OLED Care protection. Please note that warranty terms may vary by region.
Кардарларды колдоо
For technical assistance, warranty claims, or further inquiries, please visit the official GIGABYTE support website or contact their customer service department. Refer to the product packaging or GIGABYTE's official website for specific contact details and support resources in your region.