
1. Киришүү
This manual provides essential information for the safe and effective operation of your Ovsuqu JPT MOPA 100W E2 Fiber Laser Engraver. Please read this manual thoroughly before operating the machine to ensure proper setup, usage, and maintenance. Retain this manual for future reference.
2. Коопсуздук маалыматы
WARNING: This product contains a Class II laser. Improper use can result in serious injury.
- Laser Class II: The laser output power is 0.874mW. Always exercise caution when operating.
- Көздү коргоо: Always wear the provided OD7+ Goggles or equivalent certified laser safety glasses when the machine is in operation to protect against laser radiation.
- FDA Accession Number: 2420799-000.
- Вентиляция: Гравировка учурунда пайда болгон түтүндөрдү жана бөлүкчөлөрдү жок кылуу үчүн жумуш аймагында жетиштүү желдетүүнү камсыз кылыңыз.
- Күйүүчү материалдар: Do not operate the laser near flammable liquids, gases, or materials.
- Шашылыш токтотуу: Familiarize yourself with the location and function of the E-Stop switch for immediate shutdown in emergencies.
- Көзөмөл: Иш учурунда машинаны эч качан кароосуз калтырбаңыз.
3. Продукт бүтүп калдыview жана компоненттер
The Ovsuqu JPT MOPA 100W E2 Fiber Laser Engraver is designed for precise marking and engraving on various materials. Below is an overview of the machine's main components and their functions.

3.1-сүрөт: Алдыңкы жана арткы view of the laser engraver with key components labeled. The front view shows the laser source light path, galvo head, double red light pointer, E-Stop switch, chassis, focus wheel, laptop holder, 0-50cm ruler, fiber protect cable, 80D Rotary axis, and work bench. The back view shows the USB cable port, power port, rotary axis port, foot pedal port, power switch, and cooling fan.
3.1. Таңгактоо тизмеси
Төмөндө көрсөтүлгөн бардык буюмдар таңгагыңызда бар экенин текшериңиз. Эгерде кандайдыр бир буюмдар жок болсо же бузулуп калса, дароо кардарларды колдоо кызматына кайрылыңыз.

3.2-сүрөт: Contents of the Ovsuqu JPT MOPA 100W E2 Fiber Laser Engraver package. Items include: JPT Fiber laser machine, JPT laser source, D80 Rotary AXIS, OD7+ Goggles, Foot Switch, Power cable, U disk (with Software & manual), Wrench & position strip, and Data line.
4. Орнотуу жана орнотуу
Follow these steps to set up your laser engraver:
- Пакеттен чыгаруу: Carefully remove all components from the wooden crate. Inspect for any shipping damage.
- Жайгашкан жери: Place the machine on a stable, level surface in a well-ventilated area. Ensure sufficient space around the machine for operation and maintenance.
- Компоненттик Ассамблея: Connect the JPT laser source to the main machine unit. Attach the D80 Rotary Axis if required for your application.
- Кубат туташуу: Электр кабелин машинага жана жерге туташтырылган розеткага туташтырыңыз.
- Программалык камсыздоону орнотуу: Insert the provided U disk into your computer. Install the EzCad Lite software. The U disk also contains the user manual and parameter files.
- Компьютерге туташуу: Connect the machine to your computer using the USB cable.
- Баштапкы калибрлөө: While the machine is factory calibrated, minor adjustments may be needed after transport. Refer to the software manual for calibration procedures.
5. Software and Compatibility
The Ovsuqu JPT MOPA 100W E2 Fiber Laser Engraver is compatible with industry-standard software and file форматтар.
5.1. EzCad Lite Software
The machine comes with EzCad Lite software, which is compatible with Windows XP/Vista/7/8/10/11. It supports various file formats and functionalities.
5.1-сүрөт: The Original BJJCZ main board and a screenshot of the EzCad software working page. EzCad Lite supports Coreldraw, AutoCAD, Photoshop files (PLT, PCX, DXF, BMP, etc.), SHX, TTF fonts, automatic encoding, printing serial numbers, batch numbers, dates, barcodes, and automatic jump numbers.
5.2. LightBurn Compatibility
The laser engraver is also compatible with LightBurn software, offering additional features for vector graphic and image processing.

5.2-сүрөт: The JPT MOPA M7 Laser Source and LightBurn software running on a laptop. LightBurn supports importing various vector graphic and image formats, arranging, editing, creating new vector shapes, and applying settings like power, speed, number of passes, cut order, brightness, contrast, and dithering mode.
6. Операция
This section outlines general operational guidelines for your fiber laser engraver.
6.1. Материалдык шайкештик
The machine is suitable for engraving on a wide range of materials:
- Металлдар: Carbon Steel, Aluminum, Stainless Steel, Brass, Copper, Gold, Silver, etc.
- Non-metals: Some non-metals such as nylon, light buttons, ABS, PVC, PES, etc.
6.2. Lens Selection and Work Area
The choice of lens affects engraving depth and work area:
- The higher the laser power, the deeper the engraving with the same lens.
- A smaller lens allows for deeper engraving at the same power, but reduces the engraving area.
- A larger lens provides a larger engraving area but may result in weaker light intensity and shallower engraving.

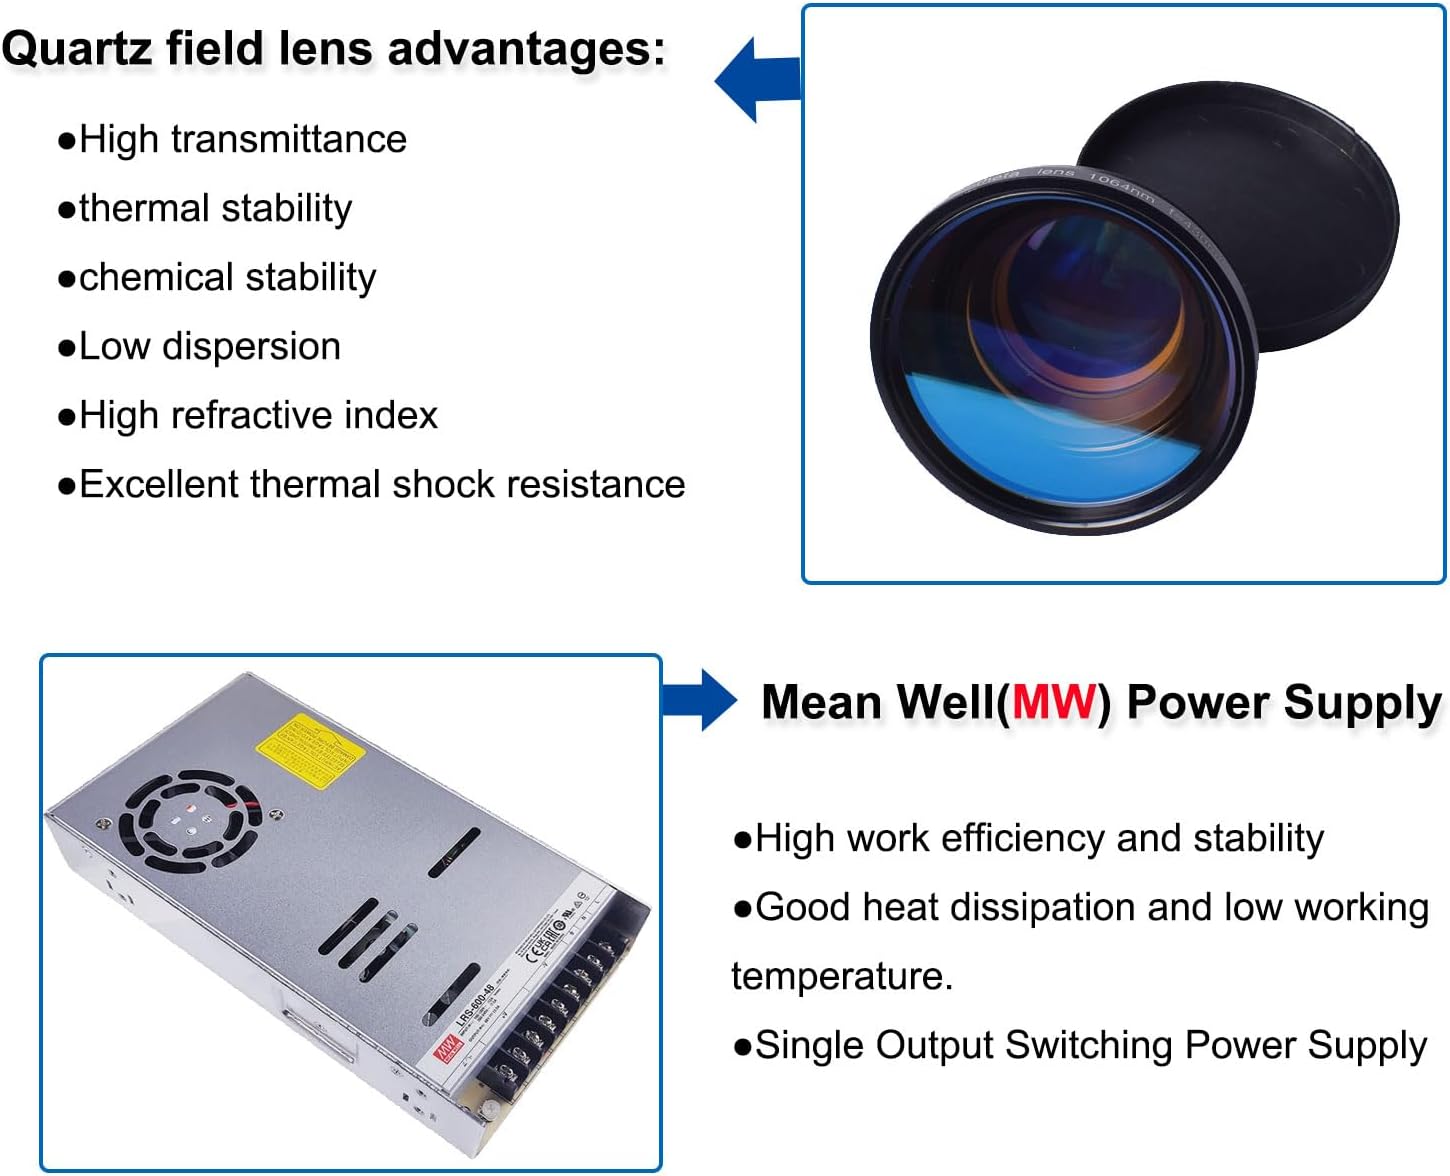
6.1-сүрөт: Quartz field lens advantages include high transmittance, thermal stability, chemical stability, low dispersion, high refractive index, and excellent thermal shock resistance. Also shown is a Mean Well (MW) Power Supply, known for high work efficiency, stability, good heat dissipation, low working temperature, and single output switching power supply.
6.3. Гравировкалоо процесси
- Дизайнды даярдоо: Create or import your design using EzCad Lite or LightBurn software.
- Материалды жайгаштыруу: Place the material to be engraved on the workbench. For cylindrical objects, use the D80 Rotary Axis.
- Фокусту тууралоо: Use the focus wheel to adjust the laser focus. The double red light pointer assists in finding the correct focal length.
- Параметр орнотуулары: Adjust laser parameters (power, speed, frequency, pulse duration) in the software according to the material and desired engraving effect.
- Preview: Алдын ала кызыл жарыкты колдонуңузview function to check the engraving area before starting.
- Гравюра баштоо: Initiate the engraving process from the software. Monitor the machine during operation.
6.4. Factory Tested Examples
The machine is capable of various engraving tasks, including deep carving, color marking, and rust removal.

6.2-сүрөт: Examples of engraving on copper, stainless steel, and iron (0.3mm thick) with a JPT 100W Fiber laser at 500mm/s speed, 70KHz frequency, and 60 cutting times. Also shown is brass deep engraving (0.8mm depth) at 2000mm/s speed, 80ns pulse width, 110x110mm working lens, 25 marking times, 80KHz frequency, and 0.025mm line distance. An example of rust removal on iron using a JPT 100W Fiber laser at 2000mm/s speed, 400ns pulse width, 80KHz frequency, and 0.04mm line distance is also displayed.
7. Техникалык тейлөө
Үзгүлтүксүз тейлөө сиздин лазердик оюгучуңуздун узак иштөөсүн жана оптималдуу иштешин камсыздайт.
- Тазалоочу линзалар: Periodically clean the field lens and protective window with a specialized lens cleaning solution and lint-free wipes. Avoid touching optical surfaces with bare hands.
- Чаңды тазалоо: Keep the machine free of dust and debris, especially around the cooling fans and optical components. Use compressed air for hard-to-reach areas.
- Кабелдик текшерүү: Regularly check all cables (power, USB, fiber protect cable) for wear, damage, or loose connections.
- Rotary Axis Maintenance: If using the rotary axis, ensure its moving parts are clean and lubricated as per its specific instructions.
- Программалык камсыздоо жаңыртуулары: Keep your EzCad Lite or LightBurn software updated to the latest version for performance improvements and bug fixes.
8. Кыйынчылыктарды
Бул бөлүм сиз кабылышы мүмкүн болгон жалпы көйгөйлөрдү карайт. Бул жерде көрсөтүлбөгөн көйгөйлөр үчүн кардарларды колдоо бөлүмүнө кайрылыңыз.
- Лазердик чыгаруу жок:
- Check power connections and ensure the machine is turned on.
- Verify the E-Stop button is not engaged.
- Ensure the software is properly connected and sending commands.
- Гравюранын сапаты начар:
- Check laser focus. Incorrect focus is a common cause of poor quality.
- Adjust laser parameters (power, speed, frequency) for the specific material.
- Clean the field lens and protective window.
- Материалдын тегиз жана бекем орнотулганын текшериңиз.
- Программалык камсыздоого туташуу маселелери:
- Verify USB cable connection.
- Машинаны да, компьютерди да өчүрүп күйгүзүңүз.
- Reinstall the software drivers if necessary.
- Айлануучу огу иштебей жатат:
- Ensure the rotary axis is correctly connected to the machine's rotary axis port.
- Check software settings for rotary axis activation and parameters.
9. Техникалык шарттар
Detailed technical specifications for the Ovsuqu JPT MOPA 100W E2 Fiber Laser Engraver.

9.1-сүрөт: Specifications table for Chinacnczone Fiber Laser Marking Machines, including JPT MOPA 60W, 100W, 200W, and 300W models. This manual pertains to the JPT MOPA 100W E2 model.
| Өзгөчөлүк | Спецификация |
|---|---|
| Модел | JPT MOPA 100W E2 |
| Элемент моделинин номери | FL-30W |
| Лазердик булак | JPT MOPA M7 Series |
| Күч | 100 Вт |
| Импульстун максималдуу энергиясы | 1.5мДж |
| Импульстун кайталануу ылдамдыгы диапазону | 1-4000KHz |
| Контролдук кеңеш | SZLI-B-V4 (BJJCZ) |
| Программалык камсыздоо | EzCad Lite (compatible with LightBurn) |
| Rotary Holder | Optional (80mm Rotary Axis included) |
| Galvo Brand & Model | SINO SG7110 SI |
| Белгилөө ылдамдыгы | 6000мм/сек |
| Белгилөө аймагы | 200x200mm (300x300mm optional) |
| Red Light Preview | Ооба |
| Double Red Dot Position | Ооба |
| Color Marking | Ооба |
| Импульстун узактыгы | 2-500ns |
| Supply DC Voltage (VDC) | 48V |
| Central Emission Wavelength | 1064нм |
| Supported Windows System | Windows 7, Windows 10, Windows 11 |
| Продукциянын өлчөмдөрү | 18.9 x 22.44 x 30.31 дюйм |
| Элемент Салмагы | 138.6 фунт |
| Өндүрүүчү | ChinaCNCzone |
10. Кепилдик жана колдоо
Ovsuqu is committed to providing excellent customer service and support for your product.
- After-Sales Team: Ovsuqu has a professional after-sales team available for consultation and support.
- Орнотуу видеолору: Comprehensive installation videos are available to assist with setup.
- Колдонуучу колдонмолору: Detailed user manuals are provided (including on the U disk).
- Accessory Warranties: Information regarding warranties for accessories can be obtained by contacting customer support.
- Lifetime Remote Assistance: Lifetime remote assistance is offered for technical support.
- Байланыш: If you are dissatisfied with our products or service, please contact us for assistance.