Introduction
This manual provides essential information for the setup, operation, and maintenance of your new Tucus replacement remote control. This remote is designed to be compatible with various JVC Micro COMPACT COMPONENT Stereo Systems, including models RM-SUXQ30UW, RM-SUXQ30US, UX-Q30S, UX-Q30B, UX-Q30P, and UX-Q30W. While it is a replacement remote and not the original device's remote, common functions are expected to operate normally. Please review this guide thoroughly to ensure proper use and longevity of your remote control.
Жайгашуу
1. Батареяны орнотуу
The remote control requires two (2) AA batteries (not included) for operation. Follow these steps to install them:
- Пульттун артындагы батарея отсегин табыңыз.
- Батарея бөлүмүнүн капкагын ачуу үчүн ылдый же сыртка жылдырыңыз.
- Оң (+) жана терс (-) терминалдары бөлүмдүн ичиндеги белгилер менен туура дал келишин камсыз кылып, эки АА батарейканы салыңыз.
- Батарея бөлүкчөсүнүн капкагын бекем чыккыча ордуна жылдырыңыз.

Figure 1: Back of the remote control showing the battery compartment cover.
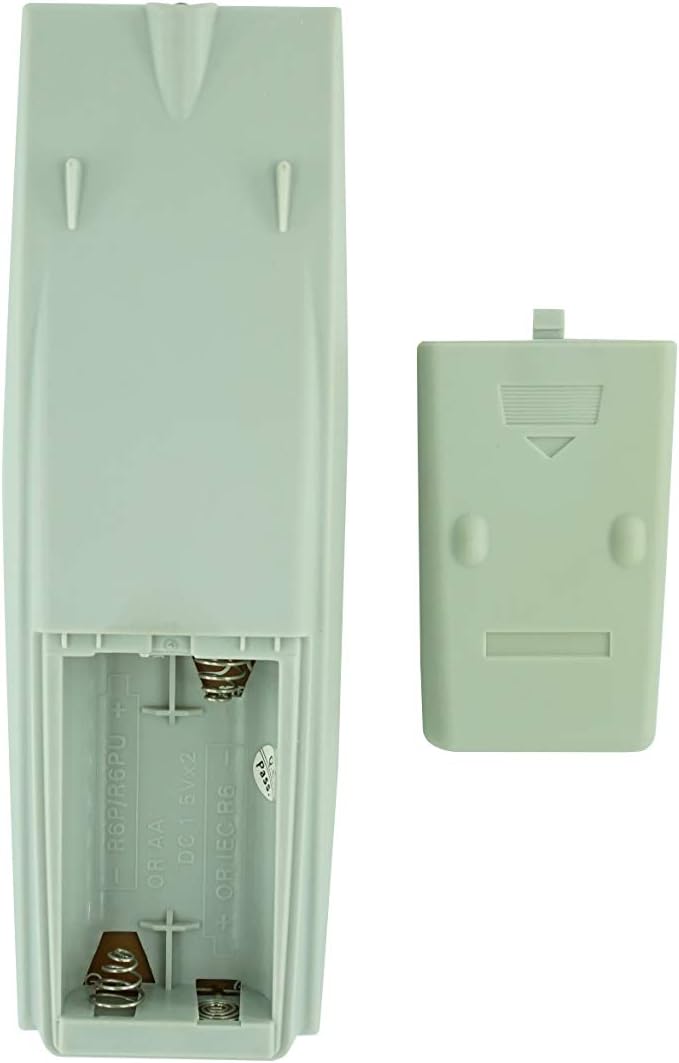
Figure 2: Battery compartment with cover removed, ready for battery insertion.
2. Алгачкы колдонуу
Once batteries are installed, the remote control is ready for use. Point the remote directly at your JVC Micro COMPACT COMPONENT Stereo System. No additional programming is typically required for this replacement remote for the listed compatible models.
Иштөө нускамалары
This remote control provides access to the primary functions of your JVC stereo system. Below is a general overview of common button functions. Please note that while the functionality is guaranteed, the exact button layout may differ slightly from your original remote.

Сүрөт 3: Алдыңкы view баскычтардын жайгашуусу менен алыстан башкаруунун.
Негизги функциялары:
- КҮТҮҮ/КҮШҮ: Powers the stereo system on or off.
- КӨРСӨТҮҮ: Changes or shows display information.
- СААТ/ТАЙМЕР: Accesses clock and timer settings.
- УЙКУ: Sets a sleep timer for automatic power off.
- Сан баскычтары (0-9, +10): Direct input for track numbers, radio frequencies, etc.
- БАС / ЖОГОРКУ СУРАТТАР: Бас жана жогорку деңгээлдерди тууралайт.
- Navigation (UP, DOWN, LEFT, RIGHT, SET): Менюда навигация жана тандоо үчүн колдонулат.
- Playback Controls (PLAY/PAUSE, STOP, FAST FORWARD, REWIND, SKIP): Медианы ойнотууну көзөмөлдөйт.
- Source Selection (CD, TAPE, FM/AM, AUX/MD): Аудио киргизүү булагын тандайт.
- FM MODE / REV.MODE: Toggles FM stereo/mono or tape reverse mode.
- AUTO PRESET: Радиостанцияларды автоматтык түрдө сканерлейт жана сактайт.
- PRGM / RANDOM / REPEAT: Controls program, random, and repeat playback modes.
- PTY SEARCH / PTY SELECT: For Program Type search and selection on radio.
- DISPLAY / TA/News / Info: Provides additional display information or traffic/news announcements.
- AHB PRO: Activates or deactivates Active Hyper-Bass PRO.
- Көлөмү (+/-): Башкы үн деңгээлин тууралайт.
For specific advanced functions, please refer to the original instruction manual of your JVC Micro COMPACT COMPONENT Stereo System.
Техникалык тейлөө
Алыстан башкарууну тазалоо
Алыстан башкаруу пультун көрүнүшүн жана функционалдуулугун сактоо үчүн, аны үзгүлтүксүз тазалап туруңуз:
- Бетти жумшак, кургак чүпүрөк менен сүртүңүз.
- өжөр кир үчүн, бир аз гampчүпүрөктү суу же жумшак, абразивдүү тазалагыч менен жууп салыңыз. Тазалоочу каражатты түздөн-түз пультка чачпаңыз.
- Катуу химиялык заттарды, эриткичтерди же абразивдүү тазалагычтарды колдонуудан алыс болуңуз, анткени алар пульттун жасалгасына же ички бөлүктөрүнө зыян келтириши мүмкүн.
Батареяны алмаштыруу
Пульттун реакциясы жайлап калса же иштебей калса, батареяларды алмаштырыңыз. Ар дайым эки батареяны тең бир эле типтеги (AA) жаңылары менен алмаштырыңыз. Эски жана жаңы батареяларды, же ар кандай типтеги батареяларды аралаштырбаңыз.
Сактагыч
Эгерде алыстан башкаруу пульту көпкө чейин колдонулбаса, агып кетүүсүн жана алыстан башкаруу пульту бузулуп калышы мүмкүн болгон учурларды болтурбоо үчүн батарейкаларды алып салыңыз.
Проблемаларды чечүү
- Пульт жооп бербей жатат:
- Батареялар туура полярдуулук менен (+/-) туура салынганын текшериңиз.
- Эски батарейкаларды жаңысына алмаштырыңыз.
- Ensure there are no obstructions between the remote control and the stereo system's infrared receiver.
- Алыстан башкаруу пультунун натыйжалуу диапазонунда экениңизди текшериңиз.
- Some buttons not working or unexpected behavior:
- This remote is a replacement and while common functions are supported, the button layout or specific advanced functions might not perfectly match your original remote. Refer to the button layout image in the Operating Instructions section.
- Ensure the stereo system is powered on and set to the correct input source.
- Remote appears damaged:
- If the remote has been dropped or exposed to liquids, internal damage may have occurred. In such cases, replacement may be necessary.
Техникалык шарттар
| Бренд | Жалпы |
| Өндүрүүчү | TUCUS |
| Модель номери | DVT-C9F24992D65E215A7DD6011D34514A46 |
| Шайкеш моделдер | JVC RM-SUXQ30UW, RM-SUXQ30US, UX-Q30S, UX-Q30B, UX-Q30P, UX-Q30W Micro COMPACT COMPONENT Stereo SYSTEM |
| Материалдын түрү | Башка |
| Power Source | 2 x AA батарейкалар (киргизилген эмес) |
| ASIN | B0D79958PW |
| Дата биринчи жеткиликтүү | июнь 17 2024 |
Кепилдик маалымат
This product comes with a 3-month warranty from the date of purchase. This warranty covers manufacturing defects and ensures the remote control functions as intended for compatible models. Please retain your proof of purchase for any warranty claims.
Кардарларды колдоо
If you have any questions regarding the compatibility or functionality of this remote control, or if your specific device model is not listed, please contact the seller directly for assistance. The seller stocks a wide range of remote controls and parts and can confirm suitability for your needs.
For general inquiries or to provide feedback, please refer to the contact information provided by your retailer or the seller.


